 Building an airplane is a journey in so many ways. You learn new skills as you go and the main effort changes from building basic structure to working with systems until you’re in the flying-testing-fixing phase. Ironic, then, that the first thing others see is the last item on the list: paint. (Assuming, of course, that you’re going to paint at all. Plenty of beautiful polished airplanes out there!)
More than that, we weren’t going to settle for a normal paint scheme. In the months leading up to the paint job for our RANS S-21 Outbound, we had done a great deal of brainstorming with master painter John Stahr in preparation for the scheme to adorn Tin Lizzy. We had discussed with him that we enjoy watching the lizards in our backyard and there was this one particular lizard that we named Lizzy.
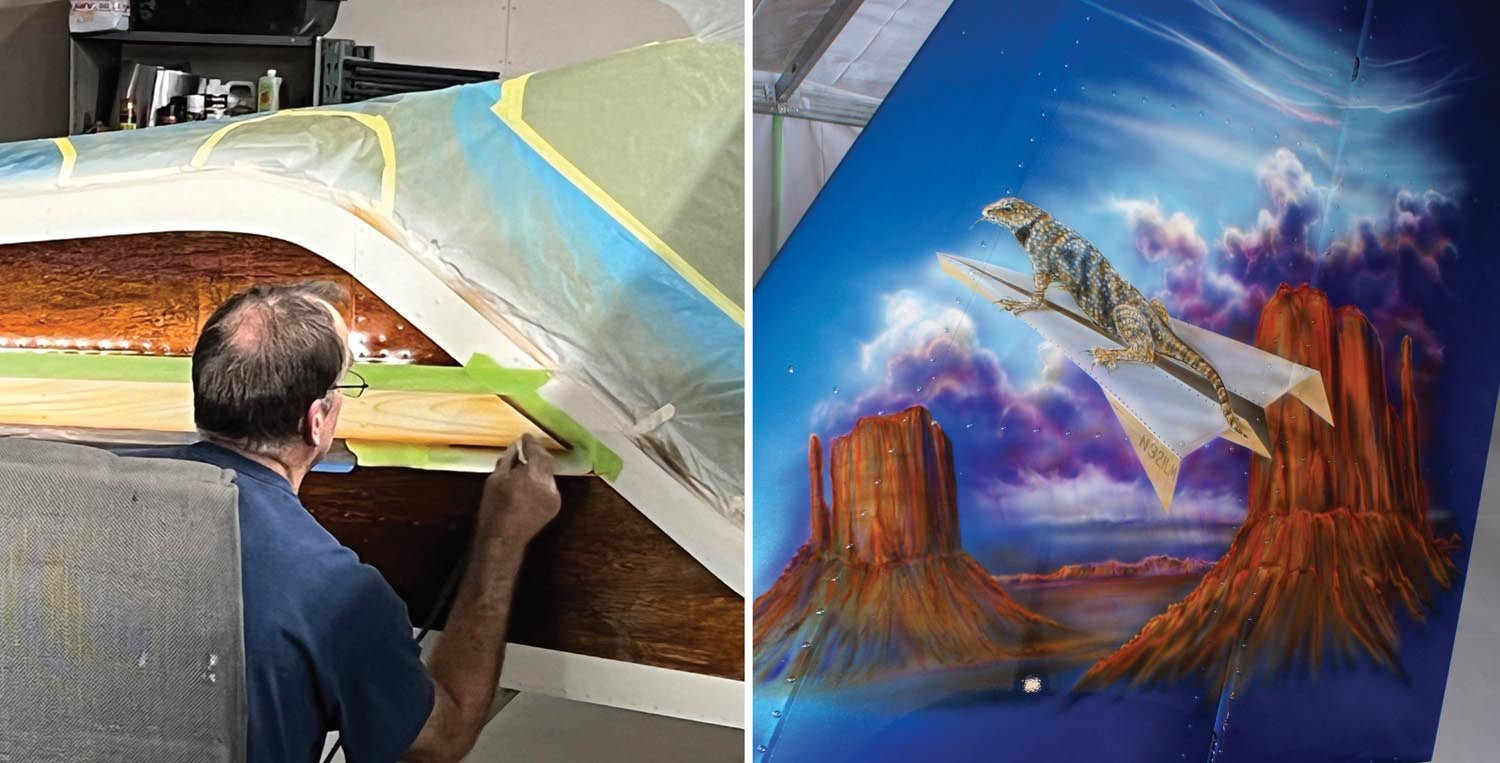
He threw out the idea of having a lizard flying what looked like a paper airplane, but instead of paper it would be an aluminum airplane with rivets. John asked about my favorite places and since I am a red rocks kind of girl, I let him know that my favorite “red rocks” are in Monument Valley. He wanted to do the cowl to tail cone in a “steampunk” theme. Everyone tried to explain it to me and it sounded pretty cool, so I went with the concept.
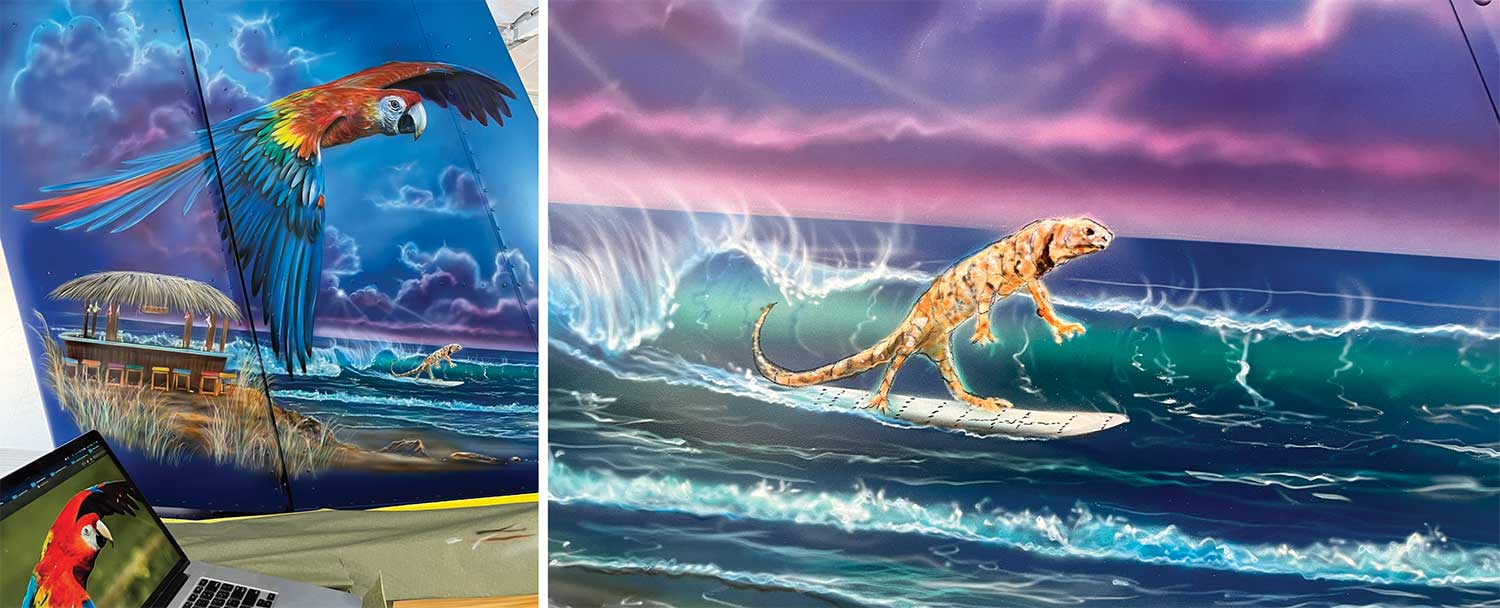
John asked Mike what he likes, and Mike responded with Jimmy Buffet, parrothead beach style. Once again, John was excited about this and wanted to do a beach scene on the tail with the side of the airplane being a “woodie-style” paint job. John had painted a woodie car before, but never a plane, and was super excited to be able to try it out.

Unconventional Thinking
I was not thinking that our paint job would be conventional since we were going to have John involved, but two different—and I mean completely different—paint jobs on the sides was something that I had never dreamt of. The main question remaining was if we were going to have his/her sides to the plane, who gets the pilot’s side! Of course, we both wanted the pilot’s side, so Mike took out a coin and we agreed that whoever won the toss would get the pilot’s side—I won and the pilot’s side was mine.
The plan was for John to paint our RANS in our hangar, so soon after he arrived we headed to nearby Carson City, Nevada, and Industrial Finishes, a shop dealing in high-end paint. John encouraged us to go with a single-stage coating (does not require a clear coat) for the areas that would get the most wear and tear—namely the belly, wings and horizontal stabilizer. I chose an off-white for this color. The body color would start at the cowl with a nice aqua, fading to a medium to a dark blue toward the tail. How he was going to accomplish this fade was beyond me. (Time to trust the pros.) He encouraged me to select metallic paints for the blues to catch the light better and make it pop. I took the paint book outside in the sunlight and selected what I thought were perfect blues and he agreed!
John asked if he could go into the mixing room to see their color rack, which was fine with them, and there he selected several paints that he wanted in some small glass jars only about 2 ounces in size. He picked seven colors with me and later used these for mixing for his airbrushed artwork. We walked out the door with primer, clear coat and tint colors in the glass jars, and the other paints would be picked up a few days later after mixing.
We finally arrived at the house/hangar in the late afternoon and John was able to check out the status of our prep job. John was happy with the scuff job, realizing that the rivet lines still need Scotch-Brite-wheel prepping. Mike had the floating structure for the paint booth constructed, but no Visqueen sheeting up yet. John was pretty satisfied with the area we had to work with as well as the ventilation. During the priming and through the airbrush painting, his main concern was to mitigate the dust. It was during the clear-coat stage that the Visqueen would be essential.
While we were still prepping the booth, John started protecting the windows. He placed contact paper on the exterior glass, while I covered all the interior glass, including the instrument screens. I continued to prep the interior by removing the seats and covering areas with plastic sheet to protect them from overspray.
The next day was another filled with prep work. Mike and John figured out a way to get the miscellaneous parts (ailerons, flaps, elevator and trim tab) hung with safety wire on boards between ladders. As John worked on getting all the rivet lines prepped with his Scotch-Brite wheel, Mike and I worked on wiping down the hanging pieces with Glasurit 360-4. This product is used to degrease and clean all the surfaces of the aluminum to prep for the primer. There were a few areas around the windshield and cowl inlets that needed filling; John took care of them.
Painting Begins
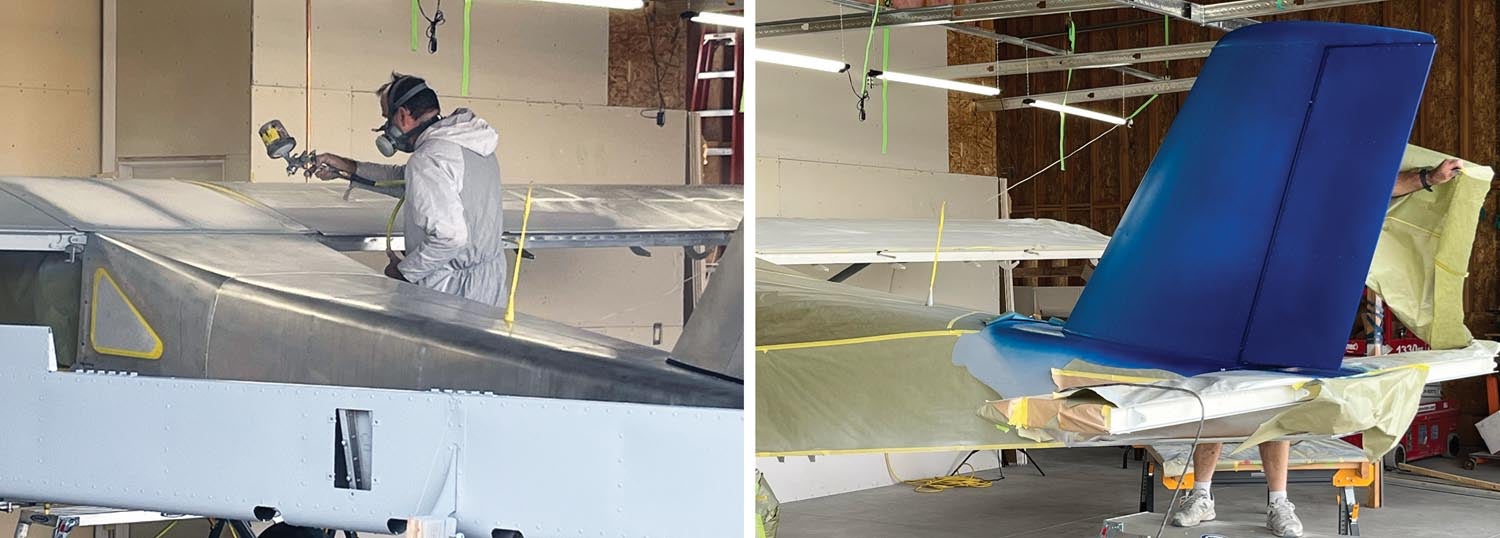
After a brief hold to verify that we’d received the correct single-stage urethane ivory white paint—we discovered that what we thought was the wrong paint was actually just mis-labeled—John started on the ailerons, flaps, bottom side of the wings and belly. It was a huge relief to finally realize that we had all the paint needed to get the job done and see Lizzy starting to change color!
After allowing the single-stage to dry overnight, John proceeded to spray the tail dark blue fading to medium blue on the tail cone. He then began sketching on paper the Monument Valley monoliths and “Lizzy” for the tail. It was a very rough sketch of what was in his head and what he wanted to see, but this was mostly to get the proportions of what he planned drawn out. For the other side of the tail, John talked to Mike and refined the parrot idea, which ended up making the parrot big over the top of the ocean scene which was to include a tiki bar, waves, clouds and a surfing lizard. John gave me the choice of whether or not the lizard was to be standing on the board or on all fours. Standing, of course!
John started sketching on the paper for the right side of the tail to capture the proportions once again of what was in his head that he wanted to create. I kept thinking, during this time, what the heck is he going to do with these papers to get his image on the tail? It just didn’t fit for me yet!
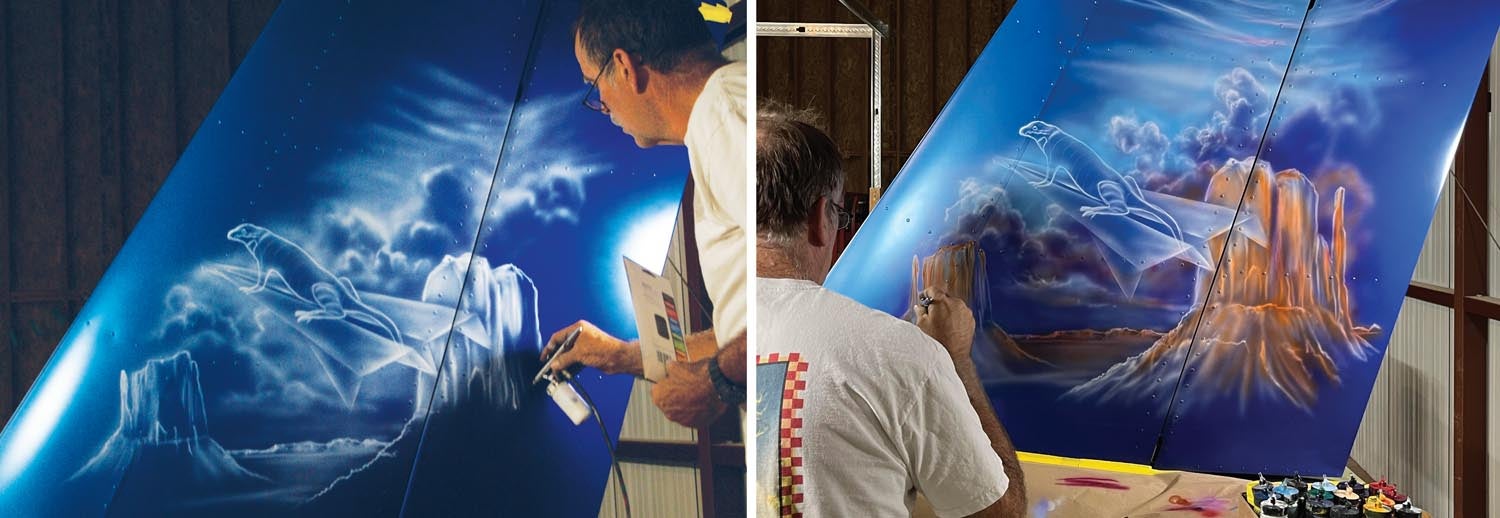
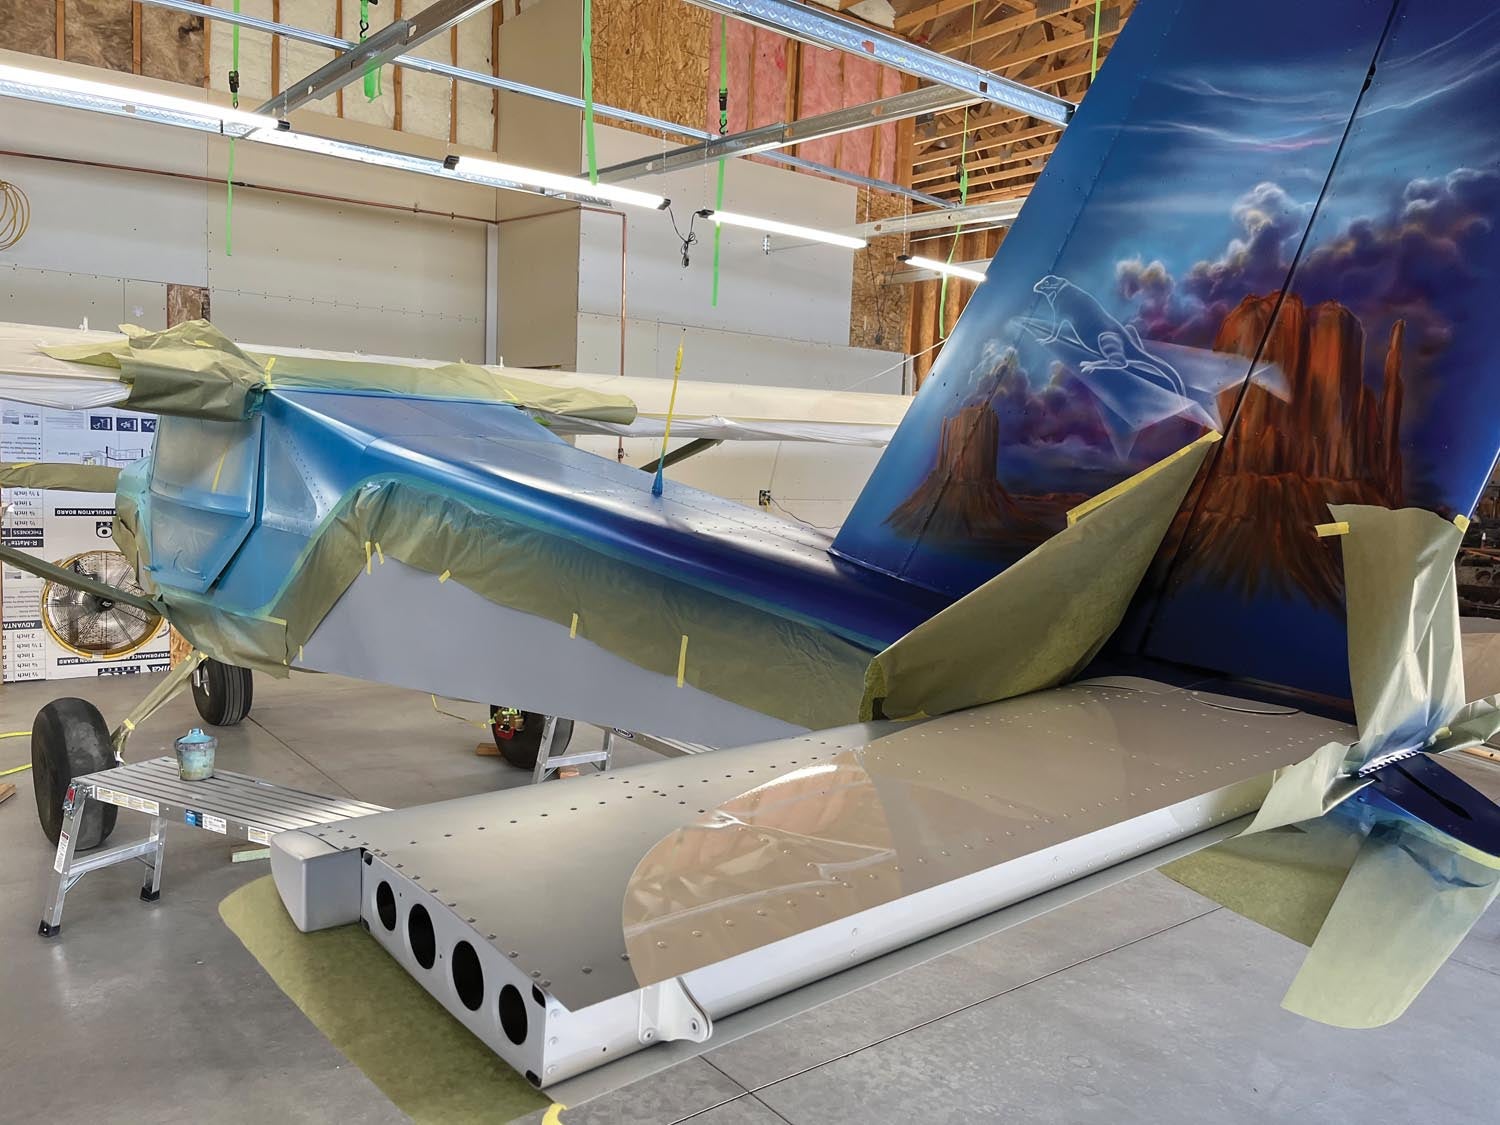
John took the paper sketch and, using a paper perforator, traced the outline (poking small holes in the paper) of Lizzy and the plane and the monoliths. Then he taped the paper to the tail and proceeded to airbrush with white paint the outlines he had just perforated into this pattern. Ingenious! Like magic, he had the shapes of what he wanted to create with his airbrush. From there, he outlined the dots and then proceeded to make some clouds freehand above the monoliths and some high stratus clouds. For the cliffs he used so many colors including not only various shades of reds, but blue, purple, brown and it just came to life. It was amazing to watch! He moved onto the clouds once again, just freehanding so many colors and blends of pink, purple, blues and white. You could really tell that this is the part where he is really enjoying what he is creating! Well into the evening, John switched to Mike’s side with the beach scene, repeating the same steps of tracing the sketch with the wheel, white airbrush through taped-on pattern and then connecting the dots with the white airbrush.
John was up bright and early the next morning to paint the remainder of the off-white surfaces. You have to keep in mind that each time he switches to another step, he has to tape off and protect other areas of already painted surfaces. It is quite a tedious and well-orchestrated process. My main job at this point was vacuuming the cement floor to keep the dust under control.
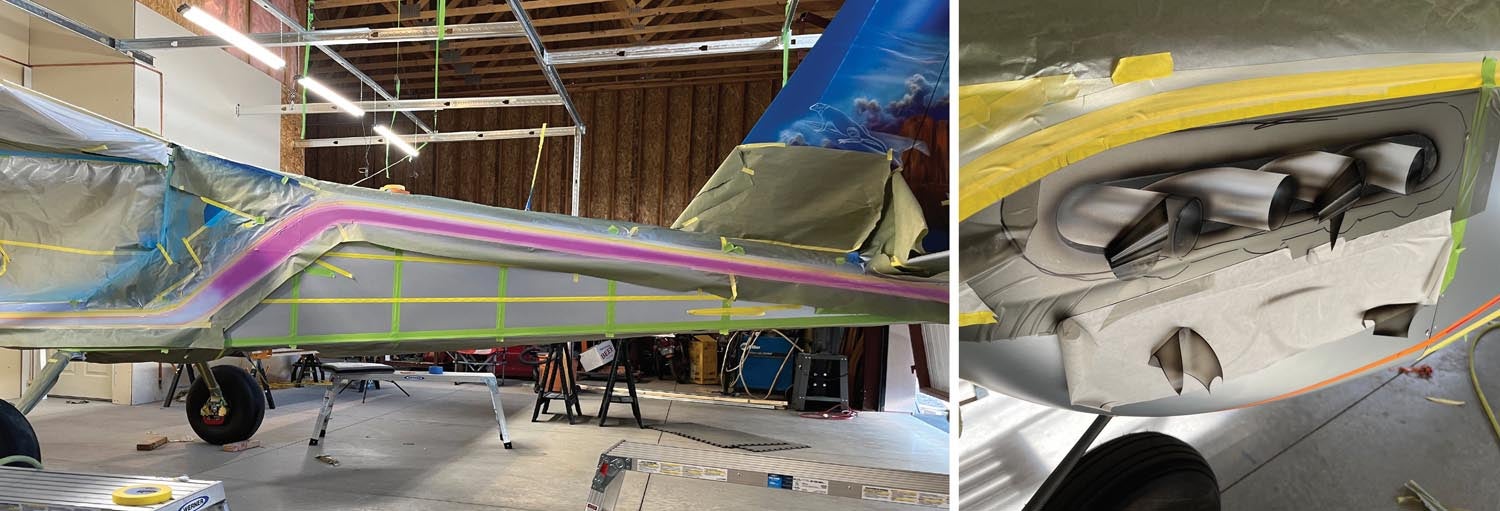
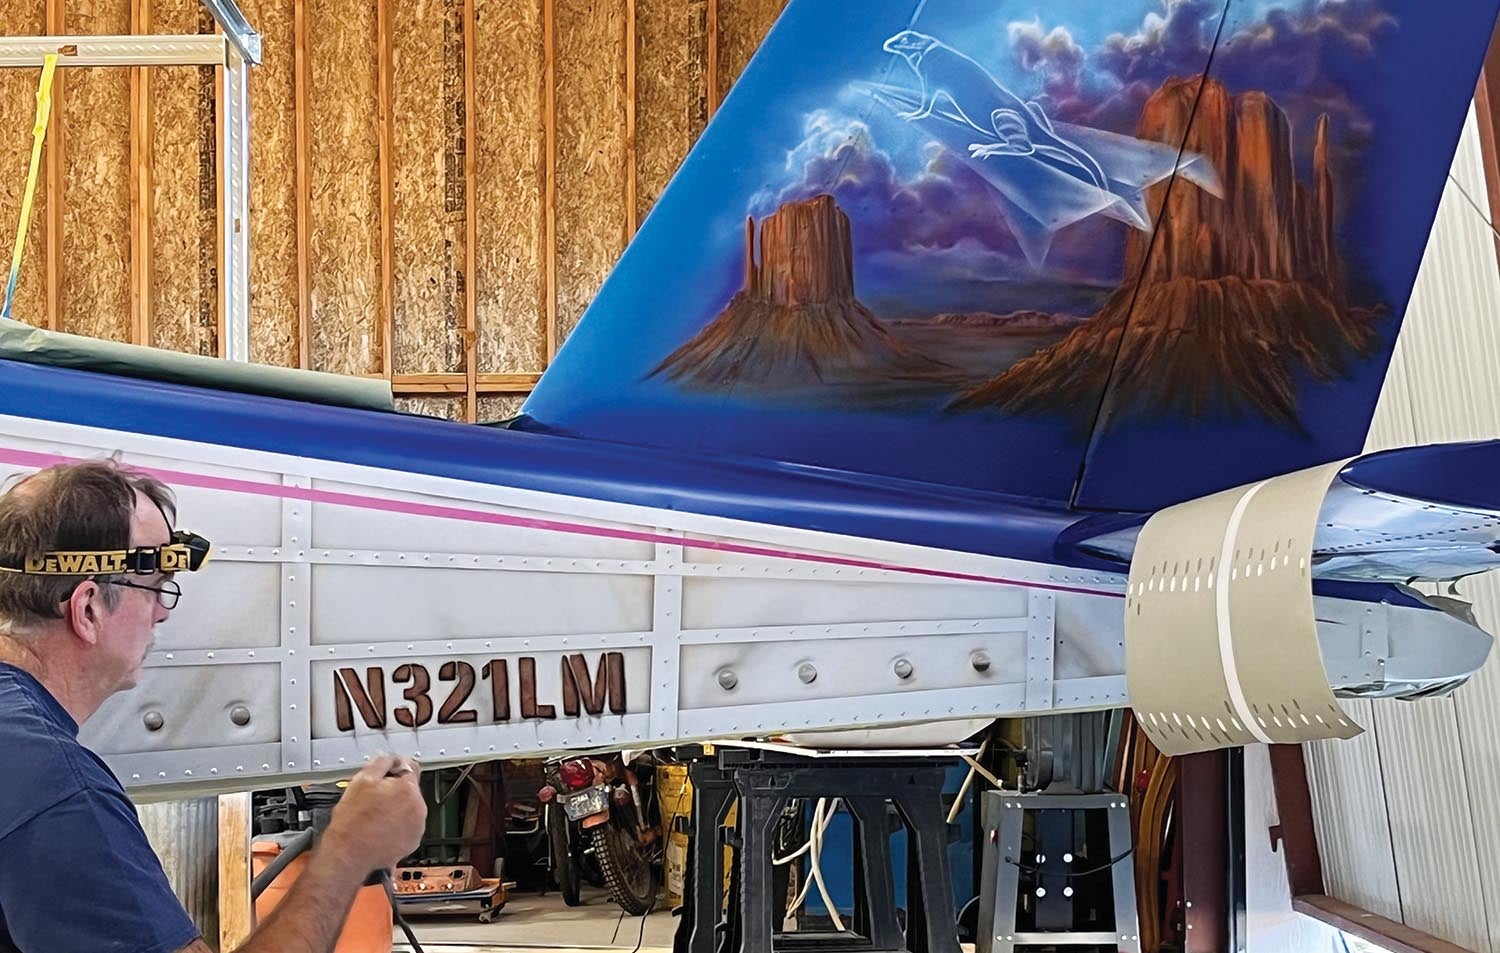
The next day John shifted his focus to the sides of the plane. He finished the light blue for the cowl and blending it to the medium blue near the doors and tail cone. He sprayed the silver background on the lower cowl, below the door and to the lower part of the tail cone on the pilot’s side, leaving a strip, which he later painted hot pink at the nose fading to an orange and back to dark pink on the tail! Next, he moved to the woodie side and painted on some wide stripes, outlining where the dark wood would be, using the off-white paint. He moved back to the cowl on my side and put on the pattern for the steampunk exhaust system (four exhausts coming out mind you!).

The next morning, as I admired all the progress that John and Mike had made, John talked to me about where I wanted a RANS S-21 logo. He had several different “patterns’’ that he could paint on and I picked out the larger ones to go on each wingtip and a smaller one to go on my side of the cowl. At first, I wanted it above the steampunk exhausts, but then we decided later to switch it up and put it below the exhaust and make it old and rusty looking. It came out really neat! Then I got to pick out the N-number size and font for my side and it was kind of blocky and broken looking, which he did a similar rusty look to it. He taped off the rivets on my side and airbrushed streaks across the tail cone silver area to make it appear like aged metal panels.
The B Side
Mike’s side of the plane took life also by the completion of the woodie-look! John applied a thin layer of slow-drying, silvery white pearl textured paint to the woodie area (that had already been painted brown-black and dried), and put Saran Wrap over that, mushed it around horizontally, wrinkling it and making the grain that he wanted. He then removed the plastic sheet, painted on another layer of semi-transparent brownish-red looking paint and—like magic—you have the woodie look!
The following day, John focused on a lot of detail to Mike’s side of the plane that I had no idea he was going to do. The chrome carriage bolts he painted on Mike’s side look like they are reflecting the image of the horizon in our area with the mountains around our valley. The N-number style that Mike picked out and Tin Lizzy lettering are each also painted in the same fashion, looking like they are reflecting the horizon around our home. Really cool ideas!
It was time for John to attack the flying Lizzy on my side of the tail. John had fun with his artistic talent here. He started with the glider, painting it silver with various shading for the effect, and added rivets to the glider. Then, he moved on to the lizard, adding so much detail with its tongue out and long nails on its feet. The detail to the color and the scales on it are amazing. It looks very realistic. I must say that our lizard was a model for this one, but John took some liberties on making it look like we have a near Gila monster running around in our backyard! It is an awesome picture and I love his portrayal of Lizzy!
Long Days, Late Nights
Apparently, John stayed up until 11:30 the prior night getting all the artwork done but was up bright and early the next day. Now it was Mike’s turn to have the tail art on his beach scene embellished upon. John’s creative juices were flowing! By the time I got out to the hangar the next morning he had partially completed airbrushing the parrot with reds, yellows and blues. There was the tiki bar and some rocks added to the beach, which had been airbrushed in. Looking at it, John told me that he still had finishing work to do on Lizzy, the board and the tiki bar. He also wanted to lighten up the sky a bit around the sun and add a few shells to the beach. John had other local business in the area to take care of, which gave us some time to hang the Visqueen in preparation for the application of the clear coat.
We ended up inviting several friends and neighbors (about seven people) to assist hanging plastic over the metal floating structure that Mike had constructed for the paint booth. The scissor lift we had rented proved once again to be invaluable. After hanging the plastic and tacking it down, we were able to get it all cleaned up once again and be ready for the final stages of the paint job.
The next morning, we were in the final stages. The shells had been added to the beach and the parrot was finalized and beautiful. Lizzy was finished up and really looks like a lizard surfing, and the surfboard was turned to metal with rivets! Mike kept on asking John to add little details, knowing that once the clear coat was on, it was “game over” for any more additions. John came up with the idea of adding some decorations hanging off the roof over the tiki bar. Mike liked the idea, but told John he needed to ask my permission to add to the artwork and that was, “Is it OK if I add some bikini tops hanging off the tiki bar to the picture?” I had to laugh at his asking for my permission! I just chuckled and said I thought it was a great idea! There were cans of Red Stripe Beer on the counter of the bar (one of Mike’s favorite beers) with a margarita mixer that’s full and a few tequila and rum bottles. Mike came up with the idea of adding a sign hanging from the tiki bar reading “Mike’s.” Too funny! Then he asked John to add our N-number to my flying Lizzy’s tin airplane, which John kindly added.
John was very happy with the paint booth Visqueen and ventilation and said that it will be well worth the effort that we had put in to make the paint booth. John masked off the areas not to get clear coated and got to work on spraying the final layer on Lizzy. Everyone kept telling me about how much the clear coat would make the colors pop and wow were they right.
After getting all the pieces and parts back together, Mike and I have had so much fun showing the plane to people and watching their reaction when they see it for the first time! We had a neighborhood unveiling together and took it to the local EAA Chapter in Carson City. I got exactly what I wanted—a fun paint job.


Wow! Incredible paint job and incredible story bringing the process to life. Congratulations! I can’t wait to see it…
Comments are closed.