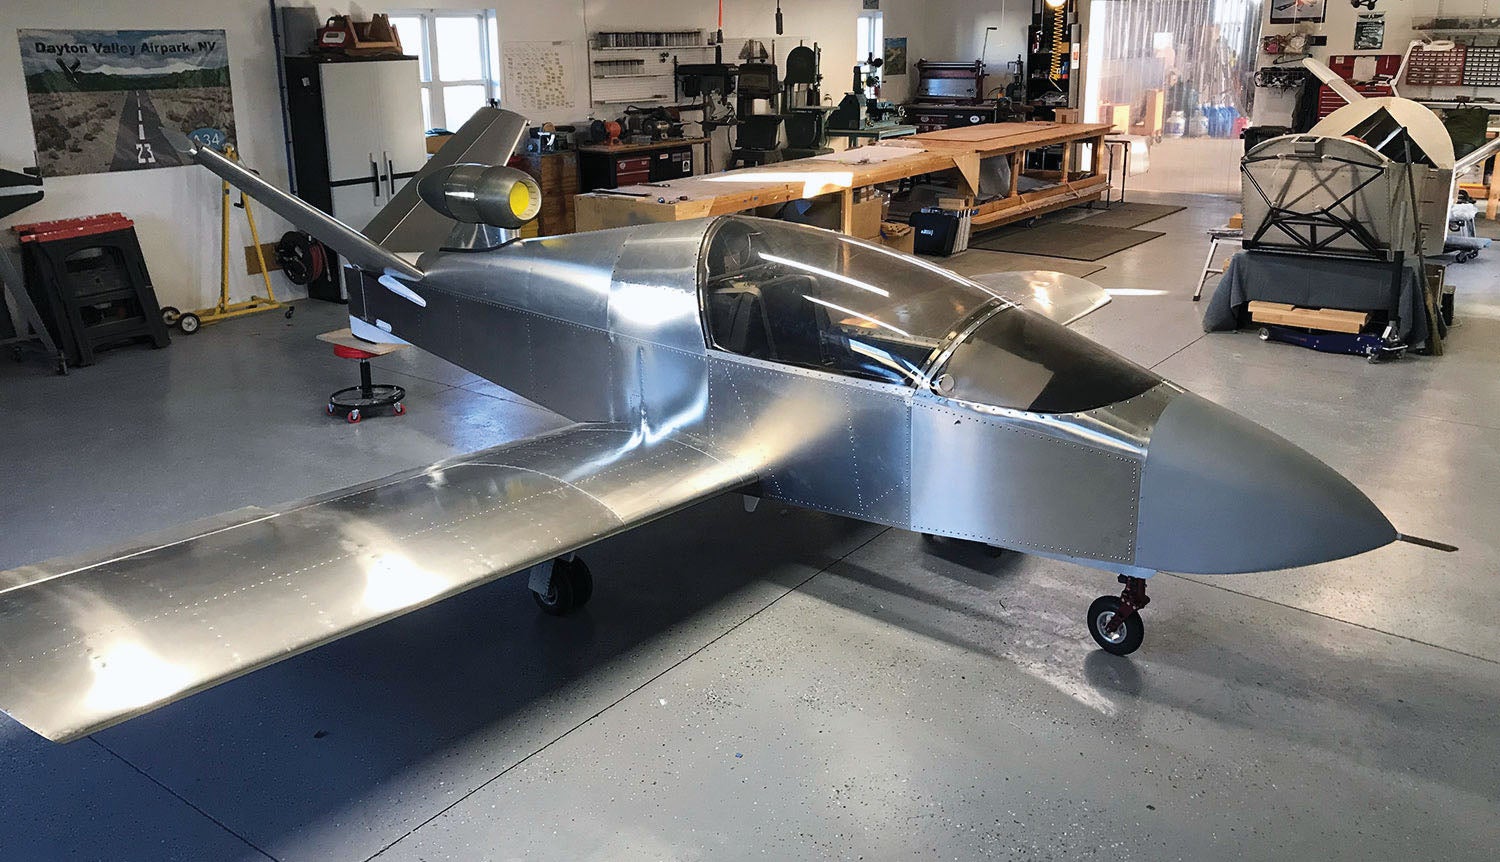
 It seems to me that a special plane requires a special finish—something that stands out and reflects the nature of the flying machine itself. My previous project was a beast of an aluminum bush plane, built to live where paint is not important, so it still isn’t painted. Previous to that, I did some airplanes that got their own special finishes. The jet was going to need something that brought out its—and my—personality.
 ![]()
Some of the problems with painting the jet were its limited range and the fact that, while the wings come off so it can be trailered, I decided against the custom trailer and the (much more expensive) tow vehicle it would require. So I began looking for paint shops within the jet’s radius of action to see what they might do for me. There were three shops that satisfied the geographical requirements, but the closest one had a lead time that was pretty far out there. The other two gave me nice bids and excellent references, but there would be significant traveling to check on things as they progressed.
I then decided to check with a noted aircraft paint scheme designer, painter, and airbrush artist, John Stahr. John is based in Eugene, Oregon, and has completed a significant number of highly decorated homebuilts. He also has an impressive portfolio of business jets and decades of experience painting custom motor coaches. We’ve been casual acquaintances for a number of years, and I expected that John would be booked a year in advance. But it turned out that not only did he have a hole in his schedule, he was also happy to come to my shop to do the work. That meant I didn’t have to fly the machine somewhere else and could be an intimate part of the painting process—a strong bonus! His price also turned out to be within my budget and less than I expected for his level of work, so we began the planning process well before the jet was finished.
The paint design was originally my idea. I wanted to salute the paint job on my RV-8 but make the jet the -8’s “younger, cooler, more flashy sister.” I loved the colors of the -8 and the swooping long lines that made the aircraft look sleeker just sitting on the ramp. I also wanted John to use his airbrush magic to do some details that would really make the scheme pop. All of this was not only within budget—but according to John, would take him only seven to 10 days! My previous airplane painting experiences were outstanding, but took about a month, so I was really curious to see just how this was going to work.
Planning the Scheme
I am an engineer, not an artist…let’s get that straight right up front. I have the ability to see a vision of what I’d like, but I need help making that vision detailed enough to execute. Fortunately, there are companies and people who specialize in designing paint schemes for aircraft (see “Choosing Plumage for Your Homebuilt,” April 2019), and John happens to be one of those artists. I have owned and built enough airplanes that I have been through the design process before, typically starting with my own crude sketches of what I wanted. But I learned early on that a side or top view does not necessarily fully transfer to a three-dimensional shape. A good designer has the ability to see things from a quartering view and understands how curves translate onto an airplane with corners and straight lines, as well as those with curving surfaces.
John started with pictures of my RV-8 and some sketches I did of the SubSonex using Microsoft Paint on my PC. These were just to get him started. I suggested placement of the insignia that I like to use on my planes (a vestige of my days at NASA) and noted that with the Y-tail of the SubSonex, you don’t have a true vertical surface to use as a canvas. That didn’t phase John, and we quickly realized that the space behind the cockpit on the fuselage would serve nicely. He also came up with a swooping silver line that begins near the nose and ends embracing the engine nacelle. And he designed what I can only describe as a “reverse swoop” on the wing’s top view.
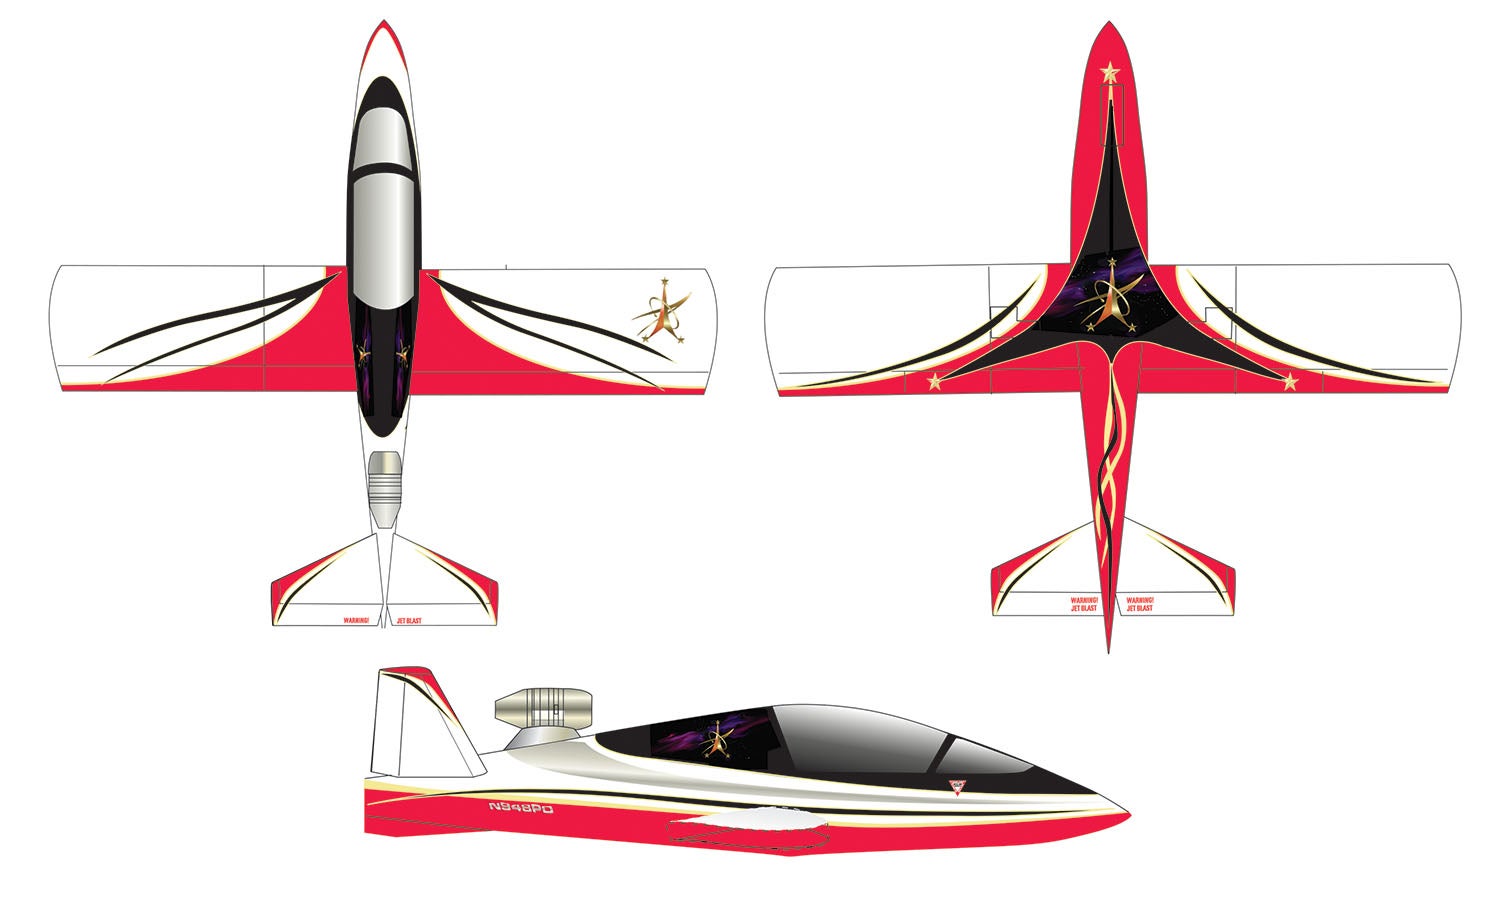
We actually nailed the top and side views down pretty quickly, and then it came time for John’s signature statement—the belly. He often draws amazing creatures and angels on the bellies of RVs, but the aft-mounted wing of the little jet was going to make that problematic. He also noted that since the main gear tires are exposed when retracted, they were going to interfere or have to be incorporated into whatever design we chose. It was the second path that we took—creating a black shape reminiscent of a Beech Starship (or some say a Klingon bird of prey) that hid the wheels and served as a background for a larger version of my NASA insignia, but with a galactic background of nebulae and stars.

Once we had figured out the overall scheme, John moved on to little details: name badges, BRS warning stickers and rescue arrows. This whole design process took about a month, with the two of us trading emails, imagery and ideas several times a week. At the same time, I was finishing the airplane, and John was firming up the hole in his schedule and coming up with a bill of materials for the project. The materials turned out to be the easy part. All of the colors he brought came in a few quart cans. The primer was a gallon (but he didn’t use it all), and the final clear coat was just another gallon. But paint is one thing—he also planned an assortment of paper, tape and plastic for masking, and various tools and guns, ranging from a large pressure pot for the clear coat down to a tiny airbrush for the magic touches.

Prep and Primer
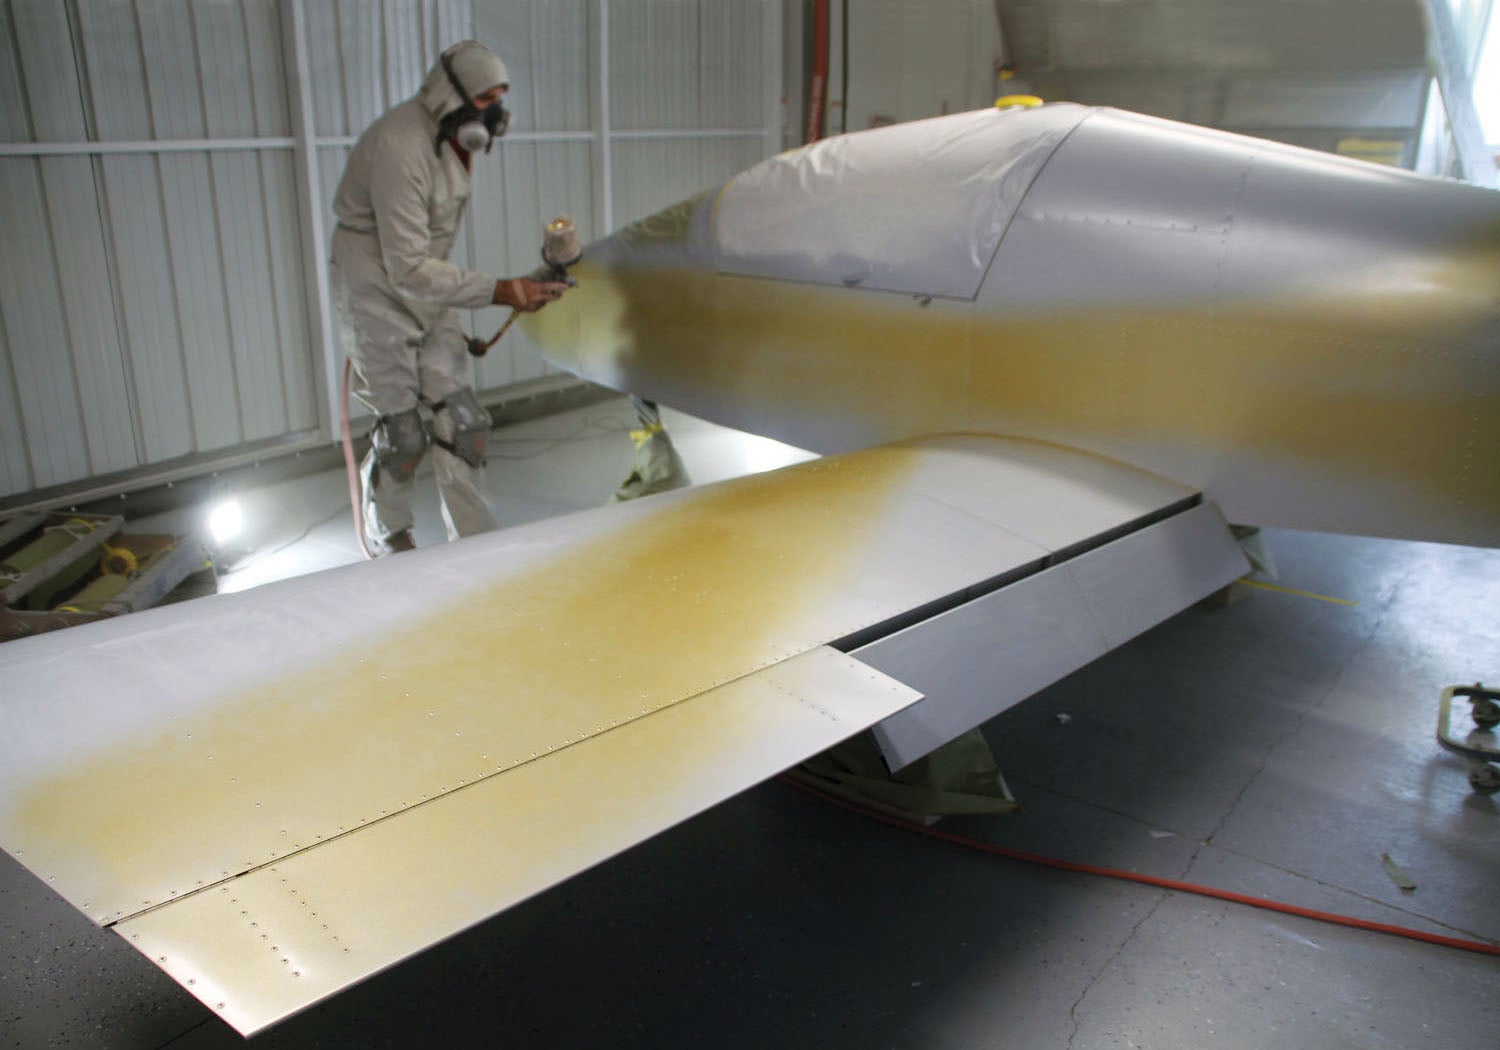
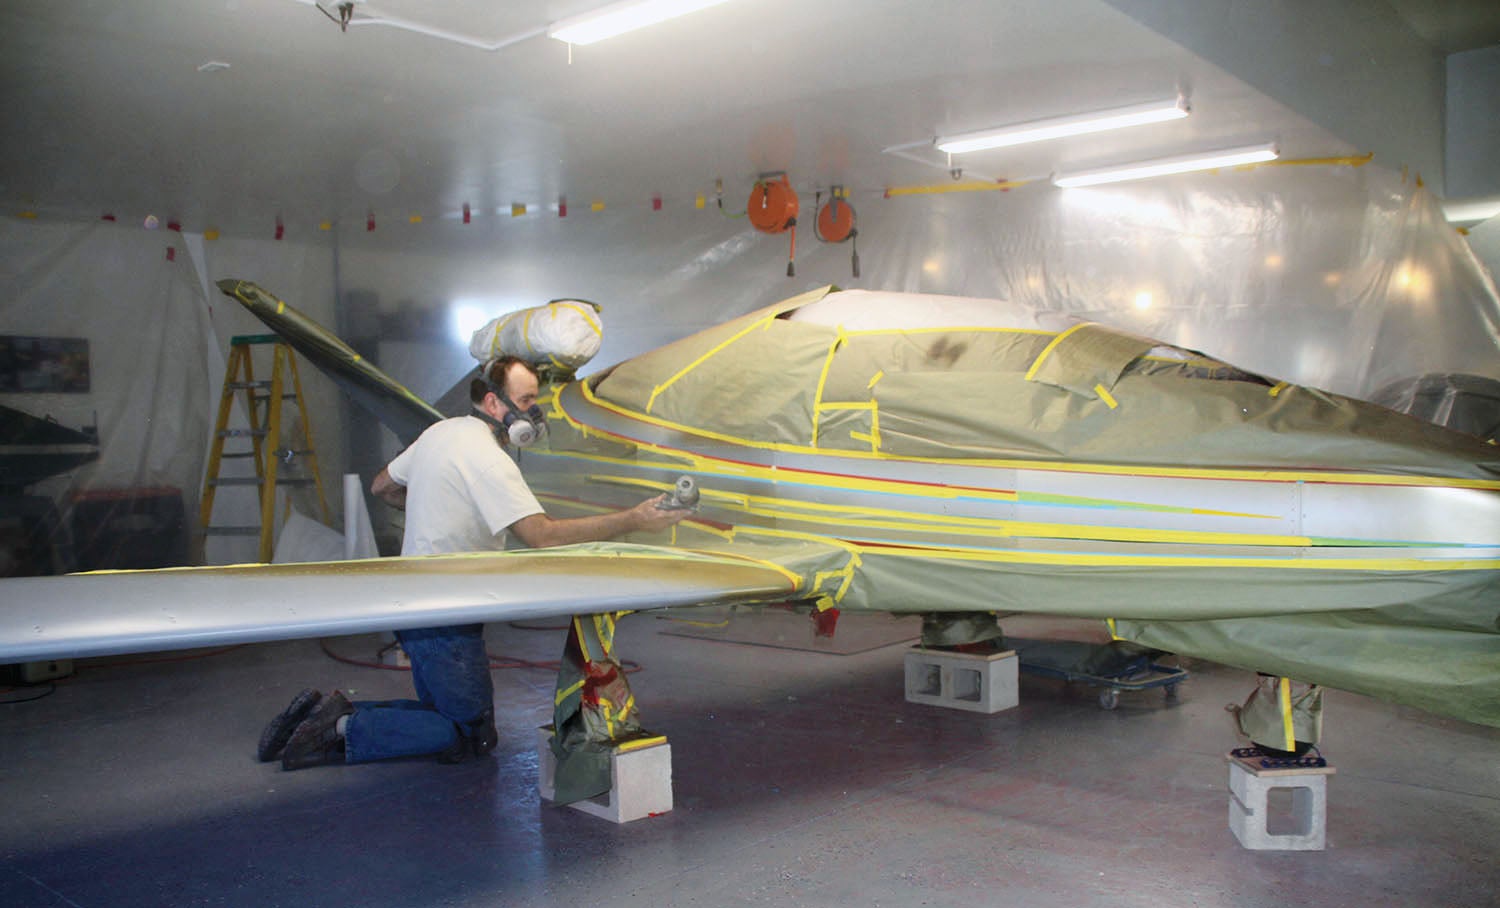
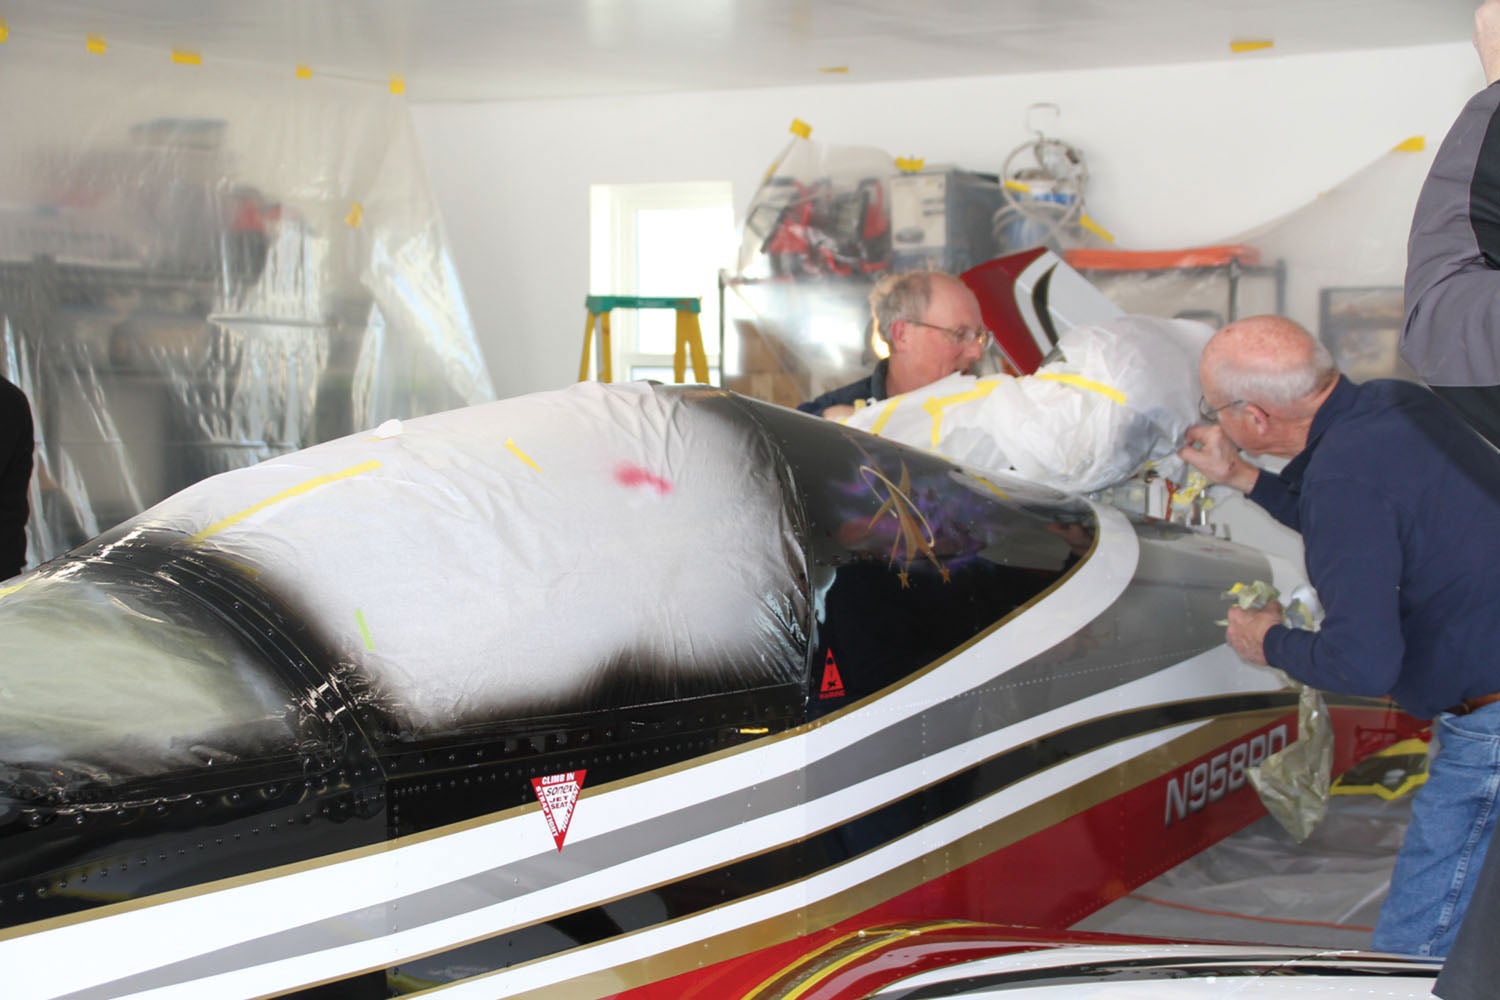
John arrived on a Saturday evening, having driven all day through snow in the mountains. Nevertheless, he wanted to get a good look at the project, so after a quick dinner, we trooped into the workshop and began looking things over. I was interested to hear how much he was worried about shop protection and overspray—and the answer was “not very much.” As it turned out, we built a paint booth by taping plastic walls that draped down from the ceiling to make an area large enough for the airplane—but even within this makeshift booth, we didn’t do any damage to the building’s walls, ceiling, or floor. The color paints are virtually dry before they hit the surfaces (other than the plane), and the clear coat was invisible. The paint booth (such as it was) was more about controlling airflow and keeping contaminants out of the air while shooting. To ensure the air moved the way we wanted, we mounted a large shop fan in one of the windows and used that to draw air through a hole cut in the plastic wall on the other side of the space. It was fun to see any mist created by the painting process drawn swiftly to the fan and out of the building.

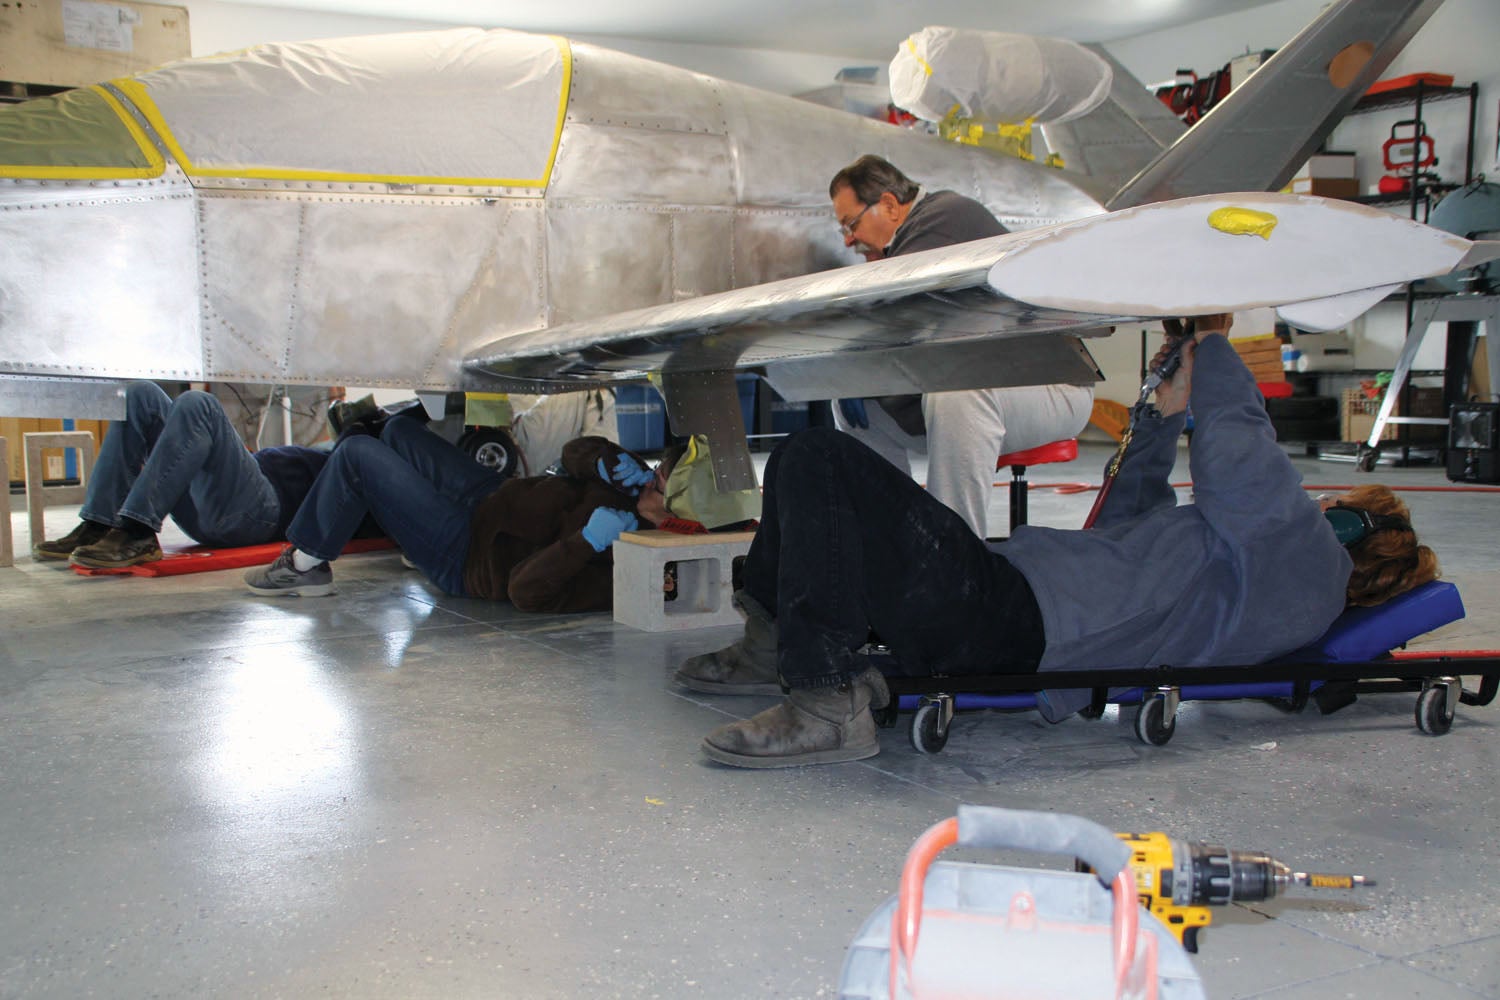
Preparation of the pulled-rivet, all-aluminum airframe was fairly simple—Scotch-Brite wheels on die grinders served to scuff the rivet lines, and 320-grit sandpaper on an orbital sander took care of the panels between rivets. We used local volunteer labor (it’s good to live at an airpark) to get the job done quickly and followed up the scuffing with a good cleaner wipe-down to remove dust generated in the process. All the while the scuffing was going on, John was masking and taping spots that wouldn’t be seen again until the job was complete: the canopy, exposed rod end bearings and the landing gear. We decided to leave the interior of the wheel wells unpainted since all of the mechanical and electrical systems were already installed, and the quickbuild kit didn’t lend itself to priming earlier in the build. Also, we live in the desert, so priming (for corrosion protection) was not a high priority.

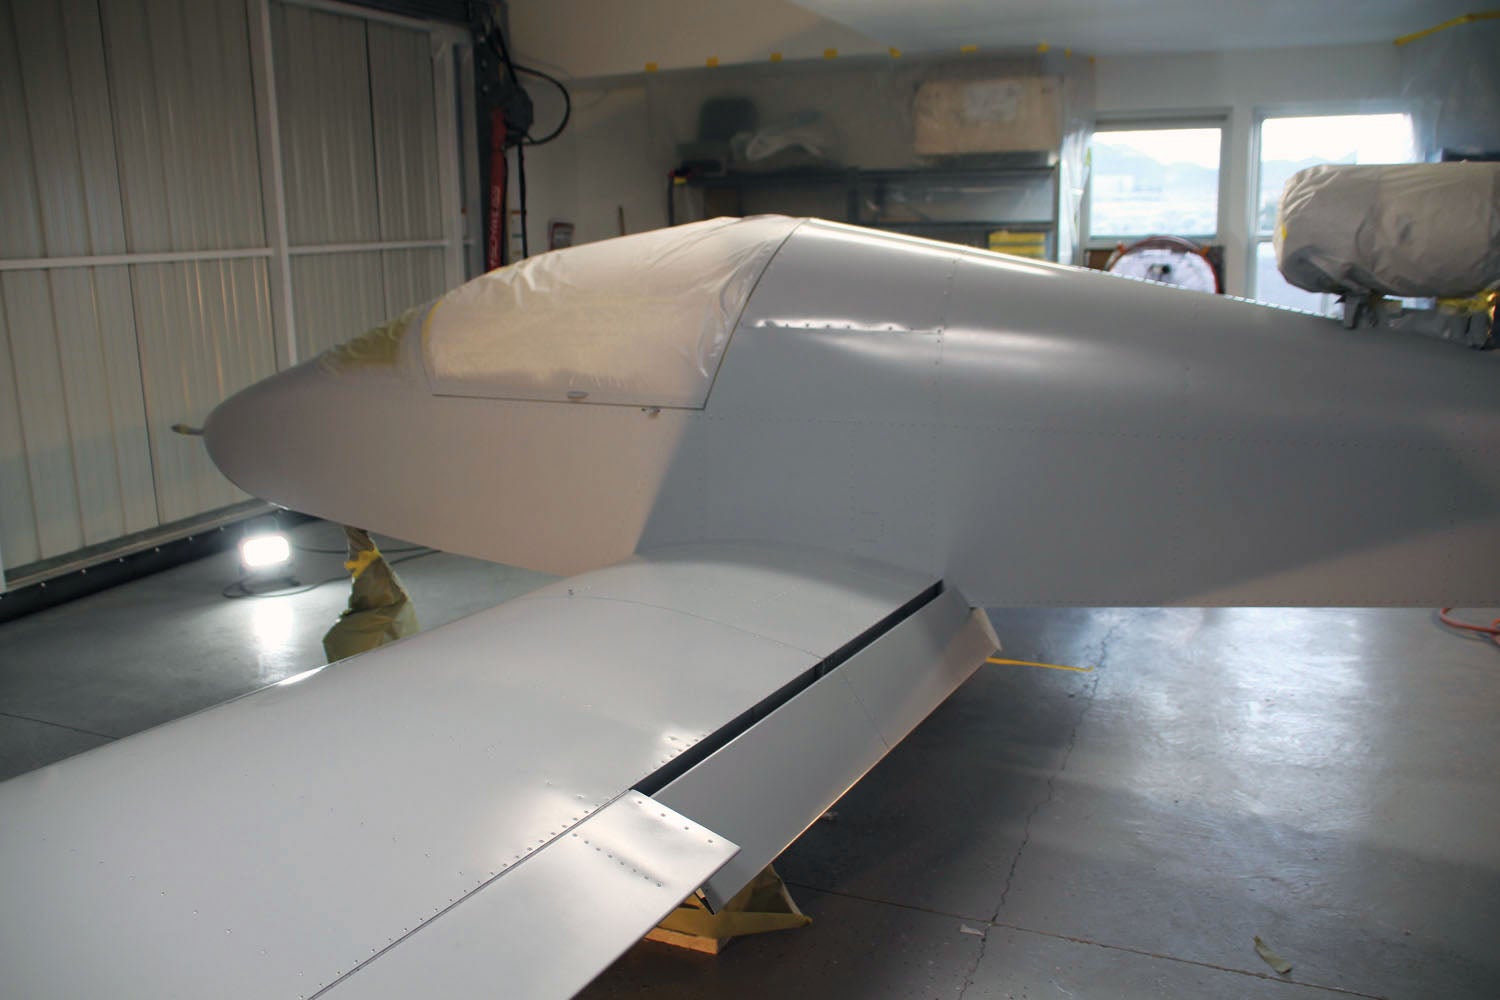
Priming for paint, however, was a different matter, and by the end of the day of scuffing, we were ready to take the bird to a total gray finish. Two-part epoxy primer was shot in the newly constructed booth, and the airplane was left to sit overnight as the epoxy fully cured.
Masking and Paint
The couple of times I have painted an entire aircraft, I have started with a primed plane and then shot the primary “overall” color (usually white). I then masked off the areas for trim and shot those. But that’s not the way John painted the jet—instead, we worked from the small color areas to the large, saving weight and paint in the process. Here’s how that works:
The first thing he did (by eye, referring to the master artwork) was spray gold on the areas that would eventually have gold pinstripes. He shot a couple of coats to make sure of a rich gold color, then let the paint dry.
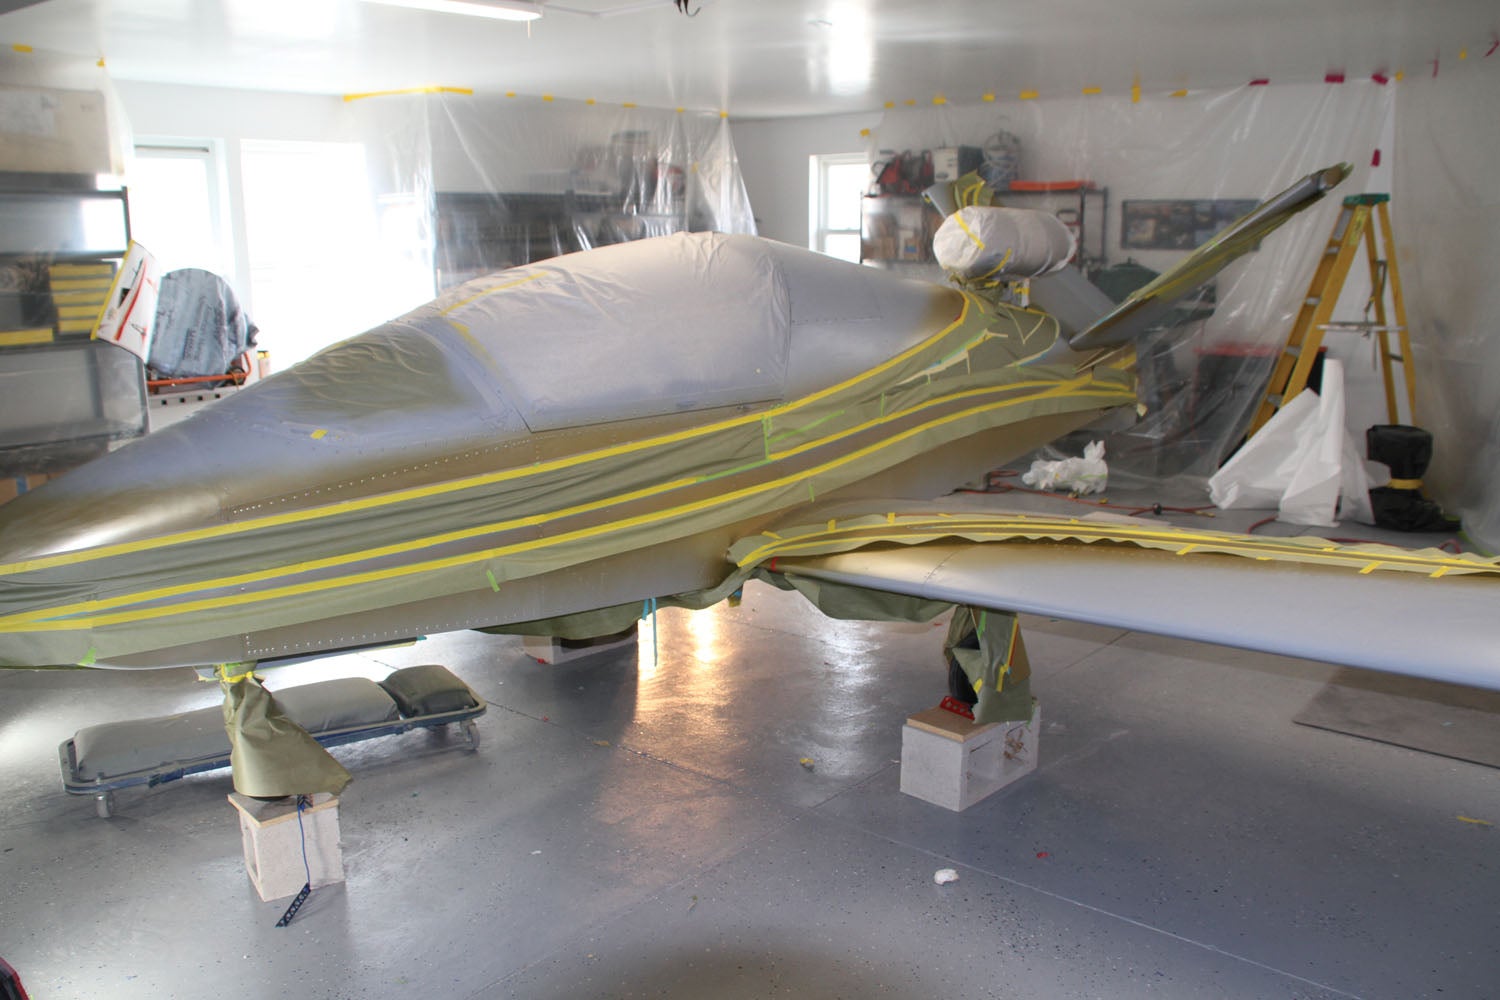
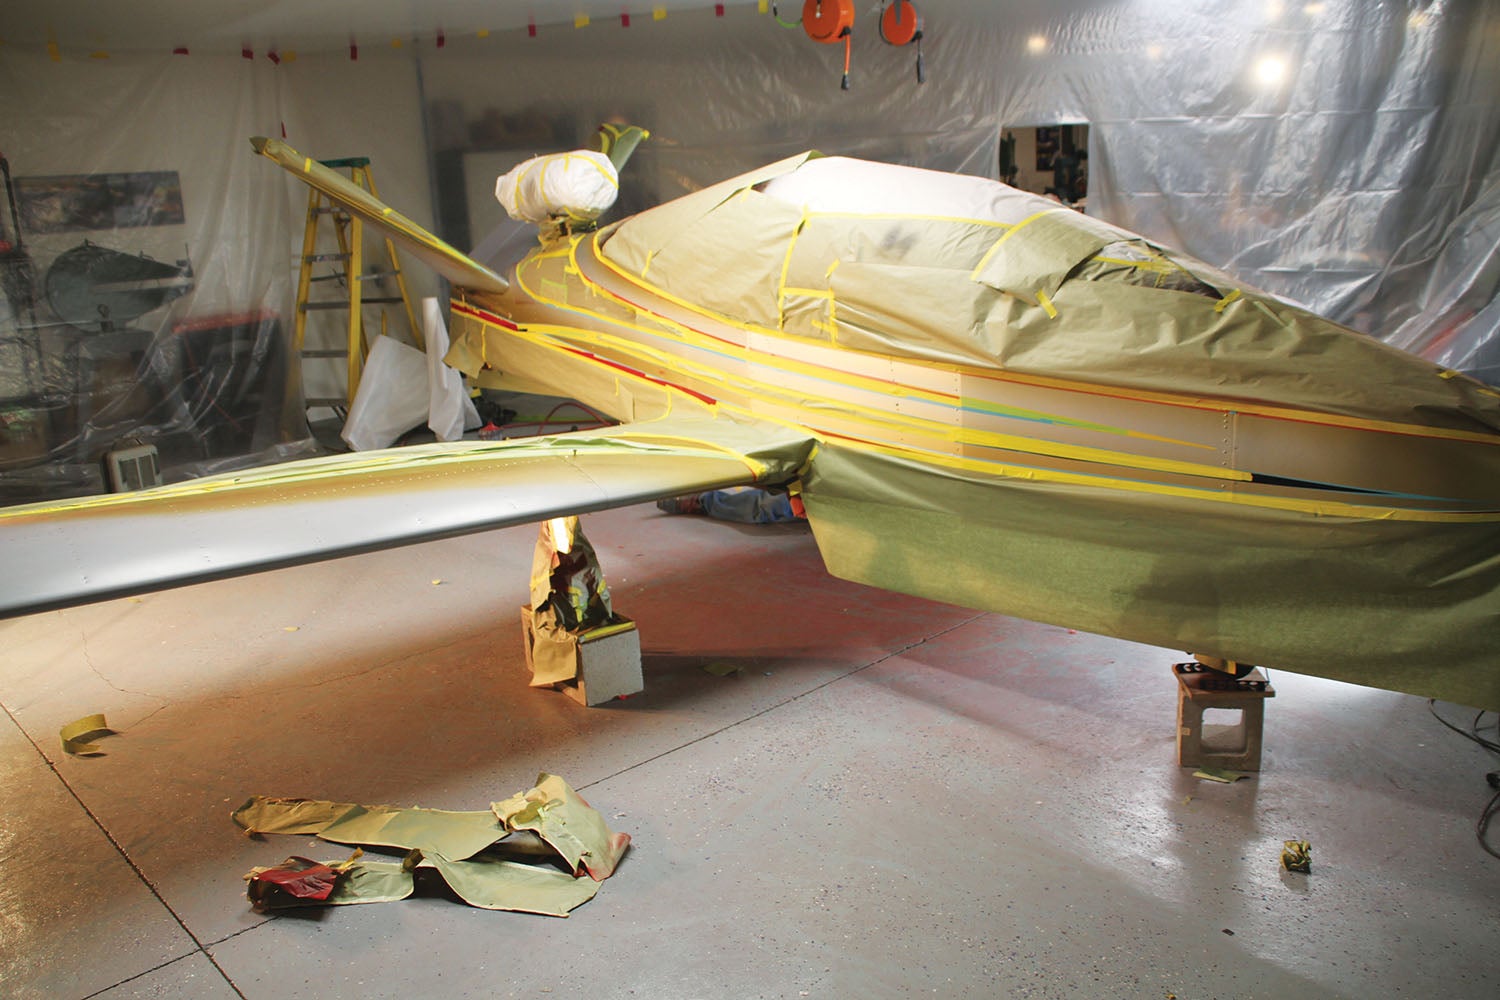
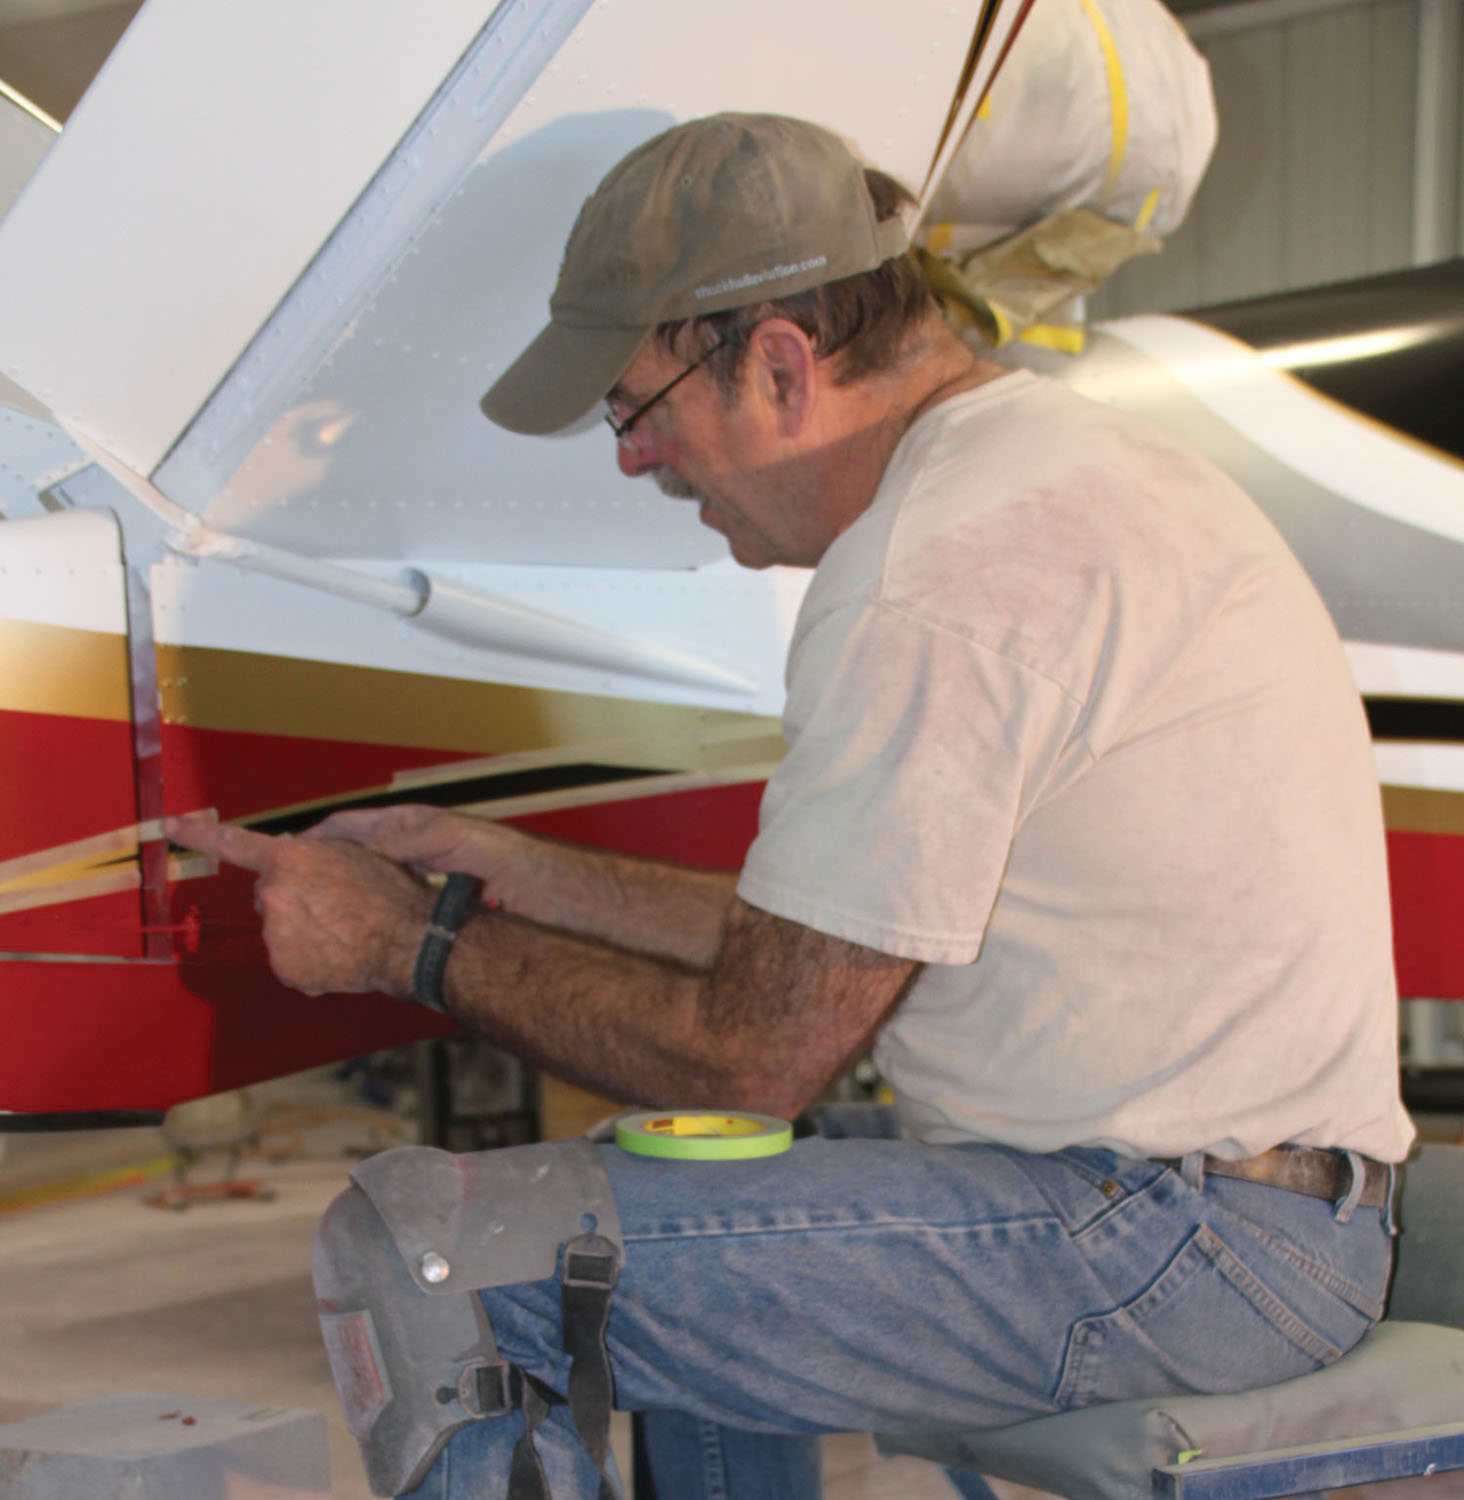
Once the gold was set, out came the masking tape. Essentially, he covered all of what would become pinstripes with tape—and that tape would stay in place for the rest of the color painting process. Since almost all of the divisions between colors on the jet would consist of a gold pinstripe, this task essentially meant laying out the overall design, and this took up much of the day. When he’d finished with one side (all by eye), he used white paper to trace the tape lines, then taped that paper on the other side and traced the lines by cutting little windows through the paper at points along the stripes. He then took the paper off and laid out the tape lines on the spots, ensuring reasonable symmetry from right to left. This is art—not engineering—and if it looks good, it is good. There’s an old saying that says, “If you lose two hubcaps off your car, put the remaining two on the same side.” After all, you can only see one side at a time.
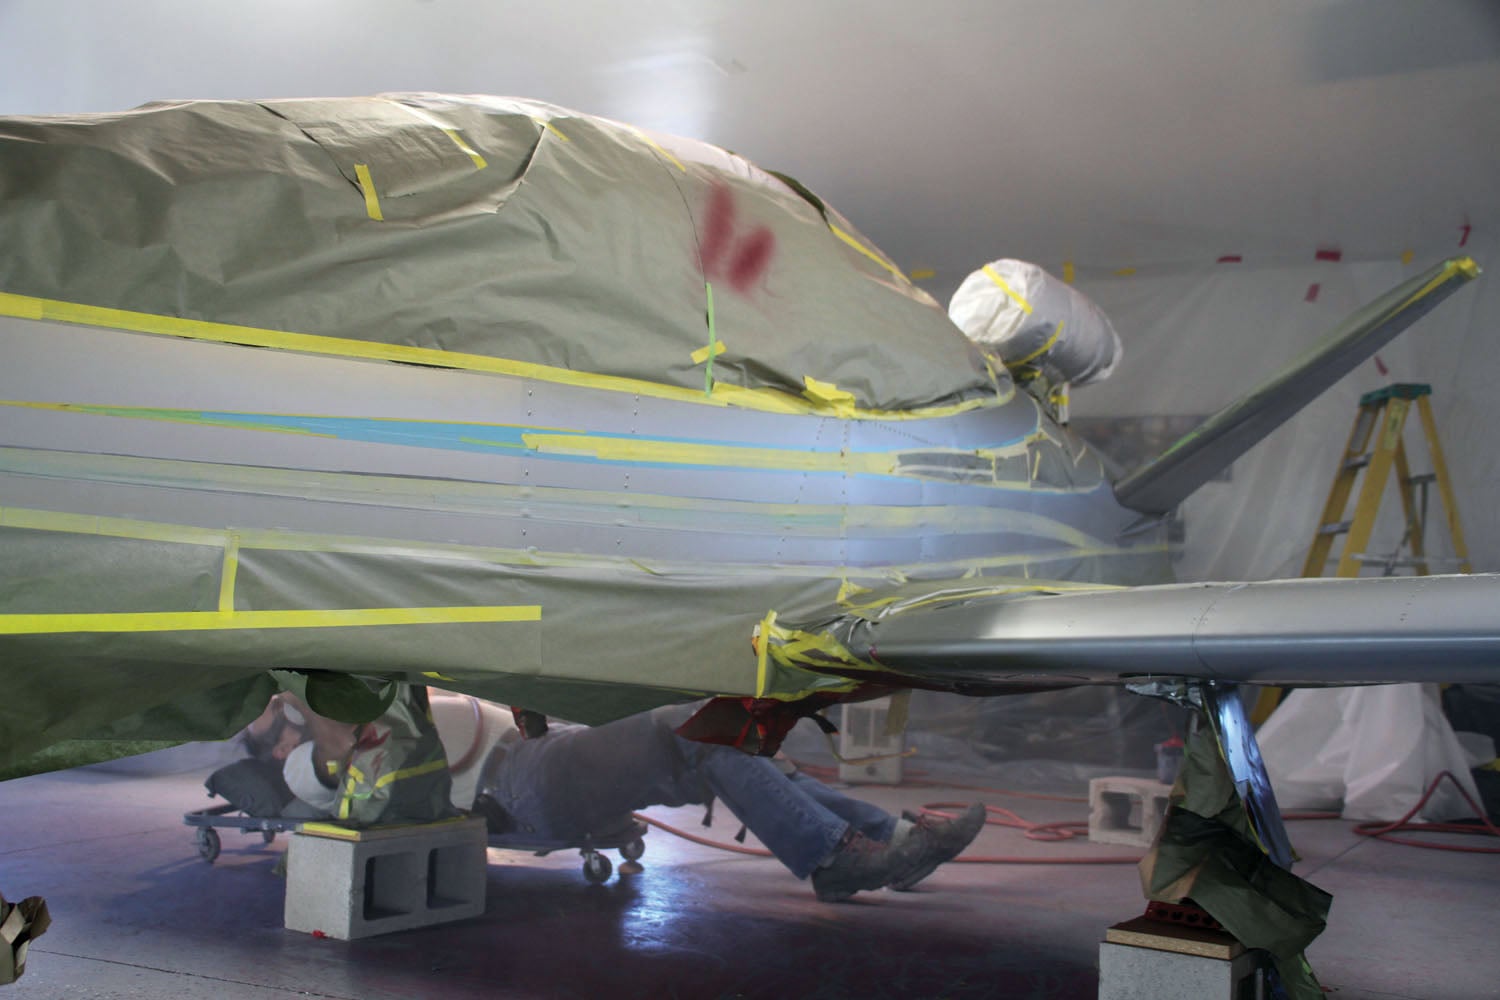
Once the gold pinstripes were covered up, it was time to mask off everything that would not be silver—the design called for a silver swoop running down each side and then up to the engine pylon. Since silver was easy to cover with the following colors, the masking wasn’t too extensive and really just consisted of layers of paper laid on some part of the airframe. John then shot the silver and waited for it to dry.

When the silver had cured, he covered that up and then covered anything that would not be black in the final design. His clever masking boxes were things he made for himself decades ago. They hold rolls of paper and masking tape so when you pull a piece of paper, it automatically comes out with tape on one edge. These little devices saved countless hours and much frustration as they gave a fast, easy way to apply masking paper.
The same process was followed for the airplane’s red areas and then for the white, and by the end of the third day, we had the basic airframe color scheme finished. And, amazingly, there weren’t any spots with multiple layers of paint—the primer was covered with its final color in each spot. Easy and light.
Details, Details…
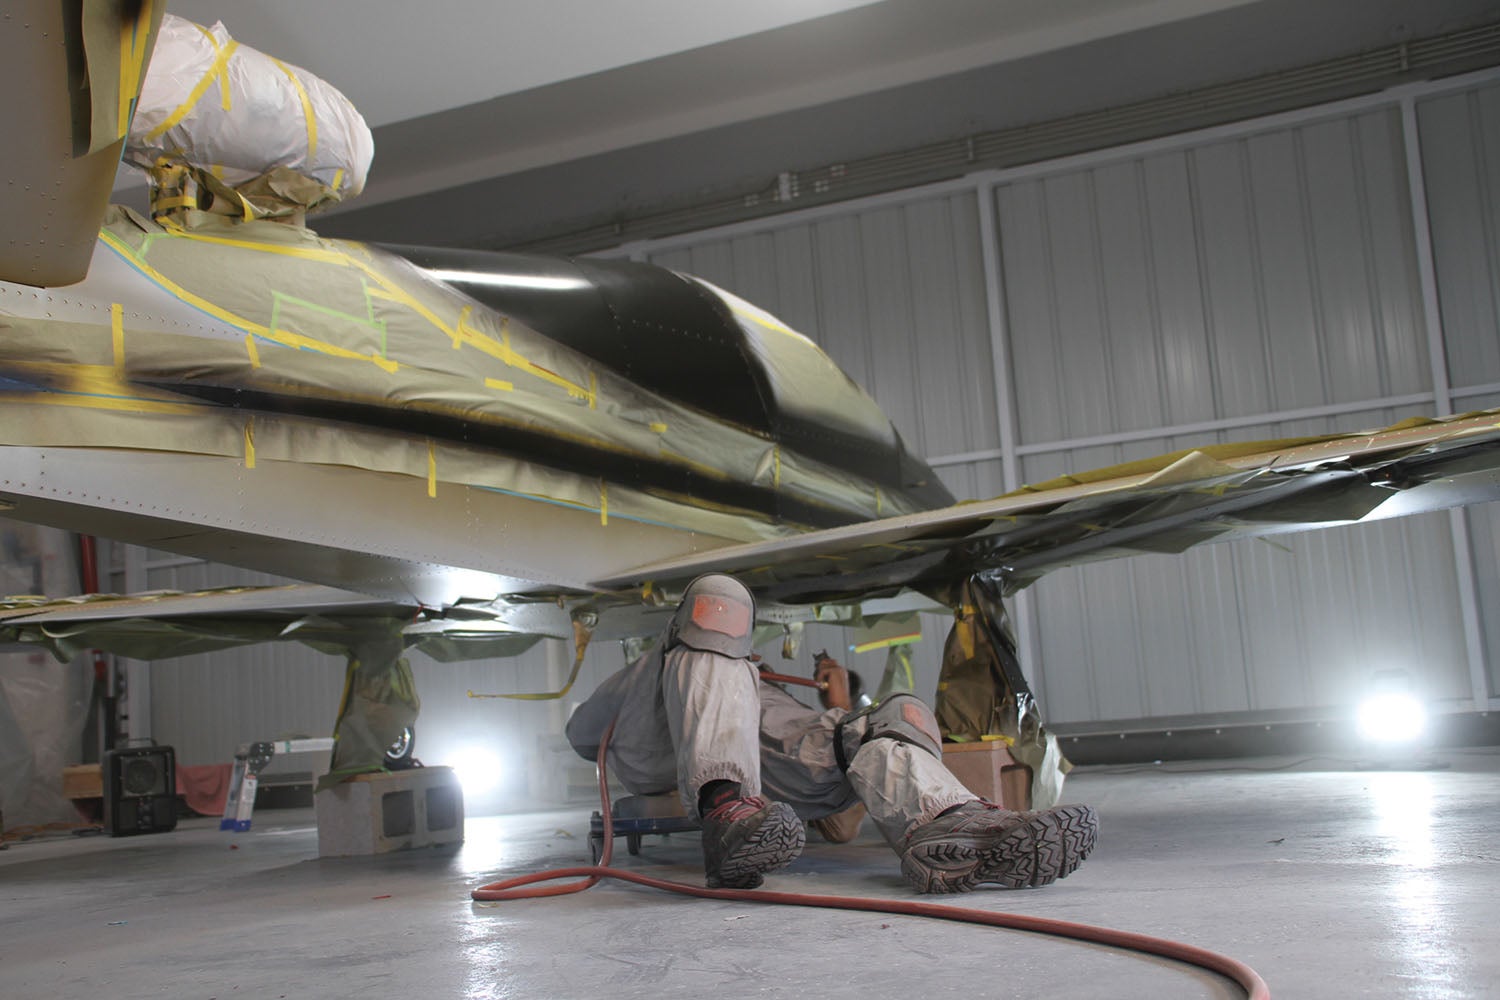
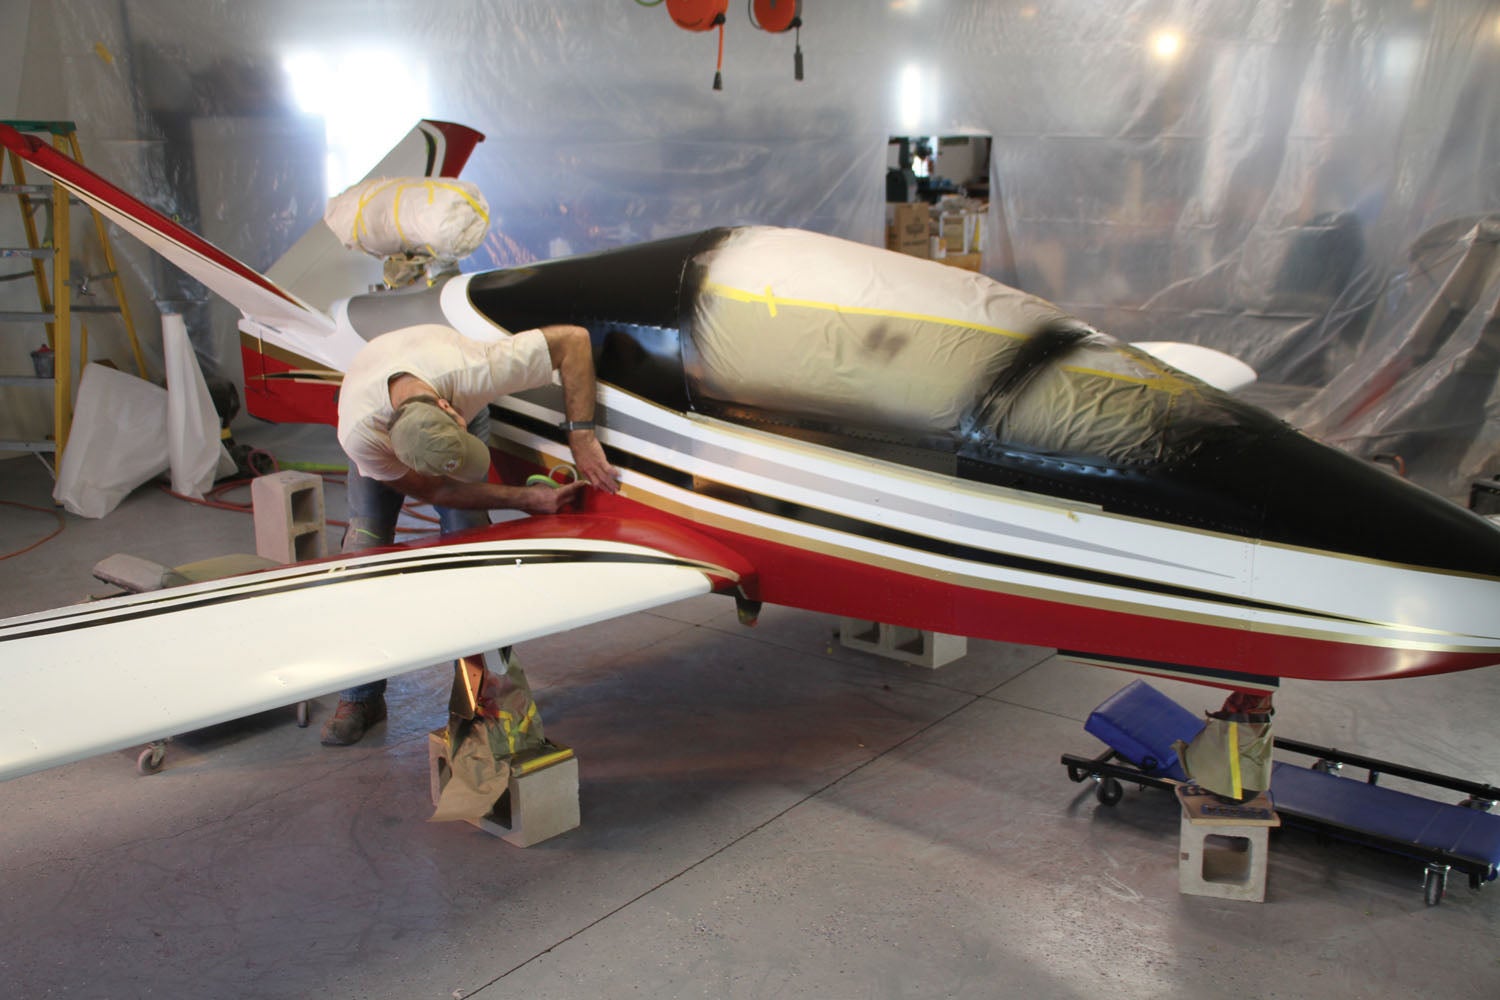
While John is an outstanding and quick paint applicator, it is clear he gets the base colors down just so he can really get started on what he loves—the many details done with an airbrush that make his work stand out. He had come prepared with vinyl masks, cut at his shop to match the art that we had decided on for the scheme. For our airplane, there were several large insignias representing my former career in the space program, as well as numerous warning and instruction labels that we wanted to have on the jet. Being equipped with a rocket-propelled BRS makes one want to let others know it is there!


Once John settled in with the airbrush, there was little for any of the rest of us to do except begin cleaning up the shop. For the eventual clear-coating step, we wanted to have all of the debris picked up and dust vacuumed and cleaned. But while this drudge work was going on, it was amazing to watch the transformation of the little jet from simply sporting a nice color scheme to really popping with details! John uses small amounts of a few paint colors and changes them out frequently in his airbrush to create many different shades and intensities of colors.
The jet features space-themed backgrounds to the insignias, and in a very short time he had transformed a black space into something you’d see in a Hubble Telescope image. This work lends a three-dimensionality to the overall art, and even the N-numbers look like they are floating off the side of the airplane.

One of the best parts of working with John to create the airplane’s finished look is that creativity builds on itself, and he was more than willing to execute new ideas we had while the work was underway. Even though he generally works from his precut stencils, he was able to generate new ones overnight with an X-Acto knife and his sure hands to bring clever ideas we thought up at dinner to life.
As a result, the jet now features an air-to-air refueling hatch and target ladder on the nose—not so much because we need people to think that the hardware is there, but so we had a viable reason to place a “No Push” sign on the otherwise black nose paint. And the final detail was a pack of Beemans chewing gum, rendered in three-dimensional glory, resting on the tail cone. Don’t ever fly without it!
The Final Touches
I had never painted with a base coat/clear coat system myself, although we had one of our other planes done that way. It was the depth and shine available that sold me that this was the way we had to go on the jet. In fact, with extensive airbrush work in the design, it was really the only way to go! When John had finished all of the color and all of the art (including a large insignia on the belly), we cleaned up all of the loose items and he prepared to cover everything with two coats of clear. The resulting shine was amazing, and the depth it added to the art was surprising. Although the color coats looked great with a sort of matte finish, there is no doubt they are amazing with clear.
The thing about clear is that it seems to trap just about any speck of dust or dirt floating in the air and entomb it on the finished airplane. We ran into this issue on one wing, when somehow a burst of dust infiltrated the airflow during painting. It was upsetting, but it by no means stopped John—he got out the 1000-grit sandpaper and a bucket of water, got rid of the impurities and then shot another layer of clear coat on top. After decades of painting everything from buses to vans to jets and little airplanes, there’s little that John hasn’t seen and no imperfection he hasn’t fixed.
Protected, Unique—Gorgeous!
A good layer of paint will help any airplane last longer, but a great piece of art will win you the “dead grass” award at a major fly-in. Although the EAA judging standards don’t give you points for intricate design, they can give you points for a well-executed finish. But if you don’t care about awards and trophies, the simple act of standing back while others admire your airplane is reward enough.
It might seem like a pipe dream to have an amazing paint job go from nothing to finished in a week—and in your own shop—but we proved it was possible, with long days, a knowledgeable painter and an amazing artist.
Your plane can be a head turner as well, and helping with the job from start to finish is a great way to feel pride in the finish as well as the airplane.
Editor’s note: Check out the time-lapse videos of the Subsonex painting process.


Color schemes, as shown, sometimes baffle me… since I have degraded color vision…
In bright daylight.. beautiful’!!
In low light reds, yellows, browns, blues… smear together…
Comments are closed.