 In the first part of this series, I walked you through the chain of events that led to our overhaul decision—the RV-6’s engine was past TBO, an engine mount was cracked, and we had decided that to maintain “Mikey’s” value, an overhaul of the Lycoming O-360 was in order.
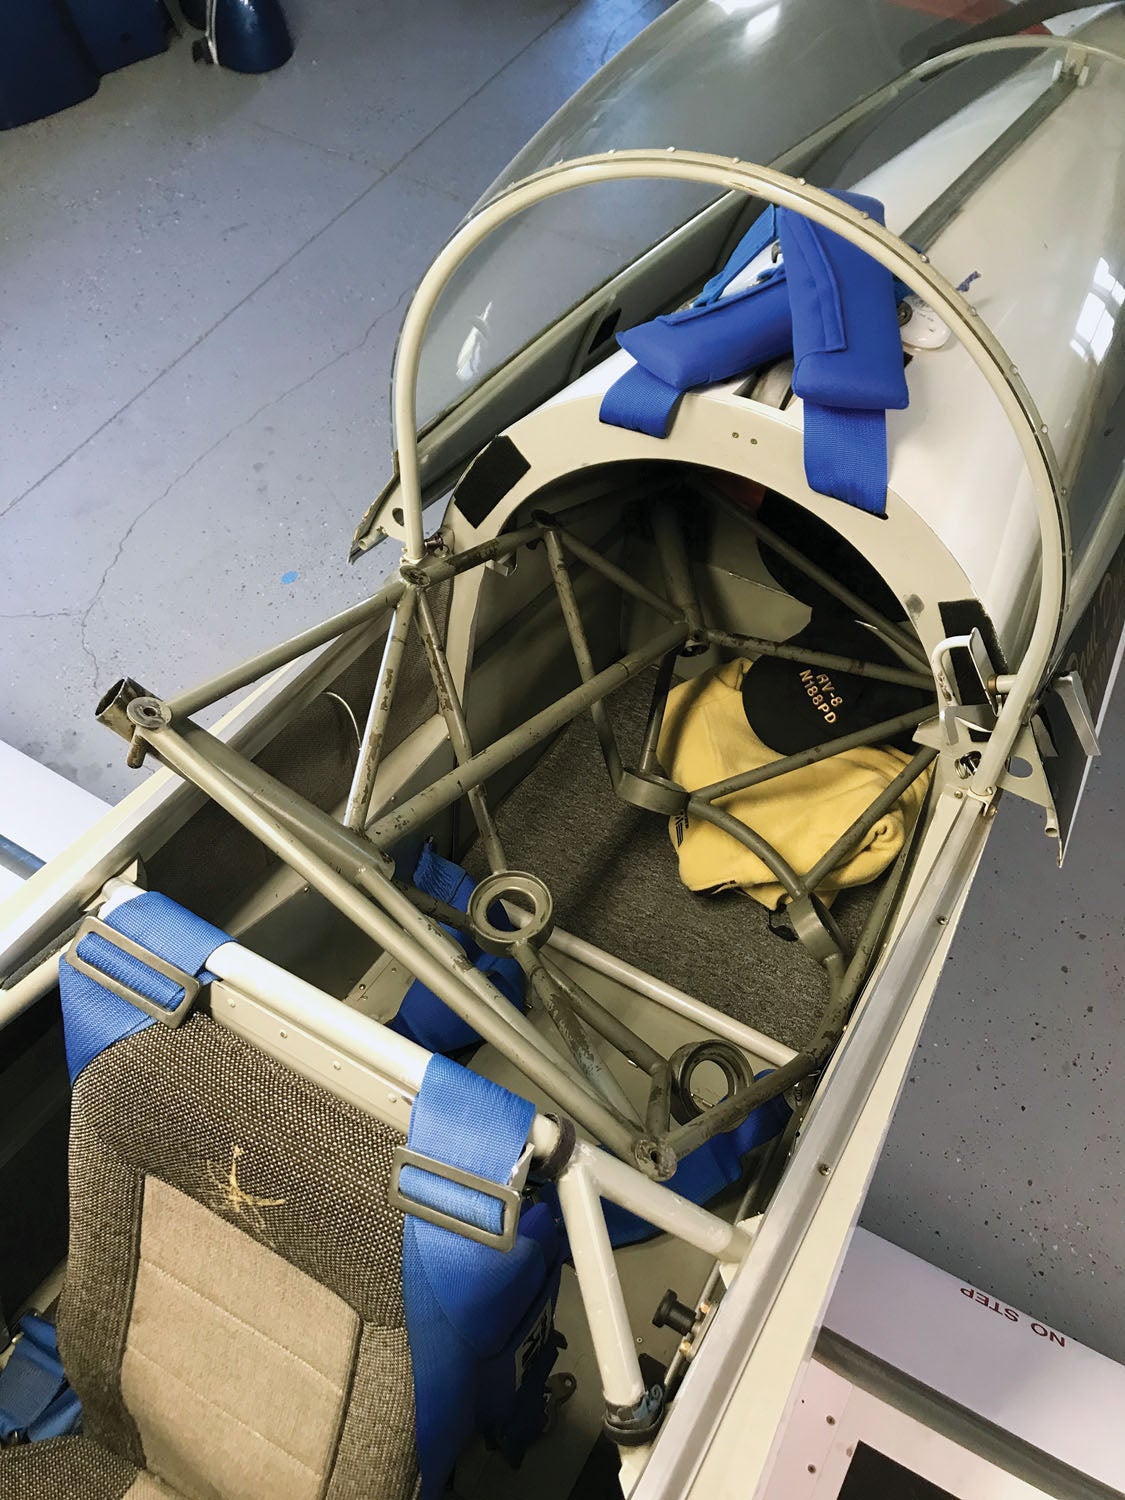
Once you choose to do an overhaul, the first thing is to remove the engine. Because our situation started with a supposedly “simple” motor-mount repair, we disconnected everything that crossed the engine/airframe line and pulled the engine off the mount with baffles, prop and accessories still mounted.
This version of engine removal is fairly quick to do and can be done by a couple of people in an afternoon. The only problem with this approach is that if you go further than the mount repair, you will have to pull things off the engine with it hanging from the hoist. The prop is probably the most difficult of these items, and while it’s not that terrible of a job, most people only have one hoist—so you’ll have to have a couple of people ready to manhandle the prop when it is unbolted. A typical Hartzell two-blade constant-speed prop weighs a touch less than 60 pounds, so plan accordingly.
Baffles are another potential problem. They can get in the way if you bolt an engine stand to the prop hub and then try to go vertical with the whole assembly. You should be ready to prevent crushing the aft baffle or just get it out of the way before trying this tricky move, one that requires at least three people.
Bagged and Tagged
When disassembling the engine, I like to have an entire box of Ziploc bags and maybe some disposable food storage containers on hand. Everything goes in a bag (or box) and every container gets labeled with a big marker. Nuts and bolts that have special relationships (like the three bolts with castle nuts on the belly of the engine underneath the sump) get put together finger tight so that later I’ll know which bolts belong where. Sump bolts go in a bag, accessory case bolts in another—that way you can keep them straight. Exhaust fasteners stay with the exhaust system while accessory attachment bolts and nuts go in small Ziplocs labeled “carb” or “starter attach bolts.” Taking the time to organize things as you disassemble will save many hours of research when you put it all back together. Oh, and don’t worry about cleaning things up now—this phase is disassembly. Inspection and restoration will come later!

The infamous and legendary Lycoming Direct Drive Overhaul Manual is a wealth of information on disassembling, inspecting and reassembling these motors—but it doesn’t tell you how to do it. It is more of a reference manual than a step-by-step set of instructions and you’ll find yourself thumbing forward and backward frequently, trying to figure out exactly how things might be put together. A better resource is the Superior Vantage Engine Overhaul Manual, which was written to step you through the process and does an excellent job at exactly that.
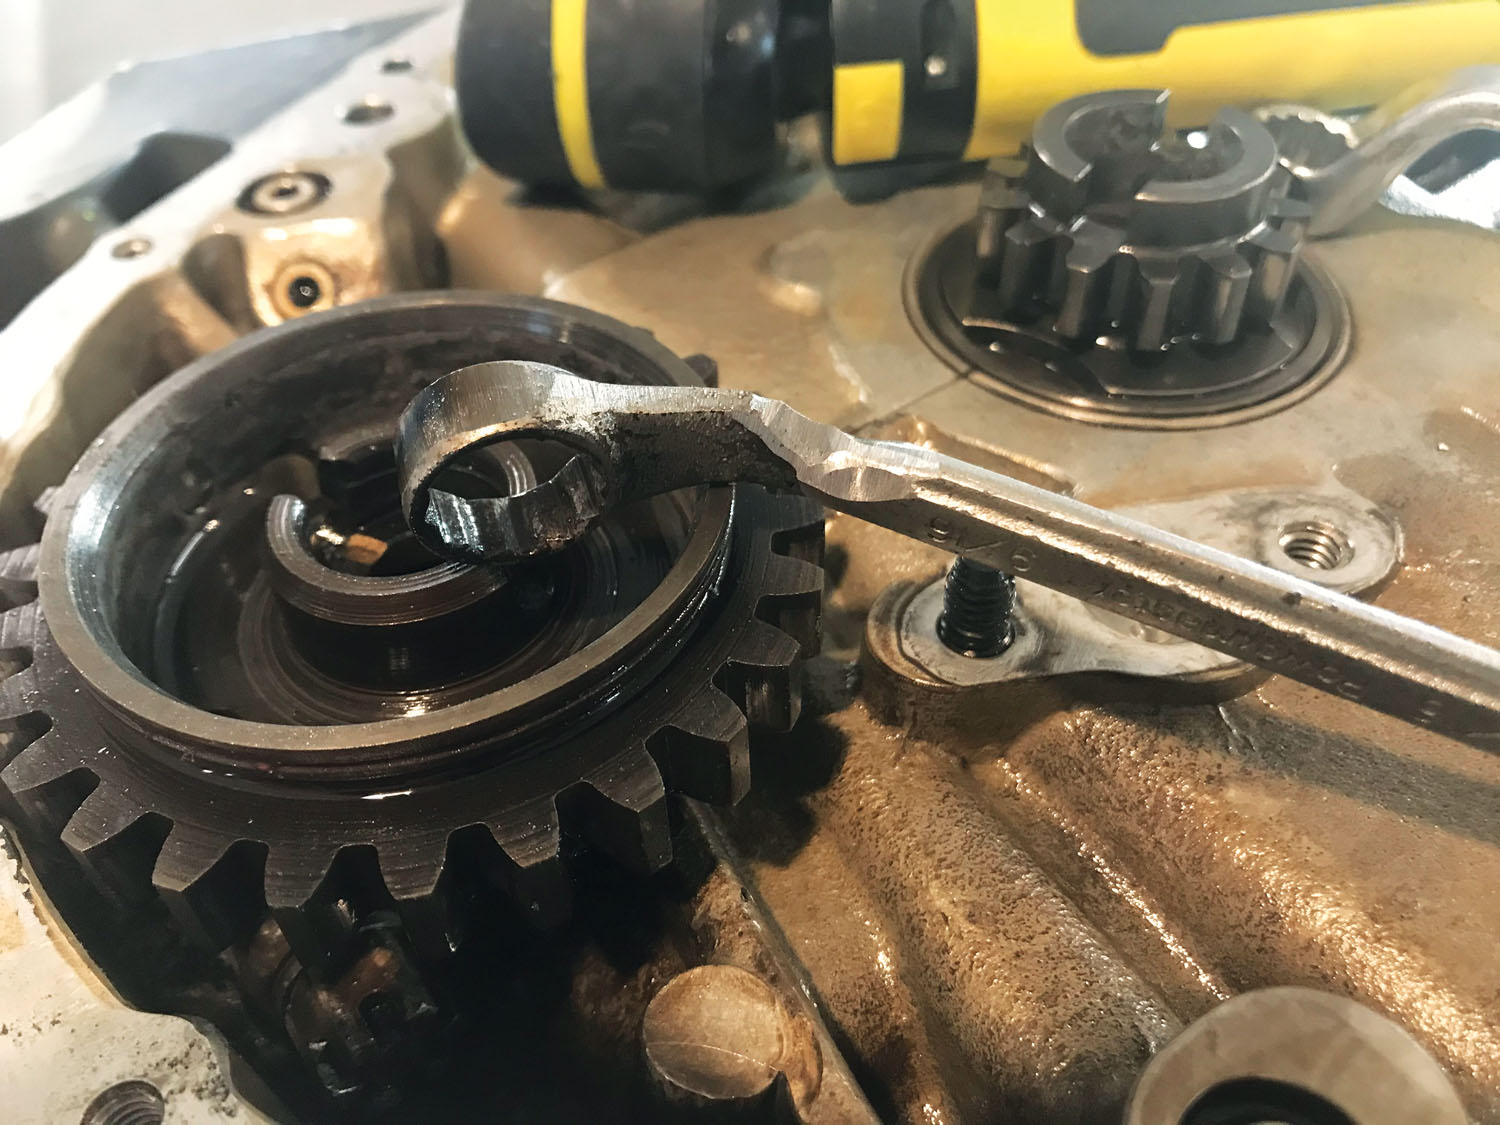
The tricky parts of pulling a Lycoming apart are taught by one mechanic to another, but are covered pretty well in the step by step. The special tools you’ll want are cylinder-base wrenches and a slide hammer that has been modified to screw on to case through-bolts. Everything else can be done with standard tools. By the way, that little nut hiding under the camshaft gear can be removed with the 9/16-inch cylinder base wrench—though you might have to grind a little off the outside diameter of the wrench to get it to fit. Grinding wrenches is almost a tradition among Lycoming mechanics.
Stay on Task
When taking the engine apart, it’s hard not to get pulled into the inspection mindset. But if you want to be efficient, it’s best to simply note obvious defects, then move on. Lay all the parts out on paper towels on a large workbench, and when you have things apart, photograph it all—or do it in groups. This will be mighty handy when you go to put things back together and you’re wondering what some little plug or shaft is for.

Organization is important because you’ll eventually be pulling all the steel parts together to go to one shop and the crankcase will be going somewhere else. Then you’ll have a bunch of stuff you need to hang on to while the expensive parts are at the machine shops. Keep it all organized!
Invest in a bunch of good shop paper towels—I like the blue ones—because every time you think you have all of the oil drained from something, you’ll tip a part and more will come out. Have some Stoddard solvent (mineral spirits is the same thing) handy for initial cleaning as you get ready to pack parts.
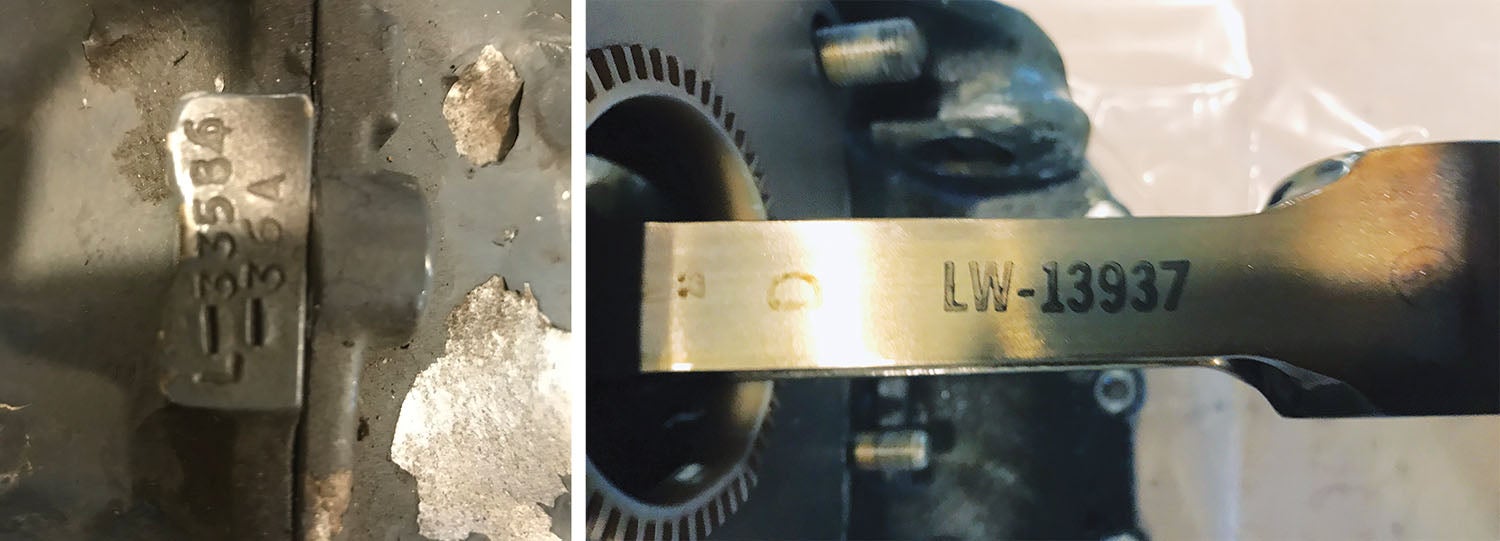
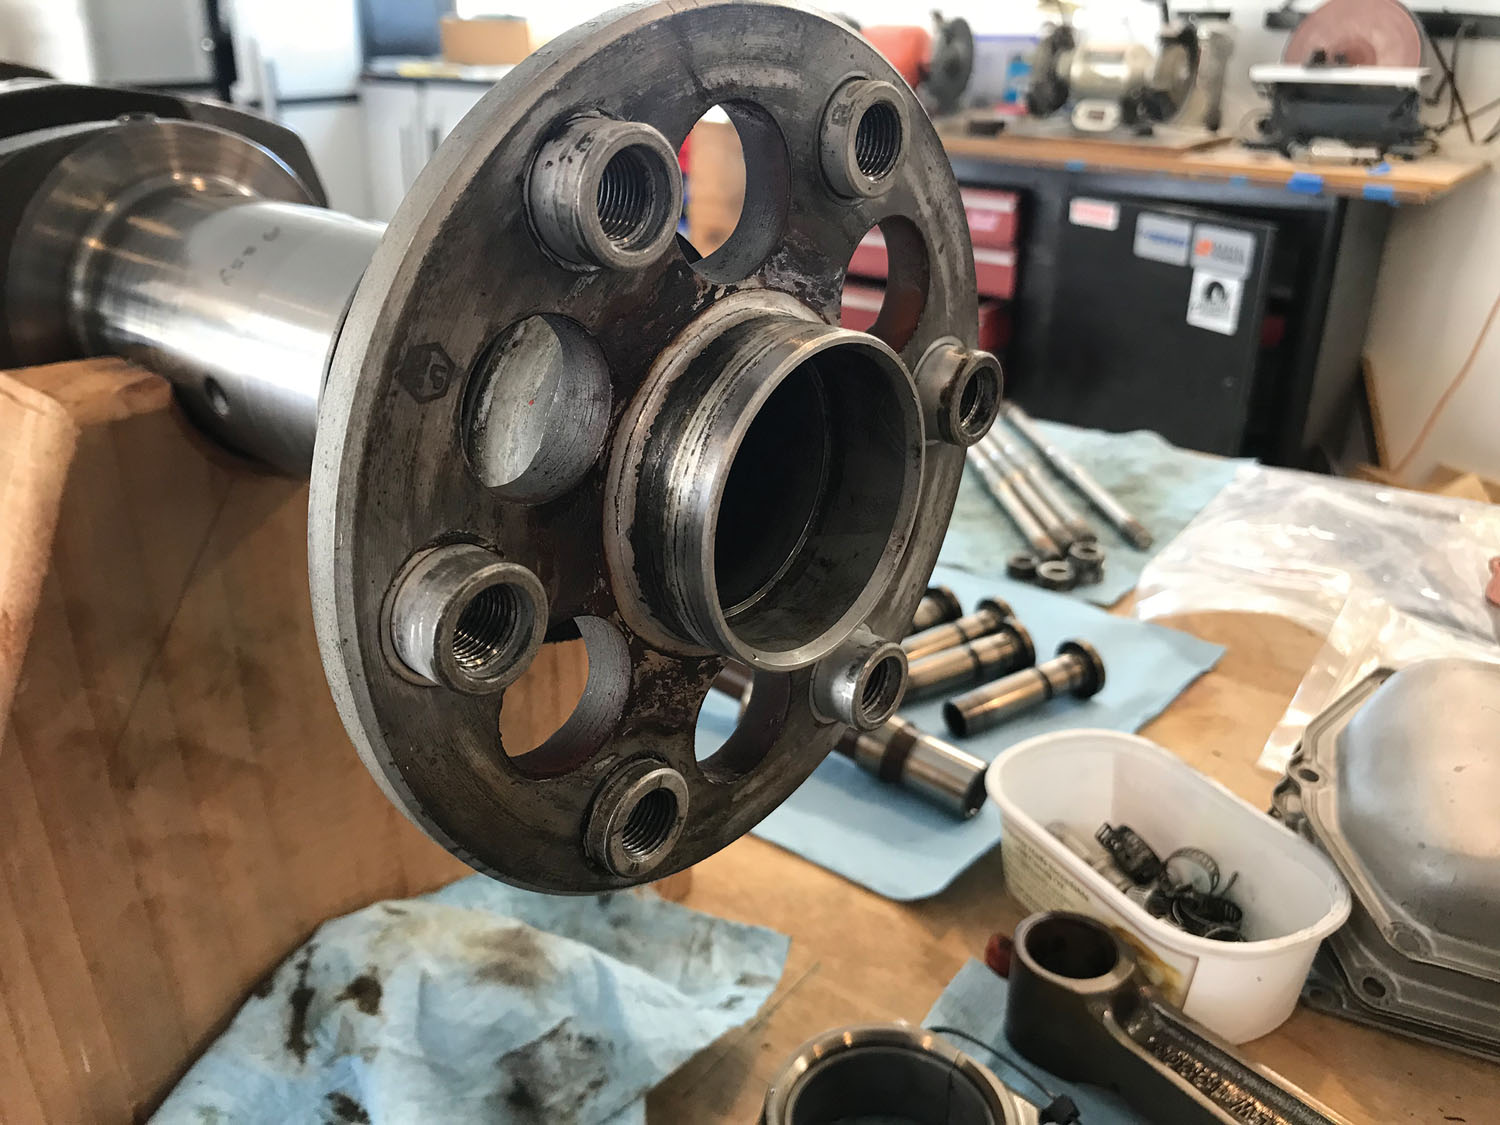
Lastly, grab a pad of paper and start writing down serial numbers and part numbers for everything you can find. The assortment of numbers on a Lycoming crankcase is astounding—but write them all down. The same is true for other expensive parts like the crankshaft, connecting rods and camshaft. You’ll want records of all these parts so you can verify that the right ones came back—and also in case you want to do any parts shopping because some parts only work with specific versions of otherwise identical parts.
Don’t forget to write down any numbers you can find on the bearing inserts for the crankshaft. These bearings have changed over the years and the parts department will need to know exactly what you have in order to send you the correct parts later. Lastly, if this isn’t the first overhaul of your engine, find out if the crank has been previously ground and figure out how much. This is so that, again, you know which bearings you have. The crankcase overhauler will grind to a new oversize regardless and tell you which bearings are needed. But it’s a good idea to know where you stand before they begin.

Where Does It All Go?
The easy answer to “where do I send my stuff?” is “Tulsa.” Everything, it seems, goes to Tulsa, Oklahoma, apparently the mecca of Lycoming engine-part machine shops. There are a couple of shops all lined up on the same road just outside the International Airport. They know each other. In fact, the place we sent all of our steel parts (Aircraft Specialties Services) was happy to have everything sent to them and they carted the crankcase next door to DIVCO—which made it simpler for me at the UPS store. I sent the entire mess to one address and let them sort it out.
What about boxes? Aircraft Specialties has an entire page on their website devoted to the topic. Basically, they want you to know that their insurance company requires that they send them in Aircraft Specialties custom-designed boxes when they send your parts back. Don’t let that fool you—they are just heavy-duty cardboard boxes, but they are the right size and shape for the parts they contain. What this means is that if you build beautiful wooden crates to send your heavy crank, you won’t get them back. But finding the right box is hard out in the hinterlands! Aircraft Specialties knows this and has a solution—just call them up and they’ll send you empty boxes for free—because they’re good people and, apparently, they trust you. Slick and easy!

The only thing they don’t have a box for is the crankcase because they don’t do cases. The case is big and heavy, and while your local packing store might have something that fills the bill in terms of ruggedness and size, it won’t be ideal. So think outside the box—and look for a better box! Large plastic storage containers—the heavy-duty ones—are available at Home Depot, Lowe’s or Costco. The good ones only cost about $25. You’re never going to see it again, but I bet you’ll pay a lot more for a cardboard box at a packing store. And the good ones have features like slots through which you can put heavy-duty zip ties to fasten the lid. It’s almost like they thought someone might use them for shipping. You’ll have to come up with a combination of foam and/or other packing material to stabilize the case in the box—but surely you have styrofoam packing left over from a TV or appliance box stashed somewhere. You’ll figure it out.

Pack everything carefully. Use plenty of wrapping, foam and bubble wrap. This is an expensive engine—spend what it takes to keep the steel parts from banging into each other and from shaking around the box. With everything sealed up and inventoried (make sure to keep a list of everything in every box), I had five boxes of various sizes. I hauled it all over to the UPS Store and about $250 later, it was all headed to Tulsa on a one-week truck. Track the shipment—it’s expensive stuff! When it gets to Aircraft Specialties, they can walk the case to DIVCO. They will send you a detailed inventory of what they received so you can compare and agree that what they have is what you sent. They’ll do this before doing any work, which is great. They also have an excellent online tracking system that you can access from home to check your parts’ status as they go through the process—it’s a very good system that helps you know what’s happening without having to call Tulsa every day.
Aircraft Specialties estimated about two and a half weeks for all the work they needed to do—it ended up being a little over three, so they were close. DIVCO said that their standard case work takes eight to 10 weeks, and for a four-banger runs $995 plus additional cost for extra work. For $300, they can expedite it to 8–10 days. For me, this seemed like a good upcharge because I’d get everything back in less than a month. Time is money, money is time, they say: If you have time, save money. If you want it quick, pay a bit more.
While You Wait…
Once everything has left your city for Oklahoma, you might think that you’ve got nothing to do but wait. You’d be wrong. First, remember all that stuff you put in bags and boxes? It all needs to be checked, cleaned and made ready for installation.
You can start with bags of nuts and bolts. One at a time, dunk them in solvent, hit them with a wire brush and do whatever you do to clean them up. I like to make a bolt block out of a piece of 2×4—just drill a bunch of quarter-inch holes in the wood—then stick all the bolts in and clean up the heads in my blast cabinet. Don’t blast the threads if you can help it—they won’t fit as well.
Collect every washer and lock washer—count them, then give them an honorable burial. Washers are cheap—buy 200 of each size at Aircraft Spruce and you’ll be set to do a couple of engines. More importantly, you’ll never be tempted to reuse a lock washer again. Re-bag the cleaned and renewed hardware to be ready for installation when you are assembling the engine.

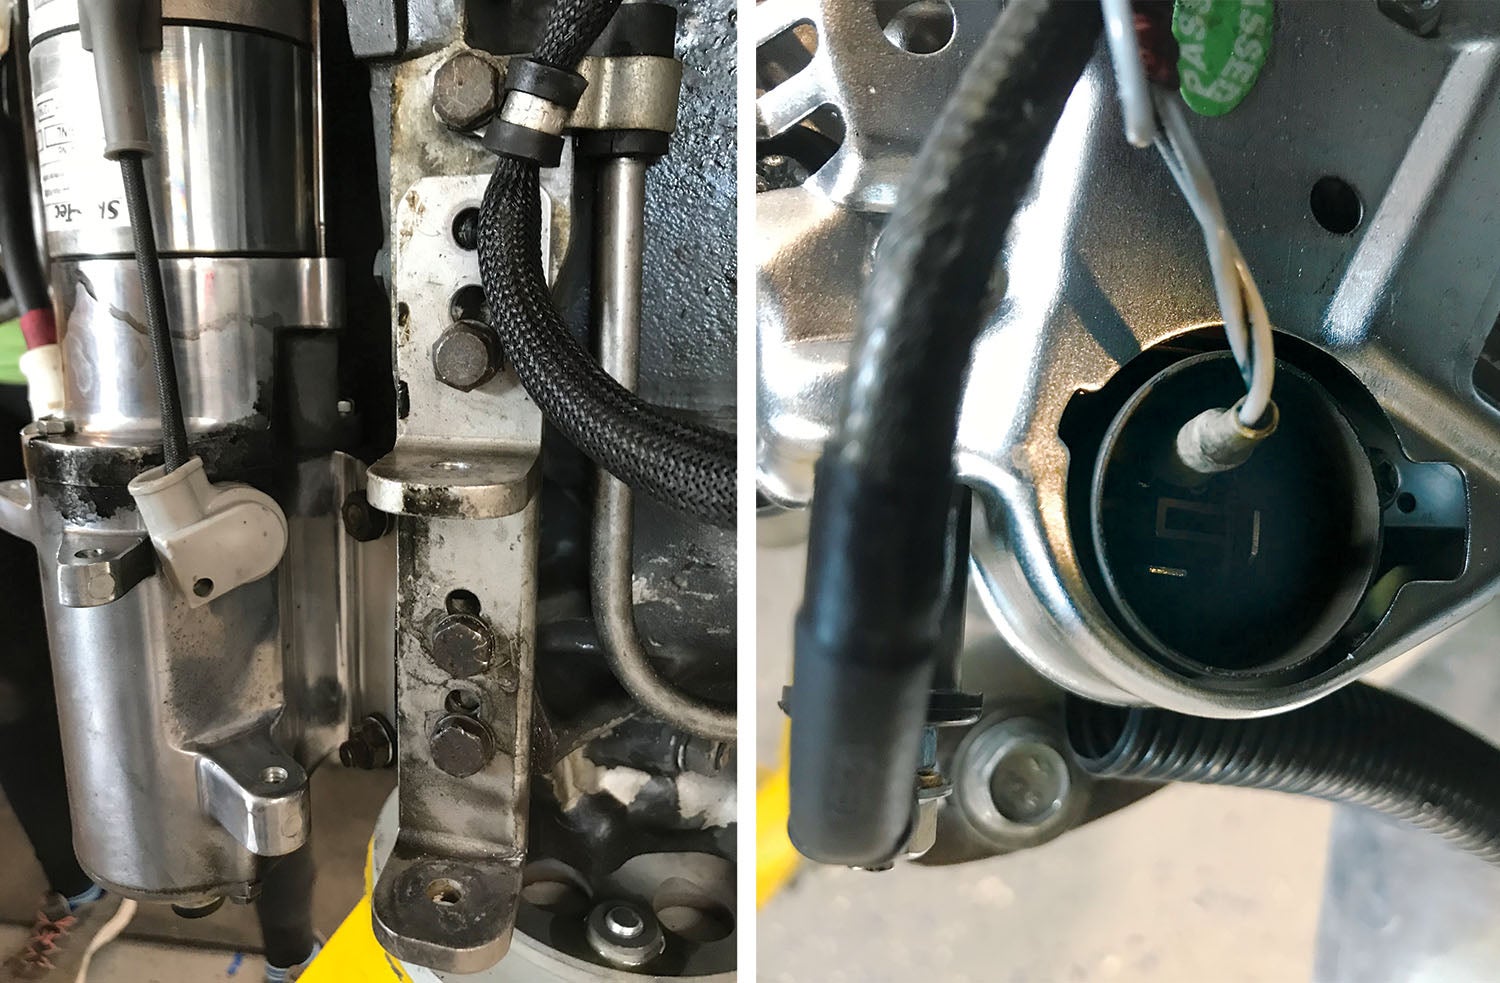
When you’ve tackled hardware, clean and inspect accessories that will be put right back on. Solvent and elbow grease can make starters and alternators look like new. Carefully inspect alternator mounts. The holes tend to wallow out a bit, so make sure the bolts are still good fits. Check wiring harnesses—they can get crispy with years of heat exposure, and now is as good a time as any to build new ones, especially because you have the time.
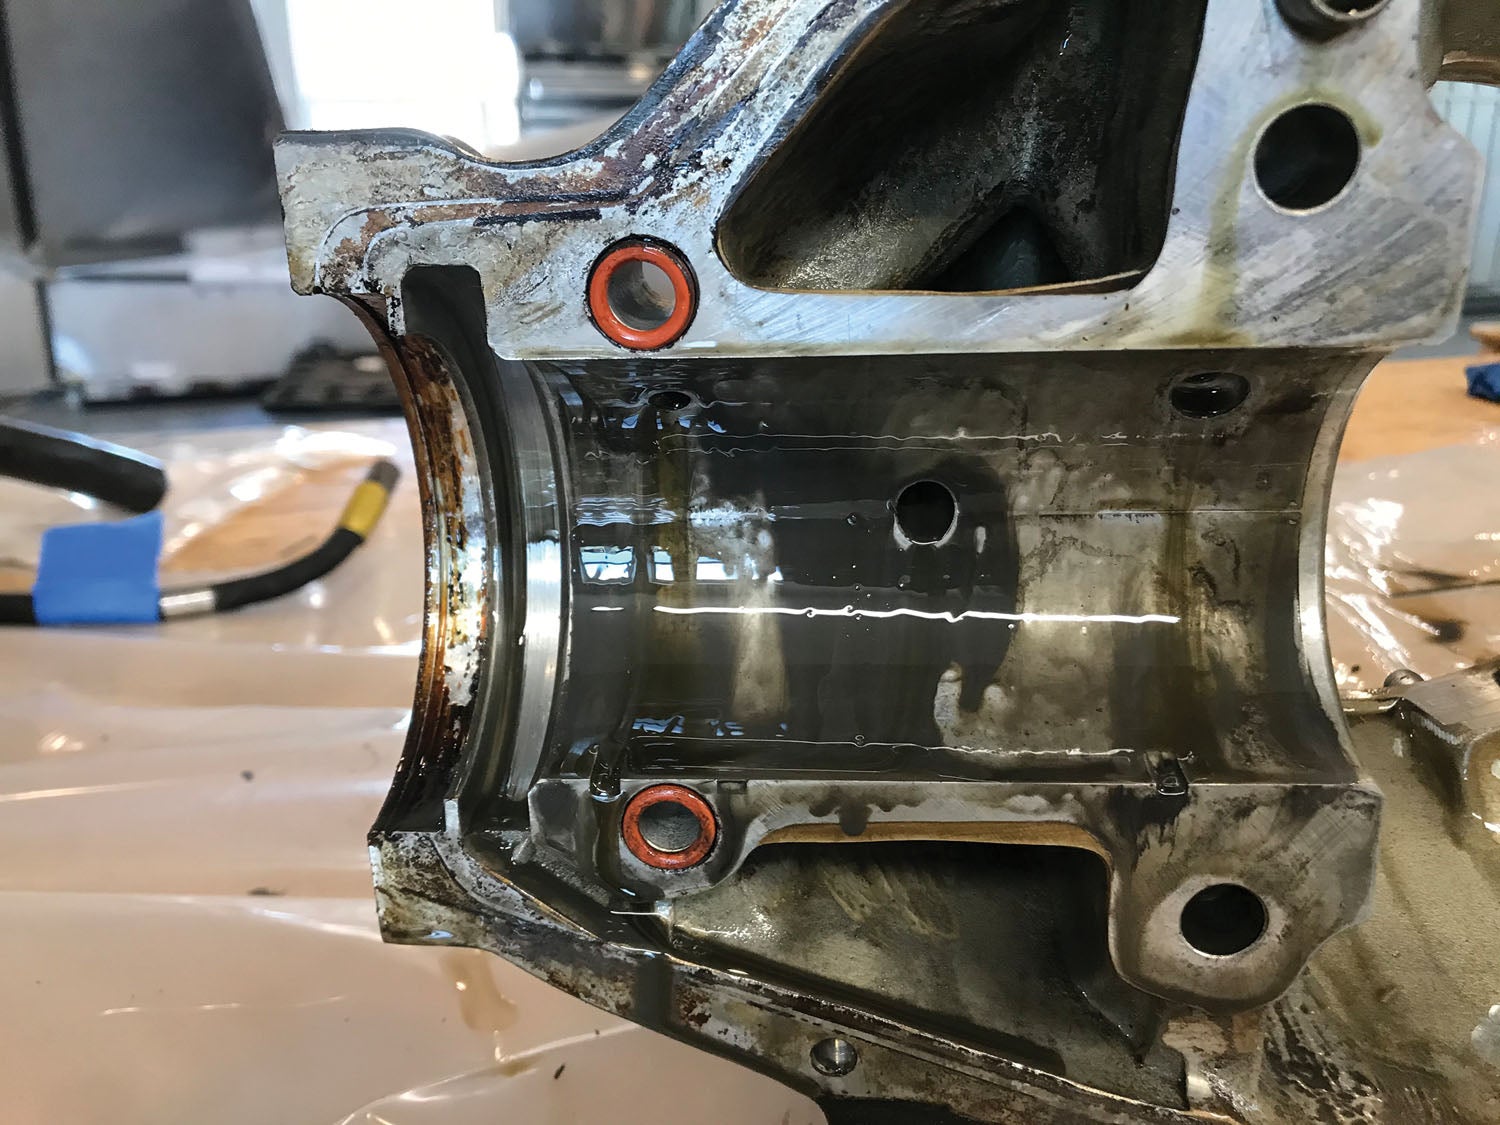
Once you’ve finished going over accessories and their mounting hardware, you’ve got the accessory case itself to go over along with the sump. These need to be cleaned (inside and out) and repainted. I start with a solvent sprayer and degrease the parts thoroughly. You’ll find lots of places where gunk can hide—solvent will take care of this and gets the parts degreased for repainting. On the sump, remove the suction screen, drain plugs and anything else attached. Except for the data plate—leave that on and clean under it with the sprayer. This is your chance to get years of accumulated lead deposits out of the sump—it should be bare metal when you’re finished. Next, remove old paint. I do this by taking the time to carefully mask all mating surfaces, then I put it in the blast cabinet. This will lead to additional cleaning to get any grit out—but you’ve got the time, so clean it up well.
The same process can be used with the accessory case, but beware that you have more mating surfaces inside—like where the oil pump goes. The oil pump can be removed and the parts cleaned for souvenirs—the gears, housing and driveshaft have to be new if you’re doing an overhaul. Remove the vacuum pump drive adapter as well as the prop governor drive adapter. Strip the case down to its bare casting—then go through the cleaning process after carefully masking all machined mating surfaces. Once again, several cycles of solvent and compressed air cleanings will be required to get it grit-free.
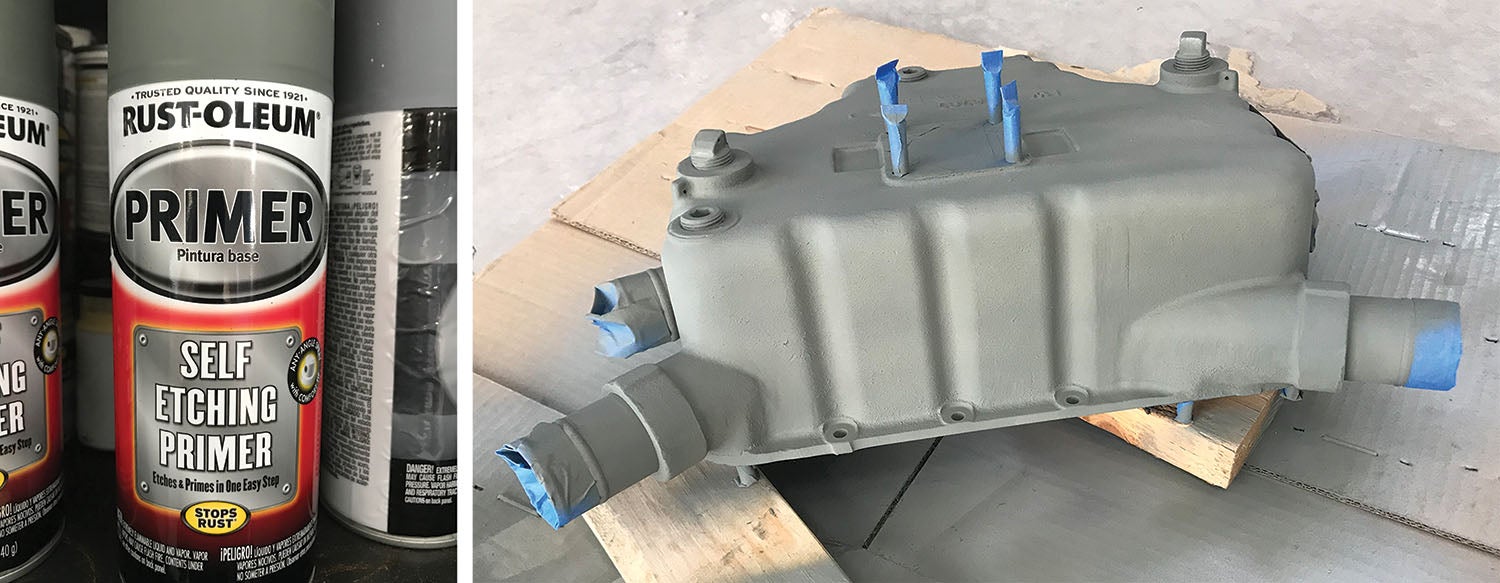
When the sump and accessory case are cleaned and stripped, now you can mask them again for painting. It’s a toss-up if you want to paint before or after engine assembly—there are advantages and disadvantages for both. I like to paint the components before assembly, knowing that I will go back and do some touch-ups on the seam areas—that way, I can get into all sorts of nooks and crannies that are hard once the engine is together. But Lycoming does all their painting after assembly so that obviously works as well! If you paint these parts now, it does give time for the paint to cure before assembly.
Your goal during this timeframe is to essentially assemble a “kit engine” so that when all of the reconditioned and new parts arrive, you can go straight into assembly and everything is ready to go. Take the time you have to do this phase right, and putting the engine together is simple.
Buying New
As we’ve mentioned before, Lycoming requires a certain list of parts to be replaced in order to call an engine “overhauled.” These include things like the oil pump and hydraulic lifers. There are also a number of bolts and keepers besides, of course, the gasket set. Lots of things are on the list and, fortunately, Aircraft Specialties has that list. When your parts are far enough along in the reconditioning process that they know what might have failed inspection and can’t be reworked, you’ll get a call from their parts department offering the complete list of what you’ll need to put the engine together. This list will feature a significant discount from retail prices, so it’s worth looking at anything else you might want at the same time.

No matter how experienced the people are working on these things (at your end or at Aircraft Specialties), some things will inevitably fall through the cracks. A good example? The nylon thrust plugs that go on the ends of the rocker-arm shafts. These little mushroom-shaped buttons cost about $2.75 at Aircraft Spruce and the ones that come out of a 2000-hour engine are crispy and ready for replacement. But since the shafts don’t come with the cylinder kits, they aren’t packaged with the gaskets and seals that come with the new jugs. And when you go through the gasket sets for a complete engine, they aren’t included because they are “parts,” not seals. So don’t be surprised if you get to the end of assembling the engine and realize that you need eight of the little critters and they are nowhere to be found. “Hello, Aircraft Spruce…”
Although not a part of a hardware package, it’s not out of the realm of consideration to buy all new bolts for the case spine as well as sump and accessory-case attachments. To do this, you need to go through the parts catalog and tediously make a complete list of them. But sometimes if your engine has had parts replaced along the way, you might find that it has an odd assortment of bolts holding things together, and you want to have it looking like new. Somewhere, someone has made this list—I just don’t know where it might be! (And it will vary for different dash-number engines).
As you go through your parts, you might find a few things you want to replace that you can’t find in the parts catalog. A good example is the little piece of hose that wraps around the constant-speed-prop oil line that routes oil from the governor to the nose of the engine—it cradles the line in a clamp to the belly of the engine. You don’t need to buy a part from your engine supplier to make this new—just find a 1-inch-long piece of oil-resistant, 3/8-inch ID hose from any source. In fact, this is the same hose used on the oil drainback lines, so if you want to save a few pennies you can buy a 3-foot length of this from McMaster and have enough for several engines.
Next up, assembling all the pieces.
Photos: Tom Wilson, Paul Dye, Louise Hose.
![[Credit: Wikimedia Commons]](https://www.kitplanes.com/wp-content/uploads/2026/07/4_rutan_a_longez.jpg_preview.jpg?w=218&h=150&crop=1 "Rutan Symposium Turns to the Coming Canard Maintenance Crisis")
![[Credit: Lisa Turner]](https://www.kitplanes.com/wp-content/uploads/2026/02/Fuel-Selector.jpg?w=218&h=150&crop=1 "Fuel Follies")


Paul thanks so much for the article. I have an 0-235 L2C engine sitting in garage floor since 1981. My understanding is that it not having been treated in any way for storage that it’s probably rusted inside and need of an overhaul. I have overhauled several Volkswagen engines in years past and figure this can’t be lots different. What would the status of this engine be if I overhaul it? Would it no longer be a certified engine? I don’t have an airplane to put it in so would likely sell it.
Hello Steve,
I think you have a realistic attitude about that engine – it sounds like after all that time, it is probably a core. Yes, if you do the overhaul yourself, and you’re not an A&P, it is going to be an experimental engine, and unfortunately, most people are going to look askance at it because they wont know the skill level of the person who built it. Honestly, your best bet would be to pull it apart to see what you’ve got inside, and then sell it as a core – you most likely would never get your money out of it if you spent what it will take to do a complete overhaul. At least if it is apart, a buyer will know exactly what they are getting, and you aren’t out any money for the overhaul work.
its possible that i could be interested in the 235
what is your asking price??
if you decide you want to sell pleas call
772 285 3374
Comments are closed.