 It began with a stumble. A normal takeoff, followed by turning off the boost pump, and the engine on our RV-6 stumbled. A quick look at the fuel-pressure gauge showed the problem—low pressure at full throttle. When the boost pump was switched back on, things returned to normal. A little experimentation (above the field) confirmed it: The airplane was ready for a new mechanical fuel pump.
And so it began.
Our Van’s RV-6, serial number 20004—that’s right, just the fourth kit—came into my future wife’s life about a thousand flight hours ago. The engine already had 1400 hours on it, and the prop had been resealed shortly before her purchase. She put a lot of cross-country hours on the plane, both before and after we met, and because of the higher-time engine (a first-run factory-new Lycoming), she started regular oil analysis with each oil change. We’ve kept that up in the years since.
This RV’s carbureted O-360 has been a reliable powerplant, with good compressions and excellent oil numbers for as long as I have cared for it. But with 2400 hours, it was only a matter of time before we started seeing signs that it might be getting tired. The fuel pump was telling us something—it was a sign that we might be getting to the end of a great run. With the airplane grounded until I replaced the pump, I ran it up and did the compression checks. Three of four cylinders were at 72/80 and one at 68. That’s a bit of a drop since the previous year, but within a range most owners would find acceptable. Still, it was another sign.
Pump It Up
I ordered a new fuel pump and steeled myself for the swap. The back of the Lycoming is pretty close to the firewall on the RV-6—not as bad as on our RV-3, but bad enough. It was an honest four hours’ work to get the new pump installed and safety wired, but since the airplane was due for its condition inspection the next month, we decided to do more than just the fuel-pump swap. We decided to go through the RV’s front half while it was opened up. And that, of course, was when we found the cracks in the engine mount.
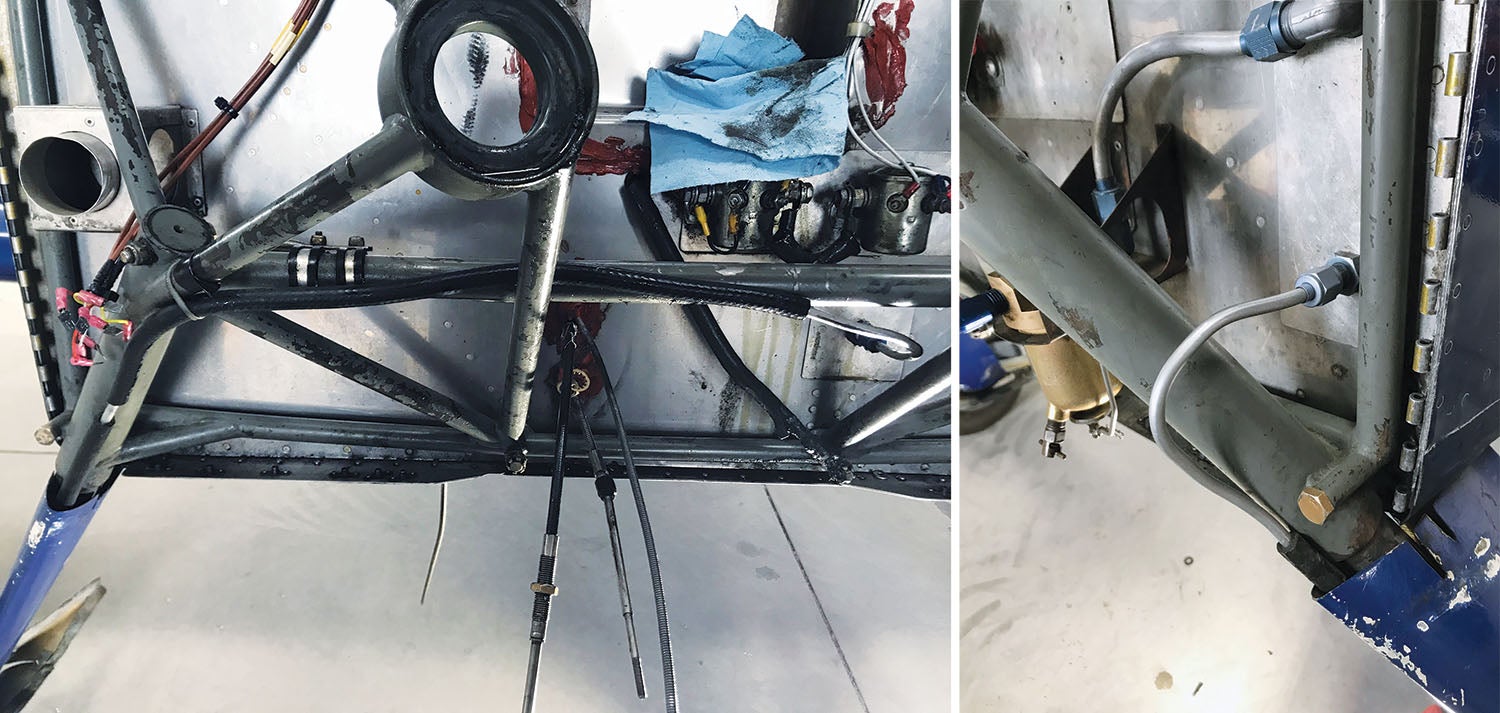
The RV-6 (especially early versions) is known for experiencing cracks at the lower corners of the engine mounts, right where the gear legs meet the mount and the mount meets the firewall. Gussets were added to later versions—as they were to the mounts for the RV-7—but this one had never been modified. We check it every year, of course, and had never seen any problems. This year, though, the crack on one side was painfully obvious, and the other showed suspicious bubbling of the paint. A little wire brush work confirmed it—the mount was going to need a welder’s torch.
That, of course, meant that the engine needed to come off. I was a bit annoyed that the fuel pump change would have only taken about 10 minutes with the engine hanging from a hook—so there were four hours of pain and scratched hands down the drain. But that was a much less significant issue to the obvious question—if the engine had to come off anyway, was it time that we go ahead and do the overhaul?
To Overhaul, or Not To Overhaul
The decision to do a major overhaul is a tough one. In truth, until the age of the RV, most homebuilt aircraft rarely reached the number of hours where overhaul was a consideration—older homebuilts, statistically, just didn’t put on that many hours. The most likely cause for a builder to do an overhaul was as a result of buying a used engine that they needed to go through before installing it on their new airframe. But rare was the case where someone hung a new engine on a homebuilt and flew it for enough hours to reach TBO. The demographics of our sport are such that the average builder aged out before their engine did.

In the case of our RV-6, the airframe has approximately 3300 hours total time. The builder put about 800 hours on it, then replaced the engine with a new factory Lycoming (as an upgrade) that has soldiered on for the last 28 years or so. There have been some interruptions when previous owners let the plane sit for a year or more before selling on to the next owner. When my wife purchased the plane, it had gone through a year of sitting, so she was concerned that she’d quickly see metal in the oil from corrosion damage. But the machine just kept on running happily.
When the engine reached 2100 hours, we began to think about an overhaul, but with two other planes in the hangar at the time, the “per plane” flying hours were going down, so we took a wait-and-see attitude. We did cover our bases. After having to reface an exhaust valve on one cylinder, we purchased four new stud assemblies (cylinder, piston, rings and valves) at a great price and put them on the shelf. The deal was too good to pass up, and that gave us a “top end in a box” should we need it.
As part of my work in evaluating new avionics, we upgraded the panel to a complete multi-screen EFIS with IFR navigator about six years ago, ending up with the proverbial airplane where the panel was worth more than the airframe. With an engine that any buyer (including me) would have to consider a “run out,” evaluating the plane’s actual worth was problematic.
With too many airplanes—I know that sounds silly, but until you have more than a couple, it is hard to understand—we occasionally talked about selling something. But each serves a particular purpose, and sentimentality cannot be avoided. We had her plane, my plane and two planes we built together—a nice little family that was hard to break up. Complicating the discussions was the knowledge that the RV-6 would be hard to sell with an expensive panel and a run-out engine. We considered simply removing the panel for a future project and selling the airframe with a “core” engine to someone wanting a project—but we’d probably get a lot less money than we’d like for that kind of package.
The Overhaul Route
So we looked into the overhaul. A factory-new engine costs about $28,000, and there is simply no way it would raise the value of the airplane by that amount. A field overhaul is viewed differently by different buyers and depends so much on the records you keep, the amount of outside machine shop work done, the overhauled accessories and, frankly, who does the work.
To do an actual overhaul—rather than simply taking an engine apart, inspecting it, and randomly replacing some things—you have to send the parts off to a machine shop specializing in aircraft engine work. They inspect the parts and call them good or repair them, or scrap them as the inspections indicate. Some parts can be re-machined to fit oversized bearings while others can be restored to original dimensions. In addition to all of this inspection, the engine manufacturer lists all items that must be replaced at overhaul. If you reuse the old stuff, you can’t enter “overhaul” in the logbook—at least not if you want to maintain the engine to certified standards. (Airboat standards? Well, you’re on your own.)
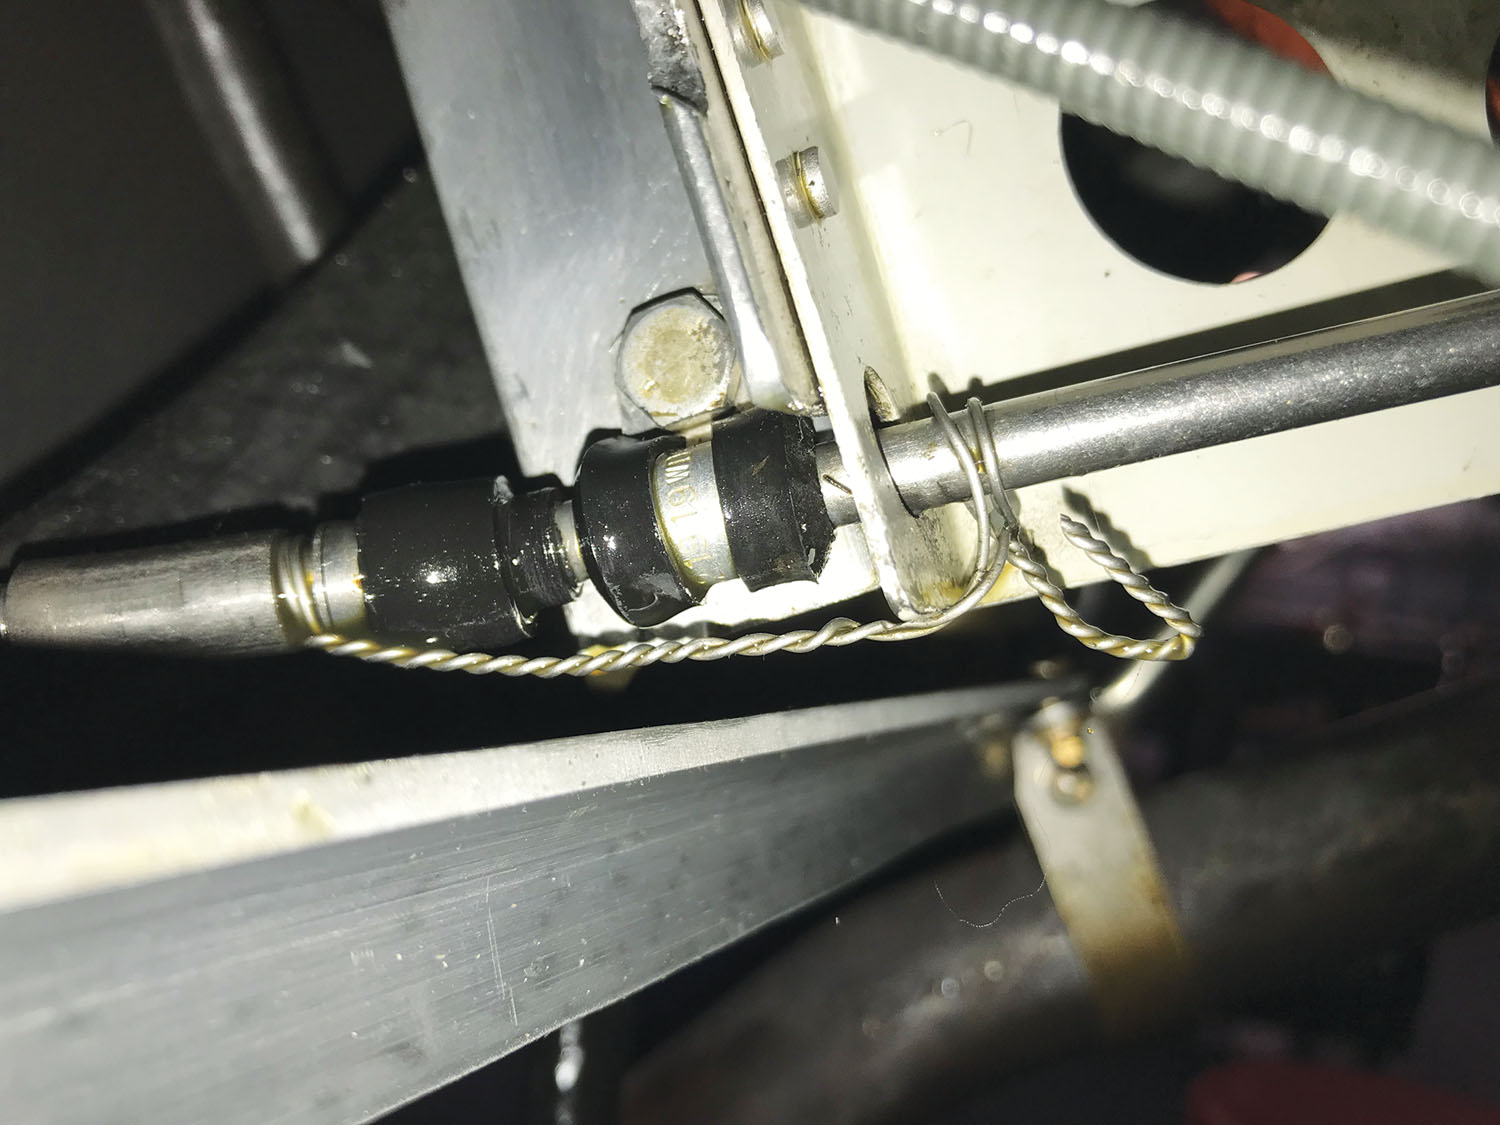
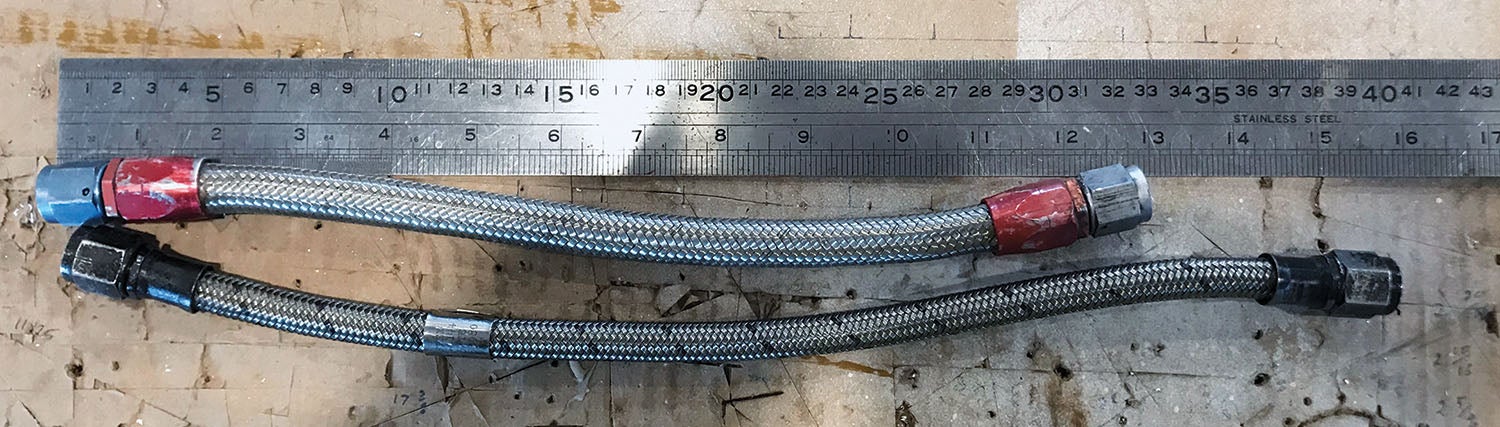
In the case of a four- or six-cylinder opposed Lycoming, this list includes things like the oil pump gears and housing, the rod bolts and nuts and the “Jesus bolt” that holds the crankshaft gear to the back of the crankshaft. (If it fails, the engine stops.) You’ll also need new bearings and hoses that are part of the engine. In addition to the mandatory list, any parts that fail to meet overhaul limits will have to be replaced, and things like all of the gaskets and seals will have to be bought new. And while it is not specified (because accessories are not considered part of the engine), if your mags, carb, starter, alternator, prop governor and other bolt-on appliances are as old as the engine, you’ll probably want to have them inspected, repaired, or replaced. It adds up.
To overhaul a typical O-360, then, you’re probably going to buy four new stud assemblies ($1400 each), spend about $2500 (minimum) with the machine shop for steel parts and another $1100 for crankcase work (plus shipping). Then you’ll need to add the mandatory replacement parts, about $2500 for those. Now you have the basic core engine, all told for about $11,700—let’s just call it $12K because there will be variations—and you have to pay for shipping everything to (and from) Tulsa, where, it seems, all the machine shops are located.
Now, add magnetos, fuel pump and carburetor (or fuel injection system) overhauls or replacement to those numbers. In our case, that was going be about $2500 for the ancient mags—a fuel pump runs about $300 and a carb exchange runs a bit over $1000. If we budget $4000 for all that, we’re in the ballpark. Oops—how old are the alternator and starter? In our case, they were fresh, but you probably need to hold another $1000 for those. So add $5000 to the core engine for a total of $17,000 in order to call this an “overhaul.”
The question, of course, is if it is worth it. If you’re preparing the airplane to sell, will you raise the value by $17,000? Probably not…but you will attract more potential buyers if the airframe isn’t sitting there with a run-out on the nose. So the question might not be whether you can get your money out of the job, but if the airplane will sell more quickly if you make this investment. No one can make that decision for you—but at least we’ve shown you the math.
All Those Accessories
OK, so let’s say you’ve decided you want a quick, painless sale and are willing to invest the money to bring things up to snuff, or maybe you’ve just decided that you love the airplane enough that it’s worth putting back into it what you have gotten out of it in 2000 hours of flying. If you’re going to go to the time and expense of rebuilding the core engine, why stop with the job halfway done?
Let’s start with the ignition. Despite the revolution in electronic ignitions, this RV-6 soldiered on with a pair of Slicks for many years. I knew that they were getting close to their life limits, however, and my old rule of thumb of $600 for a new Slick had sailed out the window with inflation. These mags were most likely going to cost almost as much to overhaul as it would cost to order new—and that was only a couple of hundred dollars less than the price of a new pair of electronic mags. Going with 114-series E-MAGs would standardize our fleet and let me throw away aircraft spark plugs for good. With BR8ES automotive plugs going for about $1.60 each in bulk, that was pretty attractive—so we added $3100 to the budget and called Brad at E-MAG to place an order.

Fortunately for us, both the starter and alternator are relatively new, so we cleaned them up and planned to re-install them. But the prop governor was another matter. An old Hartzell unit, it looked like it might have started life on a WW-II craft and been dug off a wreck on the bottom of the ocean floor. It had been working just fine, but it’s a difficult beast to change on the RV-6, with the engine right against the firewall, so it was worth it to have it gone over so that we wouldn’t have to deal with it again soon.
About 10 days after dropping it off at the prop shop, we got the bad news—the governor was as bad inside as it looked outside and was going to cost about $2200 to overhaul. That was just $200 less than a new one of the same model! Again, I looked at the fact that our other planes all had MT PCU5000s operating without problems and found a group buy that gave us a new unit for just $1300—a deal that was hard to beat. So a new governor was soon on the way, and the old one becomes a mantlepiece.
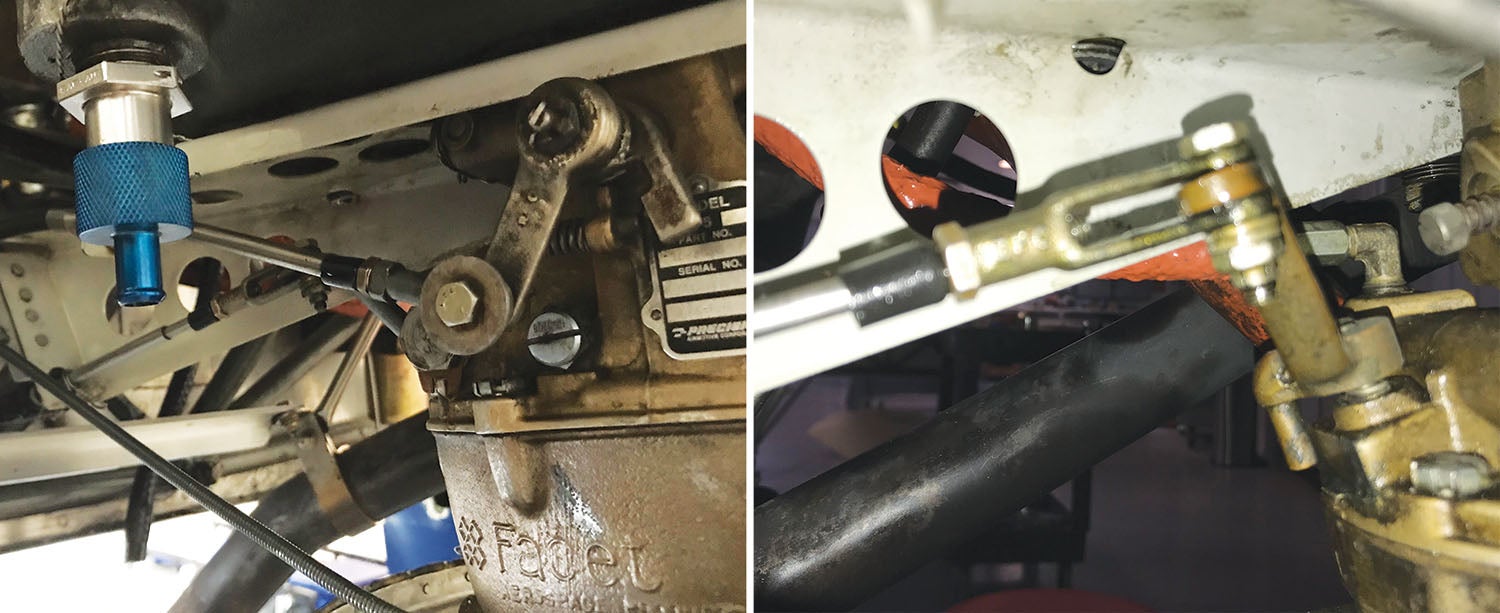
That pretty much left the carburetor. The standard Marvel-Schebler unit hadn’t given us a lick of trouble, and you hear various things about overhauled units. I am sure that by and large, they are fine, restored to factory specs, and bolt right on. But in the back of my mind, I was thinking about a freshly overhauled engine I have to break in, and the last thing I want to do is stack a potential for an un-tested (by me) carb right off the bat. The carb is just about the easiest accessory to change on an O-360, so I decided to stick with the tried and true unit. I can easily put on a freshly overhauled carb once we get through the break-in on the new motor, and then the entire package has been renewed.

The Big Fan Out Front
Probably the biggest “accessory” you’ve got hanging off that core is the propeller—especially if it is a constant-speed unit. Most likely, you’ve been flying it for many years without a problem. Let’s look at that Hartzell manual, which says, “2000 hours or seven years, whichever comes first.” Isn’t it amazing how quickly those seven years went? Or was it 10? Maybe 15? Yeah, you’re not alone—most homebuilders run their props well beyond the calendar-time limit. And, truthfully, very few ever have problems because they sell the airplane or age out before they get to the 2000 hours anyway. But let’s say that you are a high-time builder who puts those hours on rapidly. Or the second owner of a plane that had a lot of hours put on quickly in its first few years—as was our case.
The prop on our RV-6 was actually installed when the engine was new, so it has the same number of hours (about 2400) as the Lycoming. The prop, however, had a reseal at 1000 hours, and was inspected at the time and looked great, according to the logs. So that put us at 1400 hours since the reseal—but that reseal was not an overhaul, and here we’re going to have a 0 SMOH engine, so why not have the prop gone through and bring everything back to fresh?
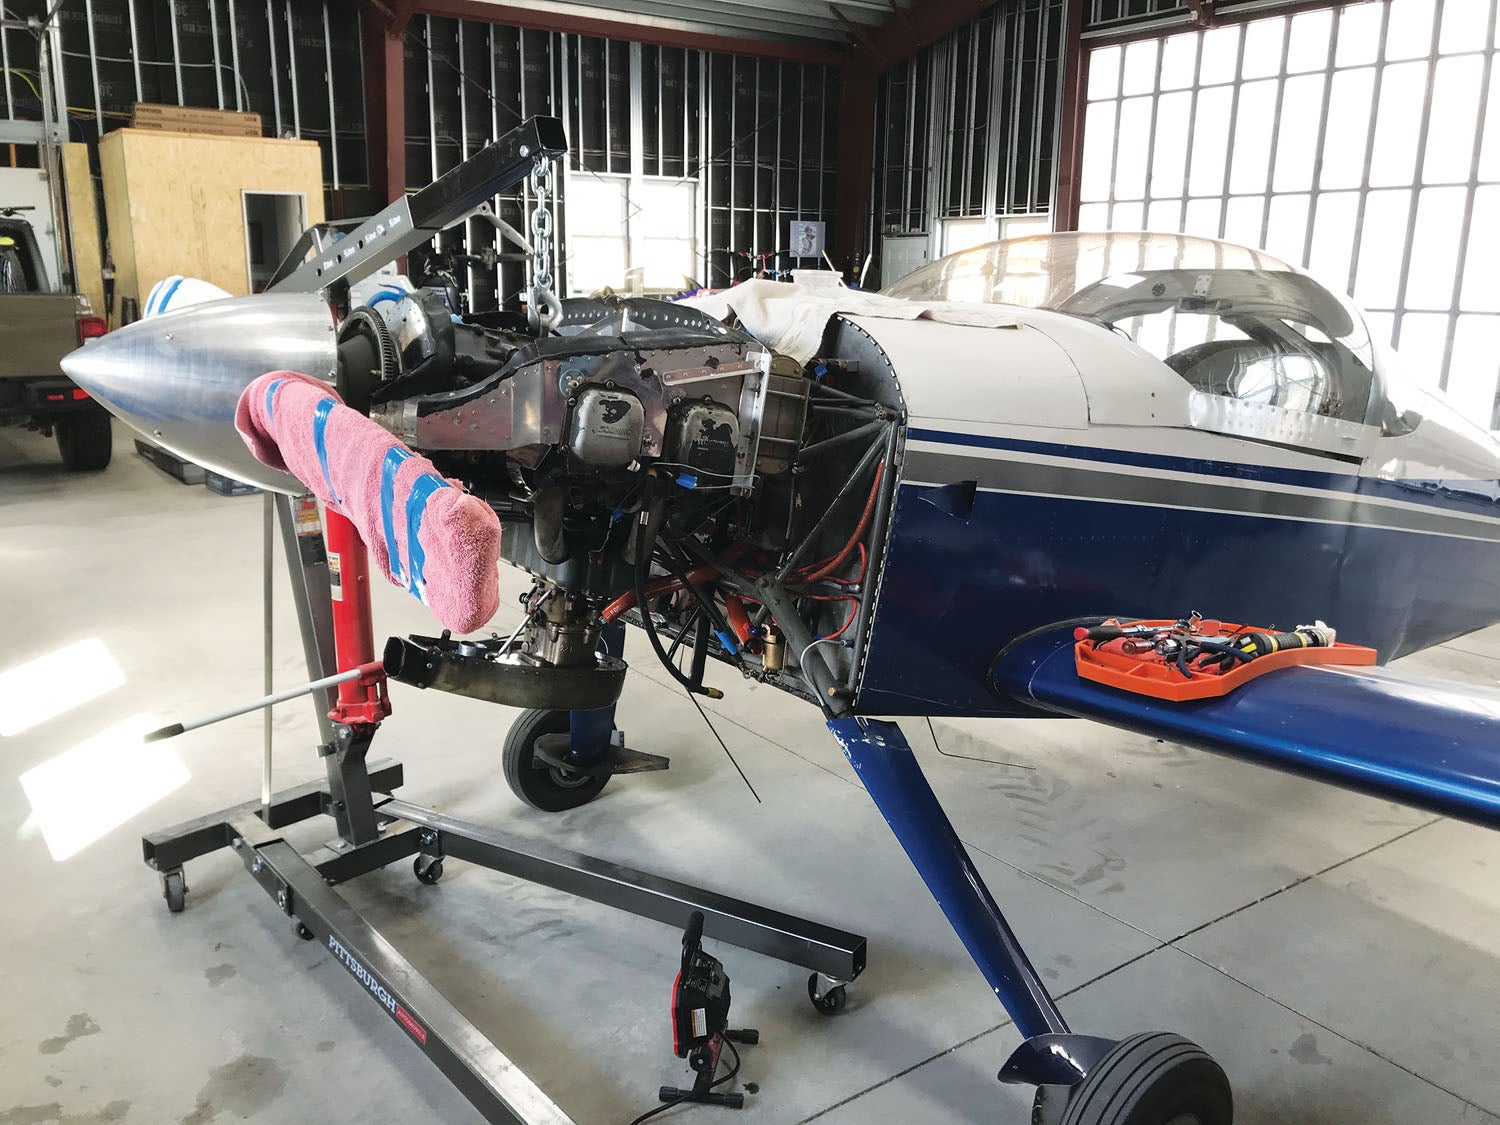
The closest prop shop also happened to be well recommended by people I trust, and it was just over the mountains in California, so we pulled it off the engine—which was hanging on the engine hoist, remember, since this job started with a cracked engine mount—and loaded it up for a three-hour drive. The shop quoted $3550 for an overhaul with no major anomalies, and that is about a third of a new-prop price, so it sounded fine. Two weeks later, we found that delaying the overhaul had cost us a little bit—the main shaft had some wear and corrosion that scrapped the part, so that added about $800—but the entire prop was back to new standards and ready for another 2000 hours.
Unlike the carb, which is easily changed, getting a new prop on with the fresh overhaul made sense, and the consequences of a sudden prop failure are pretty bad. Carbs don’t usually just quit working, but a prop blade failure is usually catastrophic.
The Ins and Outs of an Overhaul
KITPLANES® has covered the details of assembling a standard Lycoming four-banger before, so that’s not the goal with this short series. You can go to school to learn how to build a Lycoming—but you’ll be starting with a box of parts—all the parts—ready to go into the engine. What you don’t get in class is training on the overhaul’s logistics—where do you find the manual or the table of limits? Where and how do you send parts out for overhaul? What new parts do you need, and where do you buy them? What little things can trip you up, and how can you maximize your chances for a trouble-free motor in the future? Over the course of this series, we’ll get into these details and share some of the secrets we have learned.
Photos: Tom Wilson, Paul Dye, Louise Hose.
![[Credit: Lisa Turner]](https://www.kitplanes.com/wp-content/uploads/2026/02/Fuel-Selector.jpg?w=218&h=150&crop=1 "Fuel Follies")


Glad to see Mikey is getting a new front end!!!!!!!!
Paul,
This series is quite timely for me.
I too went to the Lycoming school at Montoursville, PA. And, thanks to the new AD on Superior crankshafts, I’ll get a chance to try out what I learned.
I’ll be following your series with great interest.
Paul, I went to school, specifically to learn how to build the Lycoming engine. I didn’t attend the “Bakers”, style two week crash course(Superior or otherwise), however. I went to Wayne Community College, near Seymour Johnson AFB, in Eastern NC. We overhauled a Lycoming O-320 twice during the powerplant section. We literally started at the 500 mark, in the overhaul manual, and completed every single step, and logged these daily inspections, and measurements. There was a parts room, but you had to have a part number, know what and why you were requesting the part, and given specialized instructions on mandatory replacement items, and what to look for outside of what was written in the manual. I left there with the confidence, to overhaul any Lycoming opposed cylinder engine, as well as the PT6a. Many Continental variants were worked on, timed, inspected, removed and re-installed. I guess what made me reply, was your comment, “You’re not going to learn to overhaul an engine by attending a school,” didn’t seem completely accurate.
Clearly you had an excellent education in engine work, one that the average homebuilder will never get a chance to experience. I think the thrust of my comment should have been stated that no matter which school you go to, you’ll still be learning tricks and pitfalls years (and decades) later as you work on these machines. I know that even with the schools I have attended, I still come upon new stuff when I work on them.
Another hidden factor into this overhaul qoute, ls hanger rental. Some airplanes are still parked outside on the ramp. Dont get me started on working from out of the trunk of car, with the minimums of your Harbor freight tools. Just saying, l remember
Those low budjet times.
Comments are closed.