The dog days of August means that its hot in the shop in the afternoon! Out here in the Nevada hinterlands, it doesn’t pay to put full climate control in a building like our hangar/shop because it is rarely unusable due to heat and cold – its not like its humid or anything! The truth is, in this current environment in which we live, the afternoon heat is about the only way that I know its August – days and weeks run together when you don’t have the calendar landmarks of a normal year. We tend to think of “the week before Oshkosh” or “right after Sun ’n Fun” and use those to define our year. Without these, it is easy to forget “when” you are.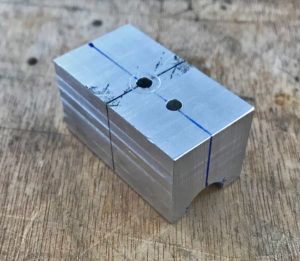
But be that as it may, the summer heat makes one look for little, short projects on some afternoons. In addition to keeping the fleet flying (we’re waiting on a new prop governor to finish a complete FWF renewal on our RV-6), we’ve been getting some work done on the Xenos project. Specifically, we are taking ADVANTAGE of the heat to get the windshield and canopy taken care of. Canopies are always daunting tasks when you haven’t done the specific type before, and the Subsonex canopy and windshield came finished, so I hadn’t actually built one from Sonex before. We spent several work days cutting the windshield to shape, and that went amazingly well, so with positive thoughts, it was time to move on to drilling and tapping the windshield bow for mounting screws. The trick here is to drill a #27 hole in a 1/2” aluminum rod – accurately and dead center. Oh – and it needs to be oriented perpendicular to the windshield, which joins the bow at a non-rectilinear angle that changes as you go around the bow.
Figuring out exactly where to drill the hole was not that hard – a straight edge substituting for the canopy gave us the tangent point, which was marked on the bow. But how to drill straight through the middle? Well obviously, a drill block would help, keeping the drill bit perpendicular to the surface you’re drilling. But this surface was curved… so how to do that?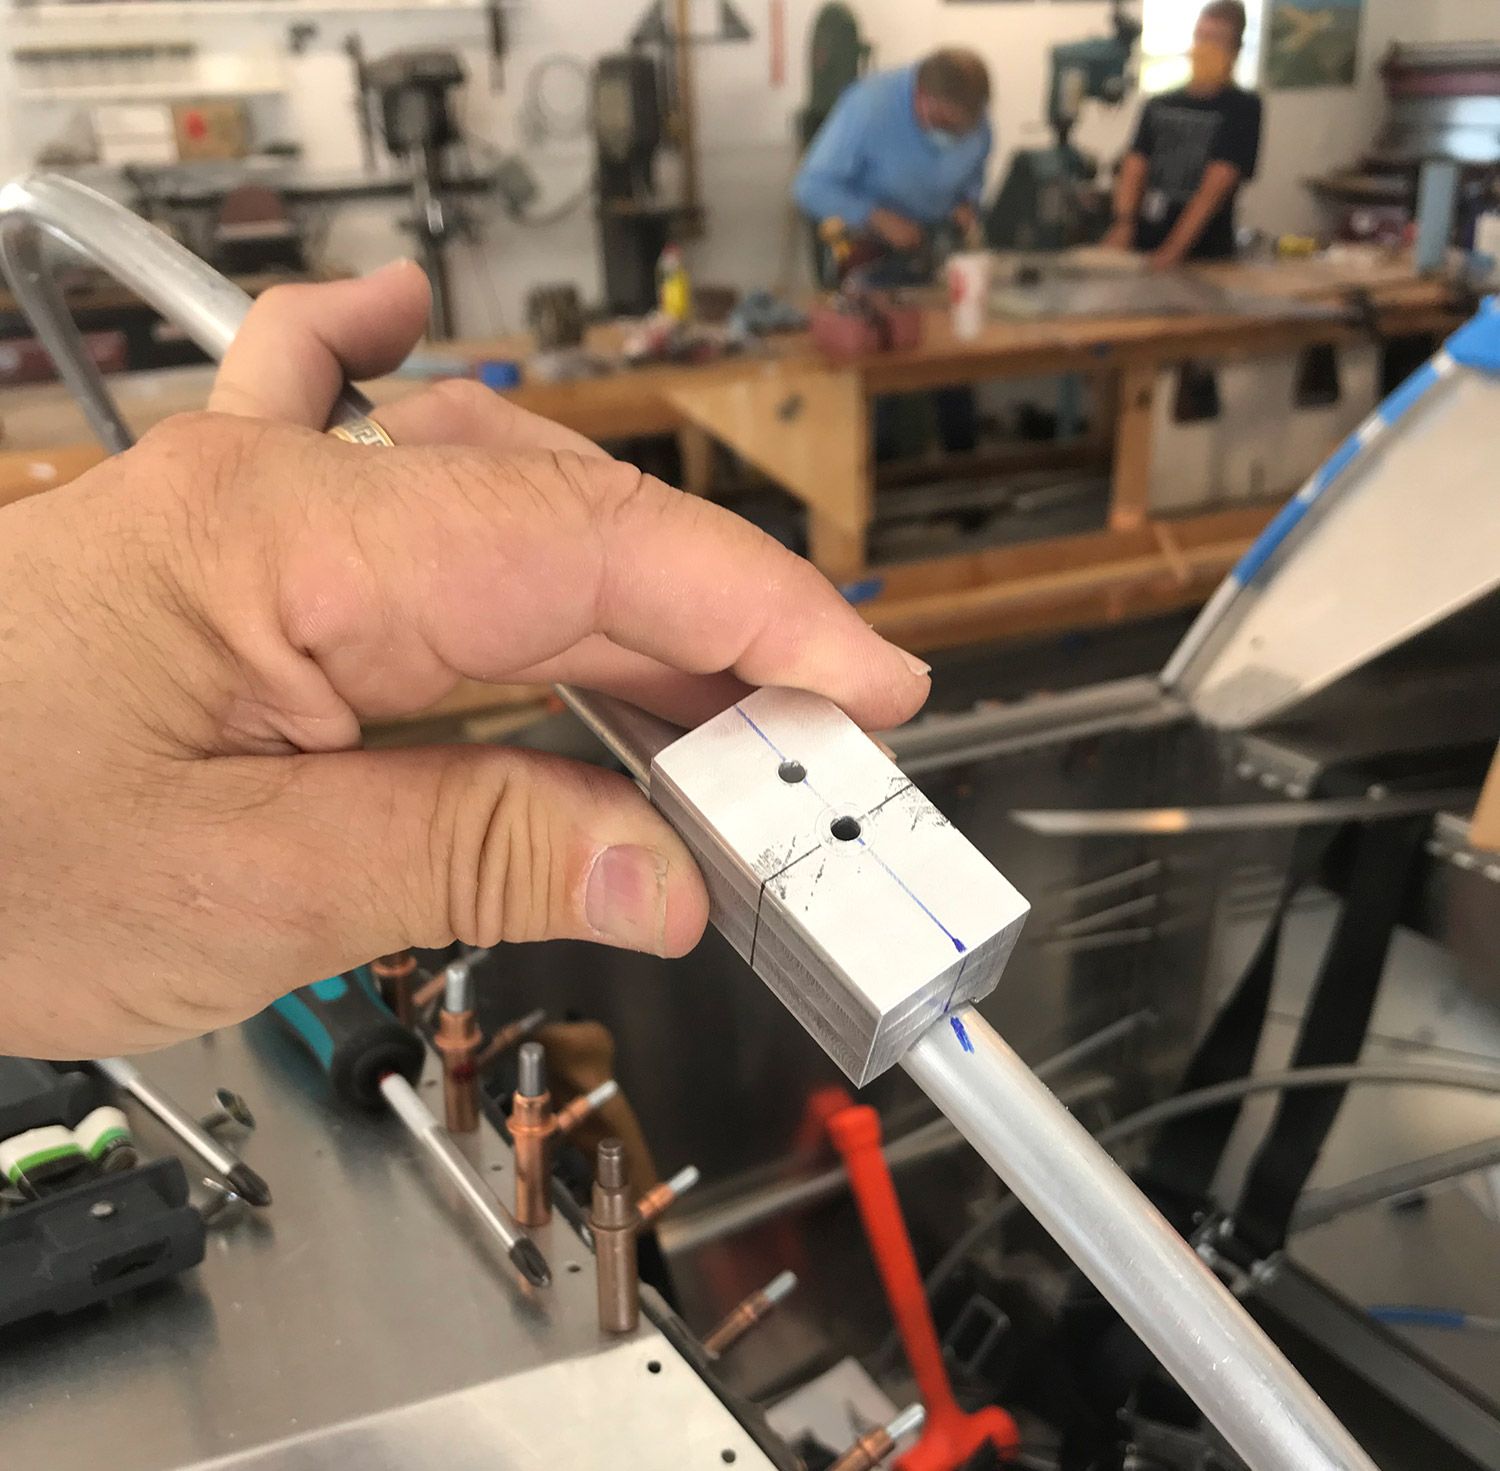
Well the obvious answer was to fire up the mill and first make a perfect rectangular block. Then we mounted the block in the mill vice vertically, and bored a 1/2” hole down the middle. Re-orienting the block, we drilled a hole perpendicular to the face and the large hole, bisecting the hole. It was then on to the band saw to cut the block dead center through the center of the large hole. We now had a saddle-shaped block that fit perfectly on the windshield bow, and assured that so long as you held it steady, the drill hole would be perfectly perpendicular to the bow in both directions.
The irony, of course, is that it takes much longer to make the tool precisely than it takes to drill the nine holes needed on the bow. But darn if those holes aren’t perfectly aligned, and dead smack through the center…


