There’s no other way but to admit that I found dozens of reasons to put this project off. By finally tackling it, though, I relearned something that seemed almost second nature during previous builds. I’ll circle back to that, promise.
My GlaStar, like many of the early ones, was built with the standard fuel capacity. Back when the airplane was developed, the Continental IO-240—basically two-thirds of an IO-360 six-cylinder engine—was the powerplant of choice and so the 30-some gallons of fuel in two wing tanks was deemed sufficient. Most GlaStars were built with the optional 10-gallon auxiliary tanks, which are, like the mains, welded-aluminum vessels, only in this case slid into the wing at the tips. During the initial build, this is a fairly trivial upgrade because you have unfettered access to virtually everything before the wing is closed.
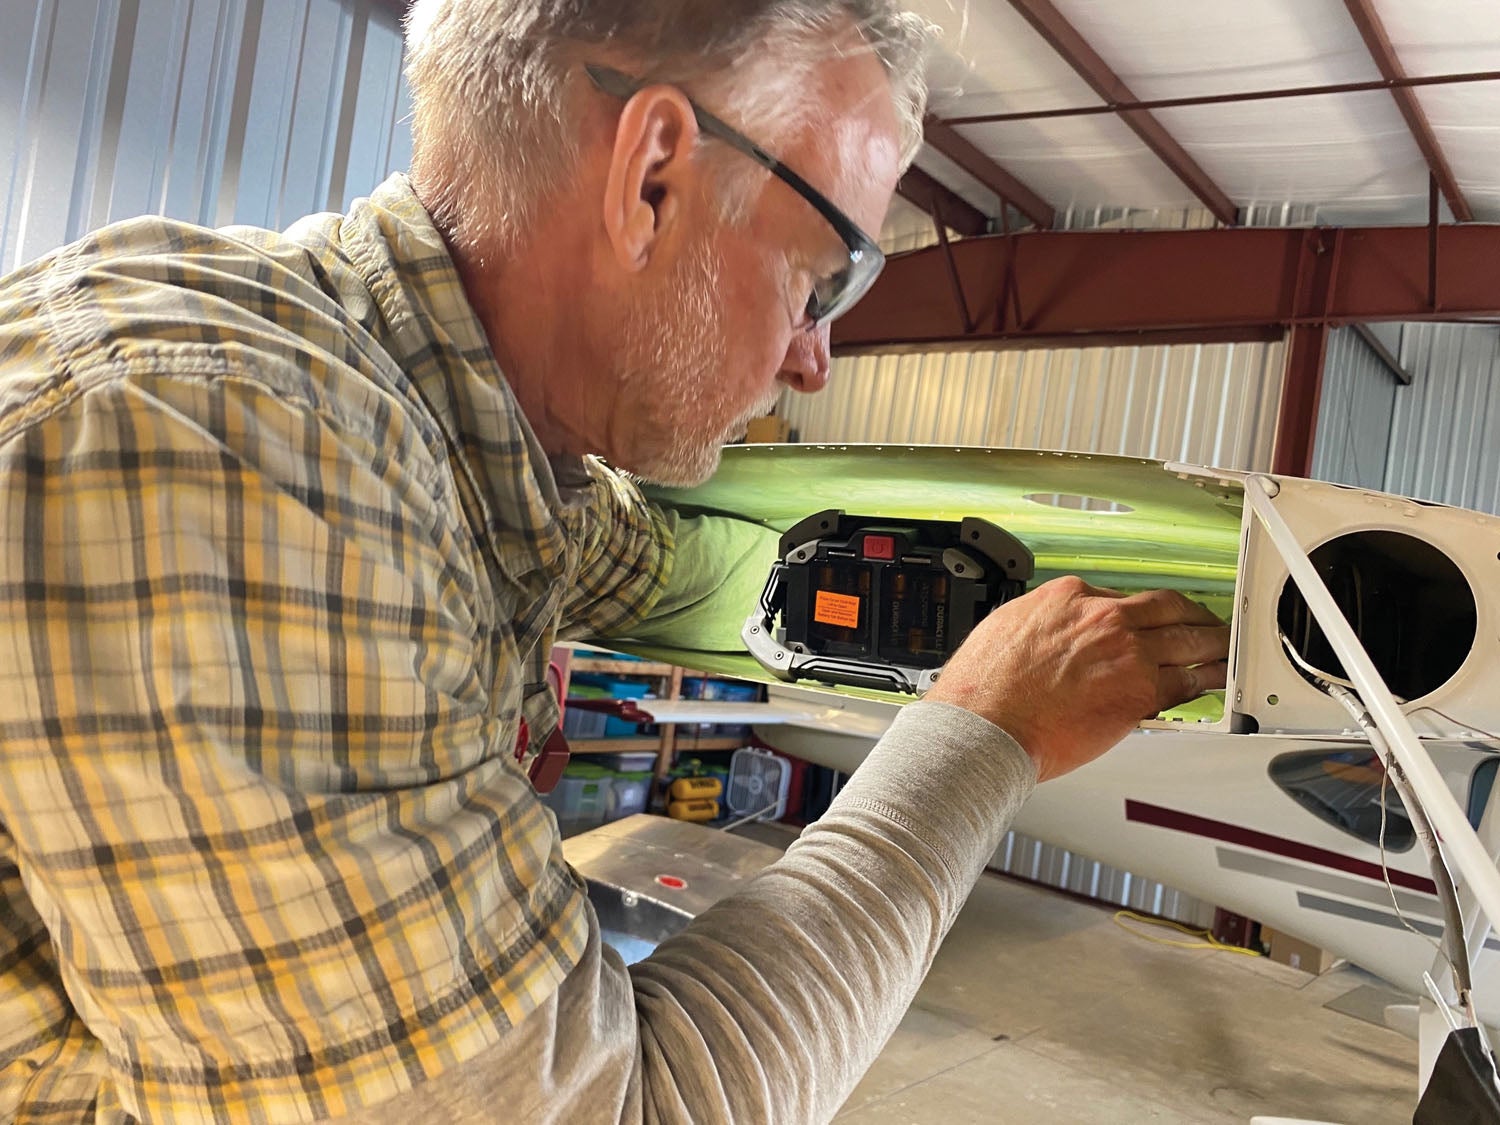
In a completed airplane, not so much. Which is why I’ve had the tank kit for many months and only at the end of our crazy cold/wet spring did I get this project done. In part, this is because it’s no fun doing so much work through access holes in the wing. A friend once described this like trying to rebuild an engine through the oil-filler tube. Not only are you dealing with wiring (because there’s a cube-type pump that moves fuel from the outboard aux tanks to the inboard mains) but you get to make new hard lines in at least two pieces, change the venting system and move some wires around. Naturally, the original build of my GlaStar had the wingtip wiring and tank vents run through the previously open end bay in the wing, so they had to be rerouted.
I won’t describe the project step by step. You can get only so excited about drilling out all the rivets for the end rib just to discover that many of your tactics for drilling out rivets aren’t suitable because there’s no way to get a straight shot at them. But I did learn a couple of valuable lessons.
First is the value of tackling the project in steps, beginning with the electrical aspects of powering the pumps. I did this as one subproject and “stubbed out” the wiring in the wings so the airplane could be buttoned up and flown during the install process. (As opposed to pulling everything apart at once, opening the wings and having it unairworthy for many days.) It took about a day to complete this portion.

Next came the installation of the transfer pumps, which required a doubler inside the wing. It takes a bit of gumption to begin drilling into a fully functional, painted wing but it has to be done. A couple of existing rivets in the hat sections had to be drilled out but mostly this was a new layout. Thankfully, the wing is flat enough in this location that I could create the rivet pattern on the doubler and drill through from the outside. Still, it was definitely a measure-thrice/cut-once process. (Especially after discovering the precut doubler blanks in the kit were slightly too small.) Before any of the plumbing was disturbed, the airplane could still be flown.
Finally, the Epiphany
Doing the “big work” took three or four days on the first wing. (I kind of lost count there.) Between drilling out the end rib, fitting the tank-supporting rails, managing the hard lines—something I only seem to get really good at near the end of the project—and all the rest, it was daunting. I took a lot of time reading and rereading the generally good instructions, double-checking every measurement and pausing before I picked up any tool that could cut or drill. You have to cut the filler hole and the tank-drain hole in the exterior skins with no better way to locate them than careful measurement. Maybe measure those a fourth time.
Eventually it was done. Nothing leaked or blew up. While most of the process went according to the plans, there was just enough improvisation to slow me down. (I’m excruciatingly careful around critical things like the fuel system.)
The next workday, I parked the GlaStar nose-first into the hangar (so the left wingtip was near the work area) and tucked in. Eight working hours later, I was done. How could that be? Simple experience—and recent experience at that. I knew what worked on the first side and didn’t have to think about it for the second. I made a few mistakes on the first side—like trying to mount the tank rails by drilling to final size, as the instructions say—that I avoided the second time around. But since I’d just completed the other wing, the process and nuances were still fresh.
The point is this: If you can, structure your build so that you benefit from this kind of recent learning. Don’t build one wing this year and the other one months or even years later. And don’t despair as you stand there with one wing full of Clecoes and the chilling realization that you have so, so much more to do. The other side will be easier, substantially so if you do it soon. This whole “second side, half the time” phenomenon is just one of the explanations for builders who do this more than once.
Humberd & Zenith
The second installment of Jon Humberd’s Zenith CH 750 Super Duty build series appears in this issue. I’m excited to see what he brings to this project, having already built a 701 and beginning with a strong plan for his 750. Zenith Aircraft apparently likes what they see, too, since they just announced hiring Jon to help develop the final-size matched-hole upgrade for the 701. Normally, I’d pass on having a builder with financial ties to the company talk about the process because that creates a strong conflict of interest. I’m counting on two layers of protection here. First is that Jon is wonderfully outspoken and independent. Second is that he’s working through Kate O’Connor, editor in chief of our sister brand AVweb, who I know will help keep him on the straight and narrow.
Aveo Update
I received a note from Aveo that some of the data used for our Lighting Buyer’s Guide in the July issue was out of date. For starters, the Andromeda lights are available in 28-volt versions as well as 14-volt iterations. We also had incorrect pricing on some units. The Ultra series is $795 a pair (not $835); the Atlas NXT is $725 (not $755); and the PAR 36 Hercules is $895 (not $965).
Photos: Omar Filipovic.


