
Of all things, I never dreamed that out of the 40+ screwdrivers and dozens of driver bits that I own, one day I’d need a “special” screwdriver to calibrate a 30-year-old altimeter. Crikey!
The instrument in question was a 2-1/4-inch Winter model W5820, non-sensitive altimeter. The unit was original to my 1997 single-seat, VW-powered Victor Stanley Funkist. When I was flying it regularly, the altimeter was as reliable and accurate as anyone could ever want. But since buying my Jabiru, I rarely fly the Funkist. I nonetheless give it a regular inspection and lately found the altimeter had drifted out of calibration and was reading 200 to 300 feet too high. Granted, it’s a single-needle instrument with resolution in 100-foot increments, but it had always been on-the-nose accurate to field elevation when setting the barometric pressure.
My first thought was to call my brother and set up an appointment to calibrate the altimeter at his test lab. About a second later, I came to my senses and realized that a lab-grade calibration on a non-sensitive, single-needle altimeter would be overkill.
Basically, all I needed to do was adjust the altimeter so the readout agreed to a known field elevation and known barometric pressure. Every altimeter has a way to adjust the readout to compensate for being out of calibration. How this adjustment is made depends on the make and model of your altimeter.
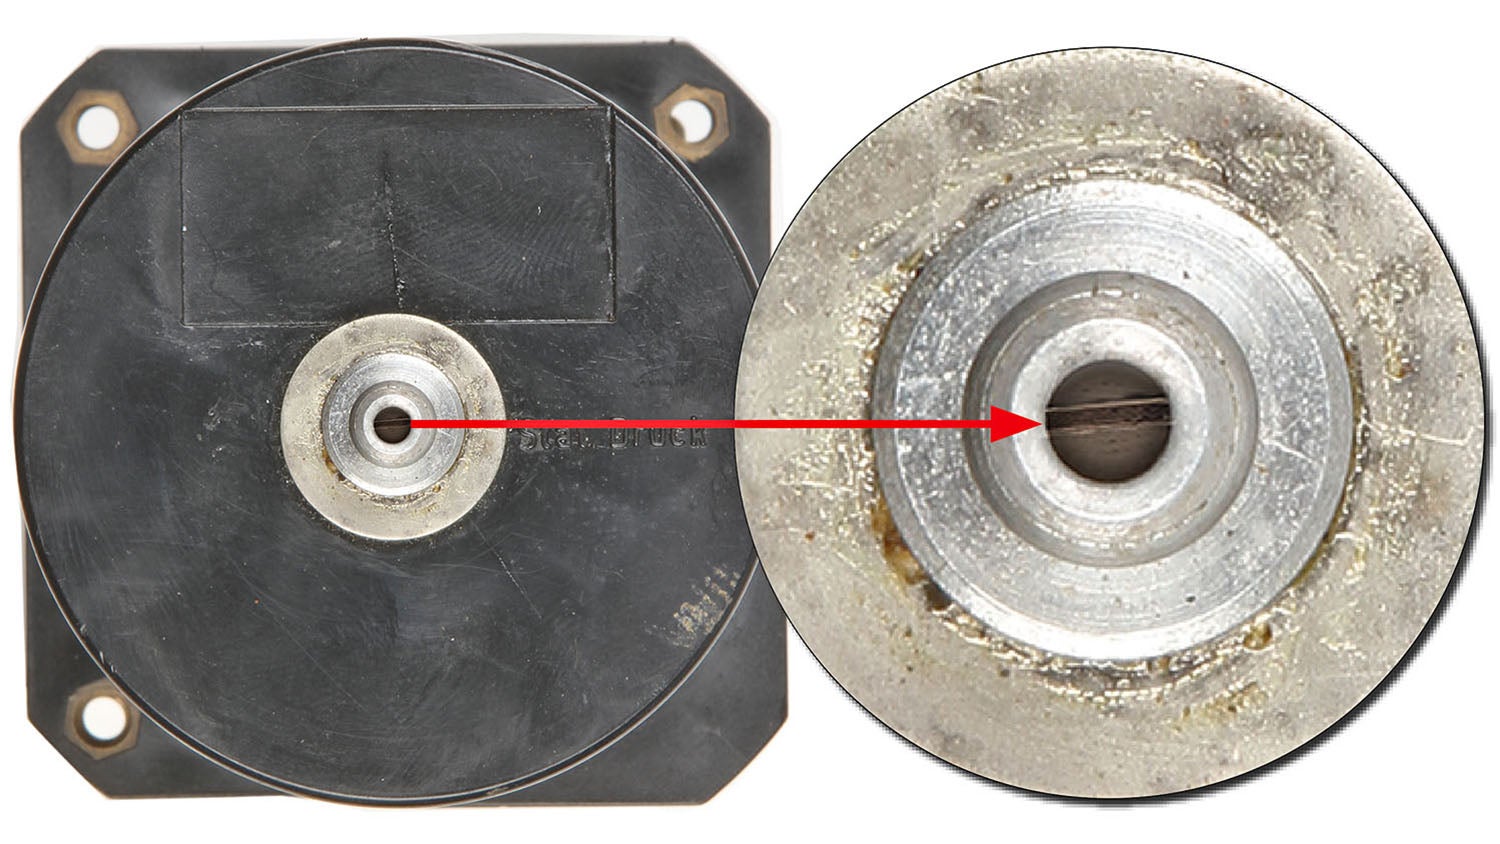
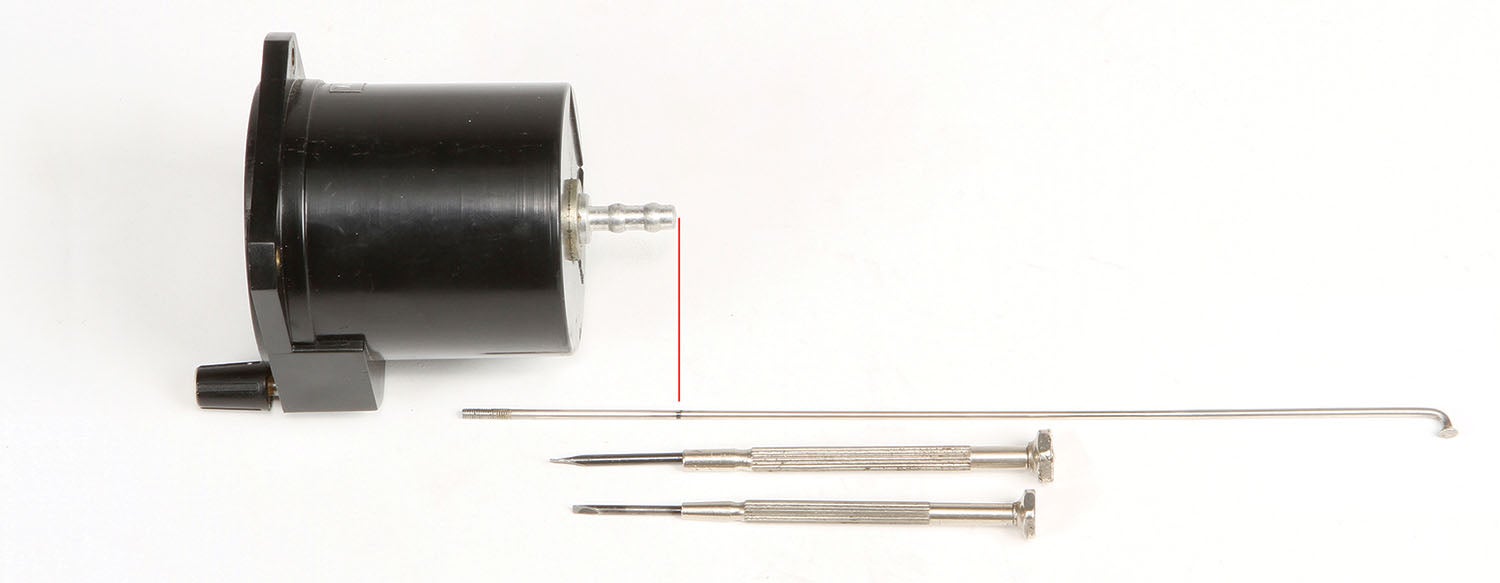
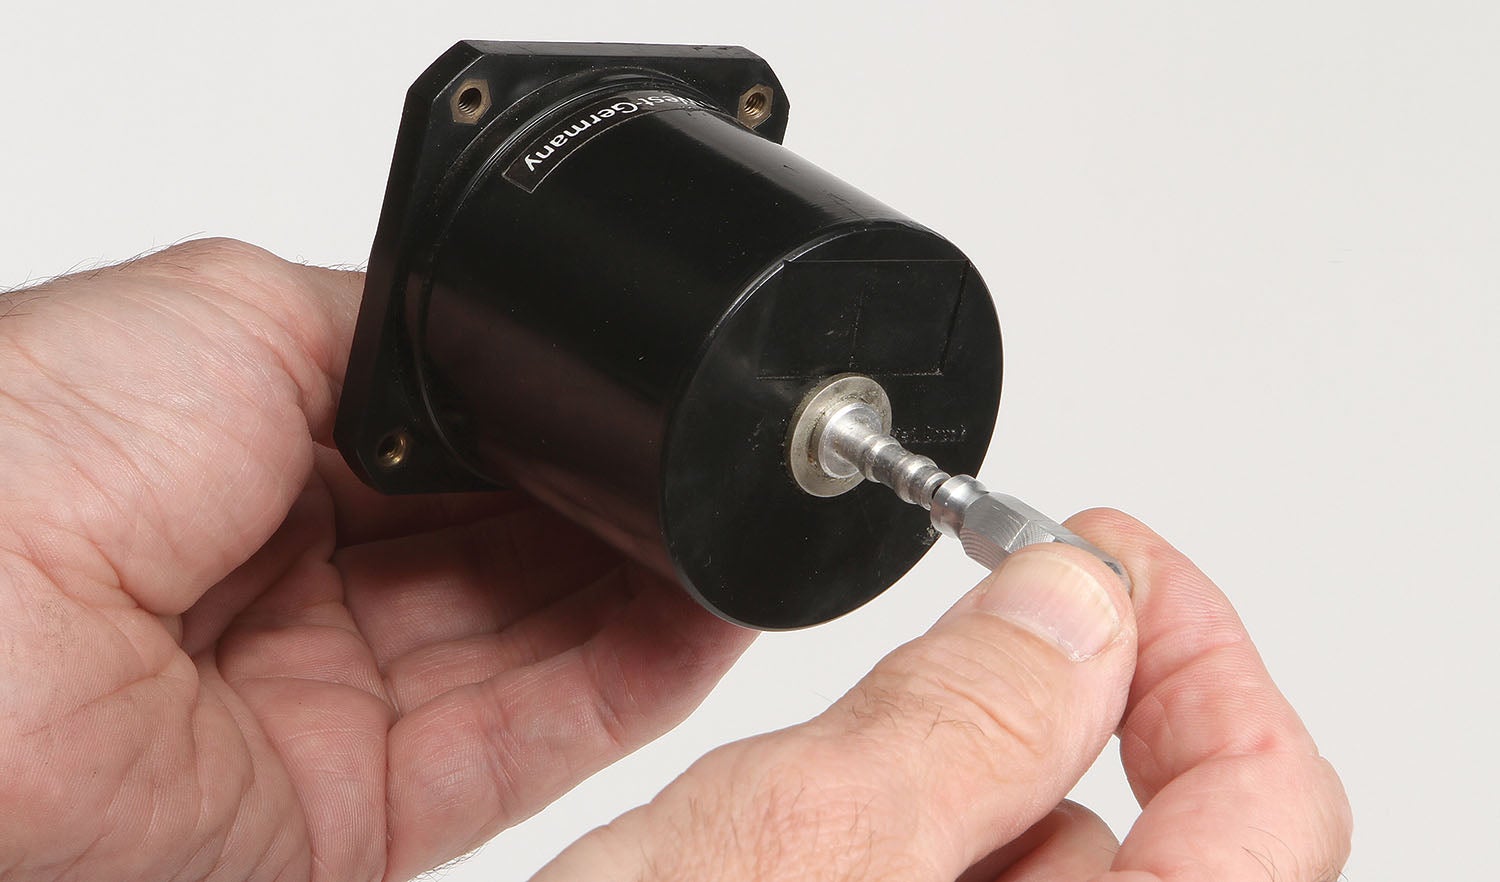
In particular, Winter’s non-sensitive altimeters have a screw adjustment concealed within the capsule. On my model, the screw is accessed through the center of the hose connection on the back of the housing—hence the need for this special screwdriver. On other models, the screw may be concealed behind a cover on the periphery of the case.
It should be noted that when adjusting any mechanical-style altimeter, you should be careful to follow the manufacturer’s procedures. Failure to do so could damage the internal workings of the altimeter.
As mentioned previously, my vast collection of screwdrivers did not contain a single one suitable for this job. Both of the jeweler’s screwdrivers that I had did fit the port opening, but were not long enough to reach the screw. So it was out to the shop to make a long-reach miniature screwdriver.

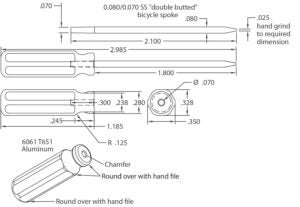
A quick check of the hose connection opening showed it to be 0.10 inch, and using a 0.080-inch-diameter bicycle spoke as a depth gauge, I confirmed the distance to the screw head to be 1.75 inches. The choice for the screwdriver shank was obvious: the bicycle spoke! The particular one I used was a double-butted 0.80/0.070-inch stainless steel DT-brand spoke. “Butted” is a term used to describe a spoke (or tube) that is thicker at one end than the other. “Double butted” means it’s thicker at both ends. The spoke tapers from thick to thin at each end. This tapering made it an ideal press fit for the screwdriver handle, which I made from aluminum. I cut off the threaded end, measured in 2.1 inches and cut it to length. This allowed 0.3 inches to be pressed into the handle with 1.8 inches of exposed shank.
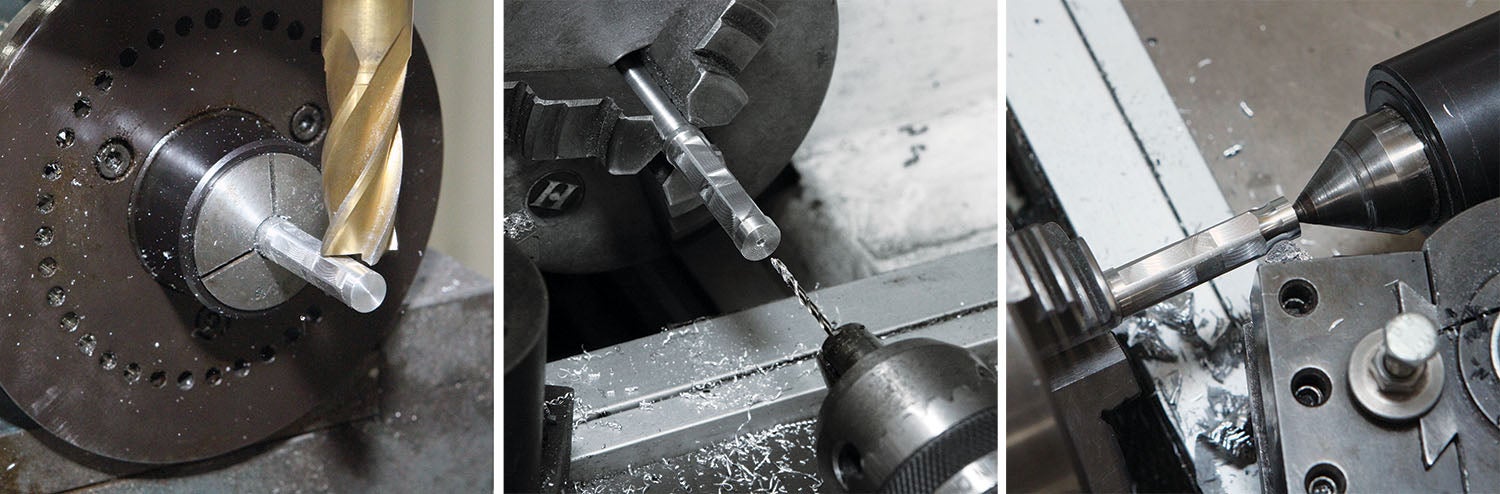
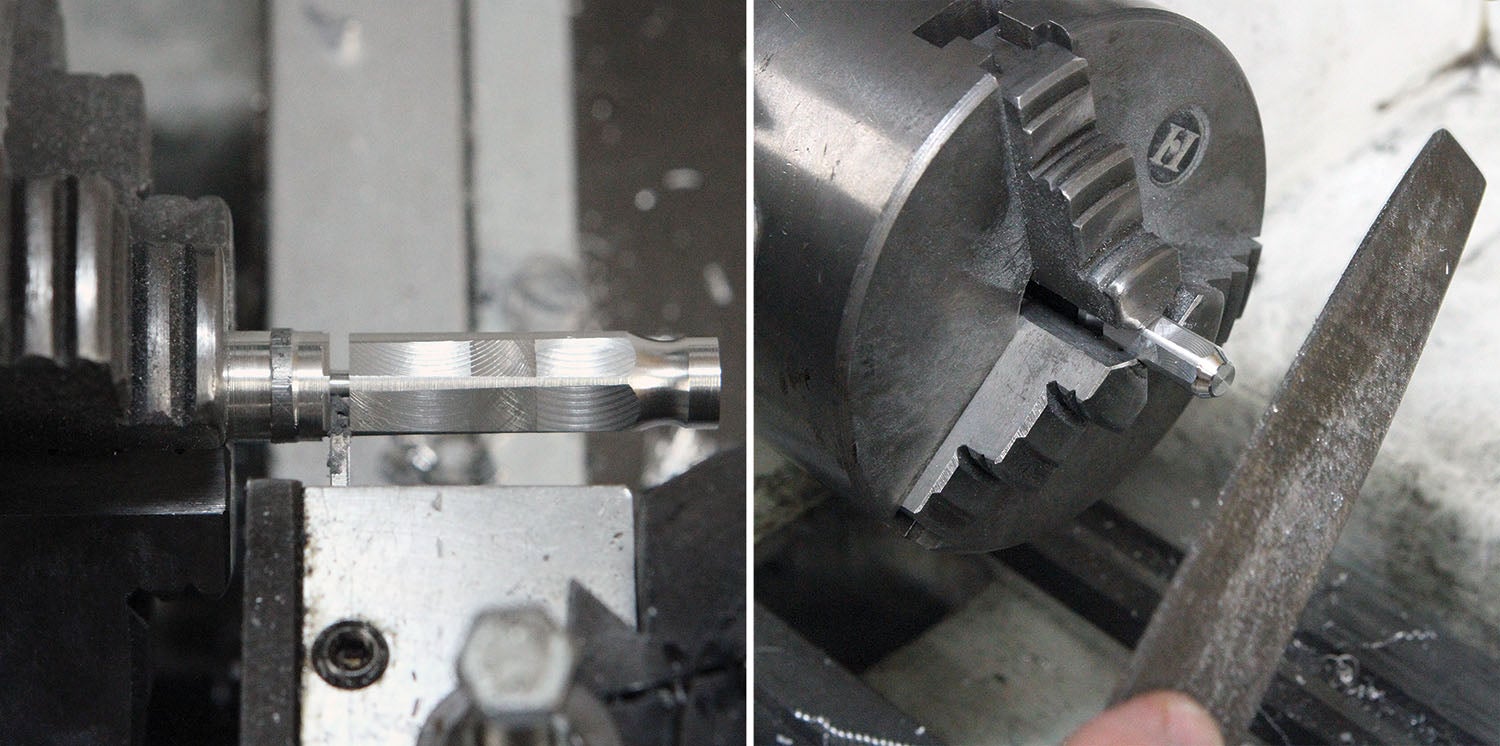
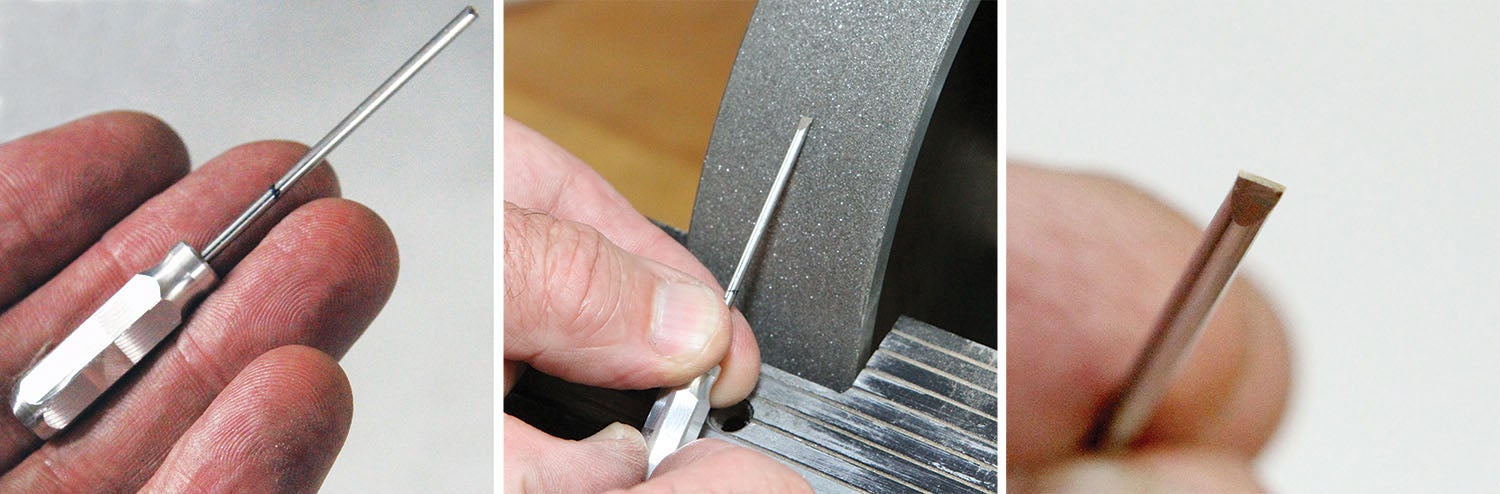
I practiced grinding the screwdriver blade using the leftover spoke end and went back and forth from the grinder to the altimeter until the tip engaged snug to the screw head. I then measured the tip thickness at 0.025 inch.
Download adjustment instructions for the Winter altimeter here.
![[Credit: Radiant Technology]](https://www.kitplanes.com/wp-content/uploads/2026/04/550095_5165745cc27748a598699799d796fd94mv2.jpg?w=218&h=150&crop=1 "Radiant Technology Unveils SafeGyro")


Had to smile. I have any number of long enough, thin, small screwdrivers in my computer/electronics kit.
But I get it – it’s the fun of making it.
Comments are closed.