 I am now in the flight-testing stage with my Hummingbird helicopter. Personally, I’ve always liked the 40 hours of required flight testing as it gives me a chance to really get to know the aircraft without having to be concerned with someone else’s comfort. With airplanes, I’ve always pulled the cowlings off and opened up the inspection panels multiple times during the test period to make sure everything is tight and working as it should. Flight testing a helicopter has brought a whole new meaning to test flying for me. Quite candidly, there’s a whole lot going on (especially with the pilot initially!), a whole lot of moving parts that need attention and a whole lot of shaking going on.

One of the important instruments in a helicopter is the rotor rpm gauge. Usually it is combined with the engine rpm indication in a dual-needle gauge. The gauge is calibrated so that the needles are riding on top of one another during normal operation. If the engine quits, the needles “split” and it is very important to manage the airspeed and rotor rpm during the autorotation so you can safely descend to the ground and have enough rotor speed left to cushion the arrival.
During the last few flights, I noticed the rotor indication was slow to start. One time it didn’t even start at all, and after I removed and reinstalled the Cannon plug connector on the tach generator, which is located on the transmission, it worked. Hmm. Bad connection? I checked it after landing and couldn’t find anything wrong with it, and the wires that I had soldered looked good.
So here I was on the very first long flight away from home to Falcon Field (all of 20 nautical miles) and guess what? No rotor rpm indication! I tried everything I could think of and after six attempts I finally got a good indication. Sometimes it would start to indicate backward, and other times it would start to indicate properly and then drop back to zero right away. I know some experienced helicopter pilots would probably be quite capable of flying it home without a rotor indication, but not this low-time pilot during the test period. I think it would be hard to explain my foolishness if something happened. So, I was very pleased when it started working, and I made a beeline home.

Of course, it was a Friday afternoon, so I didn’t know how much luck I was going to have finding parts. I removed the tach generator from the transmission and spun it with a drill while Carol watched the cockpit gauge. Nothing. Good thing I didn’t stop anywhere on the way home!
Of course, I opened up the Cannon plug at both ends and checked the wires for continuity and resistance between the generator and the instrument panel. I had run three 18-gauge wires with no connectors in between and that all checked good. I recognized the AN5547-2 part number on the generator from my time in the Air Force, having replaced quite a few of them, so I was thinking it was a bad generator.
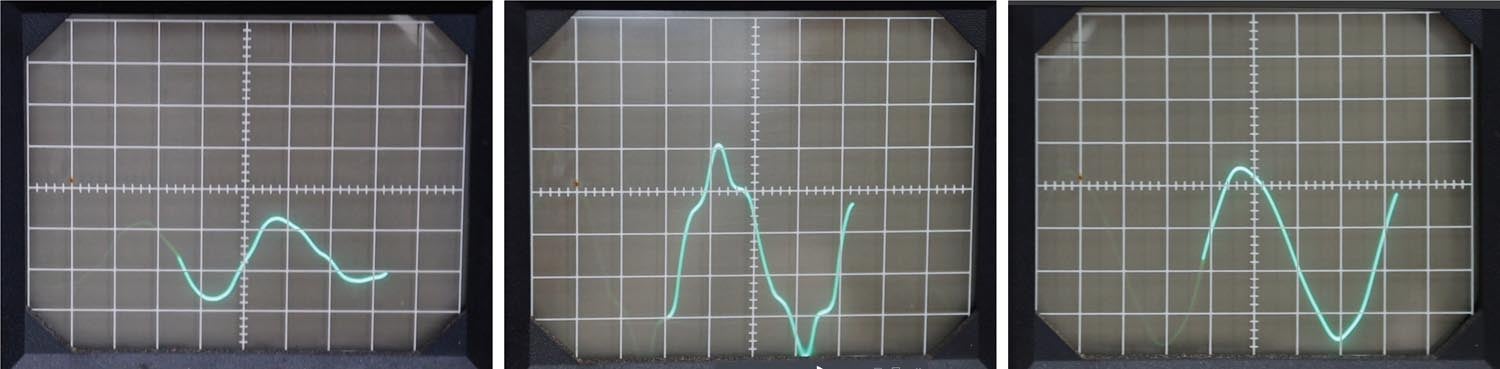
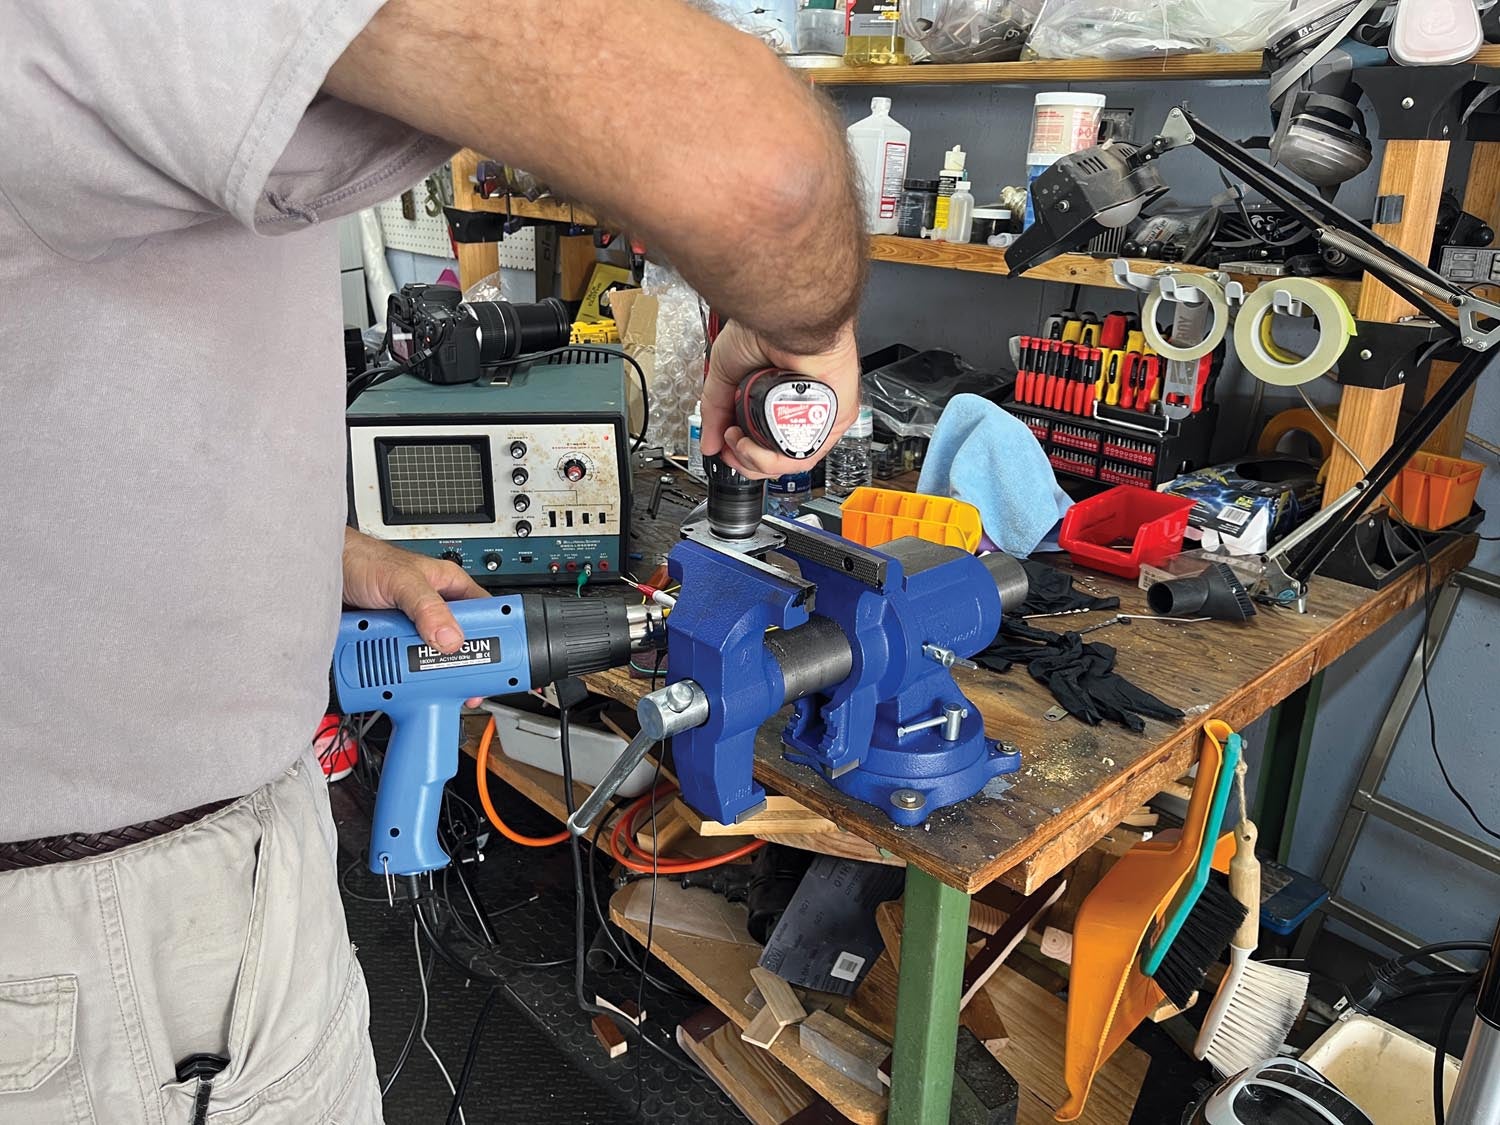
I dragged out my Heathkit oscilloscope, which I built while I was in the Air Force, and placed the generator in the bench vise and spun it with a drill. The generator is really nothing but a four-pole AC generator, and the sine wave displayed on the scope looked OK to me. However, I couldn’t remember if the amplitude was correct, as it had been many years since I had looked at one. I also had the idea that perhaps it was failing while it was hot, so I heated it with a heat gun. Sure enough, it failed! I called Brad Clark at Vertical Aviation, and he said he was having another one sent out. By the way, support from Vertical Aviation has been stellar.
So, now I had to wait through the weekend to get another generator. I also sourced one myself, since I kind of remembered these generators weren’t too reliable. Brad’s showed up on Monday, and it worked immediately. Yeah!
Both the failed generator and the replacement from Vertical Aviation were overhauled, as are most of the aircraft parts from that era. The one I managed to source myself was new old stock (NOS). Out of curiosity, I tested them all with the oscilloscope. Sure enough, the NOS one had a nice AC sine wave, but of much higher amplitude than the failed one. The overhauled one also had a higher amplitude sine wave, but not nearly as clean.
I’m happy now as I have two known working generators. But I’m also trying to convince Rob Hickman at Advanced Flight Systems to add a combined engine/rotor rpm gauge to the EFIS. I think it would be much more reliable.
As a side note, it was somewhat annoying to have a failure on a Friday when I was trying to get the flight test program completed. But on Saturday morning I decided that I really didn’t need the rotor rpm gauge to hover, as the last thing I would ever look at if the engine failed in the hover would be the rotor rpm. So, in the spirit of making lemons out of lemonade, I managed to get in three 30-minute sessions of hovering. It was a great workout for me, and it allowed me to run the engine at 75% power for 30 minutes at a time. The hottest cylinder I ever saw was 425° F occasionally, usually while hovering sideways or backward, and oil temp never got above 195. I’m really happy with that kind of performance on an 80° day and a new engine.
![[Credit: Lisa Turner]](https://www.kitplanes.com/wp-content/uploads/2026/02/Fuel-Selector.jpg?w=218&h=150&crop=1 "Fuel Follies")


Something you’ll learn over time is the sound of the eng/rotor combination when they are running correctly. Electrical failures are not uncommon. When the engine quits, the first thing that gets your attention is quiet. I have done thousands of autos (two years IP at Ft Wolters) and 27 years in the MI Guard flying all kinds of a/c from OH 13’s to CH 34’s and, of course, Hueys. Have fun with yours. I have flown at night, in RVN, with no electrical and most of my panel with several holes in it. The most important thing is NEVER QUIT FLYING THE AIRCRAFT.
I agree with your posts, and now with over 100 hours of flying in it I know I could safely fly it home by “sound and feel.” given the same scenario. However, during the test program, coupled with not a lot of time on the aircraft in total, I didn’t want to risk it.
Vic
Can someone explain to me why in this day of good synthetic oils which I presume everyone uses, is there an obsession about running oil temps below 100 C.. There are two reasons why this is wrong. First is that synthetic oils perform best at temperatures around 120C and even more important, if the oil gets water in it, which is not an uncommon occurrence, it doesn’t get hot enough to boil the water out of it.
Don’t forget that the oil temp indication is at the INLET to the engine. The sump is running much hotter.
Comments are closed.