The ubiquitous Continental O-200 can trace its roots back to the late 1940s. With many thousands built and a reputation for reliability, it remains a popular engine for Experimental aircraft today. This fact made it a leading choice for Simple Digital Systems (SDS) to consider designing a bolt-on electronic fuel injection/electronic ignition (EFI/EI) kit for it to replace the old carb ‘n mags setup with something more modern. The kit would be along the same lines as the kits SDS already offers for Experimental Lycoming engines. Although SDS ECUs first flew on O-200s back in 1996, we never had all the parts to make EFI an easy bolt-on.
Once the decision was made to develop the kit, the first step was to obtain an engine. Due to the popularity of these engines, that turned out to be more difficult than first anticipated. Good engines can be hard to find and somewhat expensive. The parts are worth money, too, and most sellers know that.
We were looking for a decent – to -time engine. Finally, after nearly three months of searching many ads on the internet, asking friends, etc., I stumbled on a small ad tucked in the back of the COPA (Canadian Owners and Pilots Association) magazine. A small shop in Winnipeg had a couple to choose from and was willing to reduce the price by keeping the mags, carb, and generator, as they would be of no use to us. The engine logs showed no damage history, and the owner/mechanic thoughtfully inspected the engine internally to be sure all was well. The original budget was blown, but truck transport was arranged to our shop in Calgary, and soon we were the proud owner of an O-200.
Design and Development
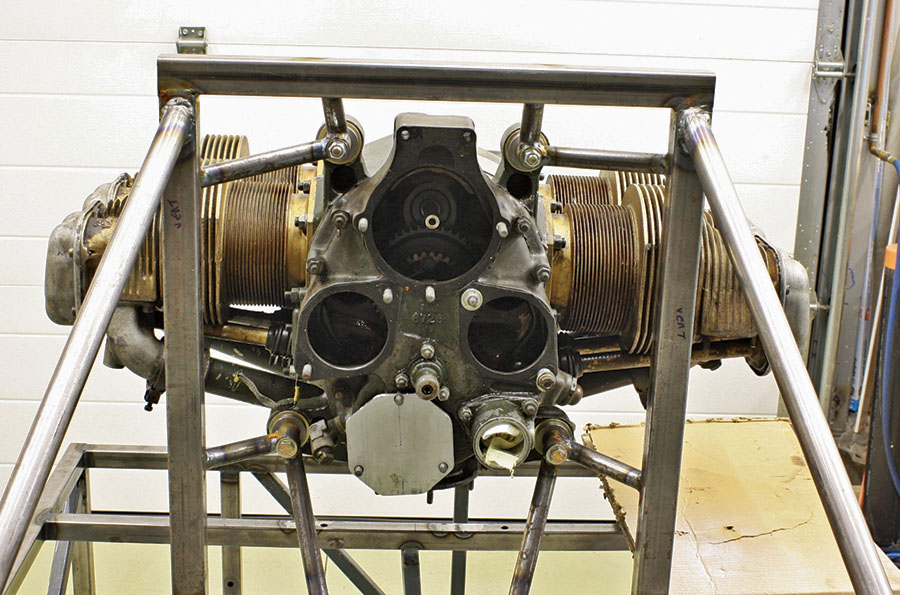
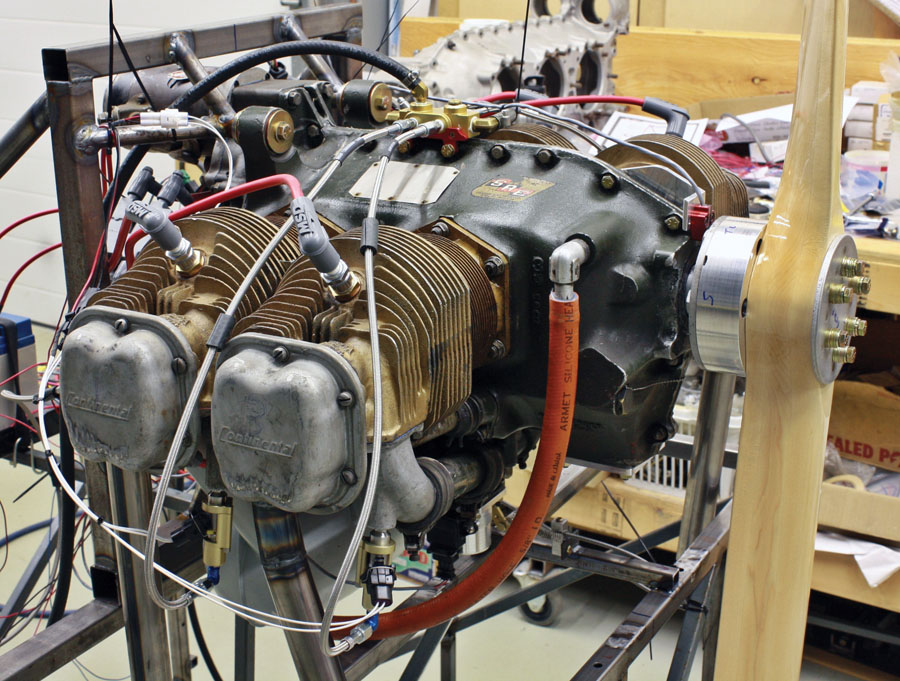
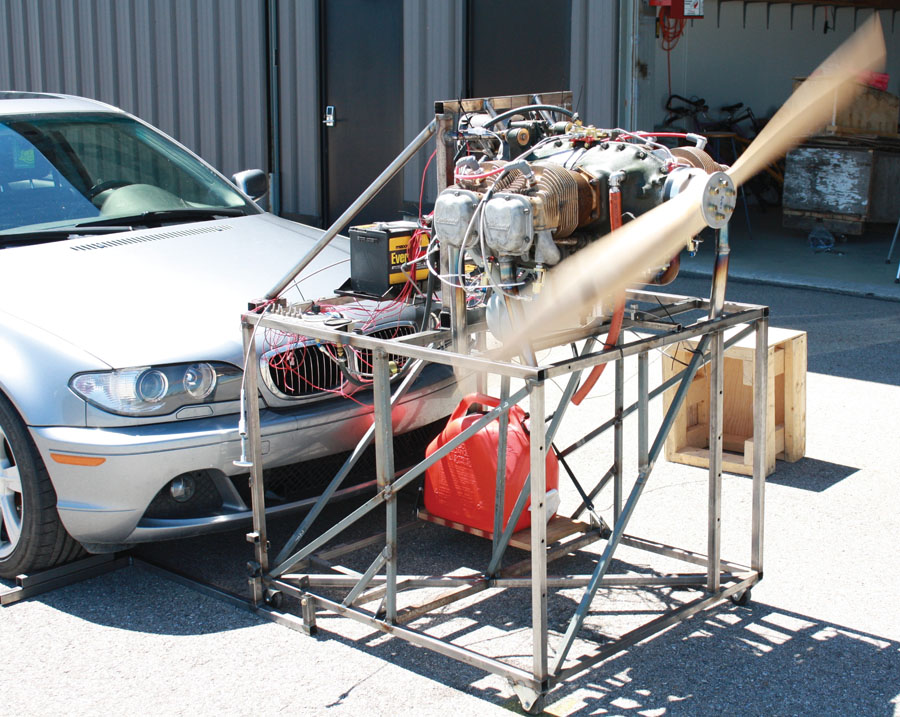
The next step was to get the Conti mounted on our well-used test stand, which has seen previous use with a Rotax 912UL engine in 2007, an LS6 in 2008 and a 2-stroke, 2-cylinder MZ 202 engine in 2014. I used some urethane engine mount bushings and hardware left over from a previous Subaru project. The bushings happened to be the exact diameter to fit the Continental mount captures. I welded up a simple bolt-on support frame for the engine and proceeded to weld tubes to support the engine.
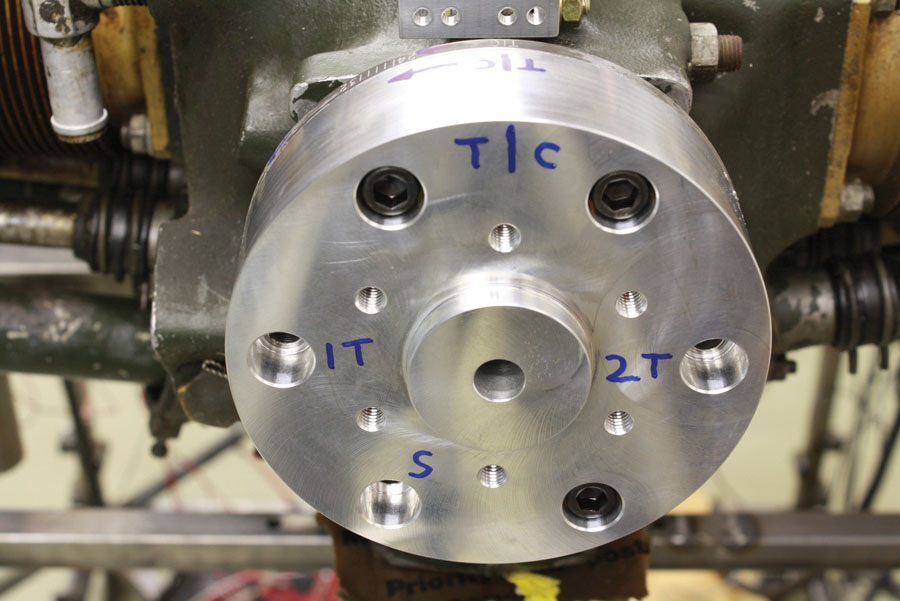
With the engine now stable and at a nice working height, I started measuring and making pencil sketches of all the components I’d have to design to replace the existing ones. I still had the GSC 68×47 wood prop left over from the Rotax, but the bolt pattern was different, so I designed an adapter to mate it with the SAE #1 Conti prop flange.
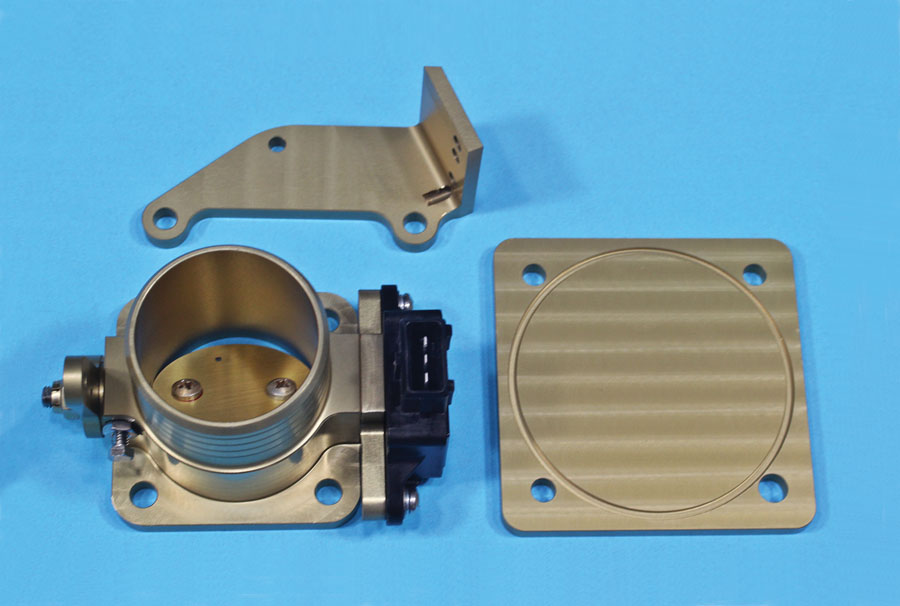
That done, I moved on to designing a cover plate where the vacuum pump is located on the bottom of the case behind the prop hub. I hate gaskets, so I designed it to take an O-ring seal.
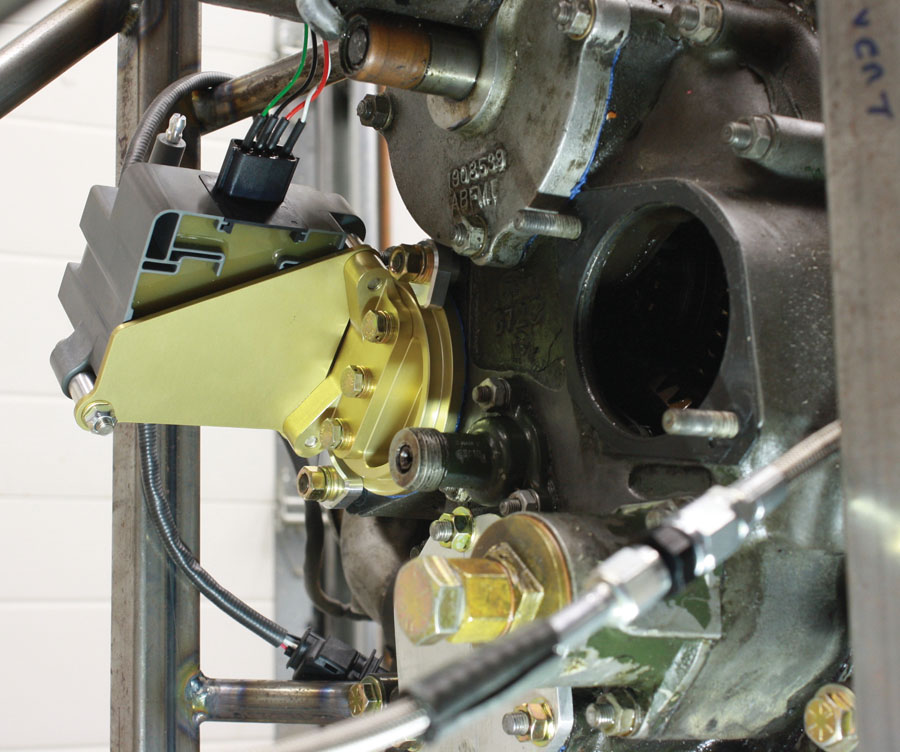
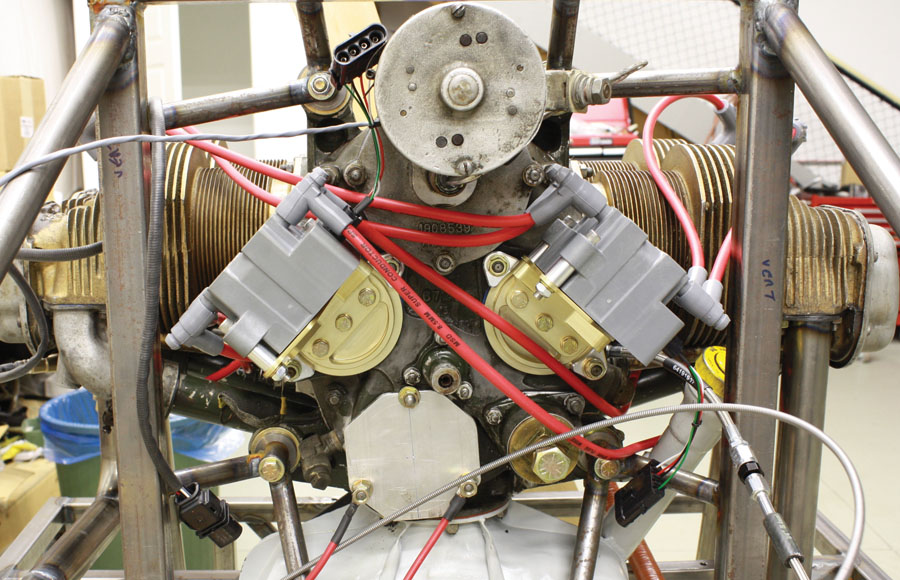
Next, I measured the magneto holes, hoping they were the same size as the ones on Lycomings. They were, so I pulled two of our CNC’d mag mounts off the shelf and bolted our coil packs to those. They cleared the starter and engine mount tubes nicely. That was an easy one down.
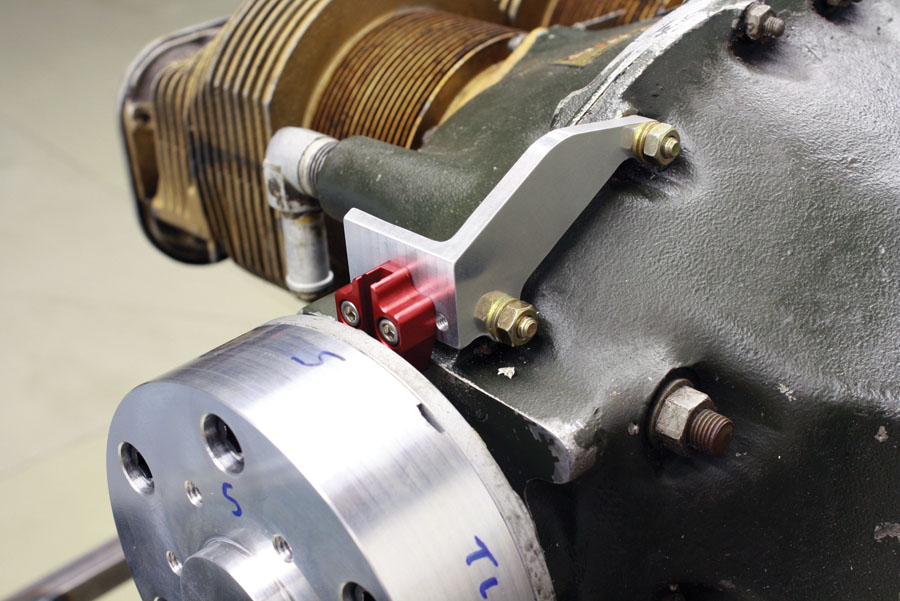
The O-200 has almost no spare threaded holes anywhere to attach things to (even baffling!). I had to mount a CHT sensor for the ECU somewhere, so I decided to copy a friend’s idea he used on Porsche air-cooled engines a few years back. I milled a slot into a chunk of plate stock to form a “U.” This clamps over one of the head cooling fins, with the sensor tightened against the fins. It’s a pretty easy solution.
The SDS ECU uses a Hall effect sensor and crank-mounted magnets to determine crank position for ignition timing and generating the fuel-injection pulses. Again, I tapped our Lycoming parts bin and determined the same sensor could be fitted on the Conti, just behind the prop hub. I fabbed up a steel bracket with the TIG and bolted it to the two front case bolts on top. I’d already decided to drill the tips of the prop bolts to mount the magnets. This worked out well in the lathe after I machined a simple fixture to hold them tight in the chuck and took the guesswork out of accurately indexing the magnets for the end user. It was also the lightest and simplest solution.
I tackled the throttle body next. We already make a billet 45mm throttle body for Jabiru, Rotax, and VW engines. This was perfectly sized for the O-200; we just had to change the base for the wider bolt pattern of the stock intake manifold. A few measurements and I had a pencil drawing for the CNC shop to modify the existing design. Again, this is O-ring sealed to eliminate gaskets.
Next I looked at mounting a fuel block somewhere convenient. The only bolts available were again on the top of the case. I removed two of these and measured the spacing. We simply modified the existing tab for the Lycoming block to suit the O-200 hole spacing.
Almost There
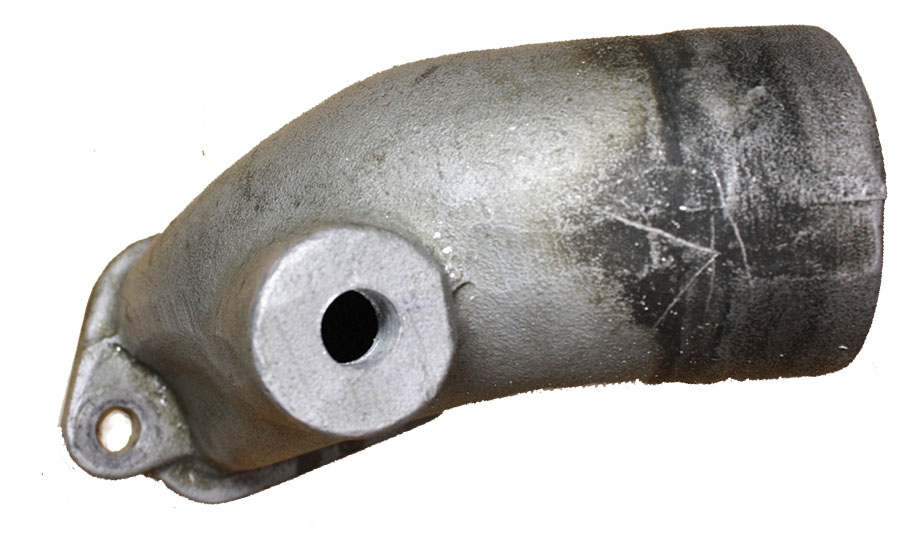
With the end in sight, I had to get the fuel injectors mounted on the engine. Some O-200 heads have 1/8-inch NPT holes over the ports but ours did not, so we had a find another solution. Fortunately, Continental cast a nice thick flat pad on the aluminum induction elbows, which bolt to the heads. This seemed like a perfect place for the injectors. I again raided our Lycoming parts bin for the threaded injector mounts we use on those engines. I sketched an idea for a fixture we could CNC to hold the induction elbows firmly. This would allow them to be accurately hand drilled by our customers and come as part of the kit.
Next, I was off to our machine shop with drawings and bits in hand, so the pencil drawings could be converted to CAD files. While the machine shop was busy tweaking the designs and making the prototype parts, I cut out a simple cover plate for the unused generator, welded up some straight exhaust pipes, and fitted a boss for the wideband oxygen sensor. I also plugged off the oil temp sender hole, hooked up the oil and fuel pressure gauges, fuel pump, and wiring for the starter and ECU.
A couple weeks later, the prototype CNC’d parts were done, and I bolted them on. Everything fit well, and we were soon ready for the first start. That’s where the first major problem cropped up. The starter wouldn’t turn the engine over properly. Investigation pointed to the starter clutch slipping, which is a common problem with this setup. Our engine came with the infamous “pull-start” starter, which was literally right out of the farm tractor world. You pull a cable to engage the drive and power to the starter motor. $400 later, I installed an improved design, a PMA’d clutch from Niagara. It cranked over decently fast now.
Our test stand was normally bolted to a vehicle frame to keep it from running away. Those shop vehicles were long since retired, so new supports were designed for the front tires of a car to capture them. Our 2004 BMW shop car acted as the dead weight in this case. Time to crank her up.
First Start
Switches on, fuel pressure up, and I pulled on the starter lever. The engine burst into life after a few revolutions of the prop. It ran for a few seconds and stalled. I opened the throttle plate a bit more with the idle set screw and tried again. It started up and nicely idled at about 600 rpm, oil pressure came up, and I was pretty happy. I started tweaking the mixture for the smoothest idle and let it warm up a bit. After 10 minutes, I gave it some throttle and brought it up to 1800 rpm, programming the mixture through the SDS programmer while watching the air/fuel ratio from the wideband O2 sensor. I was pretty satisfied with the initial running and called it a day.
We had some starting problems the next week when we tried to run it again. After lots of head scratching, we found a configuration issue with the ECU, which explained the latest behavior, but not how it ran quite well a week before! With that fixed, it cranked up very smoothly now, able to idle down below 400 rpm.
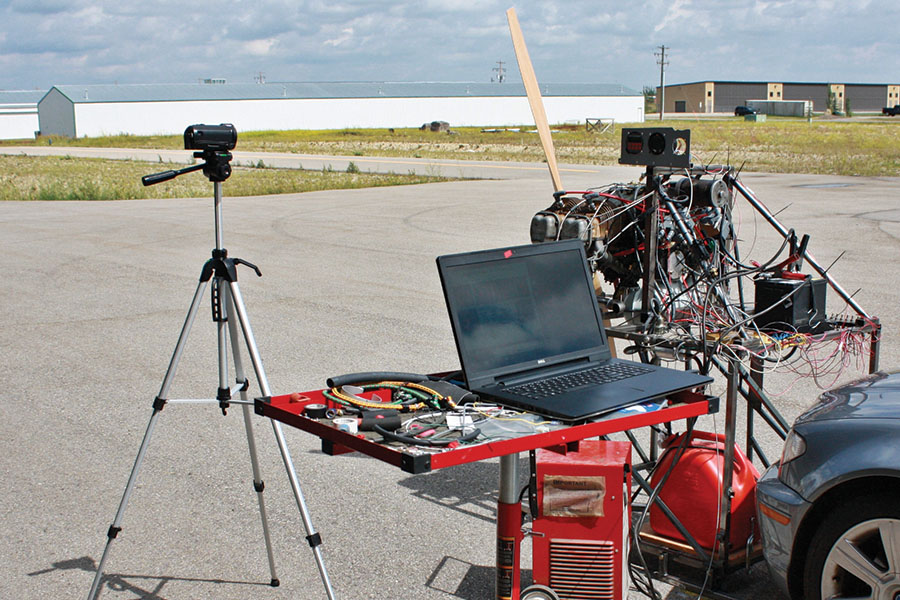
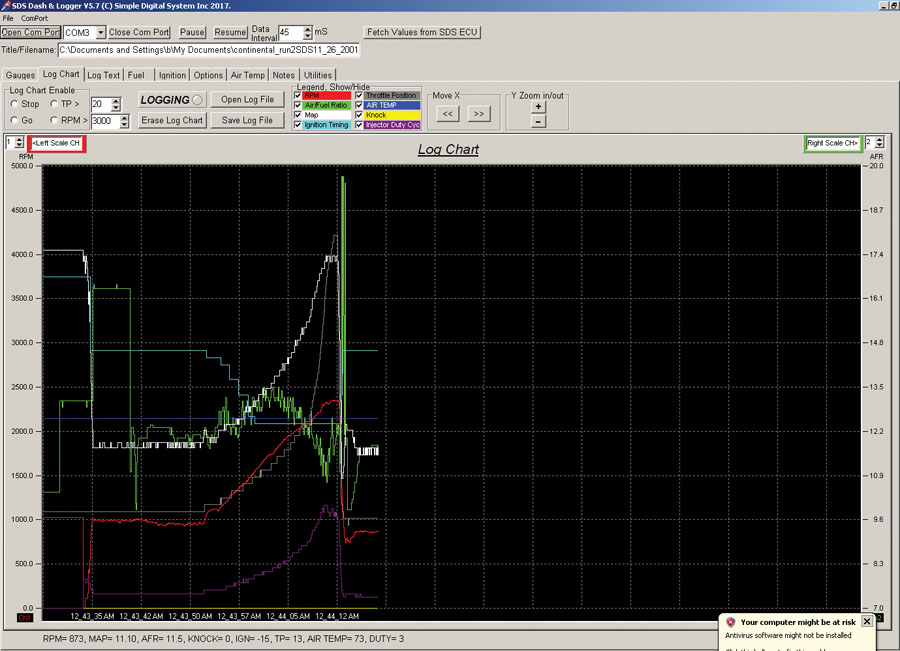
With the laptop hooked up to the SDS ECU, we started running the rpms up while watching the data logging. A few minutes of tweaking and we were able to run it WOT and up to 2400 rpm with this big prop.
After lots more testing, mapping and data logging, no more issues surfaced. The engine runs very sweet with EFI, and we already have production CNC’d parts made to offer a complete kit.
The EFI/EI starts and idles better, allows near perfect cylinder-to-cylinder mixture distribution, negates the possibility of carb ice, allows optimized ignition timing under all conditions of rpm and MAP, and removes all the maintenance requirements that come with magnetos. Some users have reported a 20% reduction in fuel flows for the same TAS compared to the carb and mags on these engines with EFI.
On the flip side, it’s a bit more expensive than the carb and mags, you need a backup power source since the system is electrically dependent, and you need a fuel return line to your tank(s).
This was an interesting and fun R&D project for the SDS team. On to the next one…
In addition to being a homebuilder, Ross Farnham runs Racetech Inc., which builds, supports, and distributes SDS (Simple Digital Systems) EFI and EI kits for Experimental aircraft engines. He currently flies an RV-6A powered by a turbo EJ22 Subaru.







I would like to get 15 more hp out of my new 0200-D. How can that be accomplished without major tear downs? Better flowing exhaust, port and polish heads maybe? Better ignition? Please advise as well as cost and down time.
Thanks [email protected] or [email protected].
Not much you can do without major tear downs- higher compression, cam change, ported heads and spinning it faster. A Powerflow exhaust might get you 5-6 if they make for this engine.