Doodads are clever solutions to small problems. You never know when you might need a doodad to fix, improve, or economize some aspect of your airplane. The following simple, shop-made doodads embody one or more of those ideals. They also pull from various skills that I’ve covered in previous columns, including turning on the lathe and using the table saw to cut aluminum.
First up is a low-profile access cover/hole-plug for my single-seat, VW-powered Funkist (essentially a scaled-up Teenie-Two). The Funkist has holes on top of each wing to access the tie-down points. When I bought the plane, these holes were covered with hardware-store, steel-pronged furniture plugs that were “secured” with a layer of clear packing tape. Although crude, it was an effective solution—except for the tape residue and the fact that they had to be pried off with a screwdriver, which was guaranteed to scratch the paint!
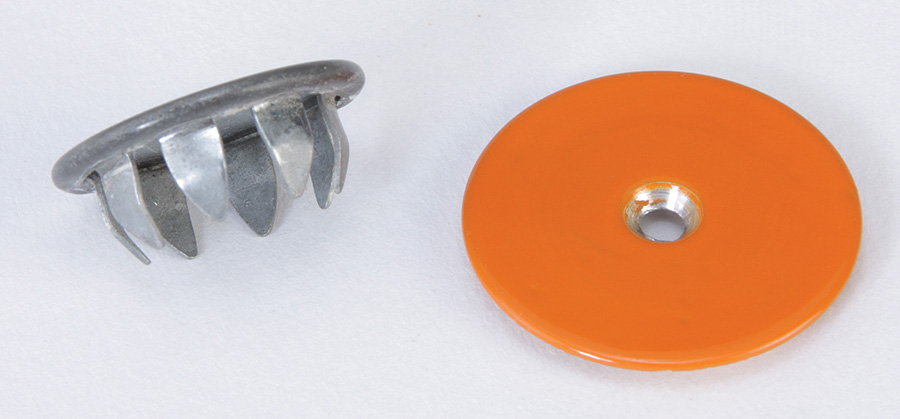
On the left is the original plug, sans tape. On the right is the replacement doodad plug.
Taking a clue from inspection covers on fabric airplanes, I worked up a doodad cover that is secure, looks good, and is easy to remove. Although the part in the photos has a key slot that indexes the tie-bar, it’s not necessary, making the project that much simpler. The raw material used for this was one-inch-round 6061-T651 aluminum. The tie-bar was cut from a section of a rectangular aluminum tube.

Start by turning the shoulder relief to the same thickness as the aircraft skin, then using a boring bar as shown, excavate the center (left). Drill the clearance hole for the 3-48 screw (right).
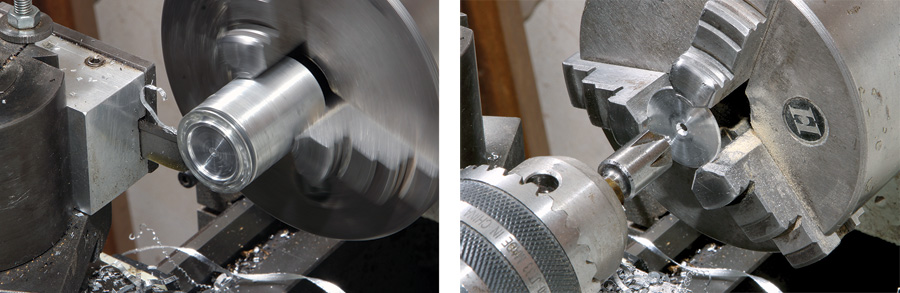
Using the parting tool, cut off the doodad to be 0.030 to 0.035-inch thick (left). Flip the doodad in the chuck and make the countersink for the flathead screw (right).
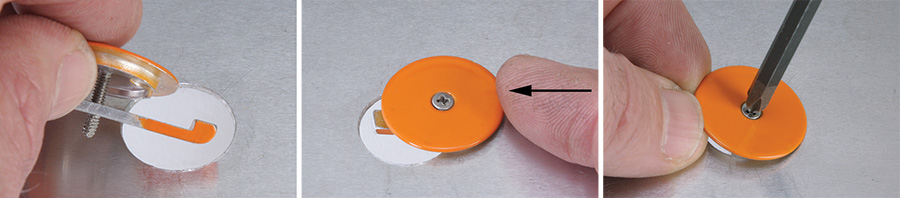
Install the finished doodad plug by inserting the long end of the tie-bar into the hole (left). Nudge the cover over the hole to index the flange to the opening (center). While holding upward pressure against the tie-bar, tighten until you feel it begin to spring under screw tension (right).

This cross section view illustrates the low profile and the tie-bar clamping action (left). Note the squished end of the screw to prevent it from unthreading. The screw is a 3-48 x -inch stainless steel flathead (center). This doodad has been in service for four years on my Funkist (right).
Wheel Alignment Doodads (aka Shims)
Ideally when you bolt the axle, brake, and wheel package to the gear, everything should be lined up. However, production tolerances and minor assembly deviations sometimes conspire to throw things out of alignment. For a detailed overview, see “Straight and Narrow: Wheel Alignment 101” by Dave Forster in the May 2014 issue.
Unlike cars, which have adjustable tie-rods and suspension mounts that make wheel alignment pretty easy, small airplanes use tapered shims installed between the axle and gear leg. You can, of course, buy shims. But they’re expensive (think “certified”), and they might not come in the exact angle you need. You can stack shims together to get in the ballpark, but that’s as close as it gets. That’s where the home shop comes to the rescue.
Using the tilt function of a table saw and a non-ferrous blade [“Cutting Aluminum on a Table Saw,” January 2014], you can slice tapered shims at the precise angle you need. Not only can you get very close to alignment perfection, you can save a pile of money.

Use a precision protractor to adjust the table saw blade to the desired 2-degree angle (left). The 100-tooth Tenryu Alumi-Cut blade easily slices through 7075 aluminum (center). With the holes drilled, this shim is ready for paint or anodizing. A check of the dimensions indicated the taper to be 1.99 degrees (right).
A variety of shims and spacers (left to right): a 1/8-inch spacer, a 1.5-degree camber shim, and a 1.7-degree toe-in shim. The corners are clipped to provide clearance for the caliper mounting hardware.
Spacer Doodads
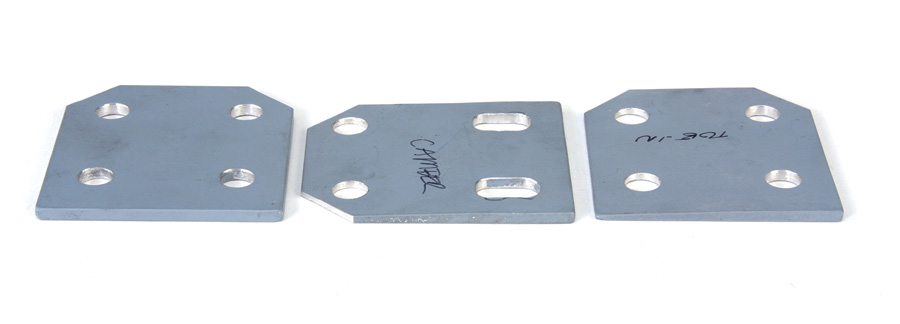
Spacers are probably not very high on the list of things to think about when constructing an airplane, but without them, we’d never make it off the ground. Spacers come in all shapes and sizes, yet it would not be unusual to encounter circumstances where, to get what you need, you have to either modify an existing part or make something from scratch. Typical examples would be axle spacers (to center a wheel between fork legs), or a spacer added to the end of a stub axle to position a castle nut to engage a cotter pin. Spacers come in handy when you need to eliminate a stack of multiple washers. That is, when you have a bolt that’s slightly too long and otherwise would need more than two washers to properly engage the nut. (Inspectors frown on such indiscretions.)
Spacers can be made from solid stock or tube, though I generally don’t recommend making spacers from thin-wall tube. Spacers should be thick enough to provide decent contact area and should not buckle or distort either themselves or adjacent components. Other than that, they are as easy to make as 1-2-3!

Sketches of typical spacers. The ones on the left are washer-eliminators, used to get rid of unsightly and amateurish-looking washer stacks. The ones on the right are axle and bearing spacers. A spacer that abuts a bearing should have a protruding lip to contact the bearing race. The other side must be faced square to provide full contact to the fork leg.

Bearing spacers are as easy as 1-2-3! Face and drill for the axle diameter (left). Turn the outside edge of the face to create a protruding lip of 0.020 to 0.030 inch. Cut the length slightly oversize and face the backside to the desired length (center). The diameter of the lip should match the diameter of the bearing race (right).


