If we put maintenance and repairs together, we can easily see a link between maintenance well done and minimizing repairs. Of course, too much or poorly done maintenance is also problematic, so let’s look at the subject of maintenance and see how to decide what to do and how and when to do it.
Don’t Let Things Go
Take care of things that need taking care of. If something isn’t right, fix it. Problems never solve themselves; they only get bigger. A gouge in the rim of your wheel turns into a crack. The crack slowly gets bigger. Then, one day the wheel breaks, and you have a flat tire, maybe just as you are landing, and your plane goes off into the weeds. It may take a while, maybe even years, but someday it will fail.
The same goes for routine maintenance. I can’t tell you how many times I have someone ask me, “Do I really have to service my wheel bearings every year if I only flew 30 hours?”
My reply is, “You don’t have to repack them, but you should inspect them.” Service intervals are given in terms of use and time for a reason. Things dry out or deteriorate. Moisture finds its way into things. Flying hours may or may not have an impact on these things.
I have a Brackett (foam) air filter. I had gotten lazy about servicing it every year. Somewhere along the line, it started to disintegrate and send pieces of foam into the engine—shame on me for falling for the I-haven’t-flown-it-that-much line. Lesson learned.
Follow Manufacturers’ Recommendations
The makers of the fine products we use typically have a lot of experience with those products and have learned a great deal from many years of experience with many types of users. When they prescribe a service interval or a replacement schedule, it is worth giving their recommendations serious consideration. As an Experimental owner, you are not obligated to follow those recommendations, but you ought to have a very good reason for not doing so.
All major manufacturers have online resources for service bulletins and ADs that apply to their products. Lycoming, for example, has an extensive library of service bulletins, letters and instructions that will tell you a great deal about how to care for your Lycoming engine. Similar engines by Continental and Superior can also benefit from these publications.
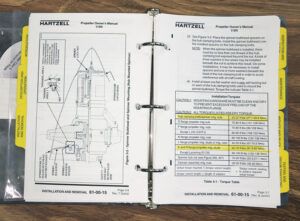
Hartzell propellers come with an owner’s manual that provides the user with useful information, including how to torque the bolts on the prop. It also contains a place to keep a record of the service life of your prop (logbook). Catto, a fine maker of fixed-pitch props, provides similar information but in two separate publications. I am sure most other manufacturers follow suit.
Use this information to service and repair your engine or prop the right way. If something is not clear, give the manufacturer a call or send them an email. Most are glad to help, especially if it prevents a failure of their product. This doesn’t just apply to engines and props. B&C Specialty Products (alternators and starters) is highly regarded for its customer service and willingness to answer questions.
Ask for Help When You Need It
This is a good follow-on to the previous topic. If you don’t understand how to do something, ask for help, which may come in the form of a call to a manufacturer, or it may be as simple as logging into your favorite builders’ and owners’ user group, such as Van’s Air Force. The EAA has many helpful videos in its library of Hints for Homebuilders where construction and maintenance topics are covered. The quality of these videos makes them favorites of A&P schools. There are also some YouTube videos that may be helpful.
Your EAA chapter can also be a source of assistance. Even though they focus primarily on construction, many technical counselors can help you with some on-site instruction in common maintenance tasks. Don’t blunder through something if you don’t know how to do it. You can ruin expensive parts and create safety hazards. Ask for help when you need it.
Once you have mastered a task or discovered something that might be useful to others, pay it forward. My thought is to ask for help when you need it and offer help when you can.
Some Things Can Just Be Inspected
Many things do not need to be serviced every year, just inspected. Here are some examples: The previously mentioned wheel bearings can be checked, along with brake pads, yearly without removing and repacking them or replacing linings. Control rod ends do not need to be lubed every year if you have relatively few hours flown in dry conditions, but they should be checked. In fact, overlubricating can lead to problems. Oily parts attract dust and debris, which is certainly not helpful.
I have a vacuum system in my airplane (soon to be gone). I used to replace the filters every year regardless of the hours flown. I no longer do that, but I do inspect them at each condition inspection. I have found that replacing them every other year is sufficient. If you handle other things in this way, be sure to note it on your condition inspection checklist, so you don’t lose track of the items you merely inspected in any one year.
On the other hand, some things need to be done on a calendar basis even if the hours requirement has not been met. Oil changes are a good example. Lycoming recommends an oil change every 50 hours (25 hours if you don’t have a full filter) or every four months, regardless of hours flown. If you live in a dry climate and stretch that to six months, I won’t be too upset. But if not, you should stick to Lycoming’s recommendation. They have a lot of experience looking at engines that need to be rebuilt, either because of years in service or hours flown. Chances are they know more about this than you do.
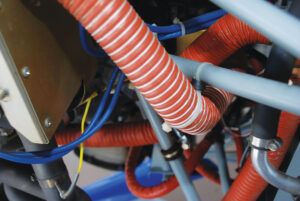
Some things are tougher calls. For instance, most manufacturers place a 10-year service life on rubber hoses and other rubber parts—some will only go five years. It is hard to look at a 10-year-old hose that seems to be perfectly fine and throw it away. In truth, I went 12 years before I replaced all my pretty stainless steel-covered rubber hoses, and even then, I wasn’t happy about it. However, few things are more important than oil and fuel lines. Sometimes you just have to bite the bullet.
Brute Force is Rarely the Best Solution
When I worked on heavy equipment, my most used tools were a cutting torch, a big hammer and a 3/4-inch air impact wrench. Now my most commonly used tools are 1/4-inch-drive sockets and ratchet, combination wrenches and safety wire pliers. Hammers almost never come out of their drawer. Needless to say, heavy equipment tools are not appropriate airplane tools. That may be obvious enough, but the point is that force in any large amount and airplane parts just don’t go together.
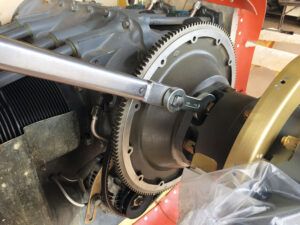
If you must use a hammer and punch to replace a wheel bearing, I understand. I would much prefer to see you use a hydraulic press, but I realize that not everyone has access to one of these. Sometimes rocker shafts and connecting rods do not slide out as we would prefer. In that case, I like to use a brass punch and the lightest hammer available to gently tap the parts out. There are tools that pull wrist pins out that would be an even better choice. Any heavy force on a wrist pin can potentially damage a connecting rod or its bearing. You don’t even want to know what a new connecting rod costs.
This cautious use of force even applies to little things such as nuts and bolts. An aircraft nut should turn with just the slightest force until the lock feature engages. If it doesn’t, it is time to find out why and possibly replace the offending nut or bolt. And remember, any relatively strong person can tighten an AN3 bolt to failure with a determined effort. The correct tightness is well short of that. Use a torque wrench if you do not have a good feel for what sufficiently tight feels like. Even then, use a torque wrench on critical items.
When Troubleshooting Think of the Whole System
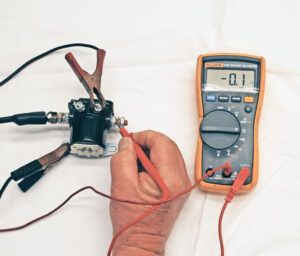
If you think you have a problem with a particular component, think about how it fits into the big picture and how it interacts with other parts before simply replacing it. In other words, don’t be a parts changer hoping by doing so you will solve the problem.
Here is an example. Your plane is hard to start. You suspect a bad battery or maybe a bad starter. Before you act, and certainly before you buy any parts, please take a look at the electrical system as it relates to starting your plane. You have several points of possible trouble. The battery could be low. That can easily be cured by hooking up your battery charger. You would only buy a new battery if it wouldn’t take a charge after a few hours. The battery cables and their attachment points could be the problem. Check all of the terminal connections for corrosion and tightness. Clean and tighten as necessary while not forgetting the ground connection to the engine. Still scratching your head? Check the starter and master solenoids. If you are still not getting what you want, disconnect the wire from the starter and have someone turn the key. If you have much of a voltage drop from the battery to the starter, you must have missed something. With the entire system checked out, you can now buy a new starter with confidence that the problem will be solved.
Don’t Let Things Go
If you let the little things slide, they will someday come back to bite you. Related to that is when you fix something, really fix it. Don’t leave a repair job poorly done and in need of future attention. Somehow the future attention never comes until it fails again. Doing a poor job of maintaining your plane is a little like lying to yourself. It never turns out well in the long run.
Here is an example. An acquaintance of mine who is loath to spend money on anything kept letting his brake pads go. Eventually, they wore down to the rivets and ruined his rotors. Brake pads cost somewhere around $20. Brake rotors are about 10 times that, and you will still need to buy new pads.
In another case, a pilot/owner never got around to flying his plane or preserving the engine. He was always going to fly it someday, but someday never came. Eventually, he decided to sell his plane, but the buyer demanded he cut the price by $20,000 to allow for the likely badly corroded engine. It turned out the buyer was right. The engine needed a complete overhaul, including new cylinders and a camshaft. Flying is part of maintenance. If you don’t fly, take steps to preserve your engine. There is a lot at stake.
Look For Ways To Minimize Future Repairs
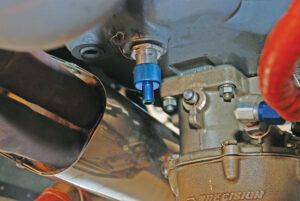
Taking the drain plug out of your plane’s sump to drain the oil seems like a pretty benign process, but screwing it back in can end up with the plug cross-threaded in the sump. If you haven’t gone too far, you can carefully clean it out with a pipe trap, but a better plan is to install a quick drain. I know a good one costs $100, but fixing your sump could cost a lot more.
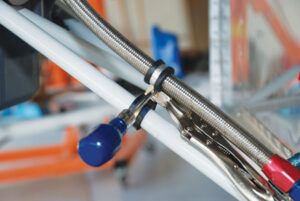
When I built my first plane over 20 years ago, I used many zip ties, especially in the engine compartment. Since then, I have learned that while these are very convenient, they are not the best choice. They get hard and crack. They wear through paint, and if ignored long enough, can wear through metal. I have since replaced all of my engine compartment zip ties with Adel clamps. They are much harder to install, but they last a long time and do not damage engine mount tubes or intake tubes. This is what I mean about minimizing future repairs.
Other examples include installing exhaust heat shields or firesleeve where cables or wires are anywhere near exhaust pipes and securing wires and hoses so they can’t flop around and come in contact with other engine parts, especially hot ones.
Get the Right Tools and Use Them
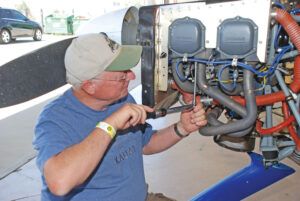
I went over this last month with a discussion of specialty aircraft tools, but it’s worth repeating that, to do the job right, you’ll need the correct tools for the job. In case you missed it, please review this column from the August issue for some recommendations. But also let me add this: If there are tools you should use, there are also tools you shouldn’t use. Adjustable wrenches and water pump pliers are for dire emergencies not everyday use. Get the correct wrenches for the nuts and bolts you have on your airplane. For example, many alternators require a 10mm wrench to tighten the main terminal nut. Go get one. An adjustable wrench does a much better job of rounding off nuts than it does of loosening and tightening them.
Be Safe
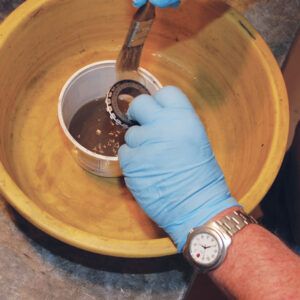
Talking about safety isn’t much fun, but getting hurt while working on your airplane is even less fun. Placing protective equipment where it will be used is an excellent way to remind yourself to use it. Hang a face shield or safety glasses on your sander or grinder such that you have to move them to use the equipment. Set out a box of gloves on your workbench and a pair of ear muffs where you rivet. A dust mask should be worn whenever you sand, especially fiberglass.
Absolutely protect your eyes. If you can’t see, you can’t fly.
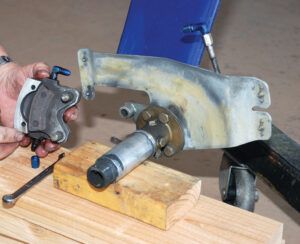
Another hazard is jacking or hoisting. Never get lazy about providing solid support for anything jacked up, and never let anything rest on a jack or hoist unattended. Even to change a tire, I never let the plane rest on a jack. Lift it up and then support it on a jack stand or wood blocks. People get killed every year working on cars that are only supported by a jack. I knew one such unfortunate soul. He was in a big hurry. He isn’t anymore. Don’t let that be you.
When working around a prop, be double darn sure that the mags are grounded out so the engine can’t kick over. Better yet, remove the top plugs from all the cylinders whenever you need to run the prop. The damage a prop can do is not something to trifle with.
Make an effort to do your work safely and correctly the first time. It will pay off in the long run.


