 In my “New Sojourn” column in the July 2022 issue, I told you I was committed to building a Hummingbird helicopter. I have begun in earnest and am happy to say that after approximately 400 hours of construction, I have the cabin resting on its own landing gear with the nose chin and windshields temporarily installed. So, it’s more motivational now to walk out to the hangar and make helicopter noises when no one is looking.
This series of features is not so much about building the helicopter as it is about providing some guidance to those who are considering building an aircraft of their own. Over the course of building 11 other aircraft, I have learned some things (some the hard way) and plan to share them with you.
![]() One of the things I hate most about building aircraft is waiting for the first kits to arrive. With the kit market booming like it is today, I don’t envy some of the builders who are waiting over a year for their kits. Patience has never been one of my virtues, so I was excited when Brad Clark at Vertical Aviation mentioned he could provide a full kit within 30 days. Wow! With today’s supply chain problems, I thought it would be good to get a complete kit, although I’ve never recommended that to builders in the past. Why? Seeing that whole kit show up at once can be pretty frightening when you realize how much work has to be done. But like any big journey, one small step at a time and eventually the journey is completed.
One of the things I hate most about building aircraft is waiting for the first kits to arrive. With the kit market booming like it is today, I don’t envy some of the builders who are waiting over a year for their kits. Patience has never been one of my virtues, so I was excited when Brad Clark at Vertical Aviation mentioned he could provide a full kit within 30 days. Wow! With today’s supply chain problems, I thought it would be good to get a complete kit, although I’ve never recommended that to builders in the past. Why? Seeing that whole kit show up at once can be pretty frightening when you realize how much work has to be done. But like any big journey, one small step at a time and eventually the journey is completed.
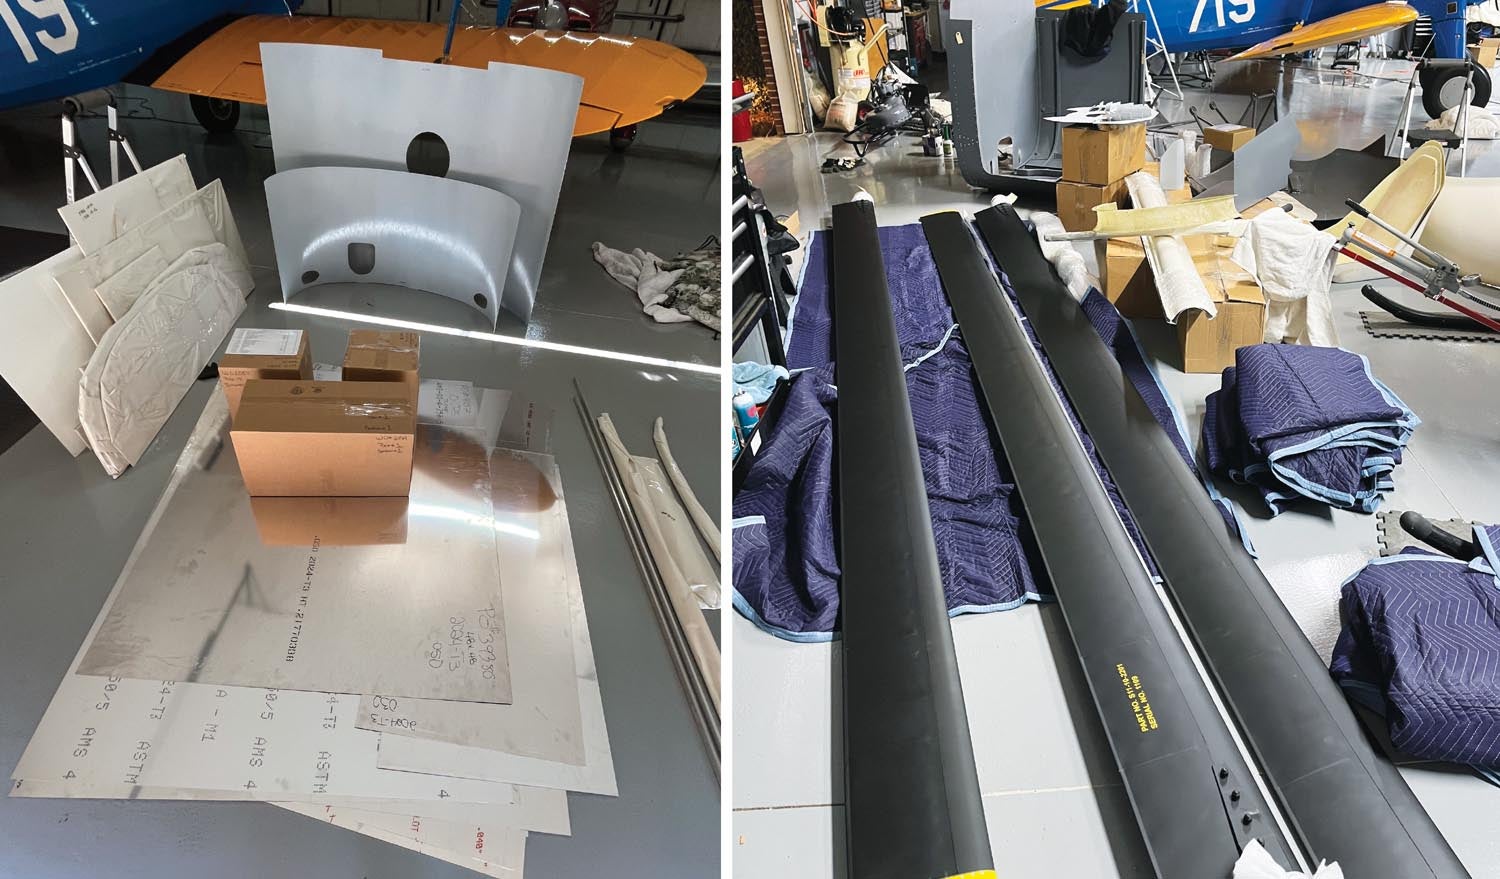
But getting back to my patience problem. For me, even 30 days seems like a long time, and figuring Brad’s team didn’t exactly get the whole kit completed on day 29, I asked if Kit 1 might be completed sooner and I could get started. Brad agreed and within a week or so we found ourselves driving down to Sanford, Florida, and picking up Kit 1. Yeah! I hate driving, and it is a six- to seven-hour one-way trip, so not a lot of fun. But we’ve seen so much damage from shipping companies lately that we didn’t want to risk any damage. Two weeks later we made the same decision about shipping the rest of the kit. My son, Nick, flew us to Sanford in the RV-10 (two hours) and we rented a U-Haul truck, loaded up the rest of the kits and drove back home. I think Nick got the better end of that deal.
Get Organized
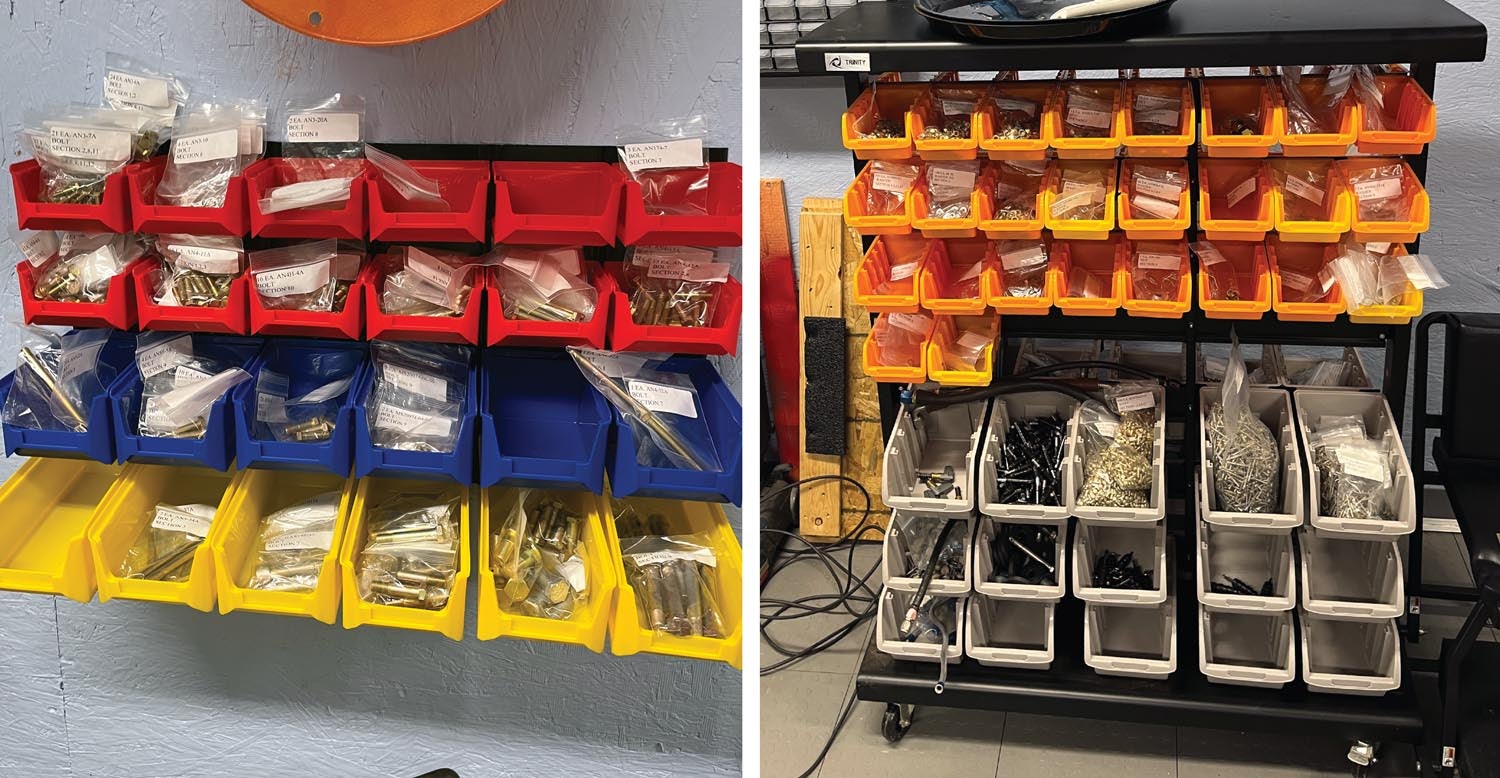
Unloading Kit 1 reminded me of something very important about aircraft building—organization. Don’t lose sight of that. Figure out a way to inventory everything and then store it in an organized fashion. In this case Kit 1 included all the hardware for the entire kit, and all bags were clearly marked as to what sections they belong in. I find simple wall-storage bins to be invaluable for this, and you can usually find them on sale from various suppliers. Then find a place to safety store the remaining parts until you are ready for them. Take time to think about the ramifications of long-term storage. As an example, while it’s tempting to store stuff overhead in garages, consider the potential impact of corrosion to unprimed aluminum and steel due to rodents or moisture.
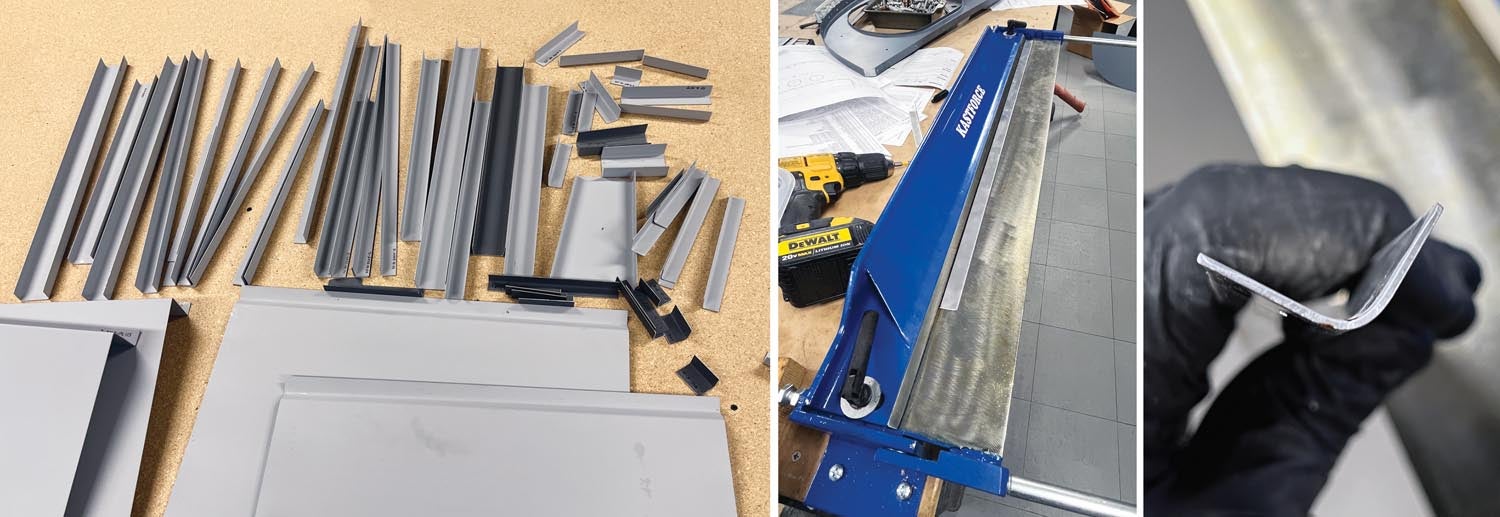
One of the things that got my attention while unloading the first kit is that there were six or seven sheets of 4×8-foot aluminum in varying thicknesses. Hmm. Something told me this wasn’t going to just be an assembly project. All the preformed parts were impressive, especially since they were all coated with epoxy primer, including the aluminum parts. Sure enough, right away in Section 1, I was instructed to make some angles.
Get the Right Tools
Here’s another thing I have learned with regards to building aircraft—you never have enough tools! I had a cheap metal brake from years ago that I decided would not be up to this task. Then I also realized that my hands were starting to get sore from cutting all the 1-1/2-inch-wide strips out of 0.040-inch aluminum, so I bought an electric shear from Eastwood that makes cutting the strips a piece of cake. A word to the wise though: The shear can generate scrap quickly if you aren’t paying attention.
Once I started bending the angles on the brake, I had to dig back into my memory to calculate bend radius angles and total flat piece lengths. It only took me a few seconds to think that there might be an app for this; I was right, so now I have apps on my iPhone for both functions.
Sometime during a discussion with Brad on the angles, he mentioned he had decided to now include an “angles” kit, which he shipped to me shortly thereafter. Boy, was that a godsend! It’s so nice now to just go “locate” the angle instead of having to fabricate it first, although I was getting proud of my ability to make them.
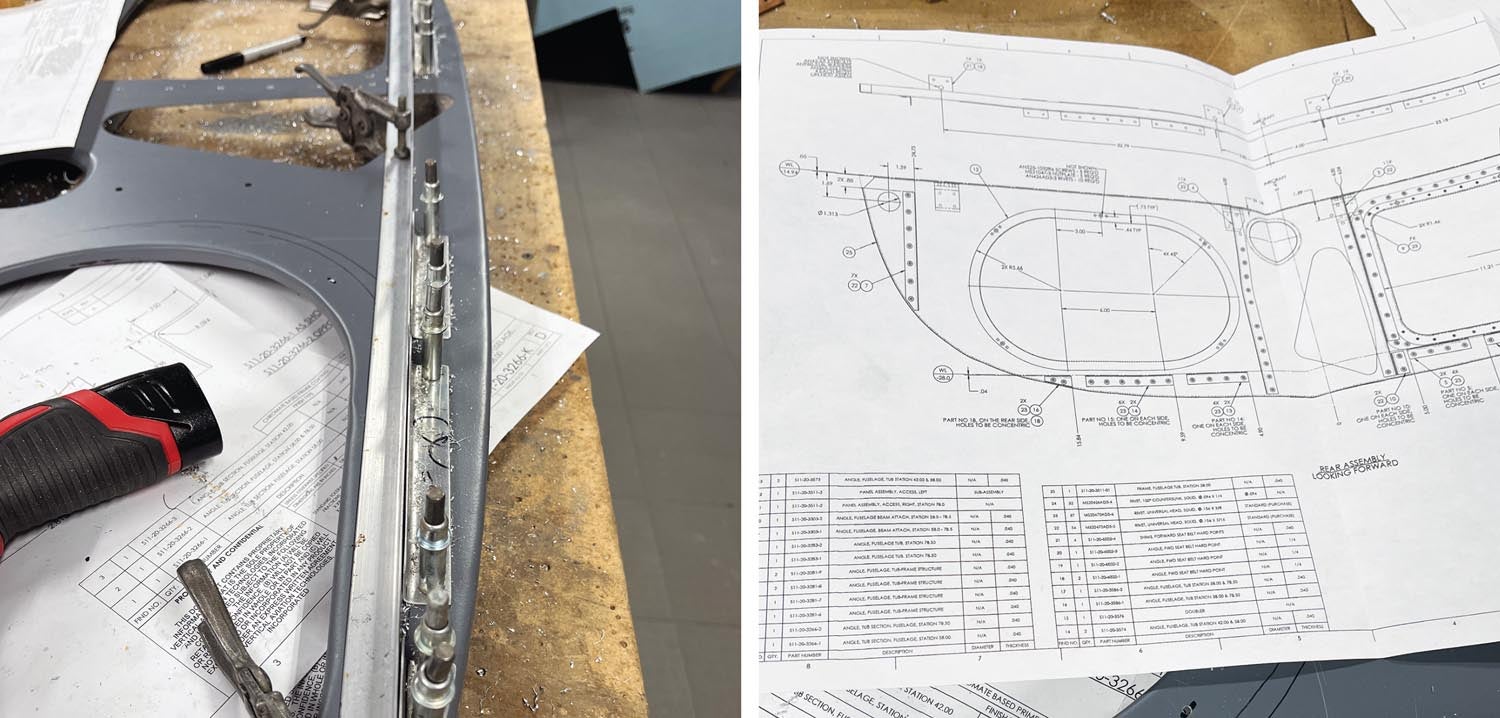
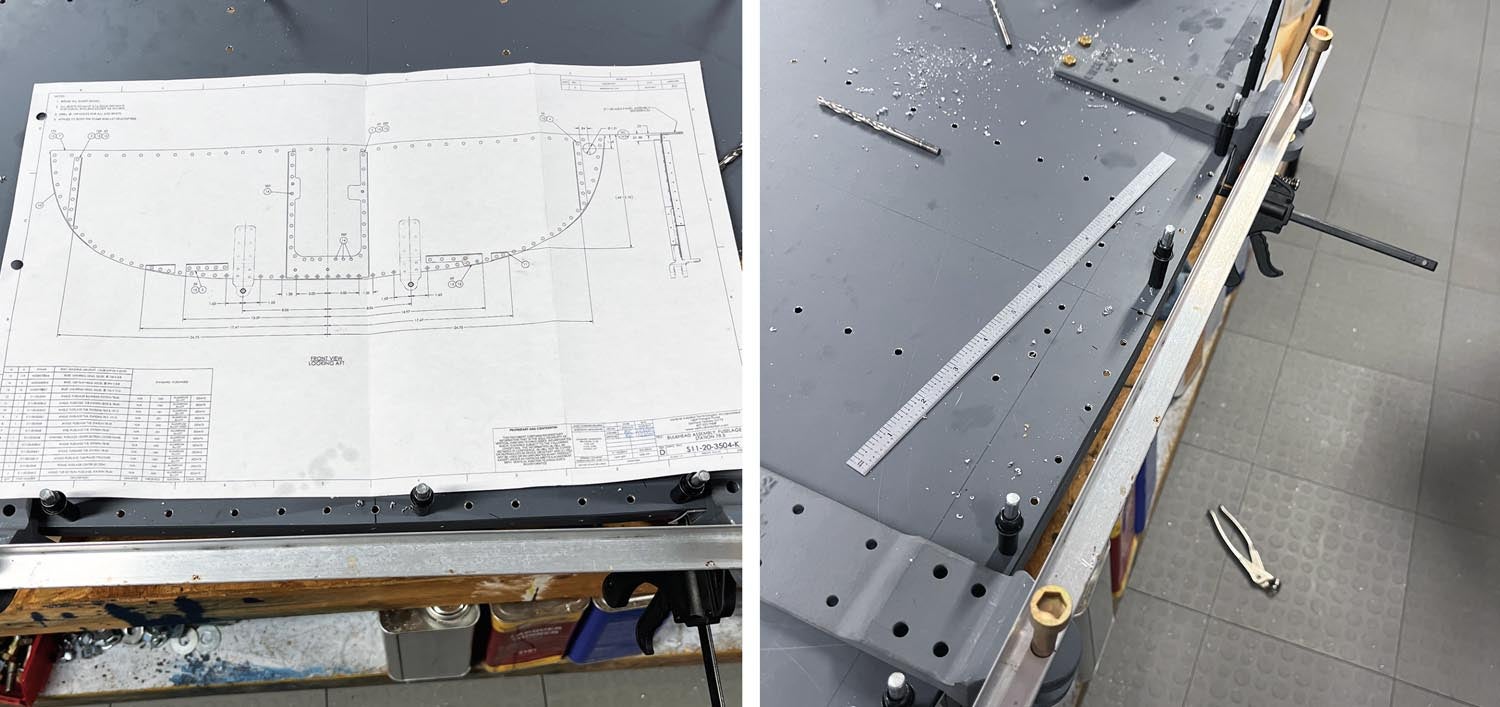
As I mentioned earlier, my observation that this is not an assembly project was dead on. There are step-by-step instructions, but there is also a large set of drawings/blueprints that you are constantly working from. Many times I have the drawing spread right above the piece I am working on so that I can continually refer to it.
It took a while to add all the angles and other parts to each of the lower cabin bulkheads. There were some critical measurements, such as the landing gear attach points, so I made a simple jig to hold them in place while I drilled the castings to the bulkheads. It paid off later, as the landing gear weldments lined up perfectly when I attached them. Once the bulkheads were completed, they were attached to the cabin floor, so things were starting to look three-dimensional.
Riveting
More things were starting to get permanently riveted together. Here are two other things I remembered from building:
1. If you haven’t had to drill out a rivet, you haven’t set enough of them yet. Yes, you are going to have a bad rivet occasionally, no matter how good you are.
2. You can never have enough shapes and sizes of bucking bars when building a metal aircraft.

If you have been a mechanic for any length of time, you know you have a drawer of modified/ground-down wrenches or pliers that you need to get to that one stubborn bolt or nut. The same is true with bucking bars. As luck would have it, I needed to buck some rivets in a narrow channel, and I still had my special bucking bar from building my RV-4 back in the ’80s. It was a platen off an impact printer. Printer platens are very tempered and work well for bucking rivets in tight places.
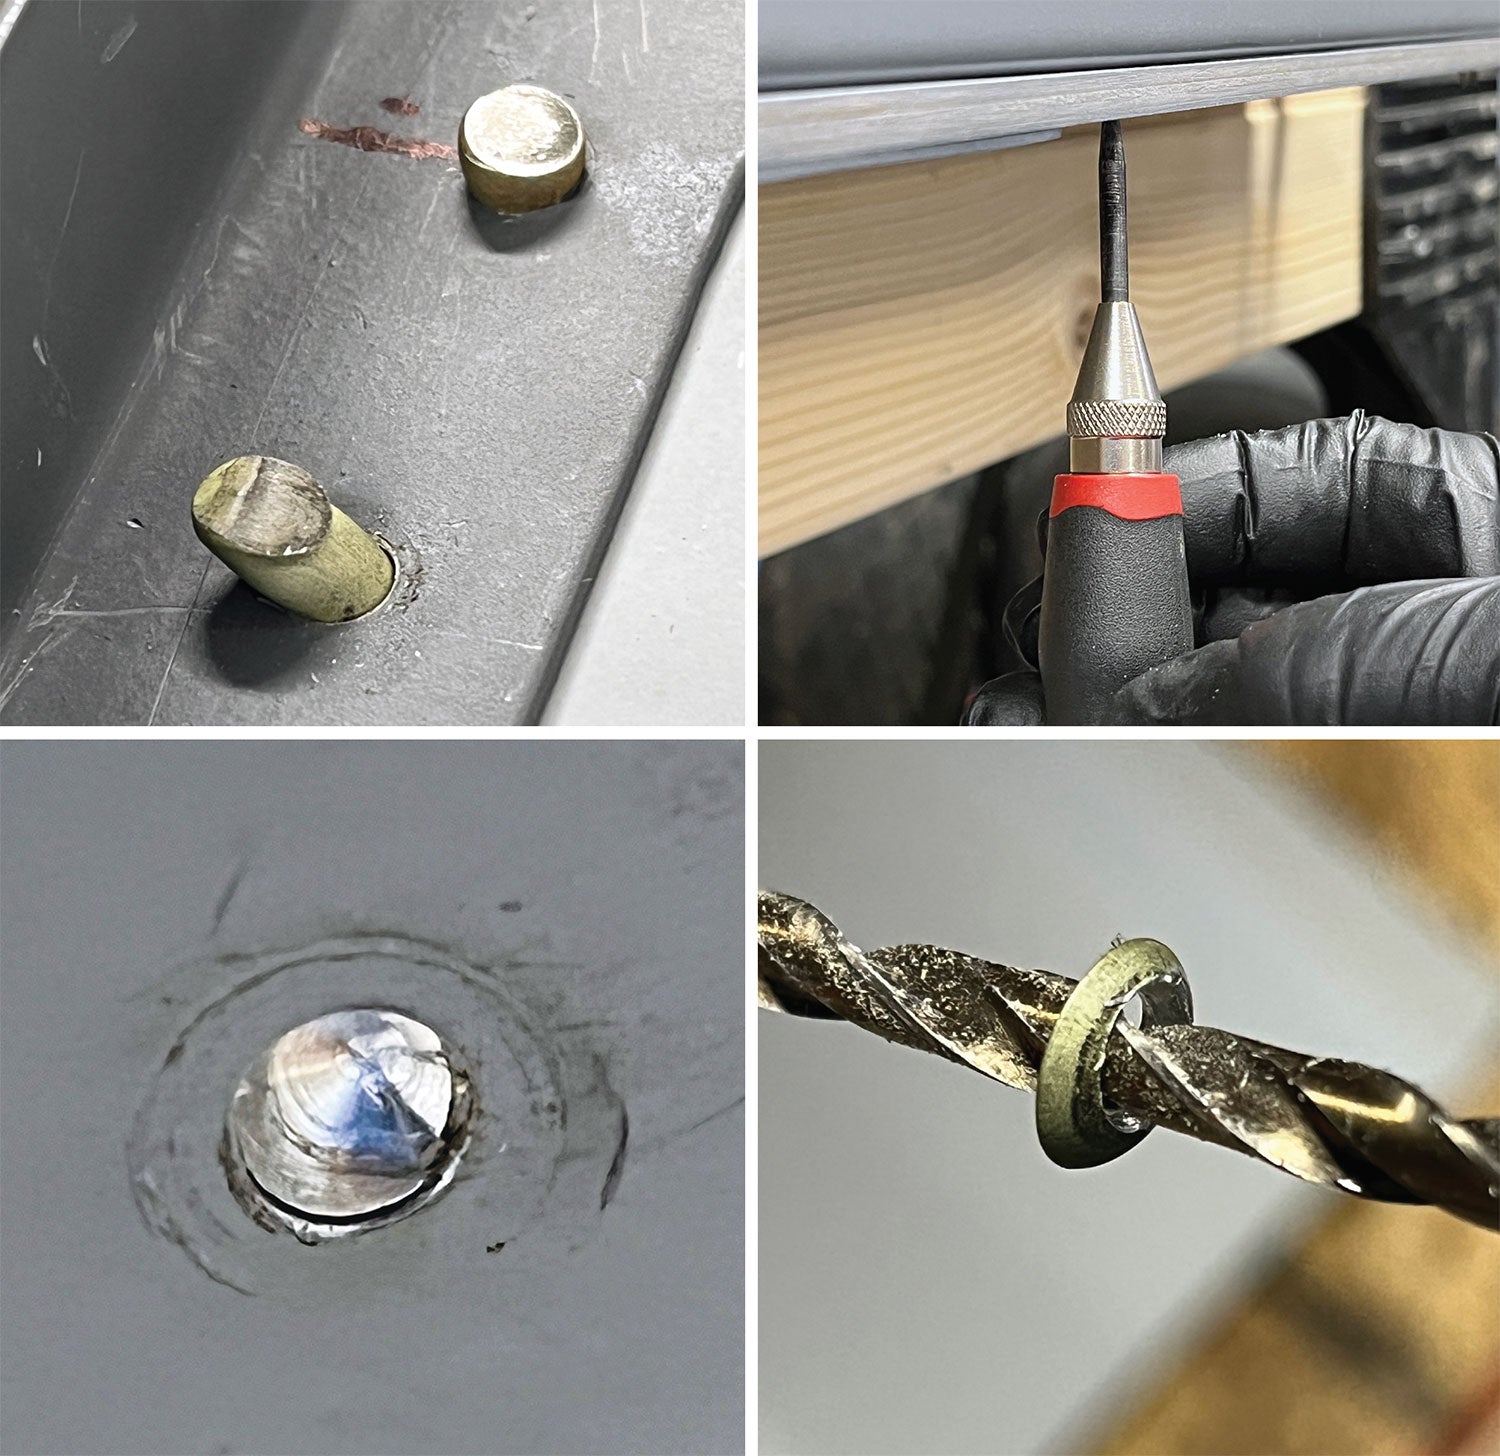
When it comes to replacing a bad rivet, it’s not that difficult, and you should practice on some scraps first to get the hang of it. The trick is to use the same size drill bit as the rivet. As an example, for a -5 rivet, you would use a #21 drill bit.
Use a center punch to make a dimple on the head of the rivet. Most rivets already have a small dimple in the center that you can use as a guide. Then carefully with your drill, slowly drill through the head of the rivet, all the while keeping it centered on the head of the rivet. Walk the drill around in a circle and eventually the head of the rivet should pop off. Then with a center punch you should be able to knock the remaining portion of the rivet out through the other side.
Sometimes you may have to drill a little past the surface material. Just be careful to not enlarge the hole. If you do enlarge the hole, all is not lost. Just consider using the next larger size rivet if there is enough edge distance. For protruding head rivets, the correct minimum edge distance is 2D (2 times the diameter of the rivet). For countersunk rivets, use 2.5D.
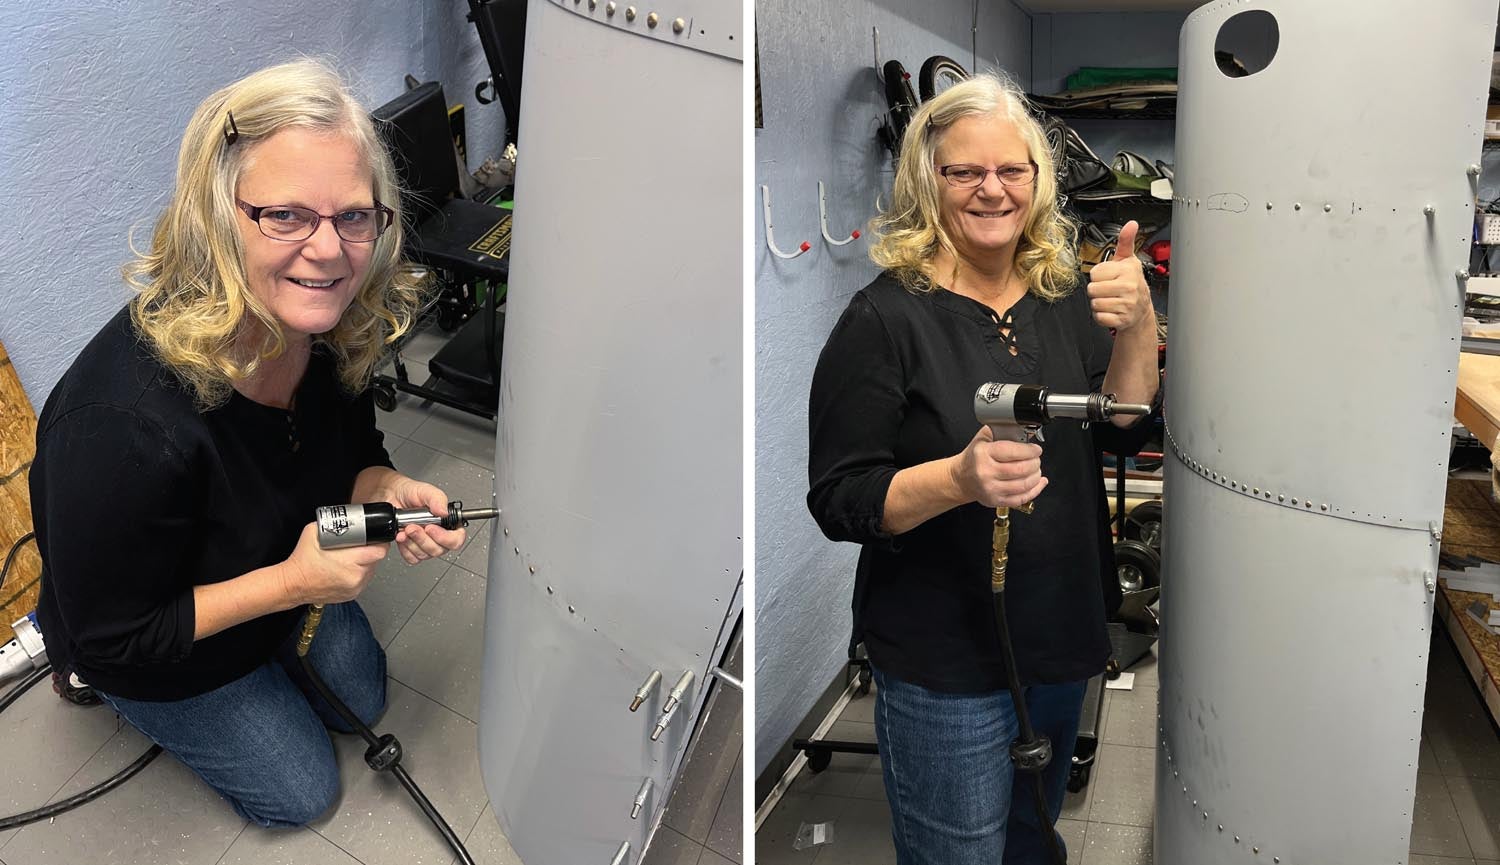
Once all of the bulkheads were riveted to the cabin floor, which was all done upside down, it was time to add the skins. This was clearly a job for which I was going to need help. Hmm. I haven’t been able to get my wife, Carol, to touch a rivet gun since she set a rivet in 1981 that left a smile on the RV-4. I never noticed it, but it sure bothered her. With some cajoling and helping her understand that these were all protruding rivets as opposed to countersunk rivets, and that the rivet gun would not dance around as much, she agreed to give it a try. Boy, was I lucky—it worked!
Carol proceeded to rivet the entire lower cabin skin to the bulkheads and has since come out and done more riveting on parts I couldn’t do myself. Once I showed her that I had to drill out rivets occasionally that even I set, I think she got over the fact that there would be mistakes. I think we drilled out less than a dozen rivets over the course of hundreds, so not a bad ratio at all. She has even done the bucking now, something she said she would never do.
Deburring Rivet Holes
One of the time-consuming parts of building a metal aircraft is that all the drilled holes have to be deburred, unlike many of the kits today that come predrilled. Deburring means the hole must have the burrs removed from both sides or the pieces will not sit tight to each other during riveting. Use a special deburring bit at slow speed for best results. For even better results, teach someone to do it while you are at work, and the parts will be ready for you when you get home. Progress is much faster. Now I leave drilled parts in a pile with a charged drill at night and they are done the next day by the time I get home. It’s almost like the tooth fairy, but I haven’t started leaving them under my pillow yet. Thanks, Carol.
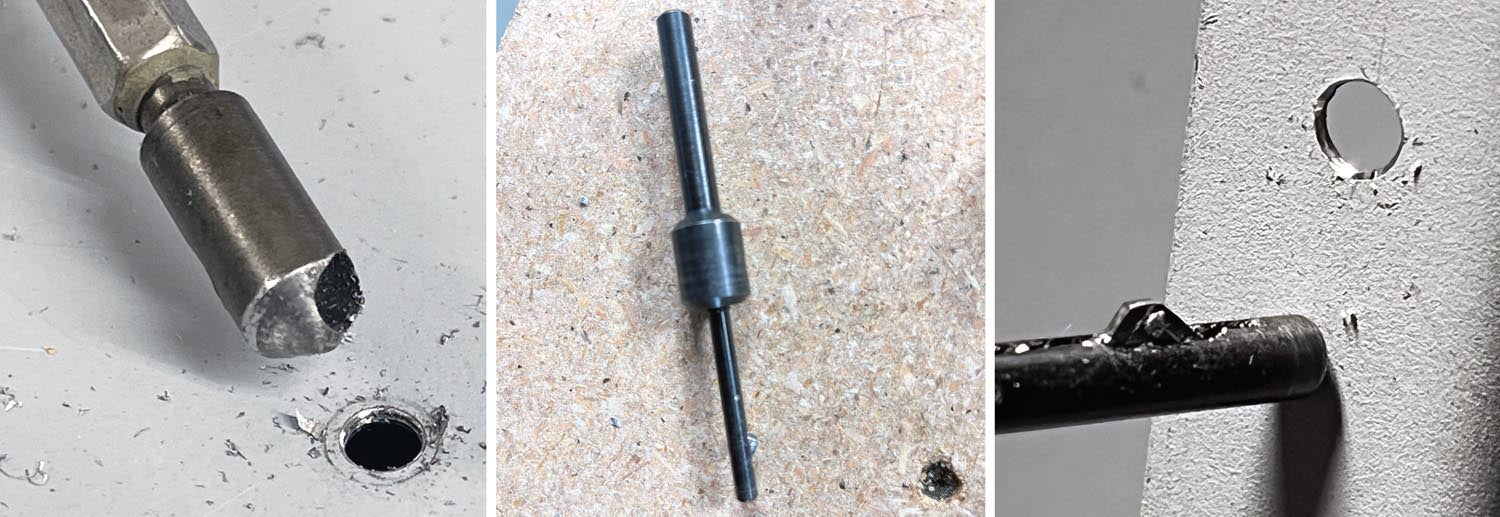
Some of the holes that need deburring are in a structure that precludes getting to the other side of the hole. This is where a Cogsdill deburring tool comes in handy. It’s a one-step deburring tool that deburrs both sides of the hole in a single step. They are a little pricey and the replaceable blades aren’t cheap, so I don’t use them all the time for the normal pieces. You can usually find sets of them on eBay for cheaper than buying them individually.
Once we got the lower cabin skinned, I realized we had to get it out of the small shop area, so I made a cradle with castering wheels on it and we moved it into the main portion of the hangar. Now it was stable and much easier to work on, and we could start installing larger parts. It is beginning to look like something. Not quite a helicopter yet, but getting there.
Next time we’ll start with the landing gear. As of now, I’m almost to the point of a quickbuild kit, which is an option. Of course, I didn’t want to wait for that, thinking I could get it done faster. But there are nights I go to bed thinking I should have thought about it a little longer. In my mind I don’t feel old, and I think building and flying airplanes certainly helps to make us feel younger, but there’s no doubt my body doesn’t always agree.
Speaking of being tired, be careful in the shop when you are tired, as that’s when accidents happen. Rotating tools are the most notorious. I remember drilling through my finger when building the RV-4. That hurt. I went inside and put a Band-Aid on it. I then went back to the garage and proceeded to do it again. It was clear it was time to turn off the lights and quit. I’ve been very careful about doing that again, until recently. I’d include a picture, but I’m sure you get the idea. Drilling through your fingertip to the bottom of the fingernail is not very pleasant. Plus, it takes a while to heal.


