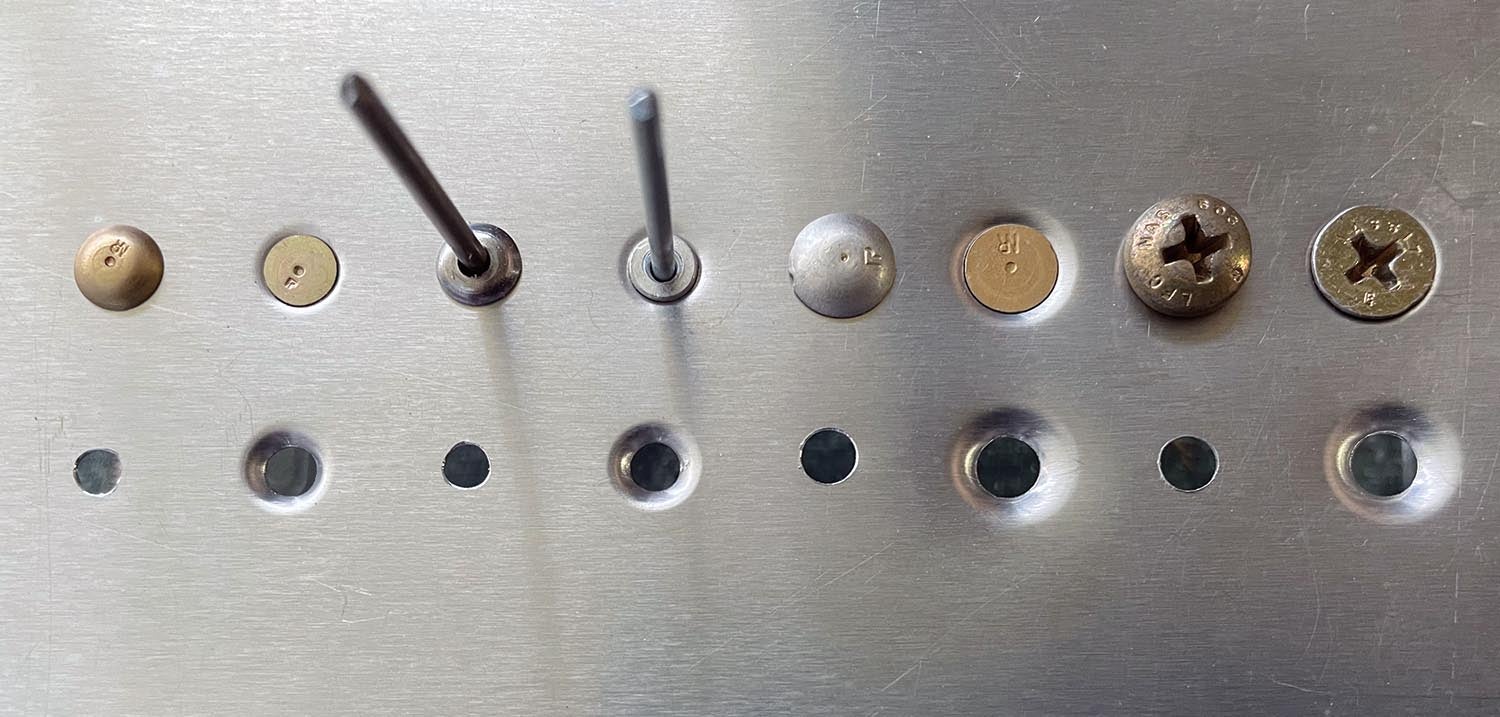
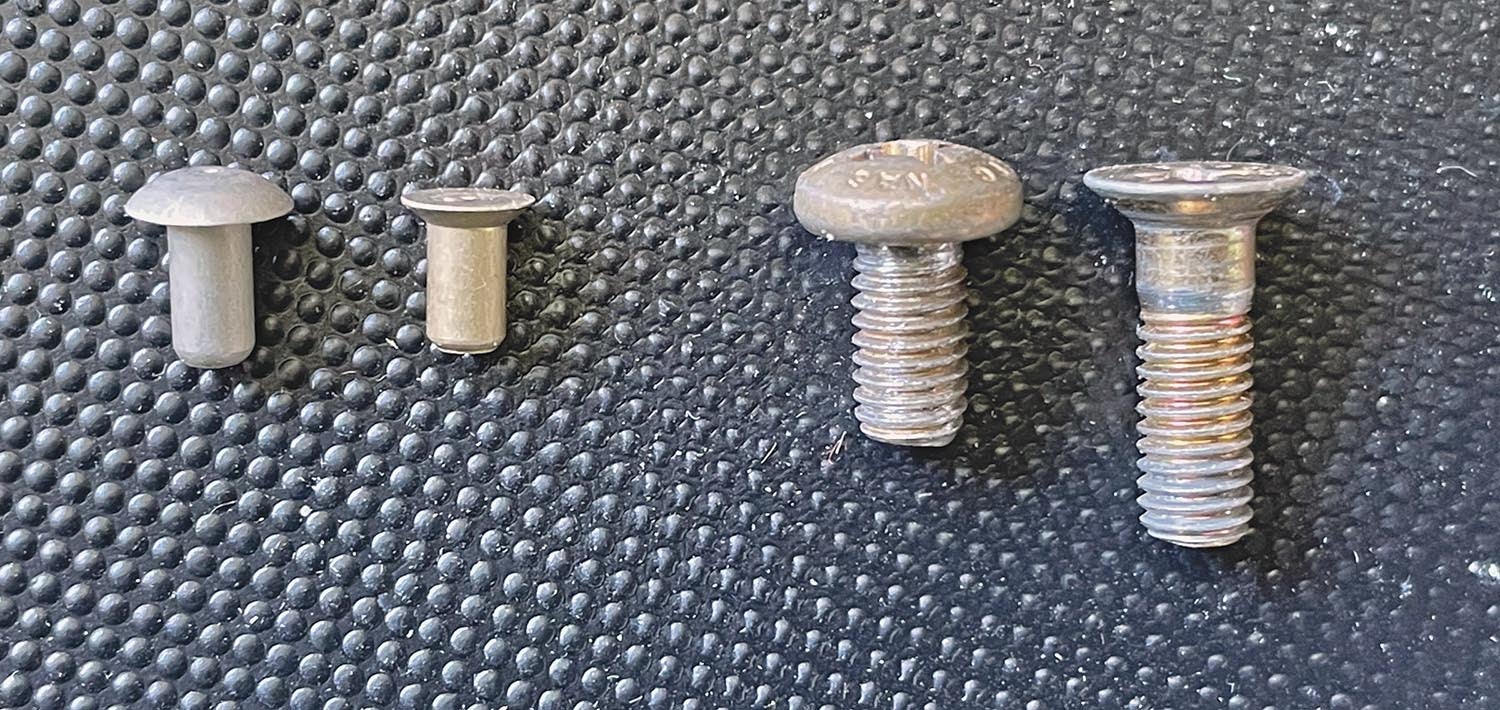
Each time you install a fastener on your airplane kit, consider whether the head of that fastener (rivet or screw) should protrude above the skin—or whether it should be installed flush with the surface. The photo above should make it evident what is meant by fasteners that are installed flush (also known as countersunk) with the surface. Here we are showing two varieties of rivets (solid and blind) as well as screws, located side by side to demonstrate protruding and flush installations.
While your kit manufacturer has probably already determined this choice for the thousands of rivets and screws for your project, you should still be aware of the differences in form and function of these installation styles. Some fastener choices may be left for you to choose on some of the aircraft components (like the instrument panel and other custom areas). Why would a builder choose between installing a rivet or screw flush instead of using a protruding head? Does it really matter and what effort is required? Have you noticed some aircraft kit models tend to use predominantly one style or the other? What’s the rationale for why this was done?
There are reasons behind the choices made by designers that drive this decision. Here are two common ones: speed and beauty. Let’s look at the second reason first. (It’s easier to think about!) While beauty is in the eye of the beholder, many observers consider the look of a machine with flush rivets and screws to be superior and more professional to some degree compared to one made with protruding fasteners. This appearance judgment is important to some people more than others. I am not interested in promoting one look over the other—I am simply stating an observation that many have claimed.
Now for the other reason. Because we are dealing with airplanes, there is a desire to reduce drag. Metal airplanes use thousands of rivets to hold things together, and those that are exposed on the surface can affect drag, especially at higher speeds. Flush rivets can significantly reduce drag compared to those with protruding heads. This is why high-speed aircraft kits generally use flush rivets on their outer skins. The effect of drag really diminishes as we look at slower aircraft—so with these models the rivet style is not very important. And, as you might imagine, some kits use a combination of flush and protruding style rivets. It turns out that drag is more critical on certain areas of the aircraft surface, so flush rivets are used just in those areas.
Is there a cost in effort to install flush fasteners? A big yes! This is another part of the decision that the designer must consider. Is it worth it to force the builder to countersink these fasteners just to achieve beauty and speed? Just how does the rivet or screw disappear and sink into the material and only show its flat top? Let’s look at the tools, time and materials for using flush fasteners.
First, we need to use fasteners made for flush installation. They are clearly marked as countersunk heads in your aviation supplier catalog, with their own part number designation. Then we need to modify the holes in the material—an aluminum skin for example—in order to accept this special fastener. One way to do this is to use a tool to impress a dimple into that skin (as you can see in the photo). The skin is deformed under pressure to match the contour of the head of the fastener. This dimple size is precisely matched to the size of the desired rivet or screw by using the appropriate dimple die set.
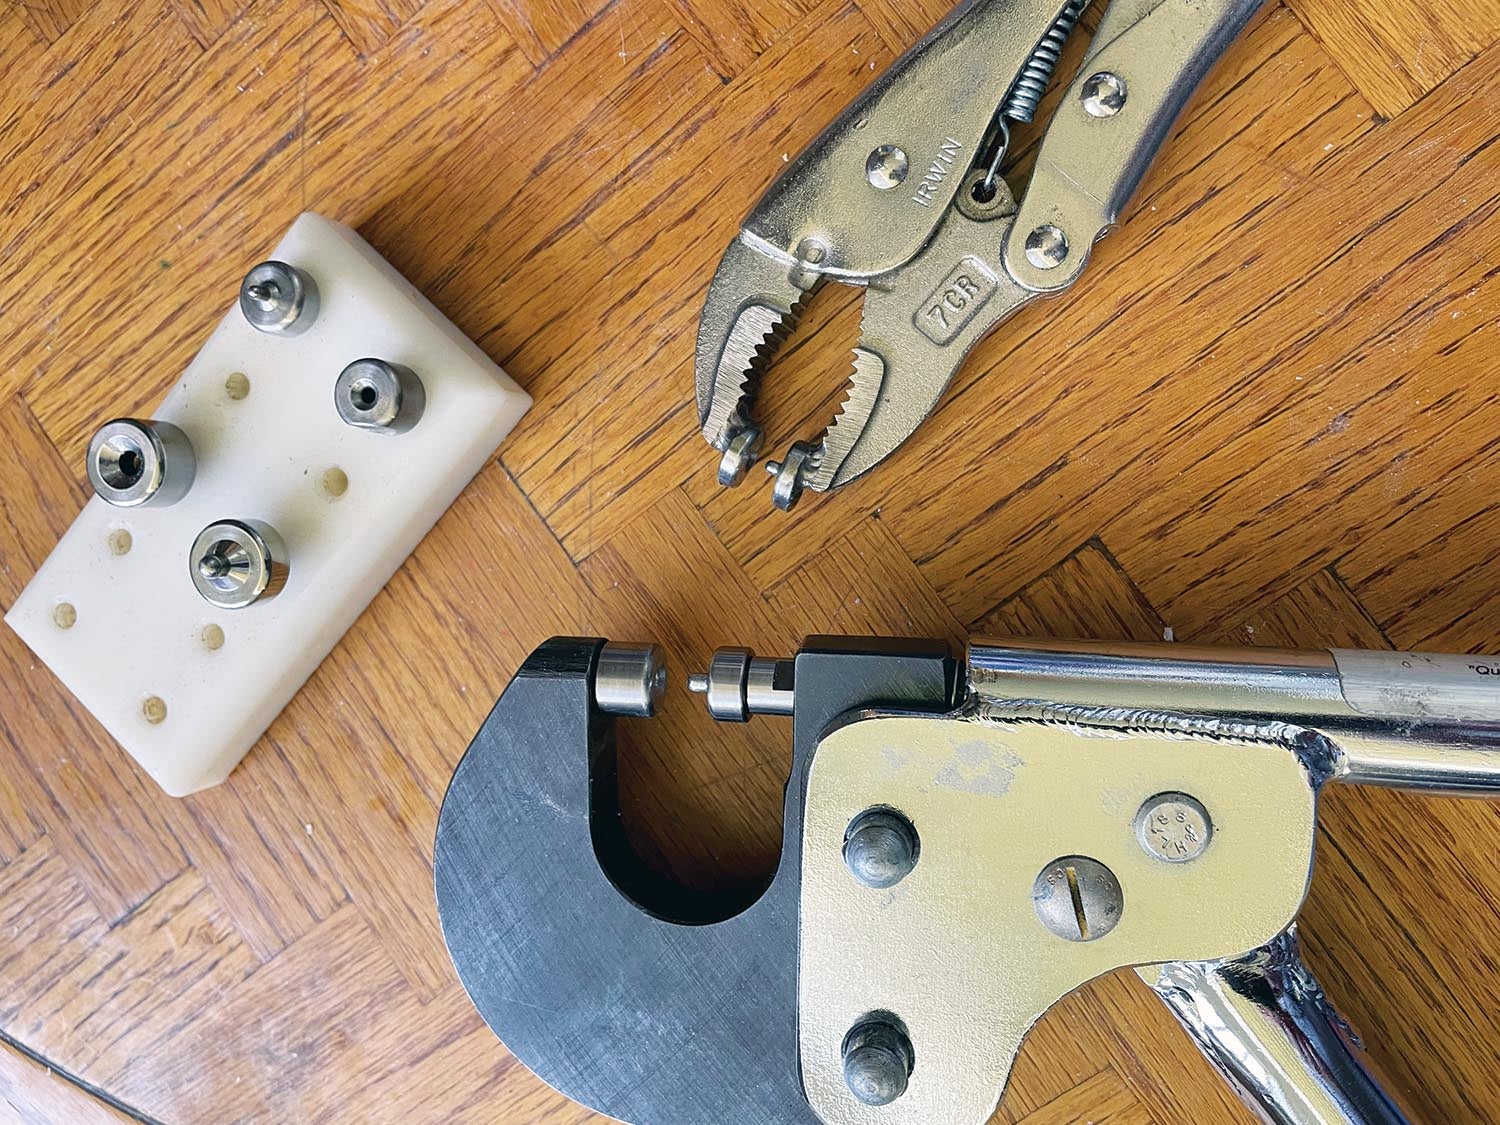
Note the photo of a typical hand squeezer and the interchangeable dies for popular rivet diameters. There are other variations of these tools that may be needed to make dimples in holes that are far from the edge of a skin sheet (like the middle of a wing skin).
Here’s a summary of the process for installing a flush rivet or screw: A hole of the correct diameter is drilled. Then a dimple is created in that hole by using a squeezer with the appropriate die set. If there are other materials that will be fastened together with this skin, then they also need to be dimpled or countersunk. Then the rivet or screw is installed into the dimpled hole.
There is an important limitation to the dimpling process. Because we are deforming metal with pressure, the limiting factor to making this work is the thickness of the metal. Typically, an aluminum sheet 0.032-inch thick is about the limit for dimpling. For thicker aluminum sheets we need to countersink instead of dimple. This process removes metal from around the hole rather than attempting to deform it. In a future article we’ll explore the basics of countersinking. Countersinking requires yet more tools and builder skills.
The choice of installing flush fasteners in your project requires the acknowledgement that every hole will need to be dimpled or countersunk. This effort and time investment should be carefully considered when taking on a project that requires flush fasteners. Beauty and speed take time. Plane and Simple!


In considering the dimpling of the aluminum skin (or whatever other component), keep in mind that the process of dimpling will open up the hole. So, if a kit manufacturer with pre-drilled components has allowed for domed rivets and you decide to put in a countersunk one, you will probably need to increase the rivet size.
A popular manufacturer of those roof top pods, for carrying skis, snowboards, etc., (whose name escapes me) uses a composite material that is distinguished by NOT being smooth, but has dimples, like a golf ball. The reason being (strongly inferred anyway) is lower drag.
How did you dimple the screw? I can’t find any tools for, nor tips on how to, dimple a countersunk screw such as a 1/4inch flat head screw. I need to do so, but don’t know what to do without needing to make a tool on a lathe (which I don’t have).
There are dimple die sets available for AN426 hardware (100 degree) sizes #6 and #8 and even #10 screws. I would suspect when you get to 0.250″ the process would need to be with a countersink, rather than “dimple” Again, limited by the thickness of the material being countersunk/dimpled.. AC Spruce, or Pan American Tool (as my goto supplier) – dl
I asked about 1/4 inch, not #10. I have dimple dies for everything else. The plans clearly state to dimple the plate, and countersink the aluminum part beneath it, for the screw, which is an MS24694-S115 1/4-28. It’s a thin piece of aluminum and these two screws are the only thing that attaches it to the aircraft.
YARDSTORE CATALOG Page 43 Part # 10138 for the 1/4″ dimple # 12999 Page 83 for the countersink
Thanks, good to have more sources. But I cannot countersink the sheet, it’s far too thin. It has to be dimpled. But the largest dimple die is for a #10 screw. But I need a way to dimple for a 1/4″ screw.
Mike, what Dave provided is exactly what you asked about, a set of dimple dies for a 1/4 100° screw: https://www.yardstore.com/dimple-die-set-1-4-male-female
Not only appearance and aerodynamics to consider. A flush riveted joint in dimpled skins is normally stronger in shear than the equivalent sized universal-head rivet.
Important note regarding dimpling – dimpled holes are known to grow cracks more quickly than a standard hole in an equivalent thickness skin. For home built aircraft this shouldn’t be a major concern, since the # of cycles/hours required for cracks to grow in aluminum is typically quite high, but it’s worth thinking about. But as a result, hole spacing and edge distance should be slightly greater on a dimpled hole than a standard hole.
None of this means dimpled holes are unsuitable for aircraft – it just means that their advantages come with trade offs.
I am a serial Vans offender . 7, 8, 2-12’s and now on a 10. I follow the guidance, dimple or countersink etc. I used to fly Airbus and I always wondered at the exquisite flush riveting they did. Countersunk and the head, just a tad below the surface, as in a dimple.
So….. Now in my retirement I fly a Pilatus PC-12. Had a factory visit at Buochs in Switzerland and was really surprised with their riveting technique. All the flush rivets stand proud. Just by a couple of thou, but proud of the surface. I queried it and they were adamant that there way was correct……
Not sure.
There was a PC-24 in the UK that went in for a respray – they stripped the paint and then DA’d the aeroplane to get rid of those pesky rivets….. Pilatus has basically said you wrote the airplane off !
Here is the result of tests I made regarding the proces of setting flush rivets:
Method A:
Drill the hole a little smaller, then dimple the holes and redrill them in the right size. When riveting I used a tool to shape the sheets exactly to the rivet before sqeezing the rivet.
Method B:
Drill the holes in the final size (3,3 mm for a 1/8″ rivet) and use the rivet and the special tool (a piece of steel with a countersunc hole) to shape the sheets to the rivet, in fact the rivet itself is the dimpling tool.
I drilled out the rivets to measure the holes and to see if there are cracks in the sheet. There was no difference in the final hole size but method A gave more risk of cracks.
Comments are closed.