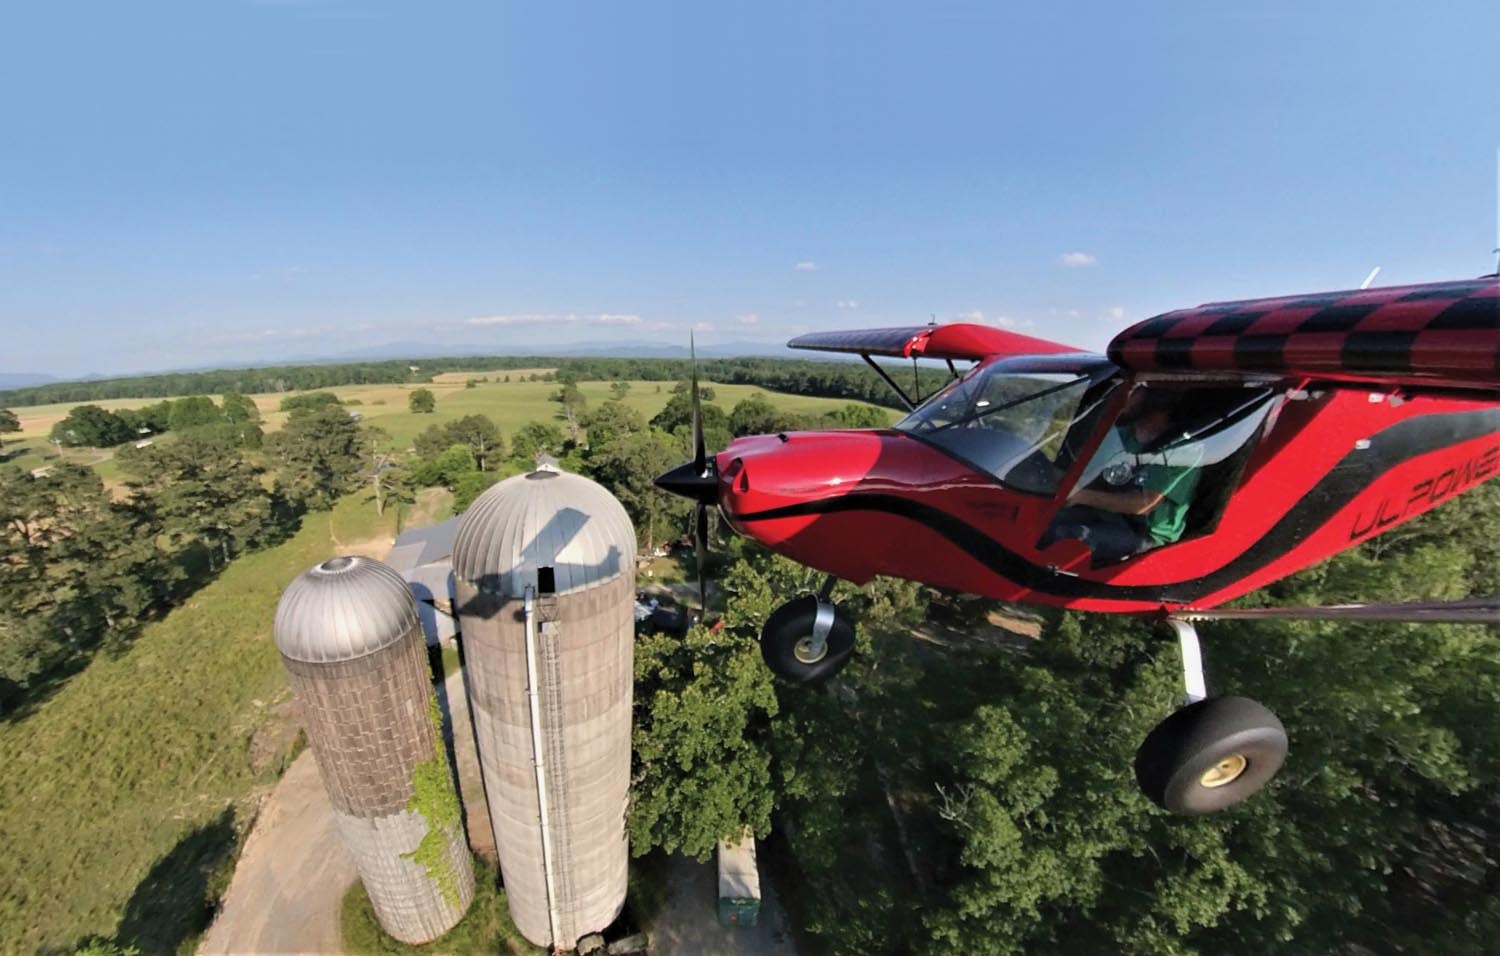
 With the change of seasons usually comes an adjustment in the mindset of builders. Some builders in the north face challenges with the bitter winter cold, while many builders in the south look forward to less of the suffocating summer heat in their hangars and garages. My 750SDX build time isn’t controlled so much by the climate because the farm shop I built is fairly well insulated from both extremes. However, the change of seasons can have many more meanings than just temperatures. For me, there is a change in the seasons on the farm and with life. The change of the seasons on the farm leads us into the last harvests of the year and planting winter wheat.
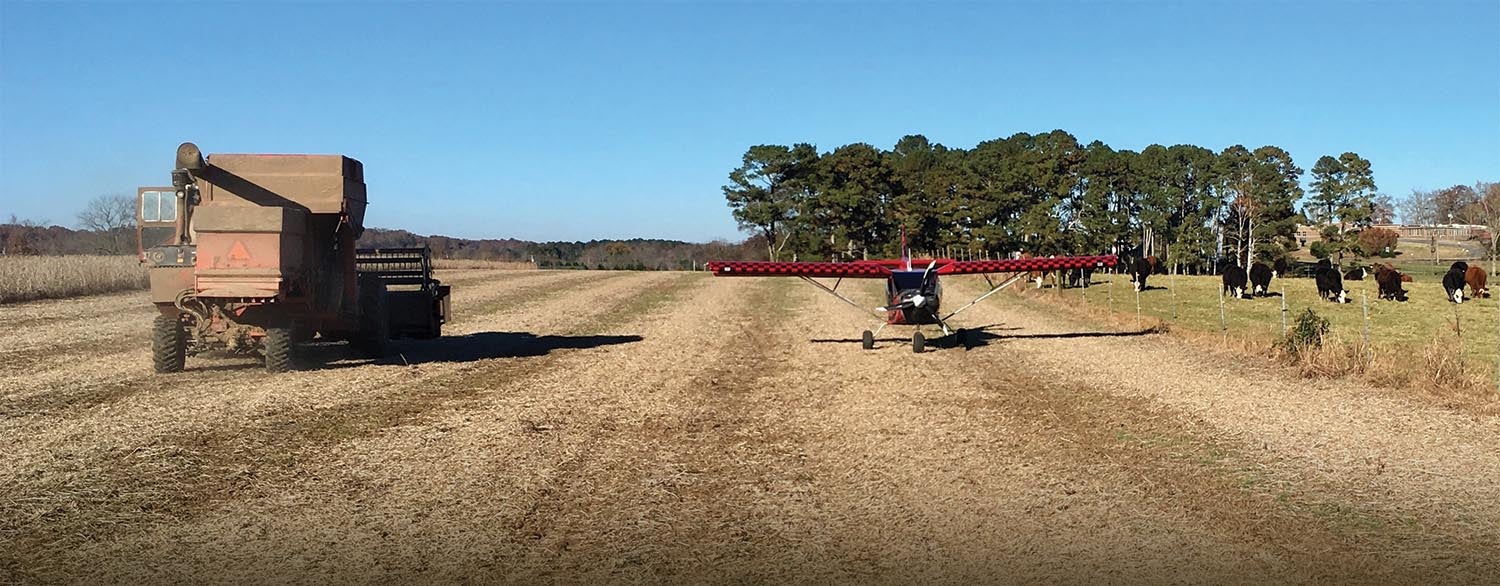
Our calving season on the farm also begins toward the end of December, so we are watching and taking care of a bunch of baby calves and feeding all our cattle for several months throughout the winter. The other change of seasons that is probably more related to airplane build time is the change of seasons in life. There is a distinct term for these homebuilt airplanes that some builders know all too well and which can be very fitting at times: the “metal mistress.” This is because building an airplane demands so much committed time that it often creates jealousy as it usually takes time away from family and relationships. Many builders experience this as they go through the end of a relationship during their airplane build. There are almost always many more factors that come into play with this situation, and I am not immune to it either. As I am wrapping up all the loose ends with coming out of a divorce, I am actually now looking forward to the “change of seasons” and what that can bring with the next chapters of my life. If I have any advice for builders on this topic, it would be: Pursue your passion while keeping priorities in line with your time management.

Back to Building
By now, you all know that I have some pretty serious goals with this 750SDX and all the cross-country/backcountry flying, camping and exploring that I plan to do with it. Of course, the first and biggest goal is successfully getting it completed and airborne. There have been several time gaps with the build due to many personal challenges with health, relationships, employment and proximity to the build, etc. I am now back home in Tennessee full time and am ready to make some serious progress on the 750SDX. I have been telling people for quite a while that I plan to have it flying in 2024.
That being said, it is time to focus on building. As always, even during the last few months of what seems like downtime with the build, I have been doing a lot of research on various components and ways to finish the current modifications professionally.
I have said it often: If you are building your first airplane, try to stick to the factory plans. Resist the temptation to heavily modify or customize the airplane. (Do as I say, not as I do!) And don’t modify key aerodynamic or structural items unless you absolutely know what you’re doing.
The CNC technology and final size match-drilled kits from Zenith Aircraft are becoming easier and easier to assemble. The best advice is to just build it and fly it! Modifications can add a lot of extra time to a build and may not result in the kinds of improvements you think they will.
I can provide my own counter-argument. My first Super701 build was almost completely stock and built to the factory plans and it has flown and performed amazingly well. The STOL CH 701 design, which is now several decades old, is still an excellent performer in its most simple and lightweight configuration. The simplicity and all-metal design make it a robust and long-lived plane, even when it is continuously exposed to harsh outdoor elements.
But I Can’t Resist
Still, builders love mods. The most common questions I get on my airplane builds revolve around the modifications I choose to do on them, so here is a brief rundown of each modification I am doing on the 750SDX.
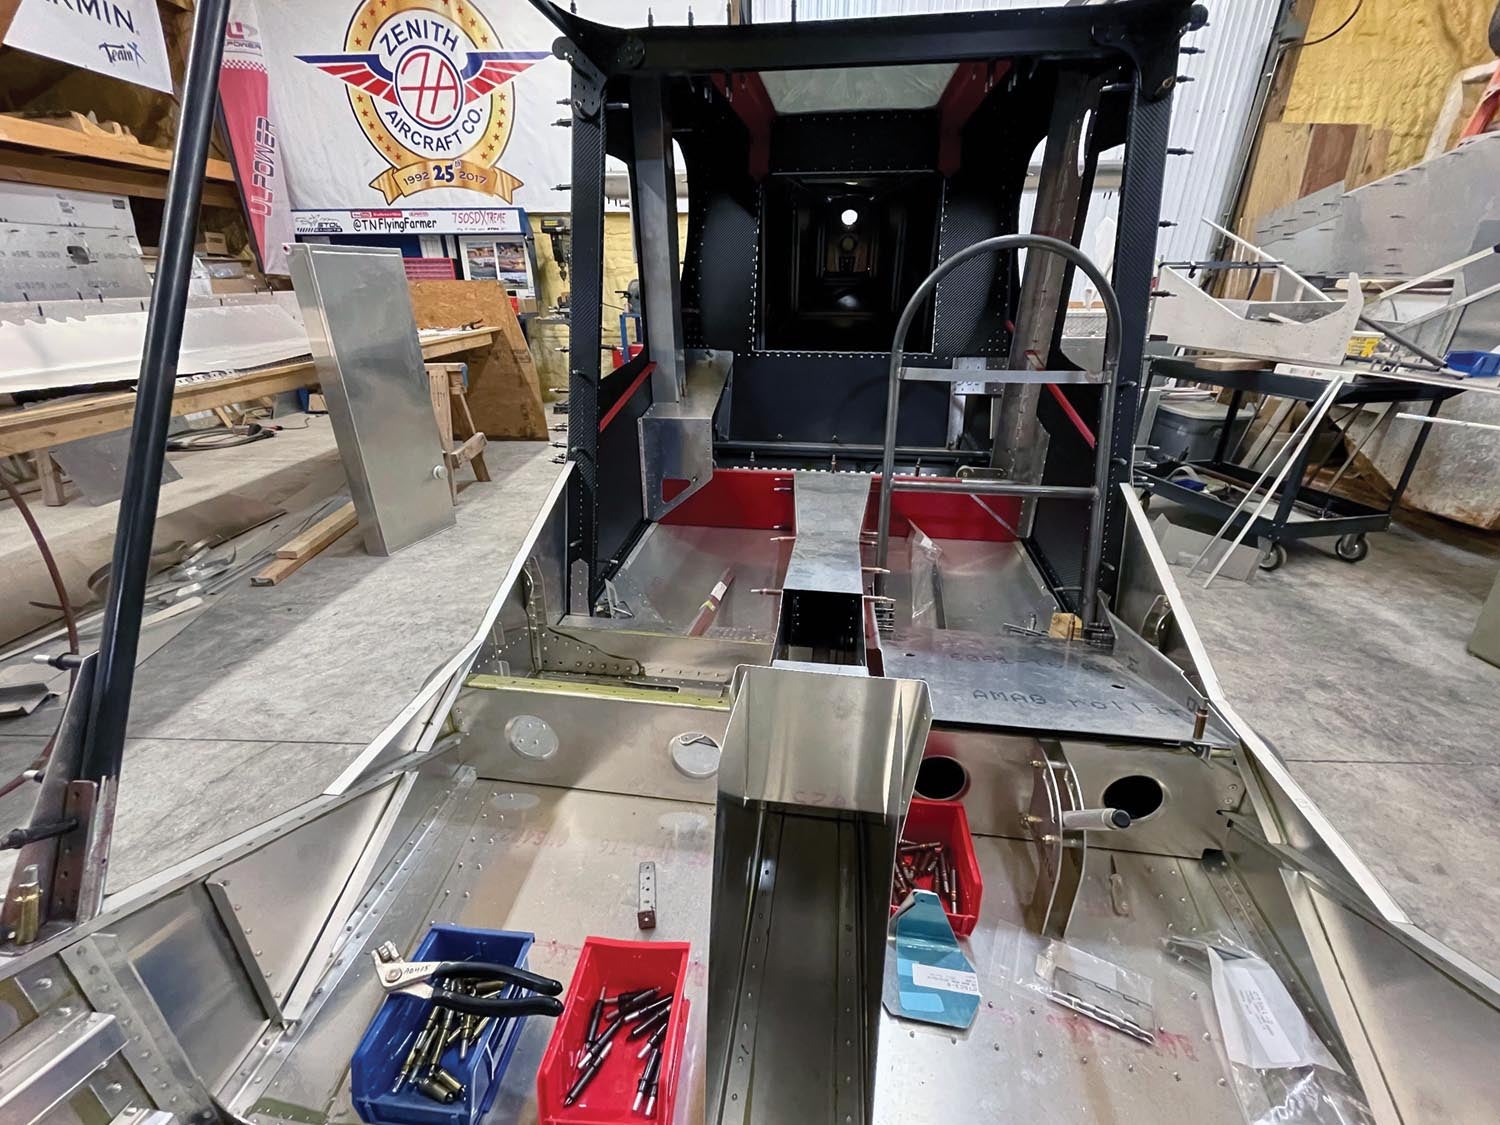
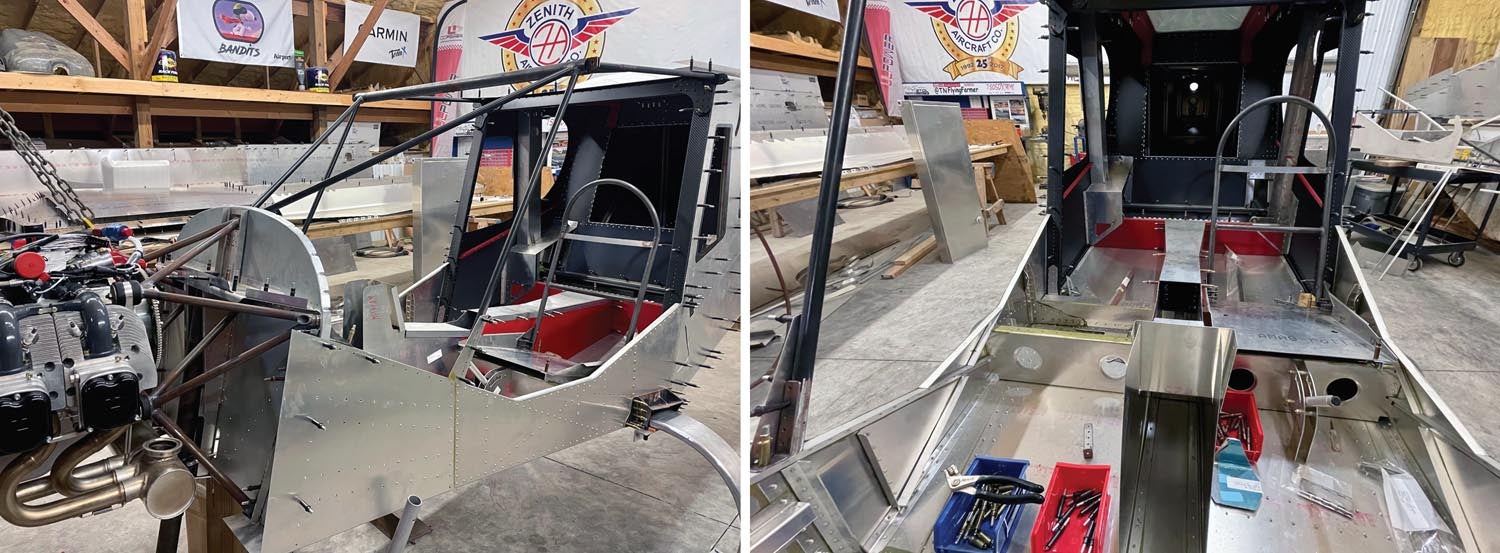
Rear fuselage access panel. I decided to move the horizontal access panel from underneath the airplane to inside the cabin on the vertical rear seatback. This modification took quite a bit of structural strengthening of the rear seatback/bulkhead. It is complete except for the final touch-ups and was discussed and shown in the second installment in this series (back in the September 2022 issue). I do not have a great reason for doing this modification except for cleaning up the bottom of the fuselage. Honestly, I may regret this one once I start doing maintenance in the rear fuselage with 100-hour inspections because it will be much more difficult to get in the back of the plane compared to the simple bottom panel. You will see more pictures of it as I get closer to completion with the fuselage and rigging.
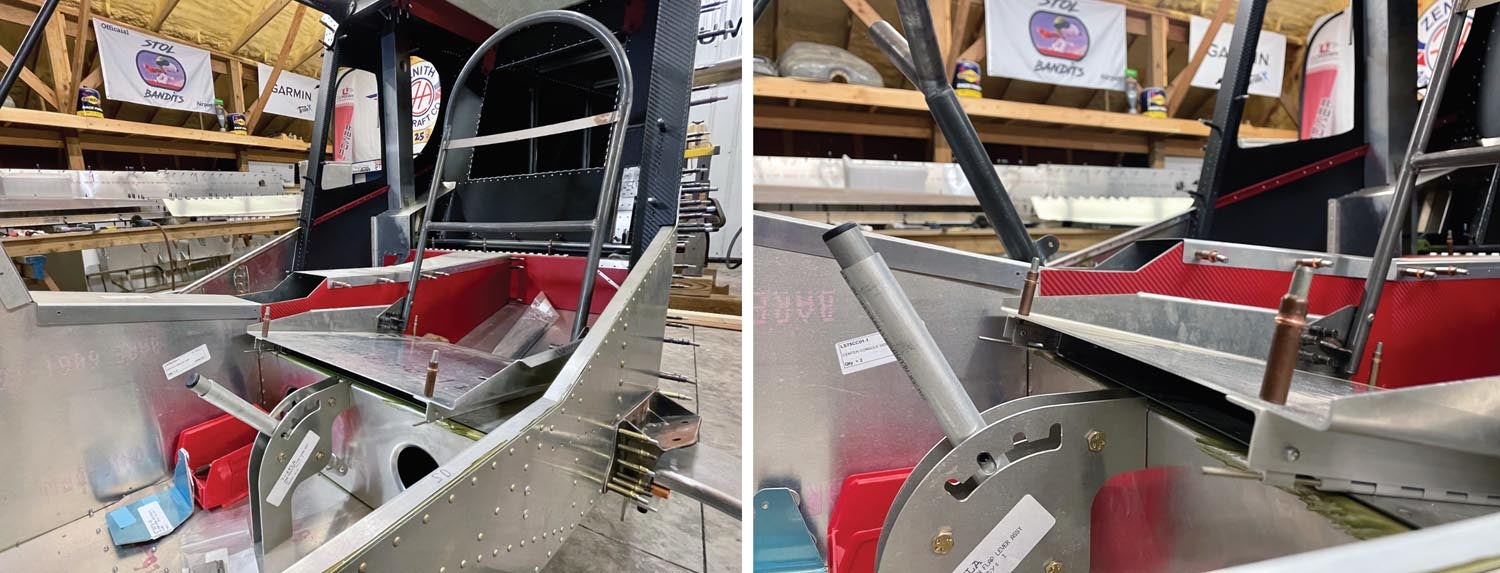
Manual flap control. The CH 750 Super Duty kits come with electrically operated flaps. I decided before even ordering the 750 SD kit that I wanted to build it with a manual flap control handle that matched the feel of my Super701. This modification also required quite a bit of engineering and work to bring the linkages across and through the center tunnel in the fuselage. It is complete except for making the pushrod that goes from the handle to the bellcrank underneath the pilot’s seat. I will wait until the wings are installed and final rigging is underway to complete this because I will need to double-check all the flaperon travel limits closely. A description and pictures of this manual flaperon control system appeared in Part 2 of this series (September ’22 issue).
Lightweight adjustable seat attachment system. I ordered the optional adjustable seat sliders but decided to create my own variation for adjustable seating because of the extra weight of the available sliders and the mission I have in mind for removing seats and/or replacing the passenger seat with a custom hold-down system for specific gear. This modification is discussed with more detail in Part 7 of this series (in the September ’23 issue).

Engine mount. While there is now an engine mount commercially available for the Zenith 750 SD/ULPower 520T engine combination, there is not yet an airplane flying with this engine. If you’ve been following this series, you know that my biggest modification and challenge so far has been the time-consuming custom engine mount, which was discussed in detail in Part 7 and Part 8 of this series (September ’23 and December ’23 issues).
The engine’s exhaust system will also have to be modified slightly to work with the very short engine mount because of how close the engine is to the firewall with my scratch-built engine mount. I have also been researching intercoolers with hopes of finding a good solution for placement and function with this ULPower 520 Turbo and the 750SDX combination.
Engine cowling. The next biggest customization will be the engine cowl. It will obviously have to be a completely custom (and probably a one-off) because of the unique positioning of the various engine components like the air intake, intercooler, ducting, etc. There is still a fair amount of work with the engine installation before the cowling work is ready to begin, but it’s generally on my mind as I walk around the project. Yet another reason to build your airplane “stock.”
Nose gear suspension strut upgrade. One of the most common concerns I hear from both pilots and builders of the Zenith airplanes is the lack of a good damping suspension for the nose gear. There have been several versions offered (both from the factory and aftermarket) including a bungee, a few varying heavy steel spring systems and the current puck system. None of the available systems offered good suspension damping, light weight and a robust install all in one package, so I have been working closely with a major shock/gear company to engineer and build a new nose gear for the Zenith 750 airplanes. We are wrapping up the details of the second prototype iteration and it looks amazingly promising and also offers an easy retrofit to the current setup.
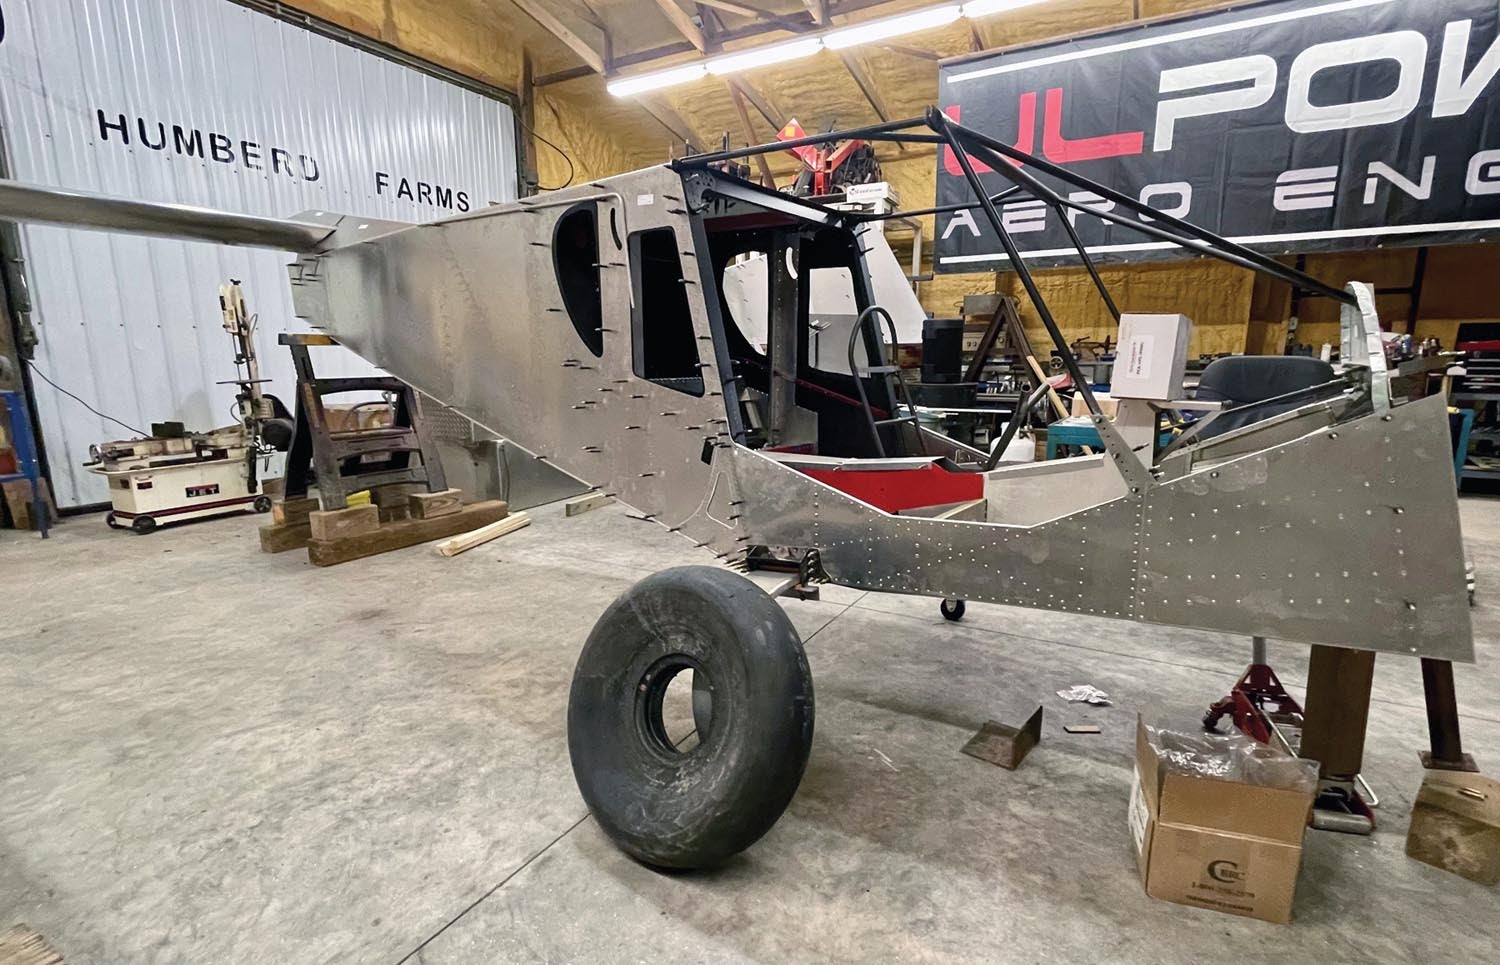
Beringer brakes and wheels. While I have been pleased with the Matco brakes and wheels included with the standard kit on my Super701, I have always liked the looks and have heard excellent things about the performance of Beringer brakes and wheels. I really wanted to give them a try on my 750SDX and I am currently working with Beringer to provide specs and details so we can develop a wheel/brake kit for the 750 SD that will be easy for anyone to purchase as an upgrade.
Instrument panel. The panels available through Zenith include a standard instrument panel, which can be the STOL panel or the Cruzer panel (slightly larger) depending on how much real estate/room you desire for your avionics. The other factory-available option that is gaining in popularity is the Unpanel system, which deletes the common stationary instrument panel completely and replaces it with a simple small panel mount (usually glass) that is attached to an arm coming from the firewall that can be articulated and positioned in front of either seat or centered. It can also be pushed forward and farther out of the way for even more clearance/visibility.
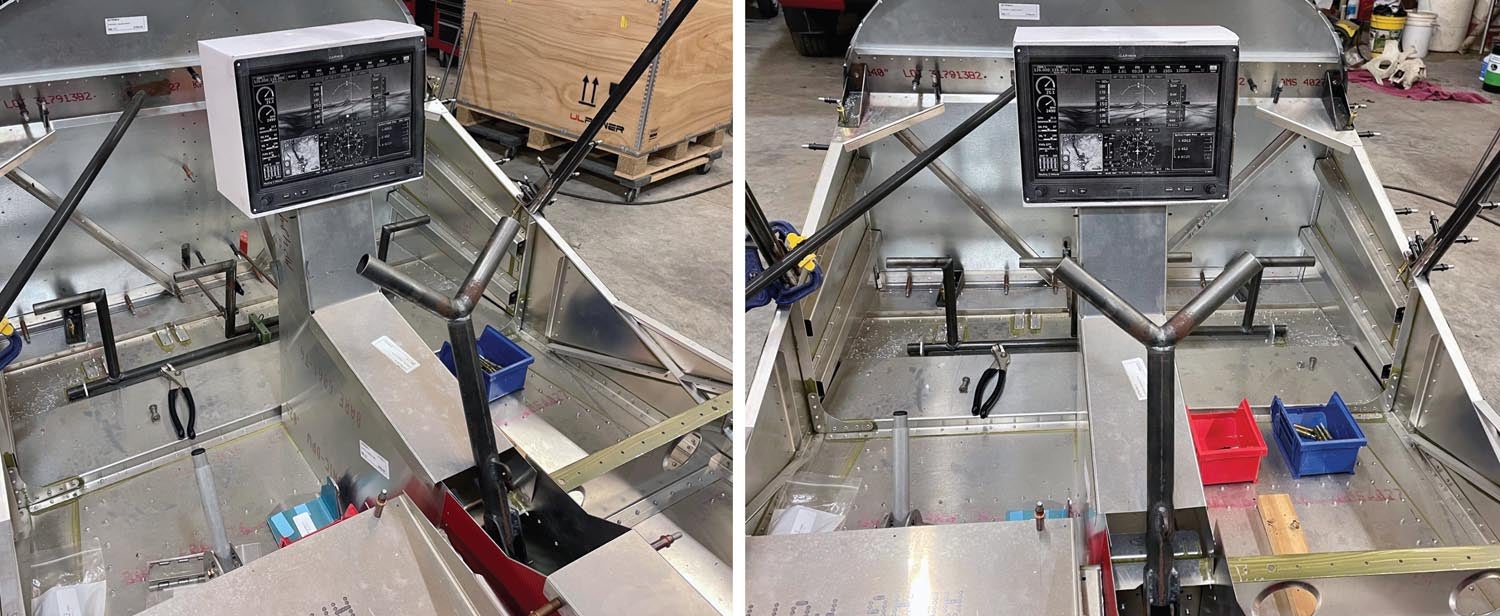
I like the Unpanel design and extra visibility it offers, but it is fairly heavy so I will be building a simple stationary instrument panel in the center of the cockpit for my 750SDX. Think helicopter instrument pod to get a basic idea of what I’m going to try to do. I have not begun my custom instrument panel yet, but by the time you are reading this, the rest of my Garmin avionics should be ordered and the thought, design and mockup process for it will begin soon.
Lightening modifications. All of these mods are using standard kit parts and involve lightening them with extra trimming, scalloping, and lightening holes. Take extra caution when modifying any structural components. This was discussed with a fair amount of detail in Part 5 of this series (April ’23 issue).
Airfoil modifications. I have been very happy with the performance of the STOL series of the Zenith airplanes. I do not expect to make any airfoil modifications other than possibly utilizing some custom-made horizontal tail fences similar to what I did on my Super701.
While I have several other possible performance modifications in mind, I do not plan to make or try them on this 750SDX. Instead, I will be saving them for my next build that is already partially underway: a highly modified and narrowed single-seat Zenith 701. (Sneak-peek photo in Part 1 of this series in the July ’22 issue.) The main reason for this is that I do not have all that much time logged in the 750 SD and that doesn’t allow me to really know how much difference the mods would make.
With well over 700 hours in several 701s, I have a pretty good feel for the performance and handling of the light STOL CH 701 and I will be able to readily notice the capability and performance differences of the modifications. The main fuselage structure is almost completely finished, but I put the highly modified 701 project on hold once I got far enough along with the 750SDX to order the ULPower 520 Turbo engine. The 701 will be a main focus again once the 750SDX is in the air, so stay tuned for that unique project too.
It is now time to evaluate the next best steps for making good progress with the 750SDX build. That is one of the disadvantages of having several components under construction simultaneously. When you build one piece at a time, you can finish it and store it until final assembly, but when you have multiple pieces in the works and there is a gap in the building, it is more difficult to just pick up where you left off and get going again. I’m going to show you that it is possible though, so until next time, happy building!
Videos of Humberd’s builds—and some of the fun that can be had with flying a STOL airplane—can be found at www.youtube.com/@TNFlyingFarmer.
![Coming in for a landing at Humberd’s Farm [All Images Credited to Jon Humberd]](https://www.kitplanes.com/wp-content/uploads/2026/07/9-1.jpg?w=218&h=150&crop=1 "Overcoming Setbacks on the Zenith 750SD Xtreme")
![[Credit: Zenith Aircraft Company]](https://www.kitplanes.com/wp-content/uploads/2026/06/31142685469.jpg?w=218&h=150&crop=1 "Zenith Throws Open Its Doors for “Fly-In to Summer”")
![Members of the North Idaho High School Aerospace Program gathered at KSZT [Credit: North Idaho High School Aerospace Program]](https://www.kitplanes.com/wp-content/uploads/2026/02/IMG_3499.jpg?w=218&h=150&crop=1 "North Idaho High School Student ACES Fly the Aircraft They Built")


