Back in September 2019, we looked at the process of evaluating a troubled engine to determine just how much work it was going to need to get it back in the air. The big question for the owner was: Do I overhaul the engine as per the Lycoming Direct Drive Overhaul Manual and replace parts as per Lycoming SB 240W (and similar Superior publications), or do I repair and replace parts as necessary (IRAN) and forego the ability to call it an overhaul?
Overhaul vs. IRAN Decision
At first, the decision to go ahead and perform a major overhaul seems simple enough. Wouldn’t it be worthwhile to be able to say the plane has an engine with zero hours since major overhaul (SMOH)? While it is obviously worth something, the question is: Does it add enough value to offset the cost?
That answer is not so obvious. As you may recall, the engine in question has 281 hours total time since new (TTSN). The difference in value of an airplane with a 300-hour engine versus a newly overhauled engine is not very much. But the cost difference turns out to be several thousand dollars. The main benefit of the overhaul is that when you go to sell the plane you can simply say the engine had a lot of rust in it so we overhauled it. On the other hand, the IRAN decision means you will have to explain why you didn’t follow the overhaul guidelines and only replaced certain parts.
So why is there such a big added cost for the overhaul? Keep in mind that a 300-hour engine is not exactly worn out. That includes all of the accessories such as magnetos, fuel pump, alternator, ignition wires, and fuel-injection system. If there is no corrosion damage, these parts are in almost-new condition. Just overhauling the magnetos alone would contribute $1400 to the engine overhaul cost. With the IRAN decision comes the ability to get another 200+ hours out of these parts. Most people would not overhaul cylinders when doing an engine overhaul; they would replace them, though this is not a requirement. All of these things add up.
As it turns out, the list of replacement parts in a corroded engine is based almost entirely on the extent of the corrosion. This leaves a few items to possibly keep as is—but in the case of this engine it turned out to be very few. In fact, many items had to be replaced that would not normally require replacement in a more typically worn out engine.
In the end, the owner decided to do a complete overhaul using bored out and reconditioned cylinders. This seems like a good compromise under the circumstances. When this owner bought the aircraft, a sale price was negotiated based on the assumption that a lot of work would be required to make the engine airworthy again. No one was under any illusion that the plane would be flyable any time soon.
The Ravages of Corrosion
For those of you who missed the first article, we should probably review how we got here. When the owner purchased this RV-6A, he knew it had been sitting for a long time with very little flight time over several years. Corrosion was high on the list of potential problems as he began the pre-buy inspection. A borescope exam showed a lot of rust in the cylinders.
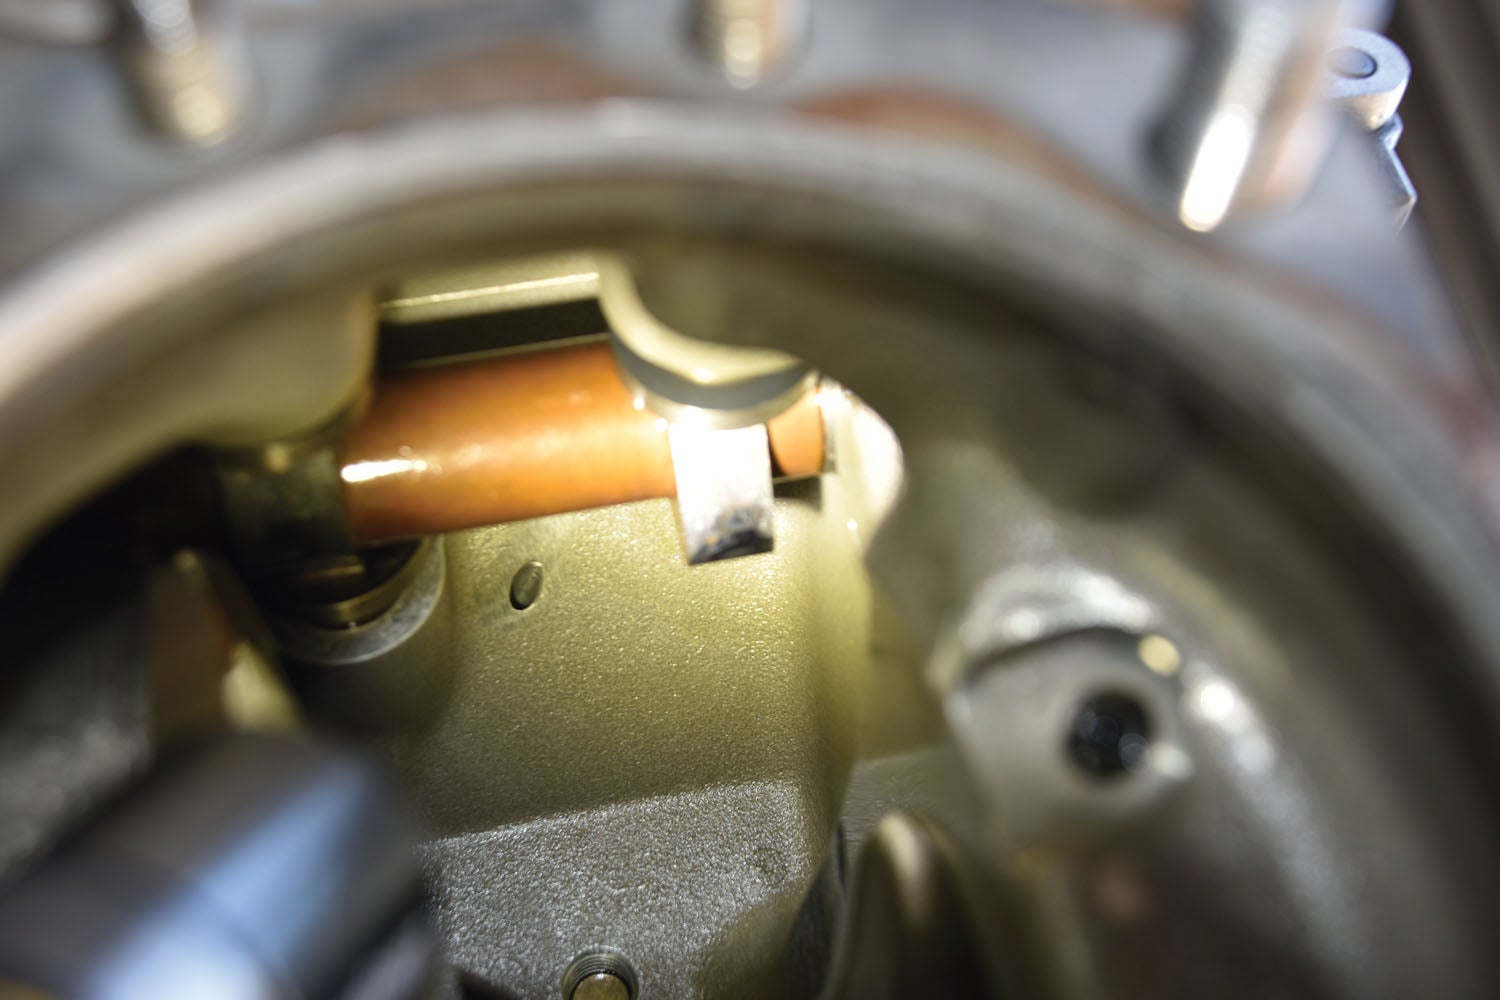
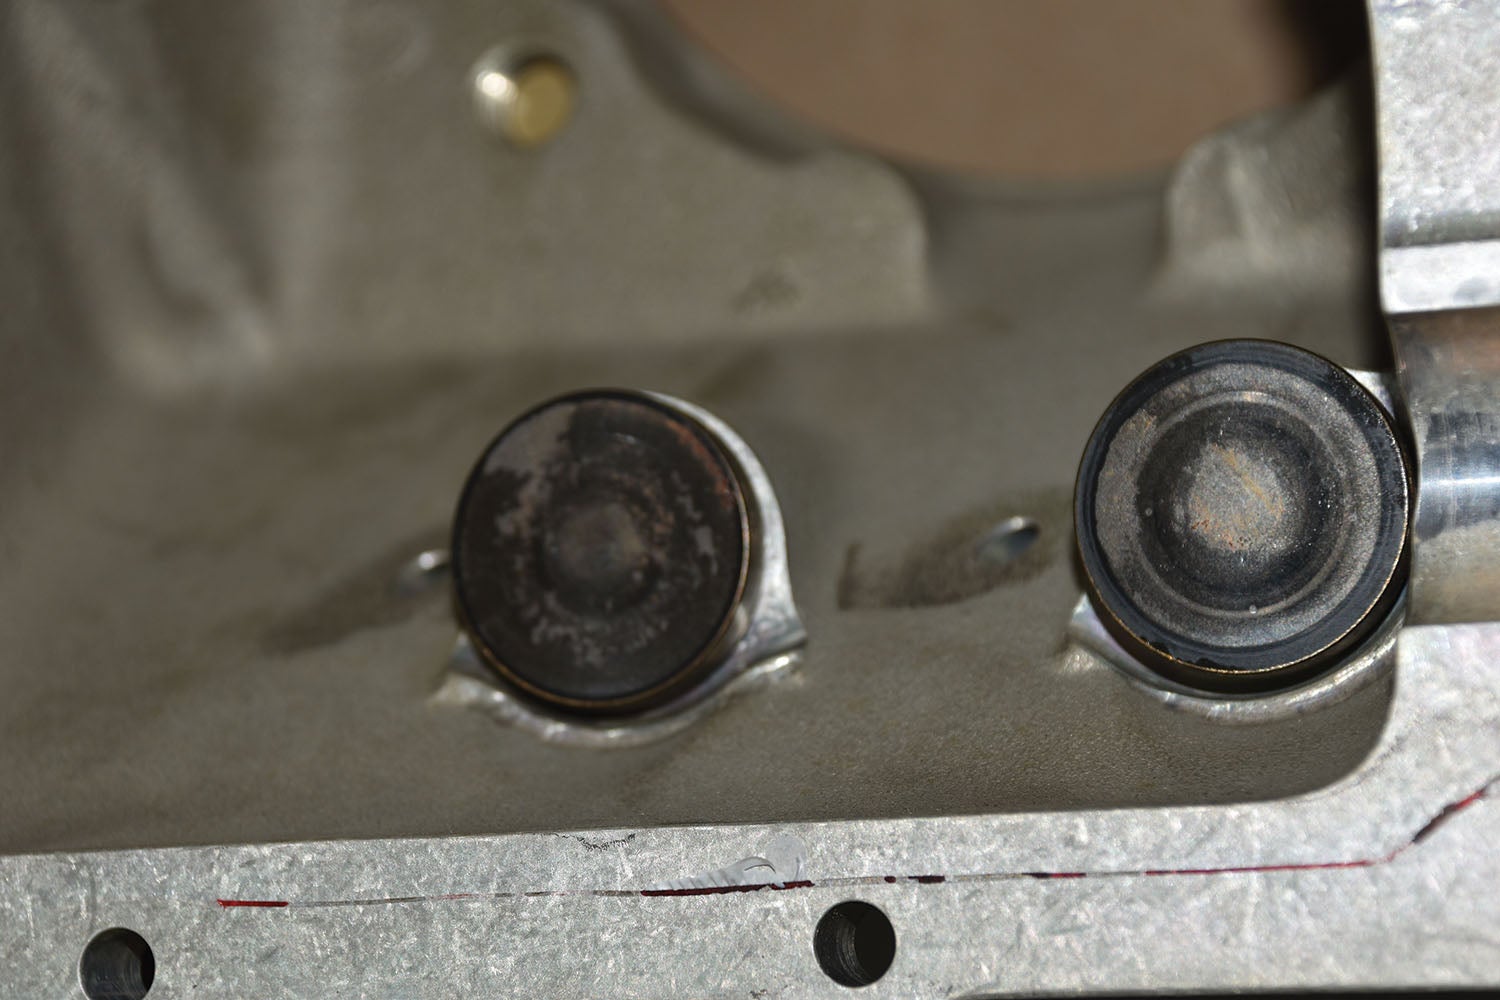
After the purchase, as the physical inspection proceeded, the goal was to not be any more invasive than necessary until the scope of the corrosion damage was clear. This began with the process of carefully removing each cylinder, installing a torque plate, and checking the cam and lifters visible at each removed cylinder location. The extra care was exerted in the hope that the engine cases would not need to be split apart. This proved to be wishful thinking, but a prudent course until more information was known made sense. It didn’t take long to see that the cam and lifters were seriously damaged by corrosion. From there it was off to the engine shop for a complete teardown.
The Process
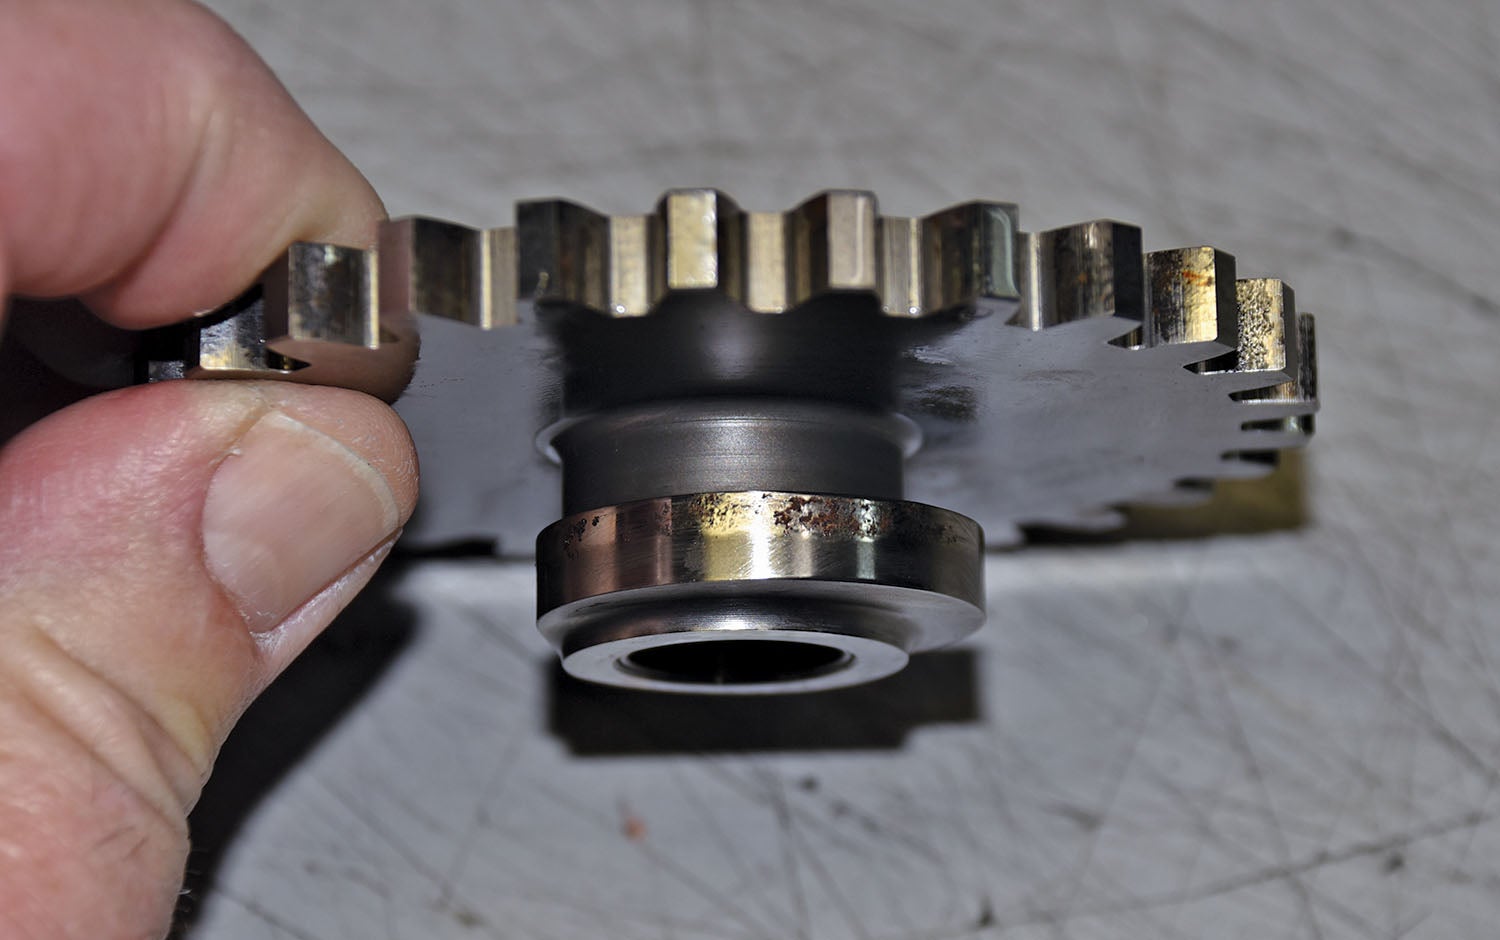
The valve covers, rocker arms and pushrods were removed. The pushrods were heavily corroded, so out they went. This is a rare cost to bear on a normal overhaul. As the case came apart, there was corrosion on the drive gear to the fuel pump, too. These accessory drive gears are rarely replaced, but this one showed clear signs of pitting. These little gears are expensive, or at least they seem so for such a small part. The crank and rods looked good, so they were set aside for Magnaflux inspection.
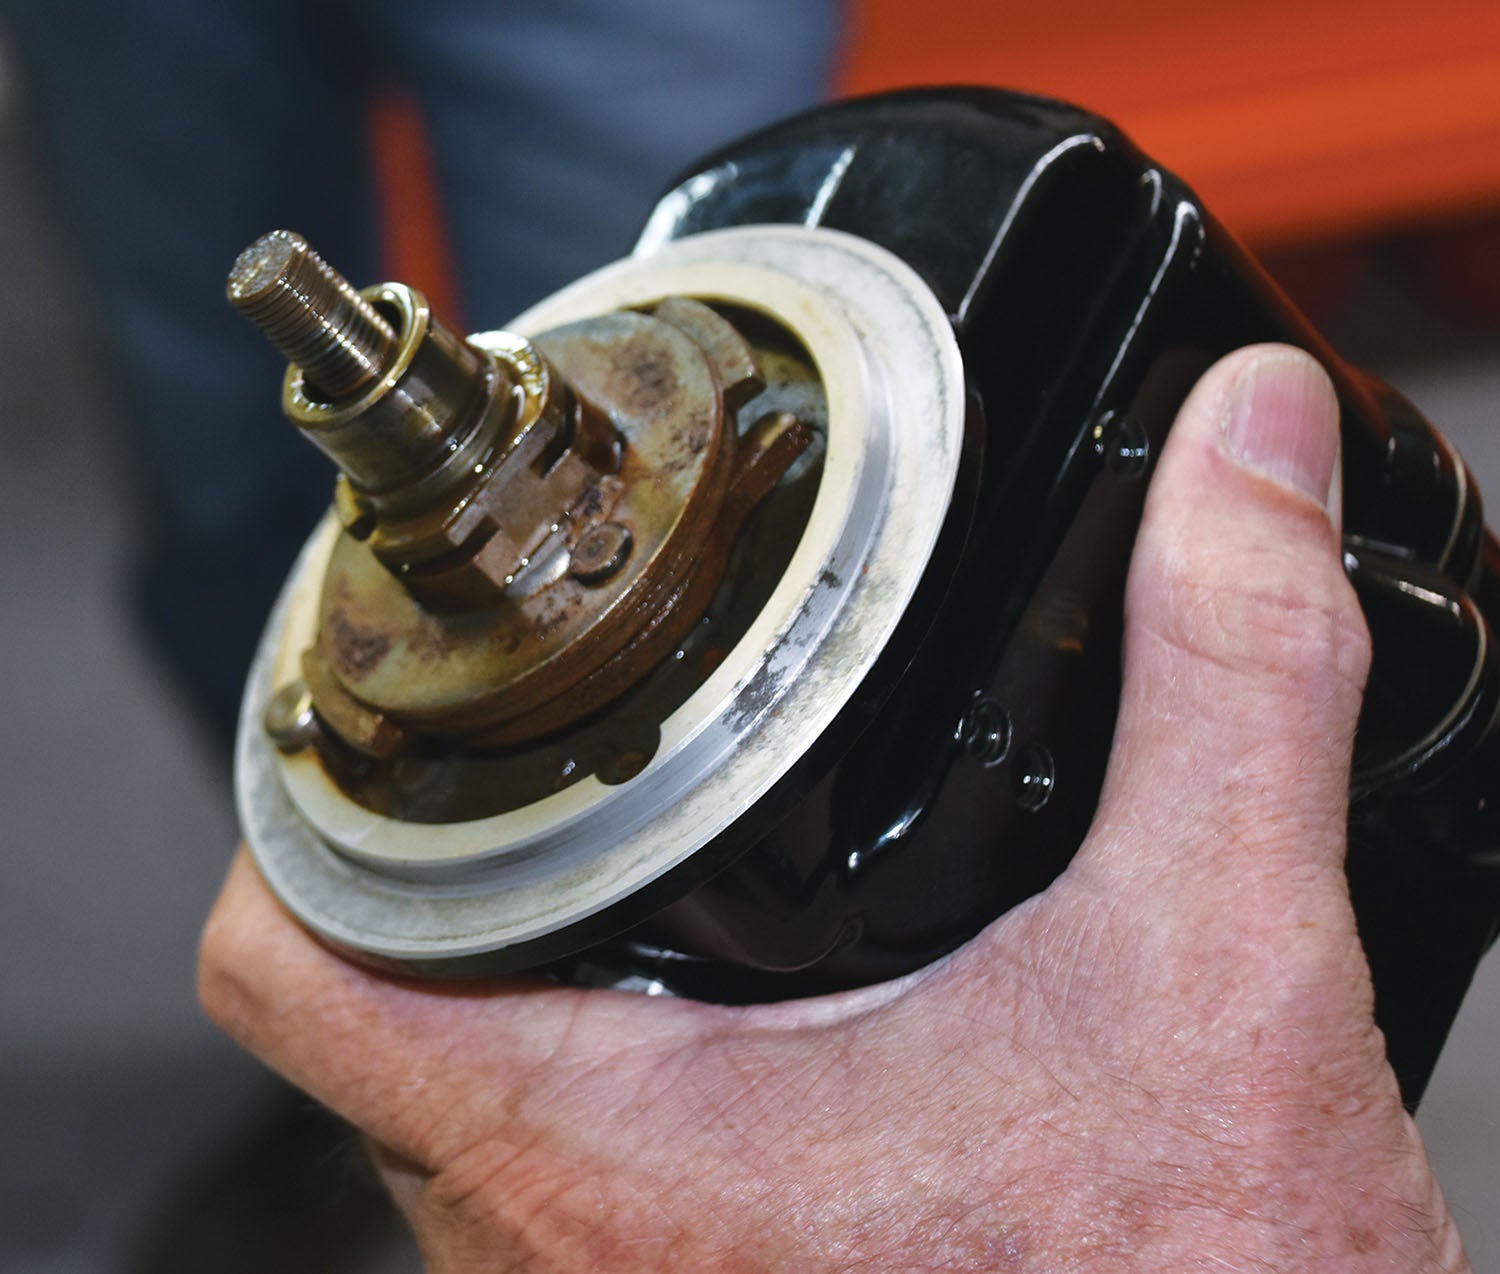
A big surprise was the amount of corrosion on the impulse couplers on both magnetos. Yes, this Superior engine had two magnetos with impulse couplers instead of the more typical one with and one without. Both mags went over to Aero Accessories for 500-hour IRAN inspection and cleanup. So much for saving money by not overhauling all of the accessories.
The alternator got the boot when the owner discovered that it was an internally regulated Nippondenso unit. A new B&C alternator with an external regulator and over-voltage protection took its place. This was an upgrade rather than an overhaul decision. The old fuel pump also got replaced with an overhauled unit. In the end, the only accessory to escape replacement or overhaul was the starter.
With all the damage that this engine had, you would think it had been sitting half in and half out of the ocean for a few weeks, but that was not the case. This was the result of several years of almost no flying and no effort to preserve the engine when it was sitting. This is what can happen to a plane that doesn’t fly. If you buy an airplane like this one that has had little or no flying in several years, don’t be surprised if you find the same thing. Of course, a dry desert climate will be more forgiving of such neglect, and a moist climate, especially one near salt water, will be even harder on an engine.
The Overhaul Process
For those who have not been through this drill before, it might seem that the overhaul process should be pretty straightforward, with an easily determined price. Unfortunately, this is not the case. Many questions come up that have a big impact on the price. Can major parts such as the crankshaft, camshaft, and engine cases be used as is, do they need to be repaired, or do they need to be replaced? Each of these items costs thousands of dollars.
Many Lycoming crankshafts must be replaced at the time of overhaul as per a Lycoming service bulletin. This was a Superior engine, so that was not a concern, but for many owners it could be. While the owner of an Experimental/Amateur-Built aircraft could choose to ignore this requirement (or not, depending on the language in the plane’s operating limitations), it would be hard to find a reputable shop that would overlook this requirement. The same applies to other components that may be subject to Airworthiness Directives or Service Bulletins.
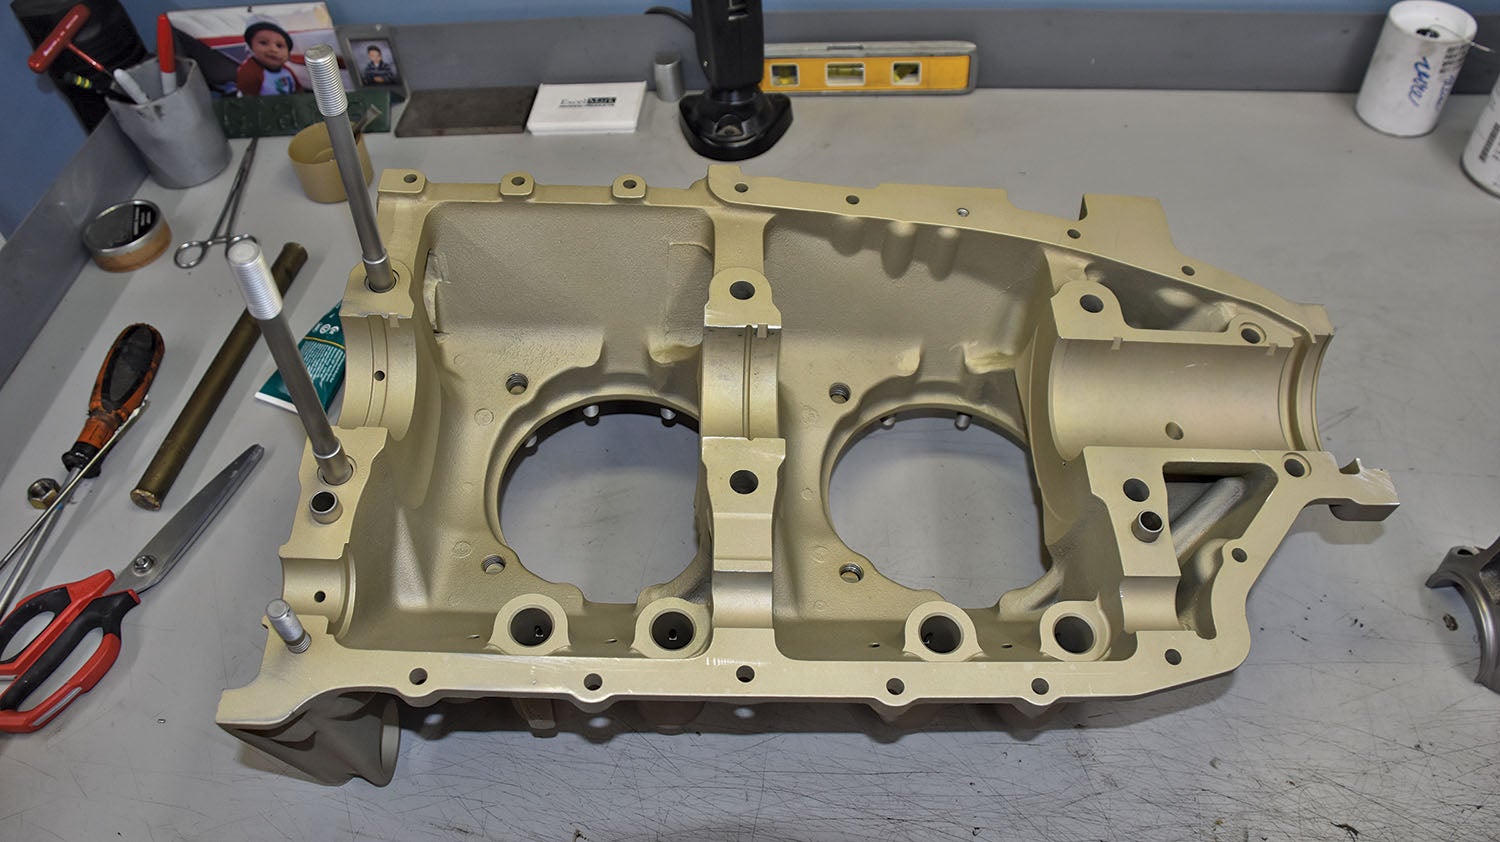
Many shops will quote a preliminary estimate for an overhaul, based on reusing the cam and lifters, but the truth is many engines need to have these items replaced at a cost of around $2000 for a four-cylinder engine. Cases typically need rework at overhaul time, but sometimes they have cracks that need welding or may be so severe that the case needs to be replaced. The inspection is covered in the overhaul estimate, but repair or replacement seldom is unless it is known in advance. The last replacement item is cylinders.
Most shops do not want to rebuild cylinders that have 2000 hours on them, the typical overhaul time. This is because the aluminum cylinder heads fatigue over time and will eventually crack. Replacement cylinders should be covered in the overhaul price unless the existing cylinders have less time on them than the rest of the engine. This is a judgment call. New cylinders run $1200 to $1500 each, with an overhaul of a cylinder running about half that.
With our RV-6A engine, the cylinders had less than 300 hours on them, so overhauling them made a lot of sense. However, they did need to be bored out to 0.010-inches oversize to clean up the rust. This, in turn, required new oversized pistons and rings. The crankshaft checked out fine and could be reused with no machine work, as did the cases. This saved some money but would not be a normal thing in most overhauls.
Bottom Line
The bill for all of this work came to about $16,000, which is not a bad deal considering what had to be done. The owner also chose to overhaul the fuel-injection servo because of how long it had been sitting. The engine mounts were also sagging, so that added another $700 to the cost including new bolts.
The worst part of the overhaul, next to the cost, is the time it takes to complete it. Small shops where the owner does all of the final assembly can only turn out the work so fast, especially when there are a dozen engines in line ahead of you. Some of this is because of outside work, such as inspections and possible rework of components, and some of it is just waiting for parts. But some of it is just waiting in line for your turn. Don’t be surprised if it takes two or three months to get your engine back from a busy shop.
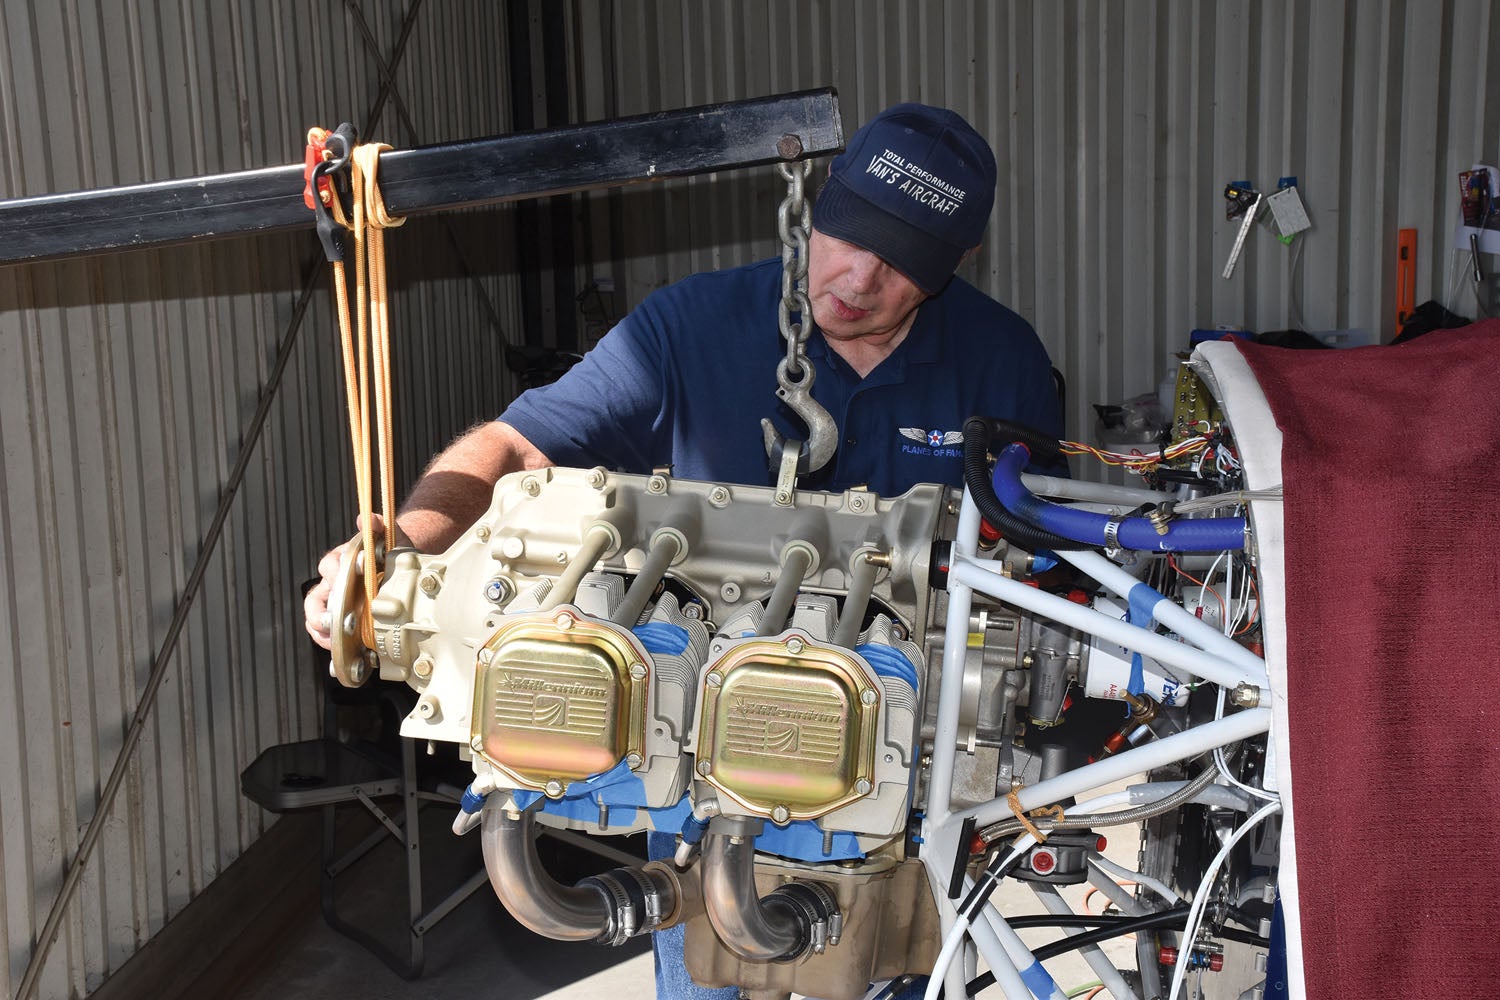
Installing the Overhauled Engine
While waiting for the engine shop to do its work, there was time to tidy up the firewall. Some penetrations needed to be modified to make them safer, others just needed a new coat of 2000° sealant that was showing signs of age. The owner wisely took advantage of the improved work space (produced by the engine being out) to take care of these items and just clean everything up.
While he had time on his hands, he decided to add an Anti Splat nose-gear stiffener (aka Nose Job) and Lip Skid. These are designed to help prevent nose-gear collapse in the case of a nosewheel landing or rough-field work. These products have gained some popularity among RV owners. New brake lines, a parking brake, and sealed wheel bearings also got installed during the down time. That’s what happens when engineers sit around with nothing else to do.
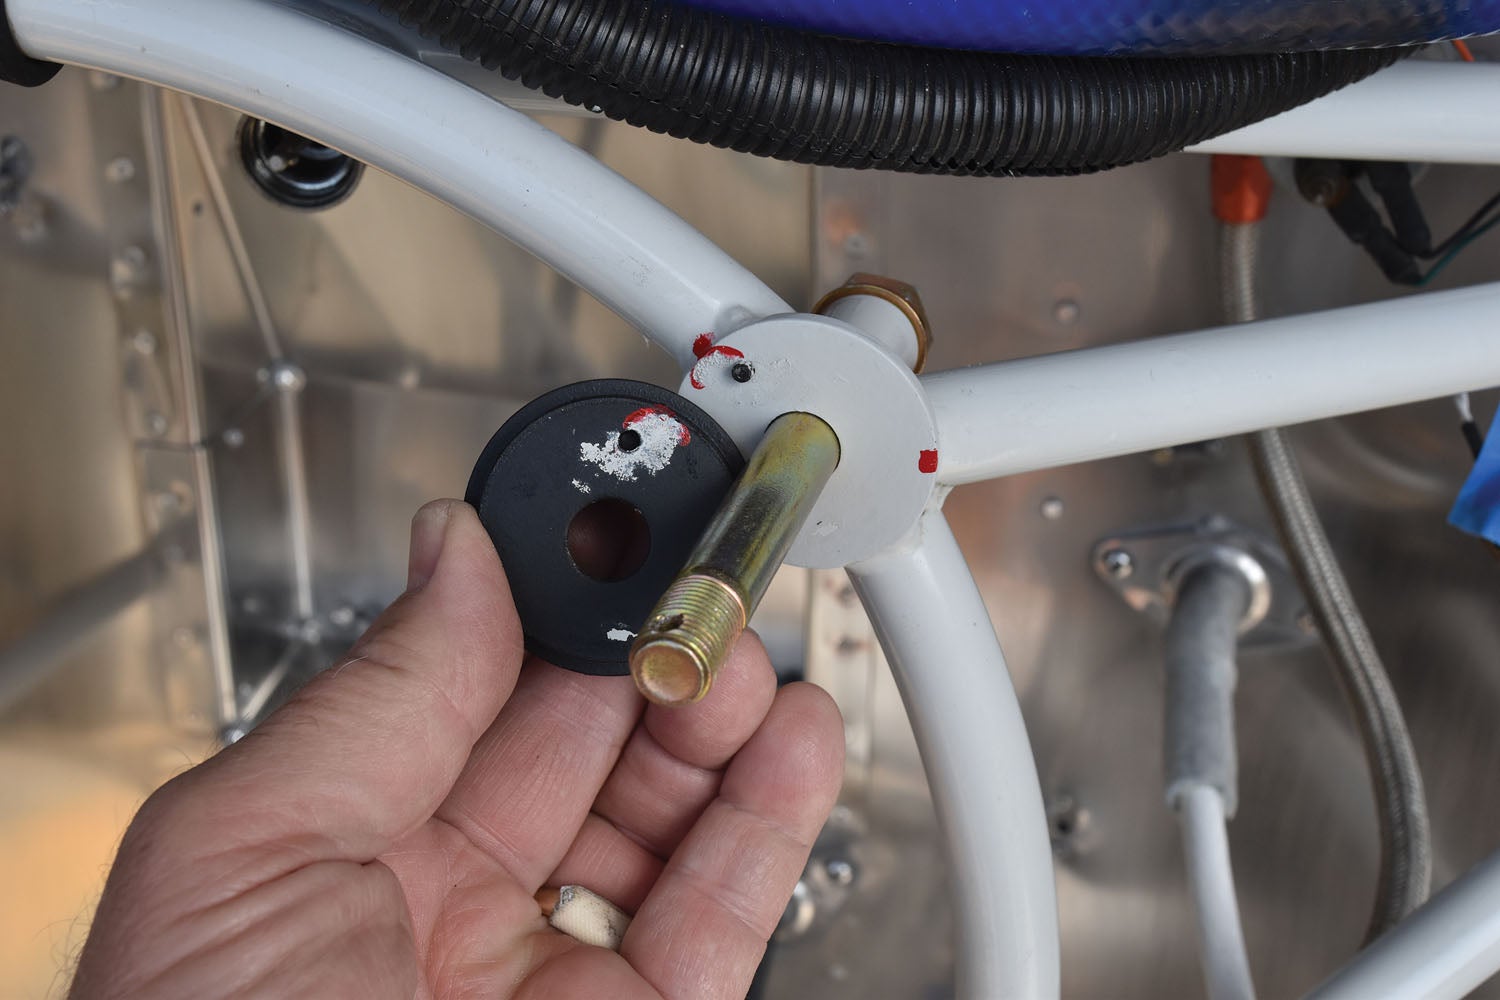
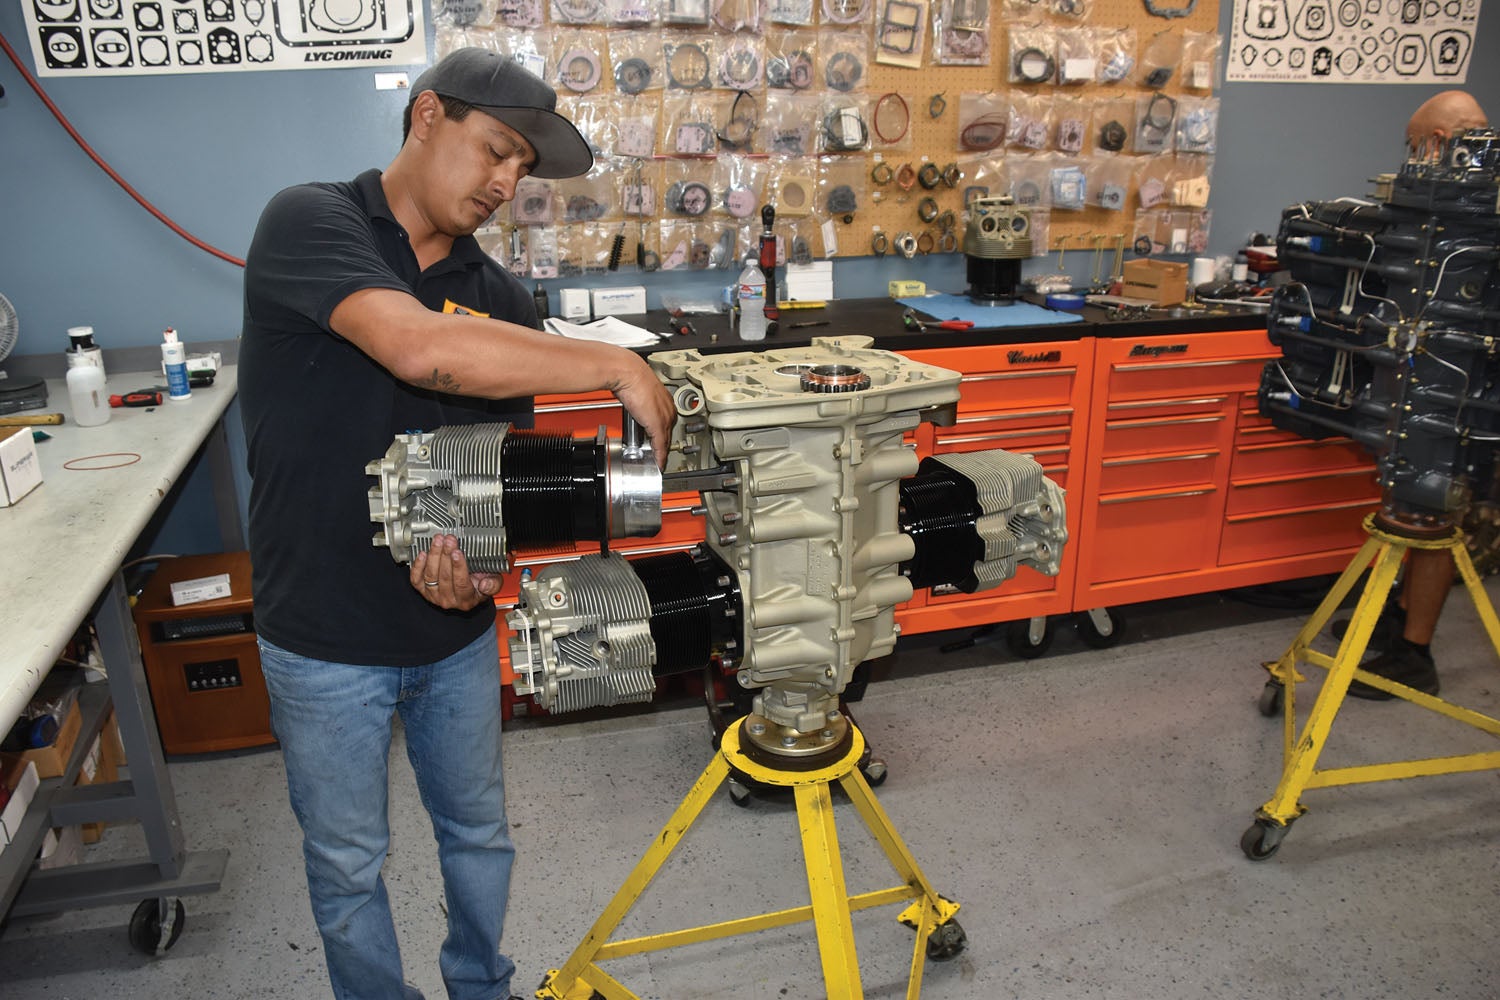
With all of the preparation out of the way, it was time to hang the newly refurbished engine back on the airplane. This required removing the left magneto due to clearance issues, but was otherwise straightforward. One difference seen with this plane was the use of conical engine mounts. We rarely see conical mounts except on old engines, but the original builder ordered the engine that way from Superior. The advantage of the conical mount system is that it limits engine movement, something that can be important in a closely cowled engine. This is not normally seen as an important issue with the RV-6A, but that was the builder’s preference. The downside to conical mounts is their tendency to transmit more vibration to the airframe.
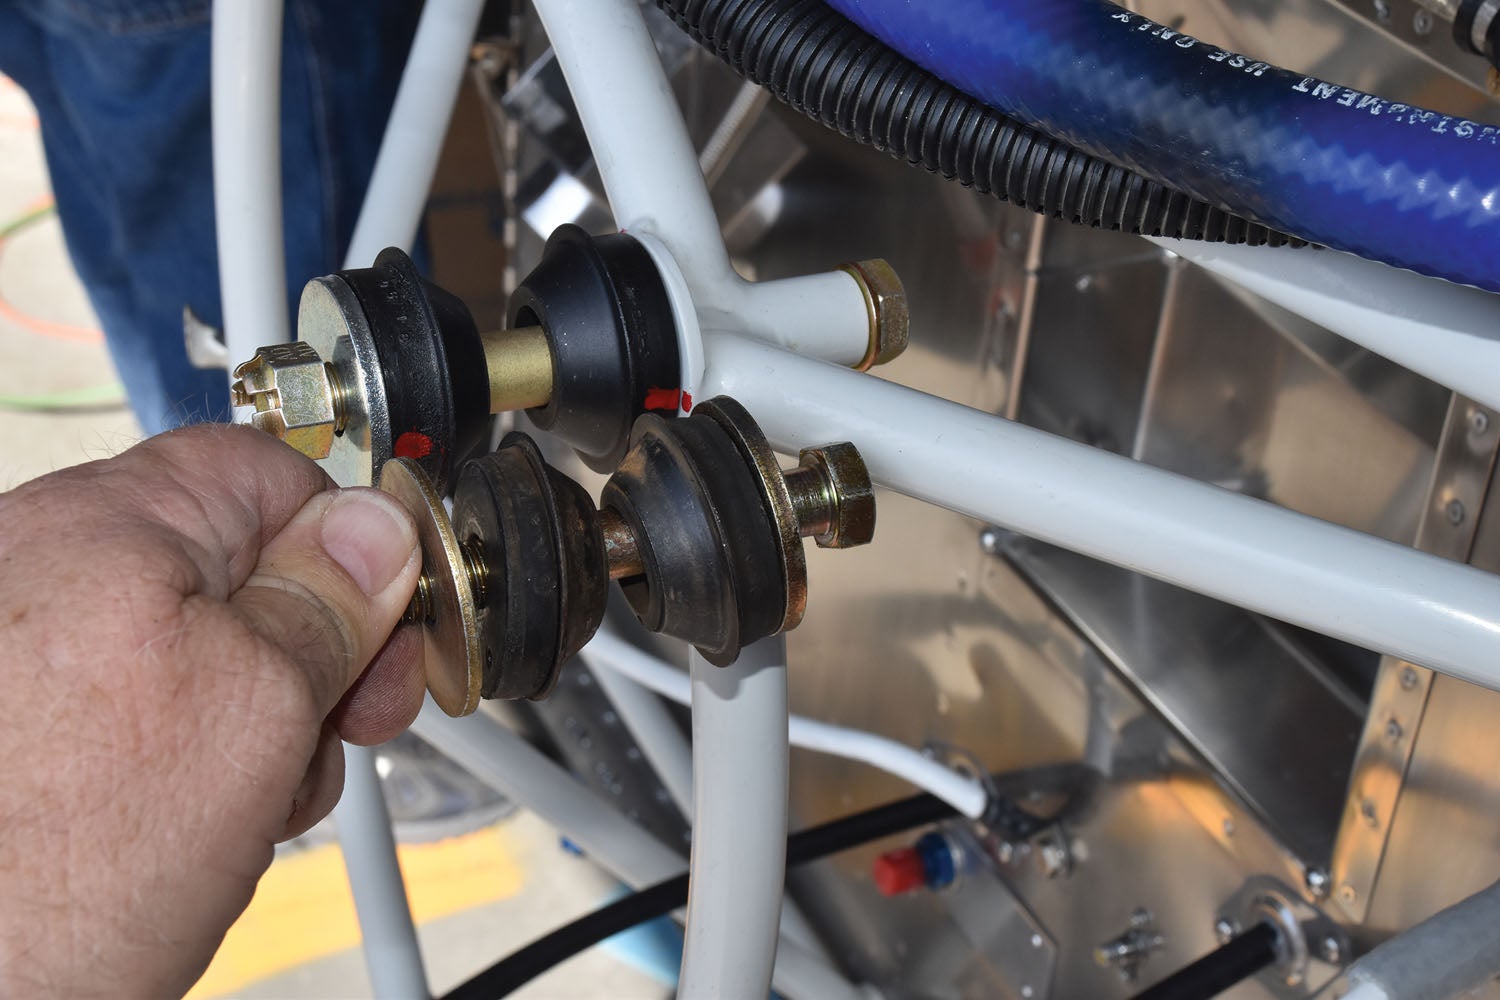
The conical mount vibration issue was at least partly addressed by using some sophisticated (expensive) engine-mount bushings. These mounts require a specific orientation that is maintained by some roll pins installed into the engine mount and lock into the back side of the bushings.
The rest of the installation went smoothly with no surprises, except for the intake air box that needed a little tuning up. As this is written, the owner is making some adjustments to the cowl to better align the intake with the air box, but otherwise it is ready to fly.
The engine will be filled with non-detergent (mineral) oil for the break-in period. This should remain until oil consumption has stabilized, usually after 10 to 25 hours. During this time, the engine should be run at fairly high power settings (65-75% power), and engine temperatures should be monitored closely. Although a return to Phase I is not required for an engine overhaul, it is prudent to set aside a flight-test period of at least a few hours to be sure everything is working properly and that there are no leaks.
Conclusion
We can take a few lessons from this story. One, as the song says, rust never sleeps. Corrosion is always a concern with steel parts that are not protected. The best way to stave off corrosion in an airplane engine is to fly it regularly or preserve it properly when it will be left unflown for 30 days or more. More rigorous measures are obviously called for in damper climates.
When purchasing a used plane that has not flown much, you should not get seduced by a low total time number. Lycoming lists a TBO for most of its engines as 2000 hours or 12 years, because time is every bit as much the enemy of long engine life as hours of use—in many cases more so. Finally, the cost of an engine overhaul is not only measured just in dollars but also in time.
This owner got a discount of about $20,000 off the normal price when he bought this airplane, but by the time the overhaul cost was added to months of insurance and hangar rent, not to mention his personal time, the discount he got was just about a break-even proposition. He is still happy with the deal he made, but he had to work for that discount.
![[Credit: Wikimedia Commons]](https://www.kitplanes.com/wp-content/uploads/2026/07/4_rutan_a_longez.jpg_preview.jpg?w=218&h=150&crop=1 "Rutan Symposium Turns to the Coming Canard Maintenance Crisis")
![[Credit: Lisa Turner]](https://www.kitplanes.com/wp-content/uploads/2026/02/Fuel-Selector.jpg?w=218&h=150&crop=1 "Fuel Follies")


Great information. I’m looking at buying a Mooney M20E and this was very educational.
Comments are closed.