I was climbing out from my home base airport in Chino, California. I noticed that the fuel pressure was quite a bit less than its usual 5-6 psi—this is, obviously, a carbureted installation. The engine was not running quite right, but I was still climbing out at a respectable rate. It is always unnerving to have anything unusual happen during initial climb out, so I returned to the airport. I ran the plane up on the ground, even a full-power runup, and things seemed OK. I took off again and the same problem appeared. Not wanting to press my luck any farther, I returned to the hangar. Back in the shop I went through the entire fuel system. Everything looked fine—fuel filter clear, gascolators clear, tanks were full. It had to be the fuel pump.
Removing the Fuel Pump
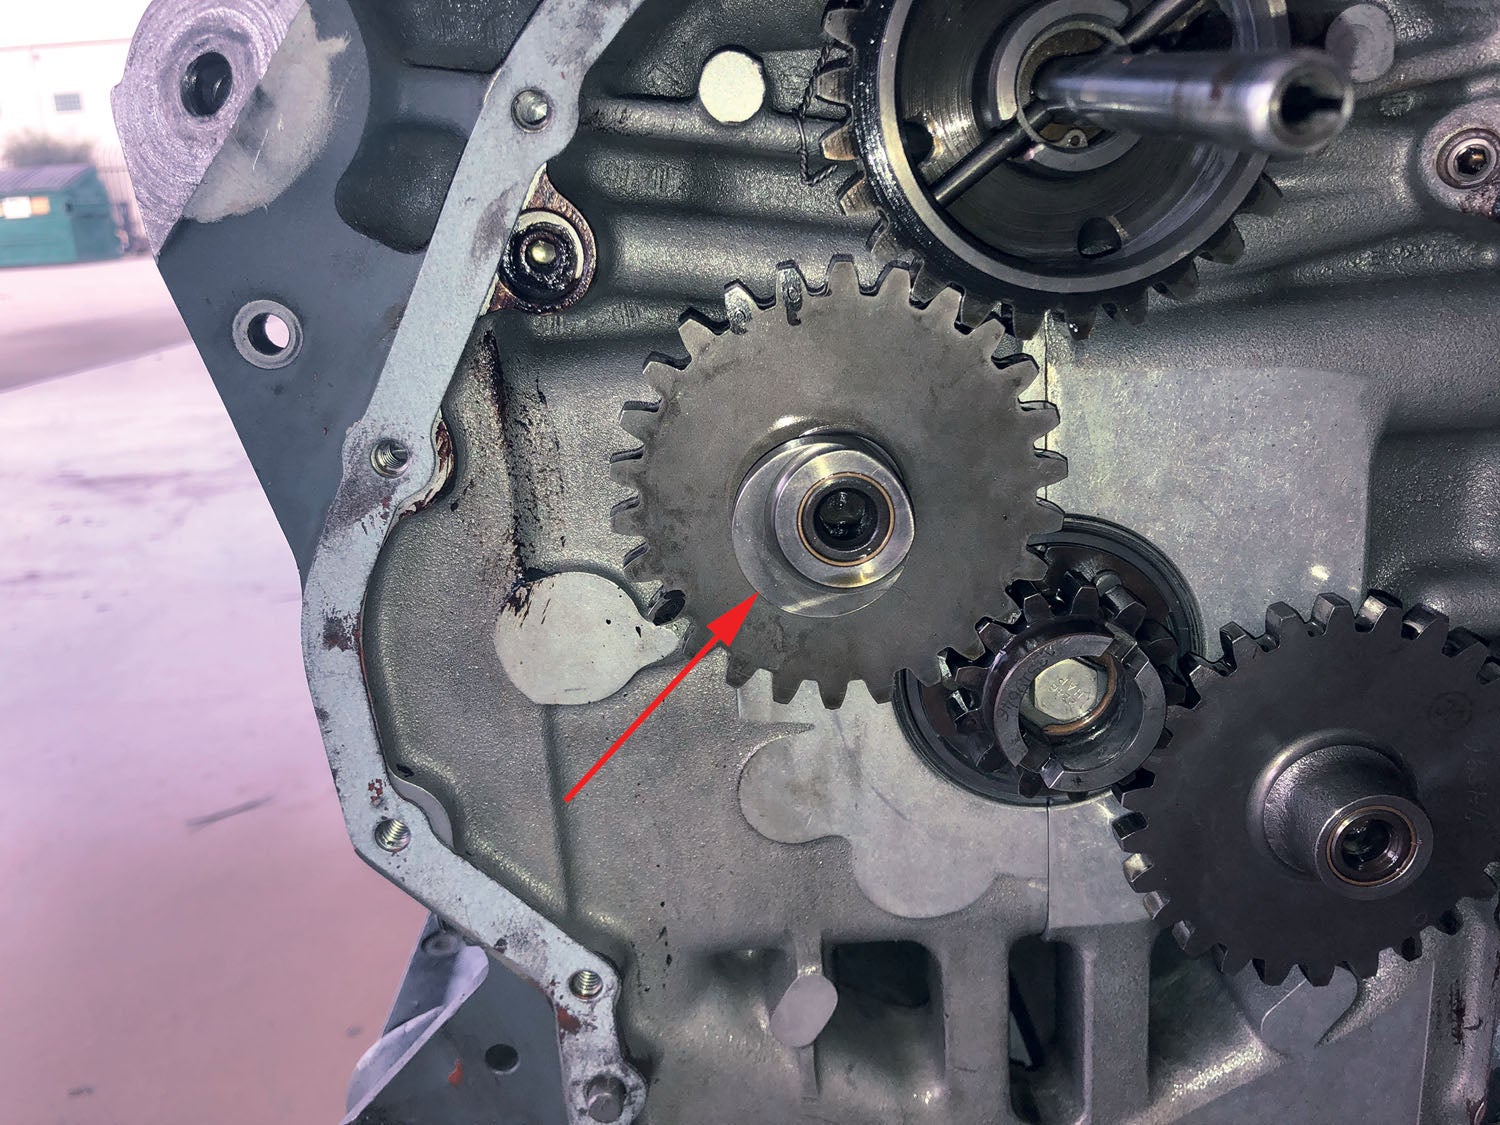
It is surprisingly difficult to remove a fuel pump from a Lycoming engine. There are only two socket head bolts but they are very difficult to reach, especially the inside one. Removing the fuel lines was easy enough with an 11/16-inch wrench. The outside bolt isn’t too bad either. You first need to cut the safety wire and then loosen the bolt with a 5/16-inch Allen wrench. So far so good. Getting the safety wire off the inside bolt is much more difficult. There just isn’t any room to get tools in there. Twisting and turning—with a sprinkling of colorful language—finally did the trick. Getting the Allen wrench in there was another challenge. The fuel pump bulges out such that you do not have a straight-line approach to the bolt on either side. On the outside you can at least see what you are doing, but on the inside you are mostly working by feel.
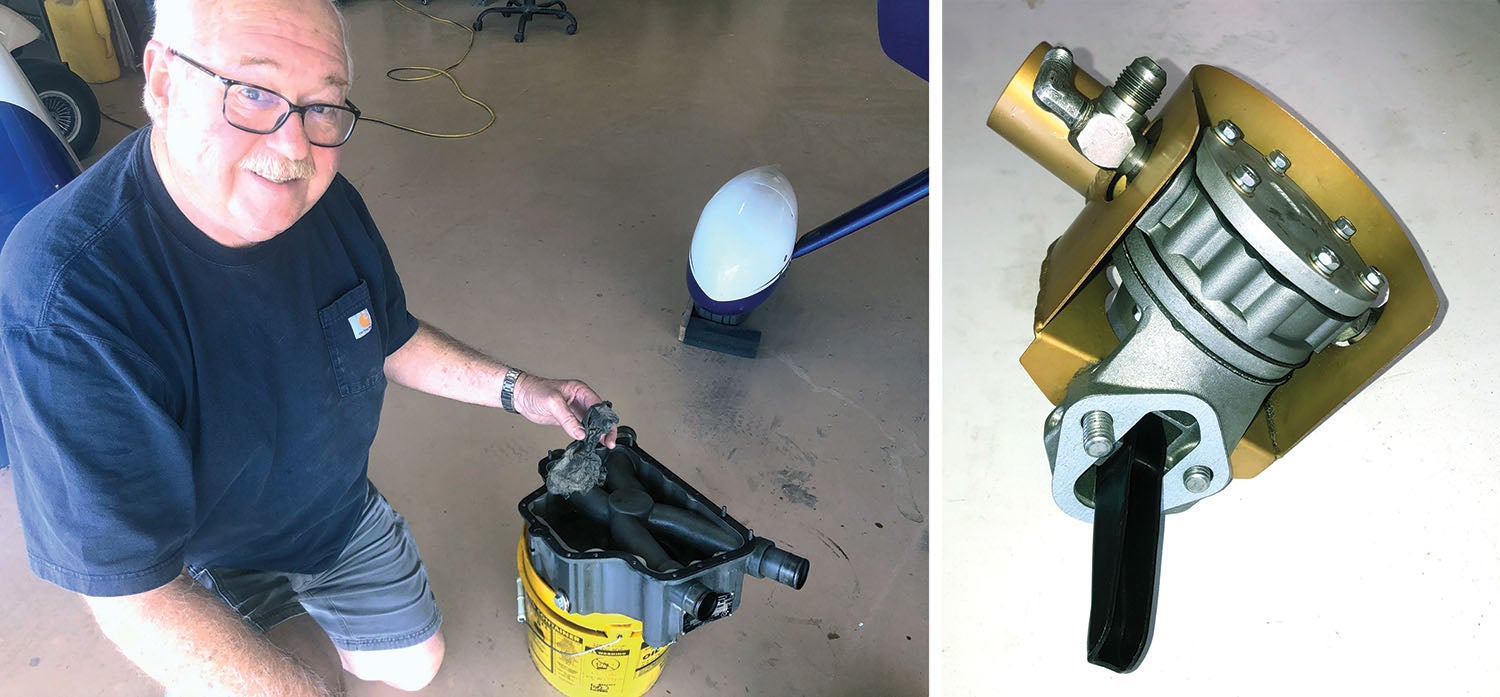
My removal was further complicated by a cooling shroud surrounding the pump, but in time the pump was out of the plane and on the bench. Now it was just a matter of driving to Aircraft Spruce and handing them $400 for an overhauled pump.
Installing the New Pump
Installing a fuel pump doesn’t seem like it would be a hard job. You just put the actuating arm into the hole and tighten up two bolts. Except that the pushrod that actuates the pump actuating arm constantly tries to slip down and block the arm from getting into its proper position.
Lycoming engines have a cam attached to an accessory drive gear that pushes down on a solid steel rod that in turn pushes on the actuating arm of the fuel pump. As the cam rotates, the arm is pushed down to pump fuel and then released to allow the arm to cycle back into its resting position. Unfortunately, when you remove the pump, the rod just drops down to block the insertion of the arm. The only way to install the pump is to get the arm out of the way by pushing it back up. Easier said than done.
I once installed a fuel pump by using the arm to push the rod up out of the way. Mistaking my good luck for being smart, I thought I would be able to do that again this time. Not so much. A good friend of mine suggested that if I was to clean the oil off the rod and coat it with some really sticky grease the rod would stay up and out of the way. As I was cleaning off the rod, the paper towel I was using somehow slipped into the engine and down into the sump. After a lot of fishing around in the blind hope of trying to retrieve the paper towel I came to the vexing conclusion that the sump was going to have to come off.
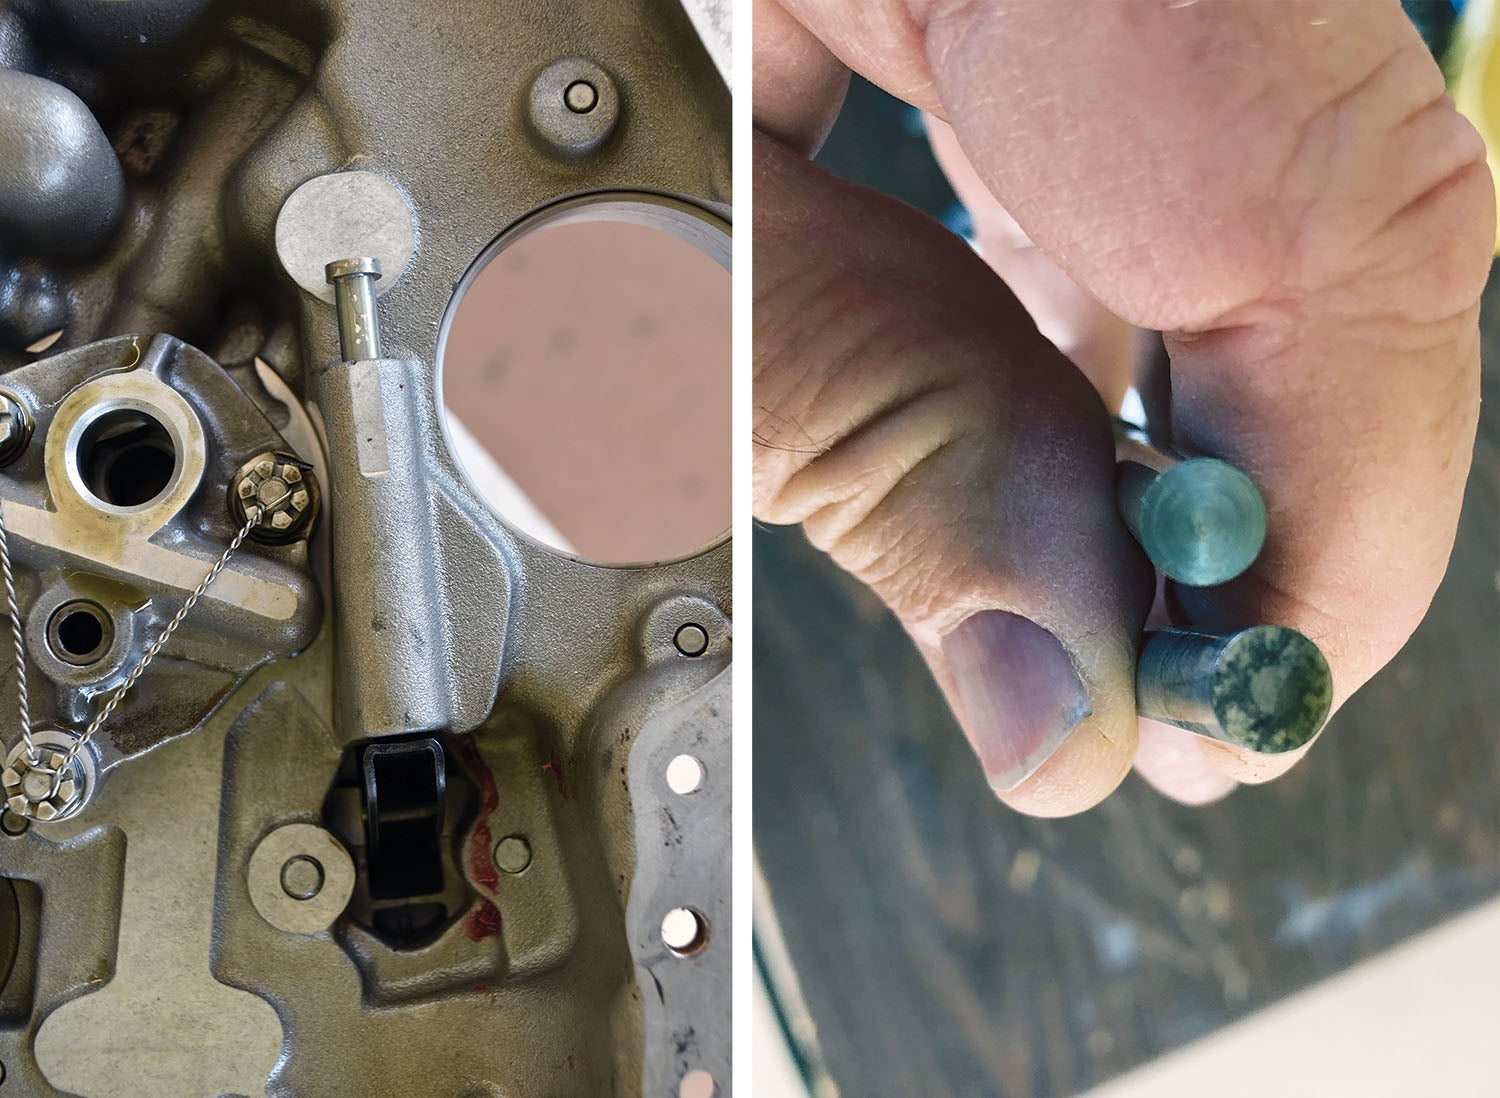
Removing the sump wasn’t as bad as I thought it would be, and I soon had a very oily paper towel in hand. The advantage of having the sump off is that you can easily see and reach the rod that works the pump. Unfortunately, when I looked up at the rod, I could see that the end of the rod that pressed on the pump arm was beginning to fail. That meant that the accessory case also needed to come off to replace the rod. Things were really getting out of hand now. I decided to sleep on it and then consider what to do next.
Looking more carefully in the sump I saw more small pieces of steel than I wanted to see. The sump screen didn’t have any big chunks of metal, but I was getting concerned. After cutting open the oil filter I found more steel. Not that there was a lot of it, but I don’t usually see any steel at all, only the odd tiny flake of aluminum. Now I was really discouraged.

Evaluating the Engine
It was just a few months ago (KITPLANES® February 2020) that I was looking at a troubled engine for a friend, and now I am faced with a similar situation with my own engine. Following the same basic steps as I did before, I removed the cylinders on the left side and took a look at the cam and lifters. The cam lobes behind number four didn’t look good. This means an overhaul is in my future. All I wanted was a new fuel pump.
To go into a little more detail let me explain the process I used. I removed cylinder Number 4, installed a torque plate I had made by cutting off the base of an old cylinder and torqued the big nuts to 25 foot-pounds as per Lycoming recommendations. This gave me a good view inside of the engine while at the same time preventing bearings from shifting as I turned the engine over to look at the cam. After seeing that the rearmost cam lobe wasn’t in very good shape, I pulled off the Number 2 cylinder to see what the rest of the cam looked like. It was in good shape, but the damage was done. There is only one way to fix a camshaft and that is to take the engine completely apart.

Things Learned

I learned a few things during this disastrous process. One, don’t put a paper towel inside your engine, especially if you are prone to dropping things. Bad idea. Two, it looks like it will be pretty easy to hold the fuel pump actuating rod in place by simply removing the left magneto and reaching through the hole to hold the rod up and out of the way. If I had known this before I could have much more easily replaced the fuel pump, but then I wouldn’t have seen how much the engine needed to be repaired. I would also not have seen the damage to the rod that was only apparent when I pulled off the sump. As it turned out it was a good thing that I had all of this trouble, but it didn’t feel that way at the time. Third, I have always been told that the fuel pump should last for the life of the engine. This has not been borne out by my experience. This is the second time my fuel pump failed to do its job in about 1300 hours, giving it a life expectancy slightly better than my vacuum pumps.
Lastly, if I consider that my 1300 hours have been spread out over 20 years, it’s hard not to conclude that there is good reason for manufacturers to have life limits in both hours and years. There have just been too many years where this engine only flew around 30 hours. That just isn’t going to be conducive to long engine life.
During that time, I also flew my Legend Cub 350 hours, but that just made it harder to fly the Sportsman. The Cub has now been gone for over five years but I am almost ready to fly my GlaStar. Once again, I will be faced with the difficulty of flying both planes enough to keep corrosion and the effects of time at bay. It looks like I may have a plane for sale in the not too distant future.
![[Credit: Lisa Turner]](https://www.kitplanes.com/wp-content/uploads/2026/02/Fuel-Selector.jpg?w=218&h=150&crop=1 "Fuel Follies")


I recently had to replace the fuel pump on my Superior o-320. A local mechanic told me to turn the engine to top dead center on cylinder 1. This made it much easier to install the new pump, as I no longer had to hold the pump lever down.
That certainly looked like a nasty chore, but fortunate to find the wear damage.
This makes me even more happy that my old Cessna 175B has no fuel pump, just gravity feed, and with a ‘both’ tanks selection on the fuel selector.
As a reliability engineer, I know that parts that I don’t have, can’t fail.!
Blue skies and tail winds,
JimH in CA
Comments are closed.