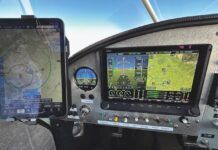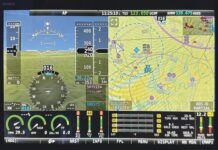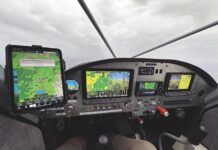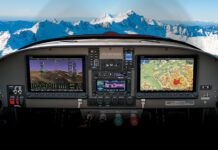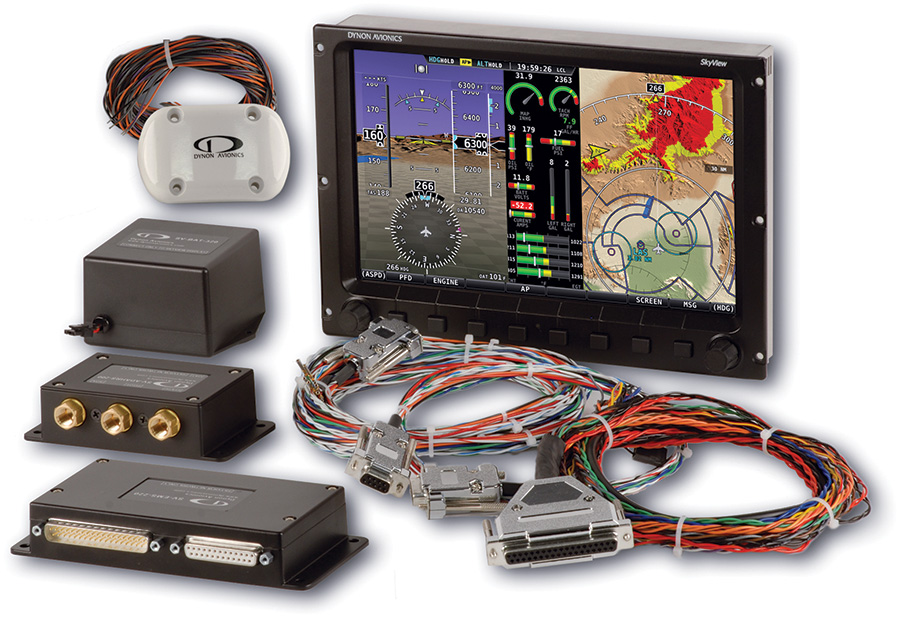
The SkyView system is available in various levels of completion, including pre-made wiring harnesses, which are recommended as a time saver. Components can be mounted anywhere in the aircraft, but the AHRS (the box with the three ports) needs to be in an interference-free area.
Converting to a glass cockpit is tough to resist after you see what it has to offer. My first exposure to glass was in Montreal at the Bombardier Regional Jet training facility. Five years and nearly 5000 hours later in an all-glass cockpit airliner, I’m permanently sold. In my view, the pictorial situational awareness offered by glass is most impressive. It increases safety and reduces pilot workload in a big way.
With a lifetime in aviation as an airline and corporate pilot, sales experience with Garmin’s G1000 system, and having owned several certified and three Experimental/Amateur-Build category aircraft, I would say that nothing has changed aviation like today’s glass panel avionics. For the Glasair Super IIS FT I completed in 2000, I originally used Garmin’s powerful GPSMAP 496 portable, which offers a color moving map with countless features that made flying safer by increasing situational awareness and reducing pilot fatigue.
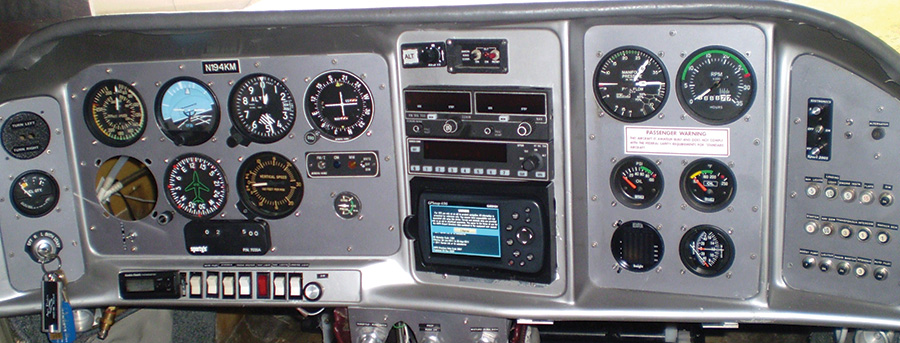
For a circa-2000 panel, the author’s Glasair was reasonably well equipped, but was clearly ready for an upgrade.
At the Northwest Aviation Trade show in Puyallup, Washington, I visited the Dynon Avionics booth and saw the company’s SkyView avionics suite for the first time. The SkyView came with a 7- or 10-inch screen that could be divided into a PFD, MFD and engine monitor display. Many of its features paralleled the familiar Garmin G1000. To top it off, it also had synthetic vision. It was exactly what I was looking for.
Before I officially retired in 2011, I ordered the SkyView. Tom Dalquist, Hillsboro Aviation’s avionics manager, and I went over the list of options that could be had with this system. Having built three kit airplanes, I ordered every pre-made wiring harness that Dynon offered. If you can afford it, I highly recommend that you take advantage of pre-made harnesses. I also added a fuel transducer that would tell me exactly how much fuel my engine was burning; the SkyView display would show fuel remaining at each waypoint and at the final destination. Having a backup battery in case of an electrical emergency was another reassuring option.
One last item was Dynon’s autopilot servo. For nearly 900 hours, I had used a Navaid Devices tracking autopilot. It worked fine, but the company had gone out of business. Dynon’s autopilot interfaced with the SkyView and offered several features the old unit didn’t, so this seemed a great place to invest a few extra dollars. For the altitude portion of the autopilot, I have TruTrak’s Altrak altitude autopilot.
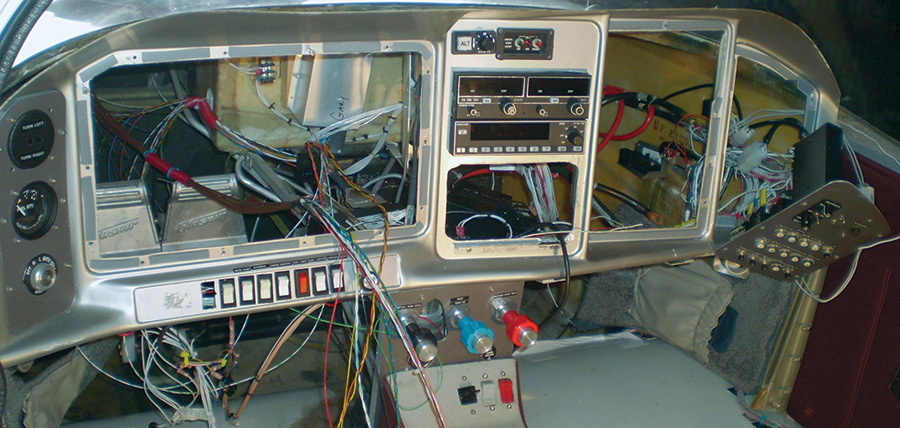
Converting from steam to glass is major surgery, requiring many hours that any builder should budget for. Having the panel cutouts done on CNC equipment will speed the job along and improve the results.
Getting Started
In preparation for the upgrade, I had a blank instrument panel insert from Glasair Aviation that would fit into my sculptured panel. In about an hour, the avionics shop at Hillsboro Aviation cut out the insert to accommodate Dynon’s 10-inch screen, the VOR head for the KX155 with glideslope and the Bendix/King stand-alone marker beacon display. Having cut out three instrument panels by hand, I appreciated the time savings and accuracy of a computer-generated panel cutter.
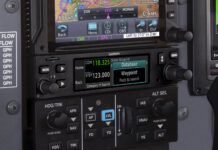
A note about nav/com options: I recently upgraded my panel with the Garmin SL30 nav/com because it interfaces with the SkyView. It’s half the height of the Bendix/King KX155, so the real estate around the radio stack increased. The SkyView has an electronic indicator for the VOR, LOC and glideslope programmed in, so I didn’t need the $1400 Garmin indicator. The weight saving in using the SL30 was an astonishing four pounds, plus the SL30 doesn’t need a separate glideslope antenna, as the KX155 does. Garmin is discontinuing the SL30/SL40 in favor of the new GTR/GNC series, which have even more capability.
Out with the Old
Starting in the engine compartment, I removed the vacuum pump and mechanical tachometer cable. With these two items gone, I had easier access to the engine oil filter. I installed a cover plate over the pump pad, and I bought a cover for the tachometer cable from Air Salvage of Dallas. I also removed the EGT and CHT probes for my GEM 610 engine monitor, along with its electrical harness.
The flight instrument panel that had served me well for many hours was removed, along with all the vacuum system plumbing. The engine instrument panel to the right of the radio stack was also removed.

One immediate benefit of glass is that the vacuum pump and its related plumbing can be removed and even sold off. In the author’s Glasair, this opened up plenty of room behind the accessory case (right) to get at the oil filter and other engine components.
Autopilot Servo
When my Dynon package arrived, the first thing I tackled was the installation of the autopilot tracking servo. It is nearly impossible for a manufacturer to offer mounting brackets for all types of airplanes in which the servos might be used. For my Glasair, I was on my own to fabricate a servo mounting bracket.
I decided that the same mounting pad inside the right wing that held the servo from the previous autopilot would be the starting point for the new servo mount. If things worked out, I would be able to use the same linkage and attach points. It was one of those rare times in aircraft building when everything went as planned.
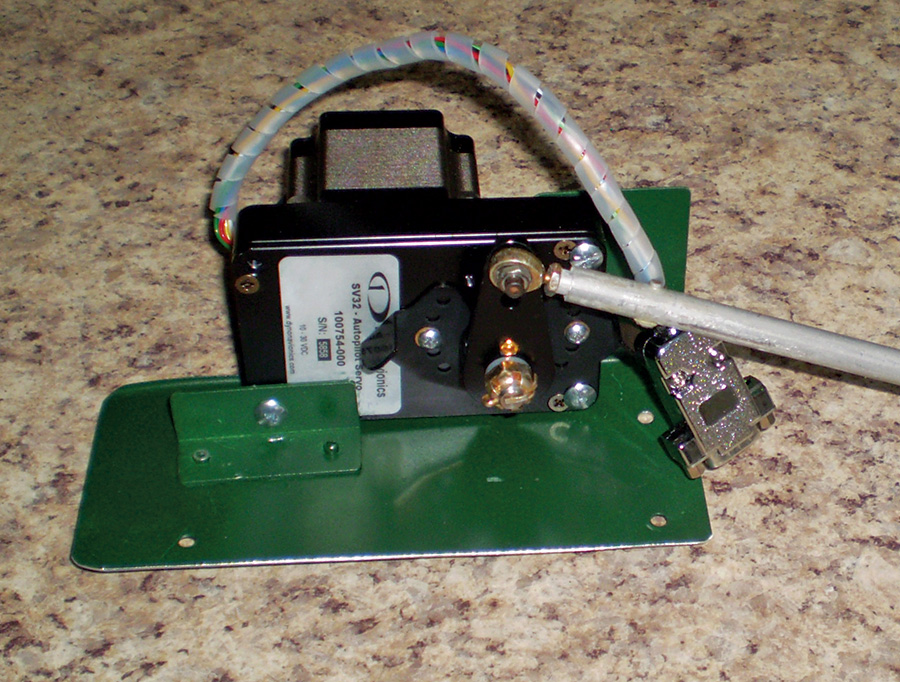
Dynon offers autopilot servos in several torque values. Since every airplane is different, a custom mount will be required. Jones made his from 0.050 aluminum sheet.
Using a piece of 0.050 aluminum sheet, I had the mounting bracket made and painted in about three hours. With the servo mounted, it was time to install the wiring. Using zip ties, I attached the old wiring inside the right wing to Dynon’s autopilot servo wiring. My wife slowly pulled the old wiring out from inside the cockpit as I fed the new harness into the wing. Have a good supply of zip ties on hand for this task.
Tough Decision
Fabricating a mounting bracket for the AHRS was straightforward, but determining where to put it wasn’t. After reading the location criteria in the installation manual, speaking with technical services at Dynon, and consulting with an avionics technician, I positioned it in the aft section of the tail on the right side of the fuselage. The concern is keeping the AHRS away from electrical components and wiring that may influence its performance. Until the airplane was flown, the suitability of the AHRS location would remain an open question.
With the AHRS mounted, I installed the pitot-static tubing and OAT wiring. Take care that rudder cables and anything else that moves won’t rub against the tubing or wiring. Also make sure the pitot-static lines run smoothly with no sharp bends.
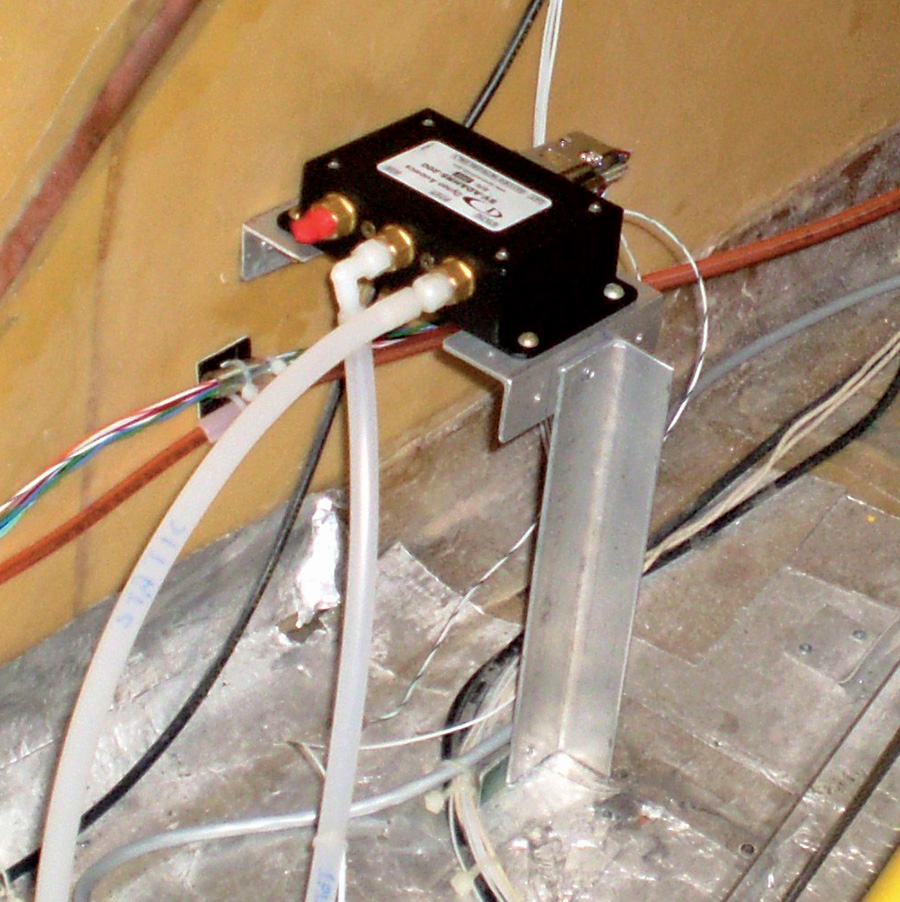
For accurate system operation, the AHRS must be mounted in an area free of electrical and magnetic interference. In the Glasair, this turned out to be the tail section.
A piece of advice: When installing any of the pre-made wiring harnesses, take your time. Give careful thought as to how the wires are routed. In two cases, the pre-made harnesses were too short. Harness length from the AHRS to the 10-inch display was one of them, as I had no idea where the AHRS would be located when ordering the harness. The other involved the CHT and EGT wiring for the engine cylinders on the right side of the engine. In each case, a simple phone call to Dynon fixed the problem.
EMS and Standby Battery
With everything removed from the instrument panel, I had great access forward of the panel. In front of the Garmin GPSMAP 496 cutout was a perfect place to mount the EMS control box and standby battery. A solid structure used to secure the left and right lower side panels was already in place. Putting the platform on top of this would place these two components close to the display and be high enough so that wiring would not be in the way when I got in and out of the airplane.
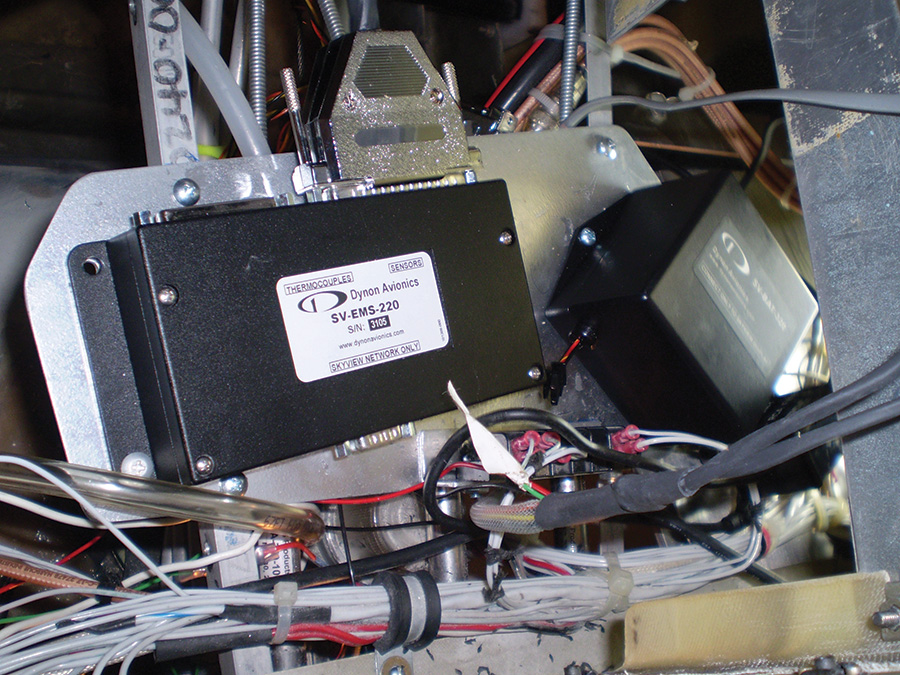
The Engine Management System module lives on a solid structure immediately behind the instrument panel, where it’s close to the main display. The system’s backup battery is also mounted here.
Fix This, Change That
This significant upgrade was done during the winter months by design. Weather in the Pacific Northwest is nasty during the winter and since I was retired, I could take my time. If I found something that needed attention or modification, this was the time to do it.
I discovered the left-brake master cylinder had a small leak, which I repaired. And I’ve always been disappointed in the size of the pockets in the inboard side panels, so I took the panels to a local upholstery shop and had them enlarged to hold WAC charts.
When grounding the engine monitoring sensors at the firewall, I noticed the wires were stacking up on the grounding posts. Adding two more posts to the grounding plane cleaned up that area and gave me extra grounding for future use. I had removed both gull-wing doors for easier ingress/egress during the work, so this was a great time to inspect the hinge pins.
I used the hole in the firewall vacated by the vacuum plumbing to accommodate the EGT, CHT, oil pressure and oil temperature sensors, and the fuel-flow transducer wiring. With one exception, this was straightforward. The exception? The quick-disconnect connectors for the CHT, EGT and fuel transducer were not compatible with Dynon’s connectors. When I informed Dynon, I was told engineering would look into a fix.
Getting Close
With everything mounted and wires routed and secured, it was time to have a professional finish the wiring. Some builders choose to do this themselves, but because of my limited electrical experience, I opted to hire someone with a lot of skill in this area. With my hard-earned dollars invested in this substantial upgrade, it would be terrible to see it go up in smoke. I hired Larry Reinecke from Northwest Airtech to finish what I was uncomfortable doing.
To add some redundancy to the system, he wired my Garmin 496 to the Dynon display and autopilot. With this, I would have the HSI display when using the 496, and the data from the 496 could be fed into Dynon’s autopilot. (Dynon’s autopilot servo does not support analog radios, only those with an RS232 digital output. My Bendix/King KX155 could not interface with the autopilot.)
Before Liftoff
Given the major instrumentation change and the fact my weight and balance was old, I did a reweigh. With the fuel drained and with oil in the engine, the empty weight came to 1321 pounds. The weight savings of converting to glass was about 15 pounds over the vacuum-gyro system.
Before the first flight, I spent a number of hours studying the manual for the SkyView and made several calls to Dynon support. Learning how to configure the display, arranging and deleting some of the EMS items, and configuring the autopilot servo take time and practice. Thinking back on my G1000 days at Cessna, I recalled that owners would use ground power units to power the aircraft’s systems while they learned the glass knobology. I kept the battery charger connected to my airplane during the learning phase.
On a good VFR day with no wind, I taxied out for takeoff. As a backup, should I miss a malfunction in the AHRS, the flight instrumentation page on my Garmin GPSMAP 496 was displayed. I had the SkyView display split 50-50 between the PFD and engine data. The first thing I noticed was how rock solid the electronic rpm reading was over the mechanical tachometer. As I watched the temperatures come up, I looked over the panel. Even with more than 5000 hours of flying with glass, it was still impossible not to be impressed. Everything seemed to be working fine, and I appreciated the addition of fuel flow and fuel pressure readings.
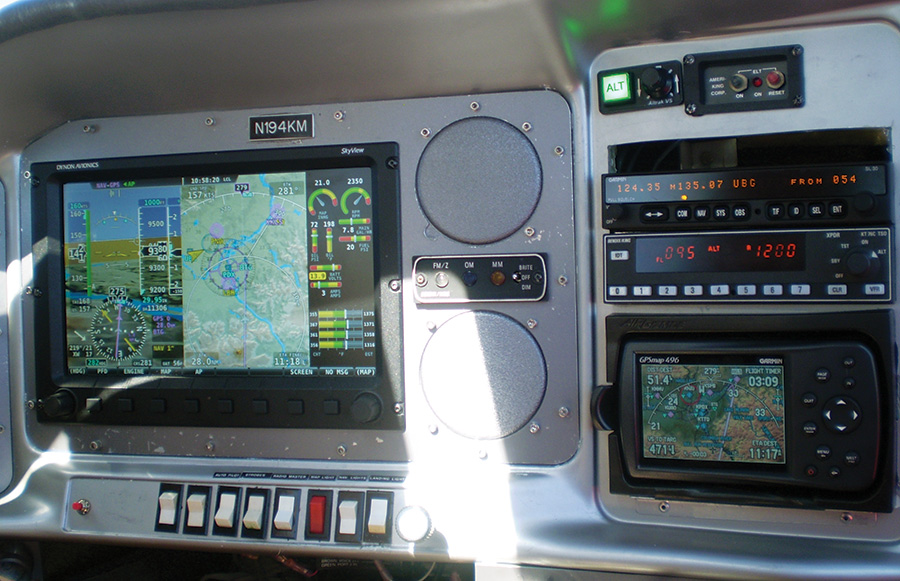
The original Bendix/King KX155 wouldn’t talk to the SkyView. It was replaced with a slimmer Garmin SL30, which opens up more space around the radios.
Lined up on the centerline of the runway at Kelso-Longview Airport (KLS), I noticed that the SkyView DG heading didn’t agree with the magnetic compass or runway heading. Clearing the runway, I taxied to a spot where I could easily turn my airplane 360° so I could calibrate the compass—or should I say watch Dynon’s software calibrate the compass. When I was a young aircraft mechanic, it could easily take four hours to calibrate a magnetic compass, so it was with amazement that I watched the Dynon software, with 100% accuracy, calibrate the compass in 15 minutes. When I again lined up on the runway centerline, the SkyView DG agreed with the magnetic compass. I had made a checklist of items I wanted to verify on the planned 15- to 20-minute flight. It wasn’t a matter of getting used to glass; it was an accuracy and systems check of the SkyView.
Setting power was much easier than before. For one thing, engine readings were straight in front of me; I would no longer have to ask my wife what she saw as the rpm setting. Another thing that popped out was the indicated fuel flow. Based on nearly 900 hours in this airplane, the fuel flow was showing at least 2 gallons too high. I made a written note and moved on down the checklist.
Shortly after engaging the autopilot, it was clear that the servo would have to be replaced with a stronger one. (Dynon offers three servos with different torque capabilities.) Slowing, I entered the downwind for the Glasair’s first landing with the new panel. Airspeeds from the AHRS seemed perfect. I guess I lucked out in positioning the AHRS in the right place.
Making Corrections
A conversation with Electronics International, which supplies Dynon’s fuel transducer, revealed that the K-factor should be set at 68,000. The SkyView setup menu showed it was set to 60,000. It took just a moment to correct it. For a final adjustment, it is recommended that you top the tanks, fly, and then top again to verify the accuracy of the transducer.
When doing the flight test, several flights were scheduled, each no longer than 20 minutes. I had modified fuel hoses to accommodate the fuel transducer and fuel-pressure gauge. Even though the hoses had been purged and leak checked, it seemed prudent to stay close to the airport for the first few flights.
After each flight, adjustments were made, time was spent in the books, and then the airplane was flown again. You can expect this procedure regardless of what glass system you may buy. The key is to not be in a hurry. Make the corrections needed, take short flights to familiarize yourself with the system, and do all of this in good weather conditions. It’s important to feel confident in your ability to use the system before taking on a cross-country trip. Cessna recommended at least 25 hours using glass instrumentation before flying IFR.
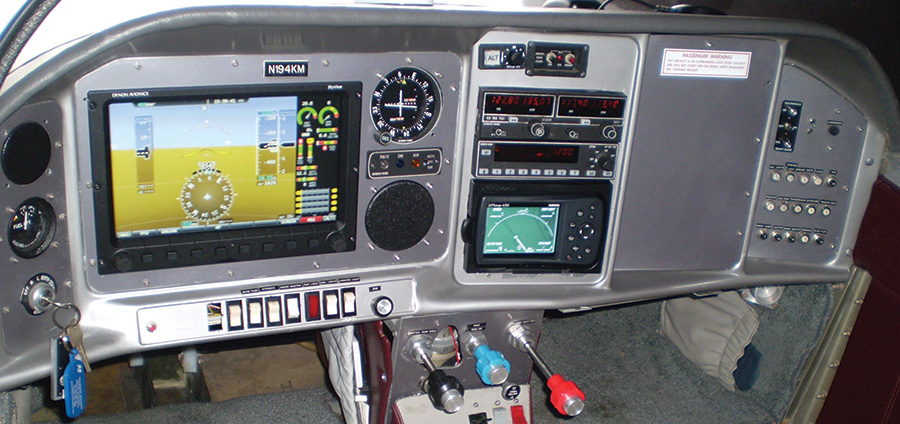
The author’s initial upgrade included the SkyView itself, plus a radio stack with a Bendix/King KX155, a transponder and a Garmin GPSMAP 496. The KX155 was later replaced with a Garmin SL30.
Time, Money and Support
Not counting my study time, I had between 50 and 60 man-hours invested in this installation. Because this was a retrofit, these numbers might be high compared to an original installation. In any case, it was a fun, easy and exciting project. Hiring a professional to finish the last of the electrical work took another eight man-hours.
The total cost for this upgrade was about $8,000, which includes the cost for an electrical technician to do the final wiring. I sold my vacuum system, flight and engine instruments for about $2,000. Don’t expect to make an investment like this and recoup it when you sell. The best-case scenario is recovering half of what you originally spent.
Product support from Dynon was good. Whenever I needed to exchange a part, they were quick in getting it to me. For me, it was worth the investment and the time to convert to a glass cockpit. With a good working knowledge of the system, this will be a great opportunity to enjoy the Dynon SkyView and all that it has to offer.
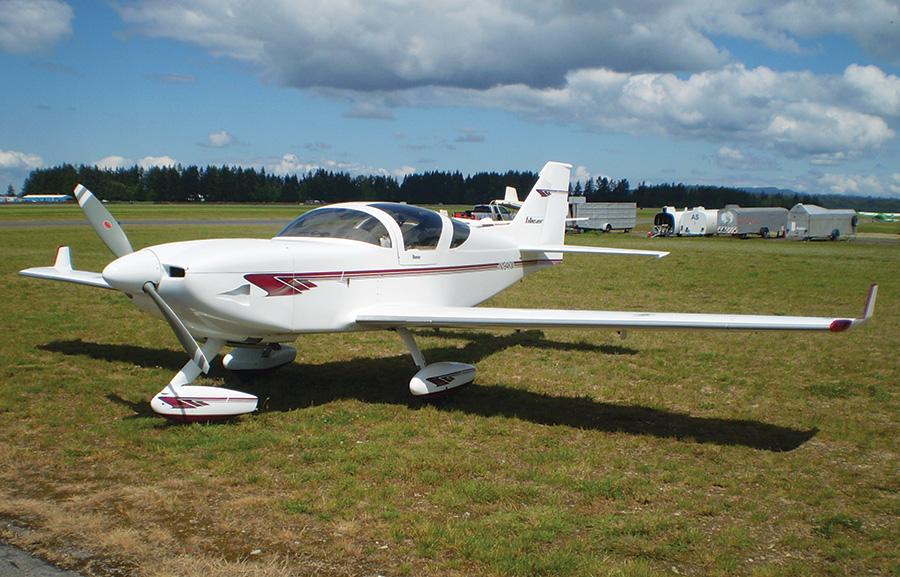
Jones’ Glasair Super II was completed in 2000. The lure of glass made it a natural upgrade candidate for the Dynon SkyView.

![]()
Gary Jones was a contributing editor at KITPLANES® magazine for over 20 years. He successfully built three Experimental aircraft (Q2, Q200, and Glasair Super IISFT). Most of his flying career was with the airlines. He has flown over 23,000 hours, holds an ATP rating with two turbojet type ratings, plus an A&P license. He spent nine years with a large Cessna affiliate in aircraft sales and taught the Garmin 1000. Retired, he uses his Glasair for personal transportation. He now works as a standup comedian and performs for the U.S. military.

