 I find that overheating and intermittent electrical gremlins are some of the toughest problems to fix. Often, the data you are given to work with can be sketchy or hard to follow for various reasons. Many times, the aircraft are on the second or third owner, who may not understand the electrical configuration. Often the owner is not even sure of when the problem started.
In the past few years, there has been a proliferation of glass panels and their digital engine instruments. Some owners weren’t even aware of an overheating problem because the multiplicity of the digital engine representation far exceeds the old analog gauges. Where in the past they may have only had one analog gauge tied to one cylinder, there are now probes on each cylinder and even audible alarms. There’s a chance that the old CHT gauge wasn’t even tied to the hottest cylinder, and since it was way over on the opposite side of the panel, no one may have noticed that on climb-out the CHT was running a little hot. By the time that gauge got a glance, the aircraft was in cruise and things had cooled off. Plus, the needle width alone was probably good for 25 to 30° of resolution.
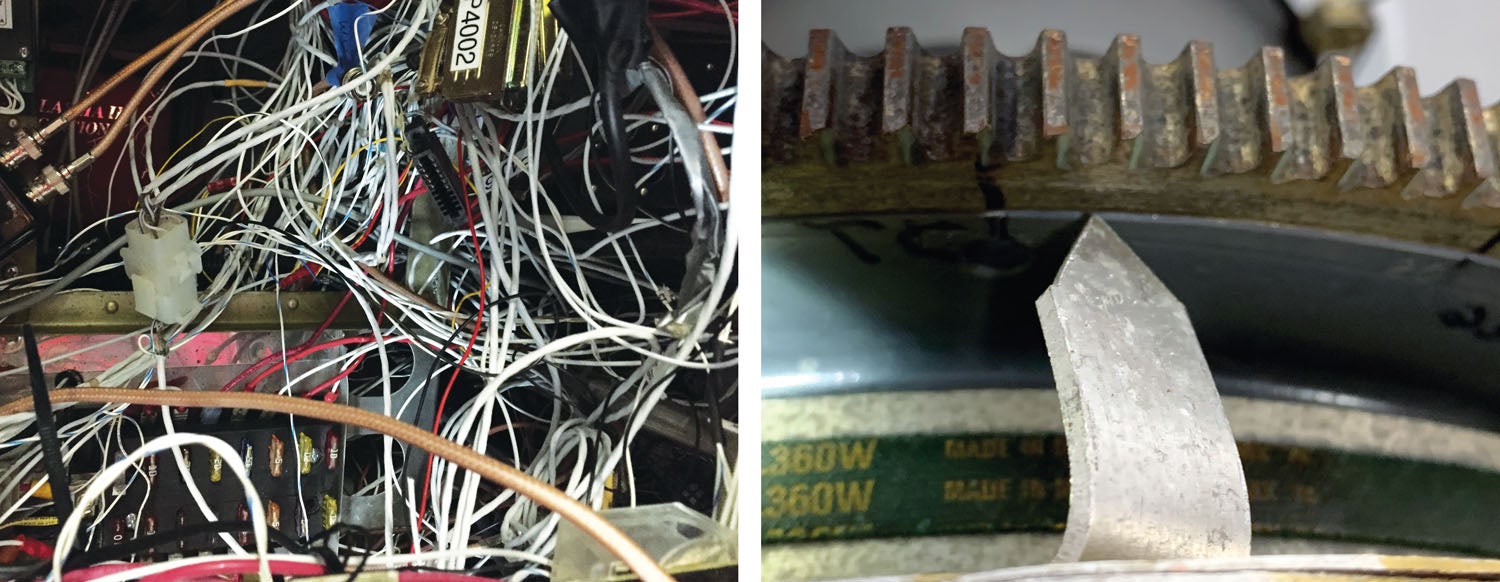
Intermittent electrical problems can be extremely difficult to figure out. Airplanes are a high-vibration environment to begin with, and the temperature ranges of the operating equipment can vary widely. Engine compartment temps can go from subzero to over 400° in a matter of a few minutes.
This was the scenario with a couple of RVs that came to us lately. Two RV-6s, both non-builder owned, had the same issues. Both planes had nicely upgraded glass panels, and both owners had been working on fixing overheating problems, which of course meant getting lots of advice from everyone and trying various solutions. Since I had recently written a column on overheating and noted that ignition timing could be a culprit, both owners were convinced that the ignition timing was the problem.
One owner told me he had retarded the electronic ignition timing, but it didn’t make a difference (more on this in a bit). The other was convinced that the problem started when the electronic ignition was installed about five years ago, along with the panel upgrade. In this case the airplane has flown about 2–5 hours per year since the upgrade. Now on the trip up to us for the condition inspection, the primary alternator was intermittently tripping the field circuit breaker.
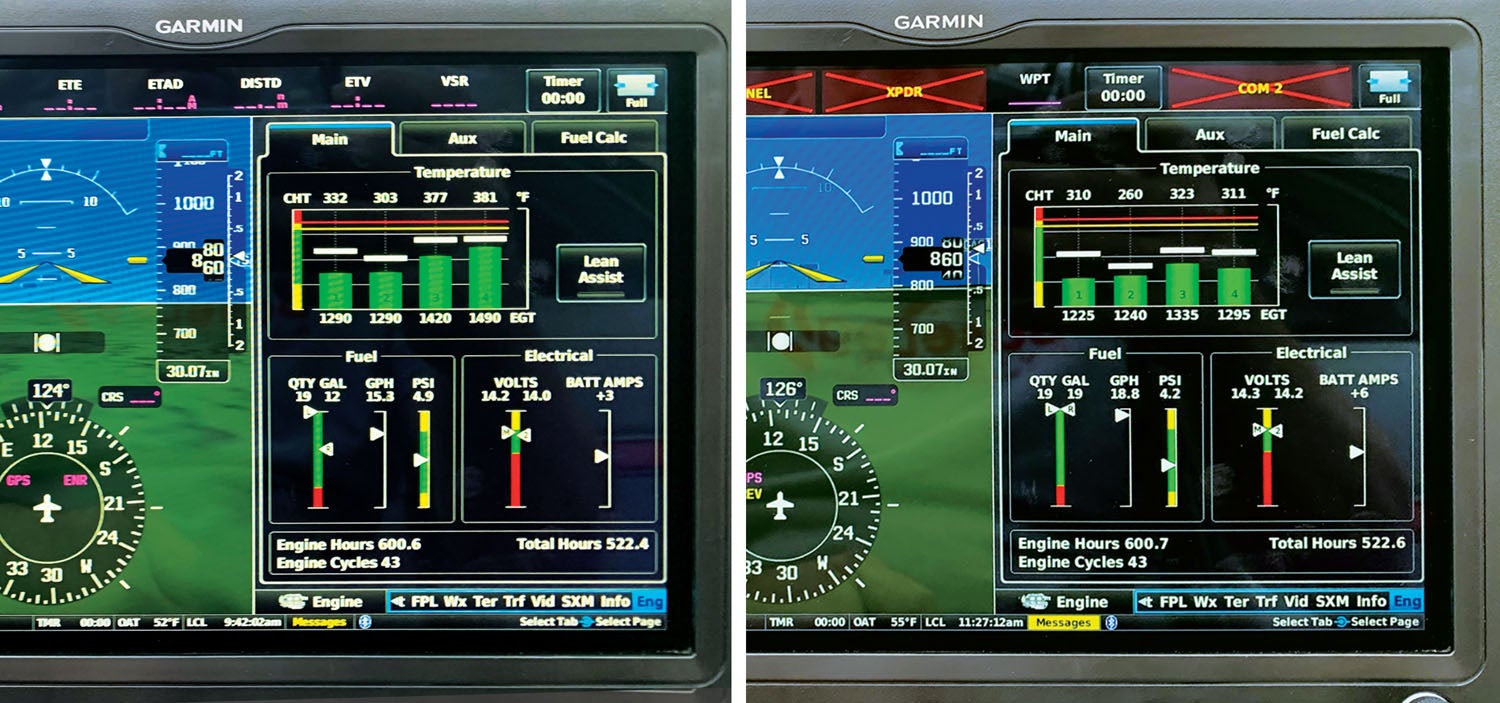
We checked the first RV-6’s timing to make sure it was correct. In fact, the timing was set at 2 to 3° before top dead center. (This electronic ignition has its own advance curve and is normally timed to TDC; retarding this timing “hack” similarly retards the whole curve.) The owner had mistakenly gone the wrong way and had inadvertently advanced the timing. Then we could check other items that can contribute to high CHTs, namely fuel flow and EGTs. On an O-360 with a constant-speed propeller, my experience has been that fuel flows should be 16–18 gph at full throttle, with EGTs between 1175 and 1300°. This one showed 15 gph and EGTs at almost 1500°! Way too lean.
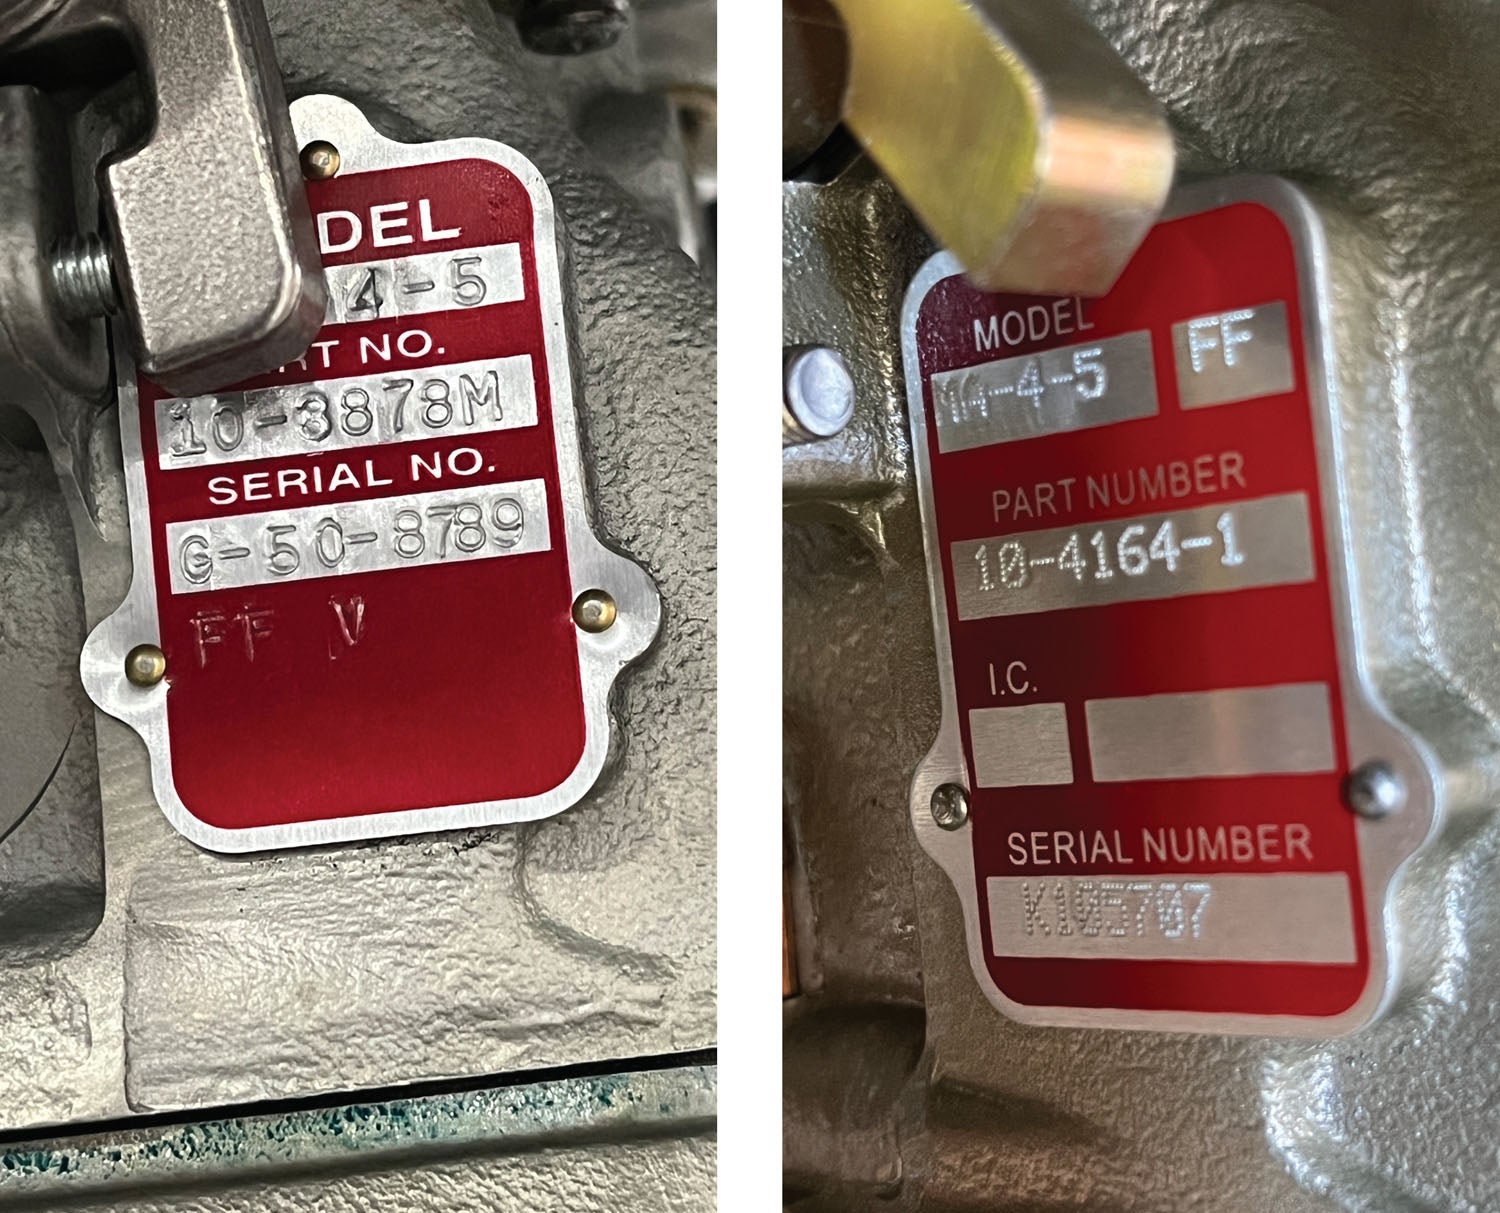
We checked the cylinders and spark plugs and noticed a loose helicoil in Cylinder 4. Replacing the helicoil did not change anything, but we also noticed that the engine was very difficult to shut off via the mixture. Taking a closer look at the carburetor showed a slight blue stain around the bowl-to-body connection, which is usually an indication that the float level is too high. It turns out the owner had the carb modified with a “Mooney mod” to richen the mixture. It was then that I noticed the part number on the carb was not correct for an RV. After a discussion with the owner, we agreed to install the correct carb. Fixed! The subsequent run showed a fuel flow increase of 3.5 gph, along with a 200° drop in EGTs. The owner was very pleased with the operating temps on the way home.
On the second RV-6, all the timing was set correctly, but I know you’ve already guessed it—wrong carb again. We replaced it and saw the same improvement. At least that one went faster.
By the way, the correct part number for RVs seems to be the MA-4-5 10-4164-1, so for those of you with overheating problems, you might want to check it.
The Alternator Problem
Alternator field breakers usually pop open for one of two reasons: overvoltage or a short in the field wiring. In this case, we had no indication in the logs of an overvoltage incident. Also, it had only failed on one flight and not two subsequent flights. I thought about it and realized we had taken the cowling off and performed an engine run between the failures, so I figured something must be moving around in the engine compartment.
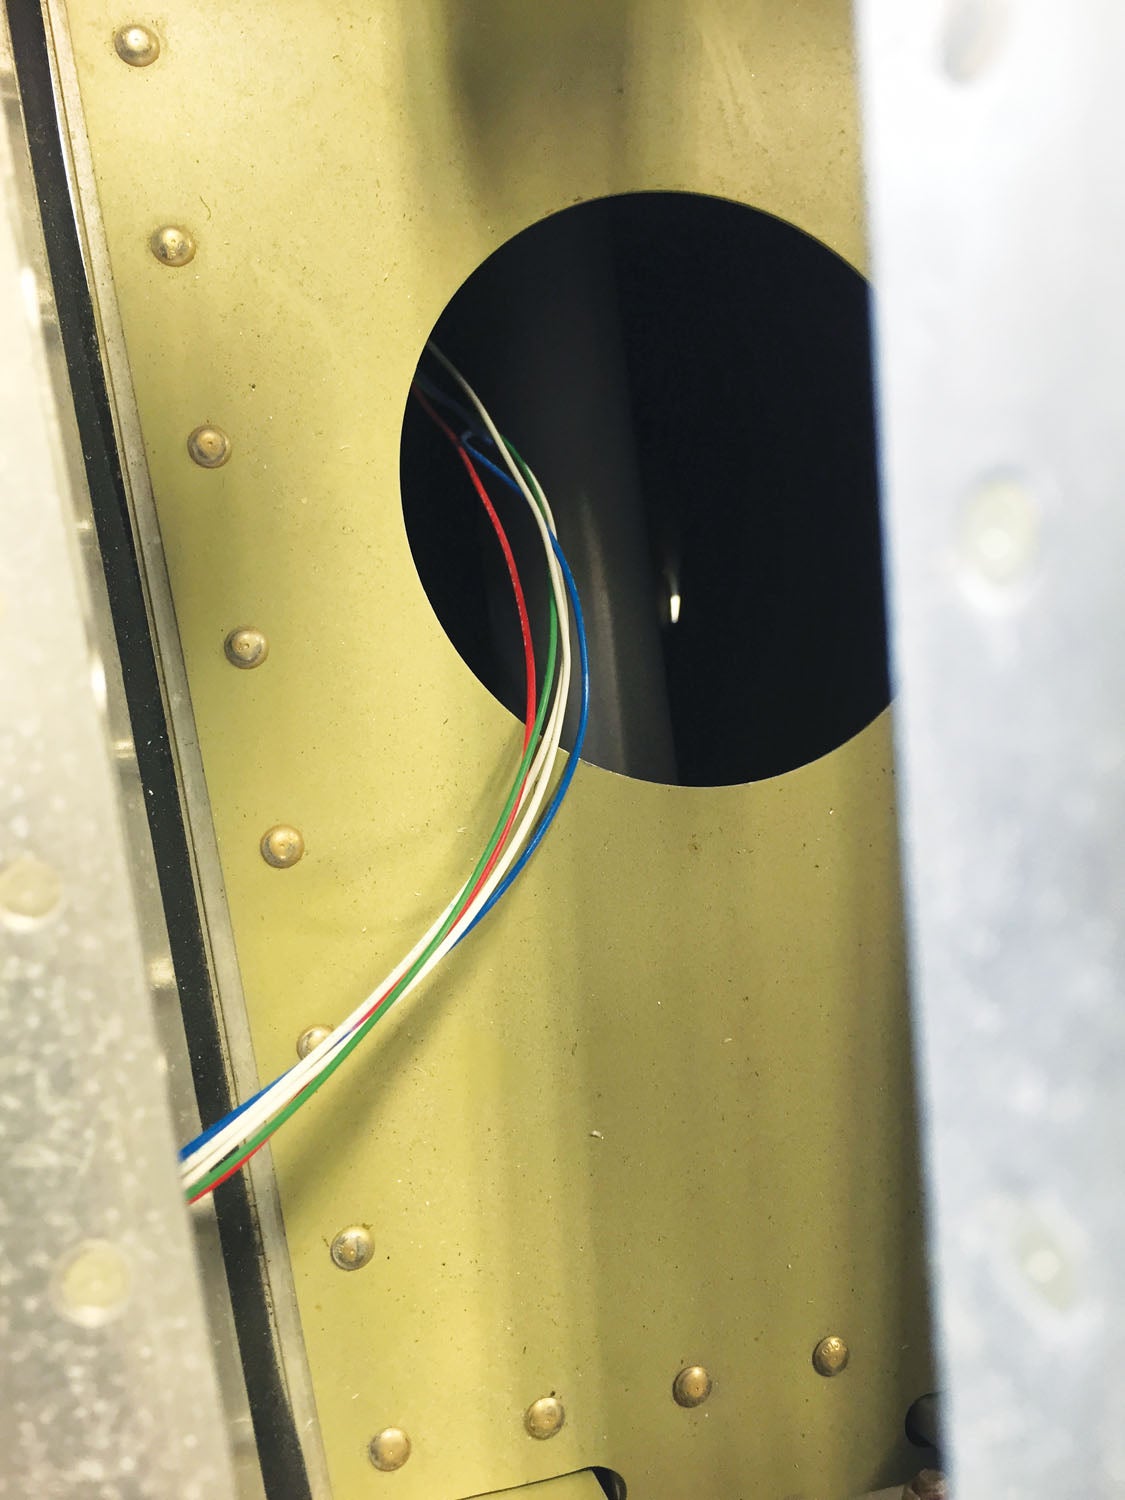
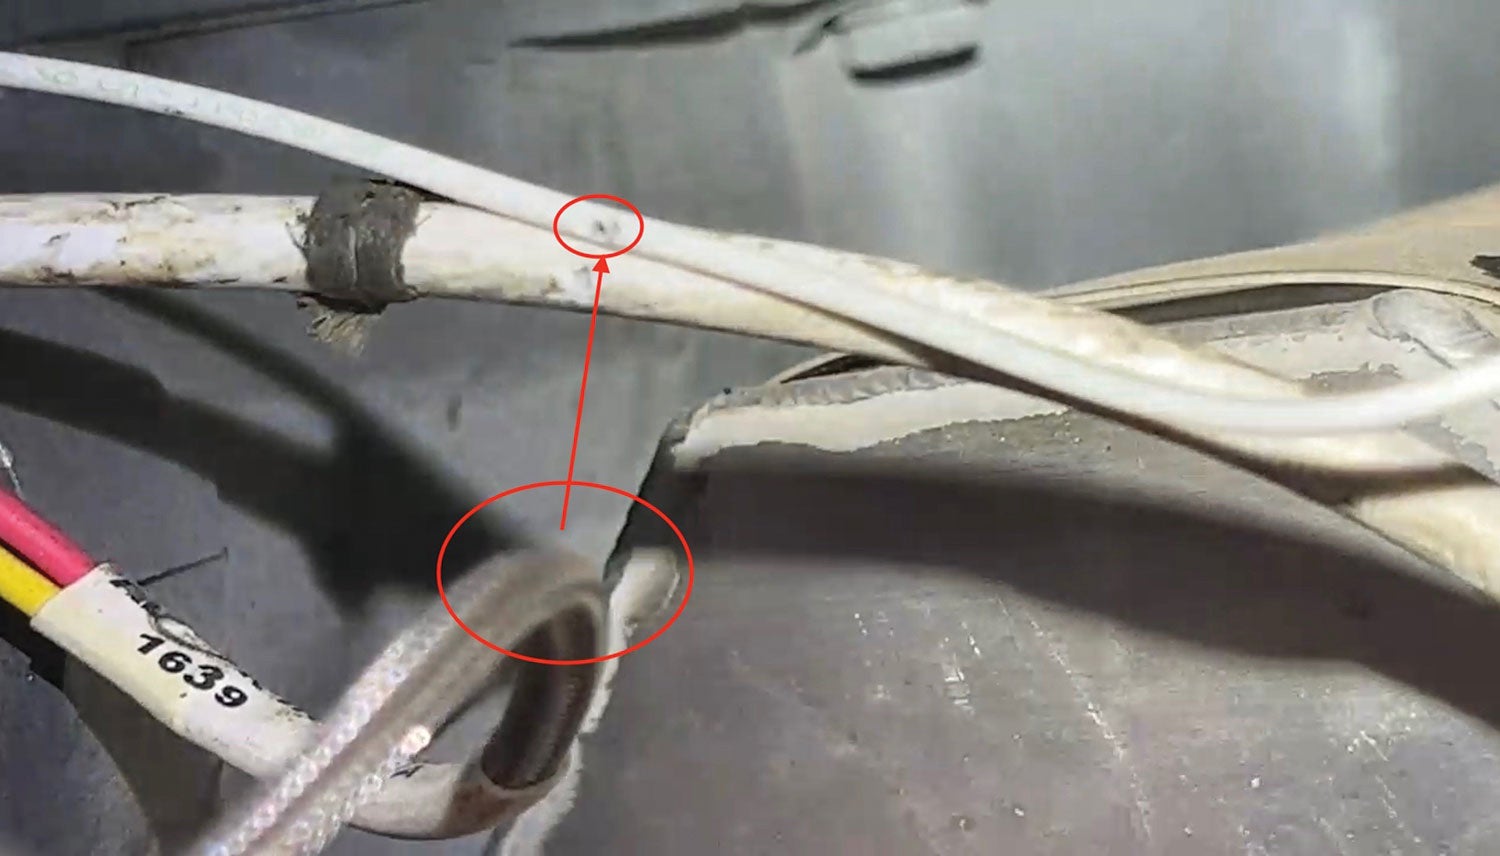
The best place to start would be at the alternator field connection and then follow the wire to where it enters the firewall. So that’s what I did, and I think this is the fastest I’ve ever solved an intermittent problem. About four inches back from the alternator, I could see that the steel spring wrapping of the EGT probe was touching the field wire. I moved it aside and staring me in the face was a spot on the field wire where the insulation had rubbed through due to vibration. Yeah! Time will tell for sure, but I’m confident I found it.
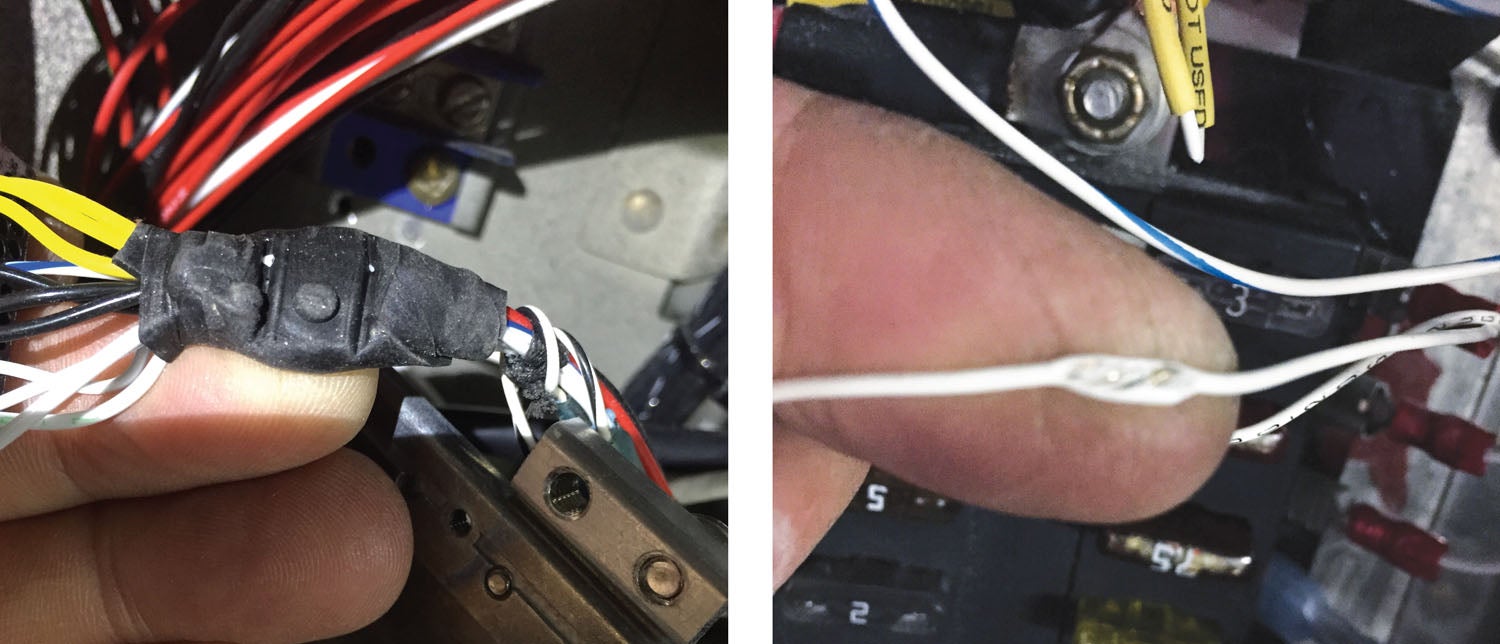
While it’s easy to see how insulation being worn off can cause a problem, there is another source of intermittent electrical failures that is a little harder to find. It’s called “cold flow.” What happens is that when a wire is clamped too tight, over time the insulation can compress and eventually push the wire through the insulation. This takes a while to show up but seems to be very common in engine compartments where wires are bundled with other metal-sheathed wires, such as EGT and CHT probes. We’ve also seen some construction errors where a wire was inadvertently clamped underneath a panel or other structure during assembly, and no one noticed it. The backshell connectors can also be a source of this problem if the clamp is tightened too much on the wire bundle. So, for those of you who are doing your own wiring, there are two lessons: Don’t be a gorilla, and be sure to protect and separate different types of wires as much as possible.
![[Credit: Lisa Turner]](https://www.kitplanes.com/wp-content/uploads/2026/02/Fuel-Selector.jpg?w=218&h=150&crop=1 "Fuel Follies")


I had a problem on my boat’s battery cable. Engine was hard to start. I examined the cable and discovered a fat spot in the cable. I cut it open to find water had entered thought a nick in the insulation and corroded the copper wire causing it to swell. Of course it was in a spot that was hard to see. There was very little metal left with a lot of blue corrosion.
Hi Vic,
I have an RV-8 with an IO-360-B1F w/ 3-blade MT CS Prop. I have the same problems with high CHT. Mine shows a FF of 15.5 USG and EGT of 1450°F at Cyl1 (the hottest). Reaching my circuit altitude of 1200ft AGL my Cyl 1 CHT is at 420°F. Any suggestions to deal with this problem. Im shortly before installing 2 EZ Cool Cowl Flaps.
Comments are closed.