I know it has been a long time since I’ve written anything when Marc Cook texts me to “check in.” I realize I have been remiss in updating him and others who want to know what’s been going on with my Spacewaker II build. The truth is, I had something really exciting happen to the project, but shortly thereafter I was hit with a medical issue that took longer than expected to recover from.

The first exciting bit was that a gentleman, now friend, posted online that he had a complete Spacewalker II project for sale for an amazingly reasonable price. Without waiting to consult my wife, I found that I was the owner of a second airplane. My wife’s friends want to know if I’m still alive after she learned about the “unauthorized purchase” on social media. And no, that is not the reason for my unexpected stay in the hospital.
Talk about things falling into place! The seller of the project lives in Austin, Texas, and he was selling it because he really wanted a different airplane that he had just bought. Lucky for me, his new airplane was located in Virginia, and he was going to drive past our little airpark here in upstate South Carolina on the way to pick up his dream project. Not only that, he restores airplanes for a living and has a rig specifically designed to move fuselages, wings, engines, etc. He offered to drop off the Spacewalker II on his way to Virginia and wouldn’t charge me a delivery fee. Truly amazing bit of luck and the best part is, I was able to add a cool guy to my list of friends.
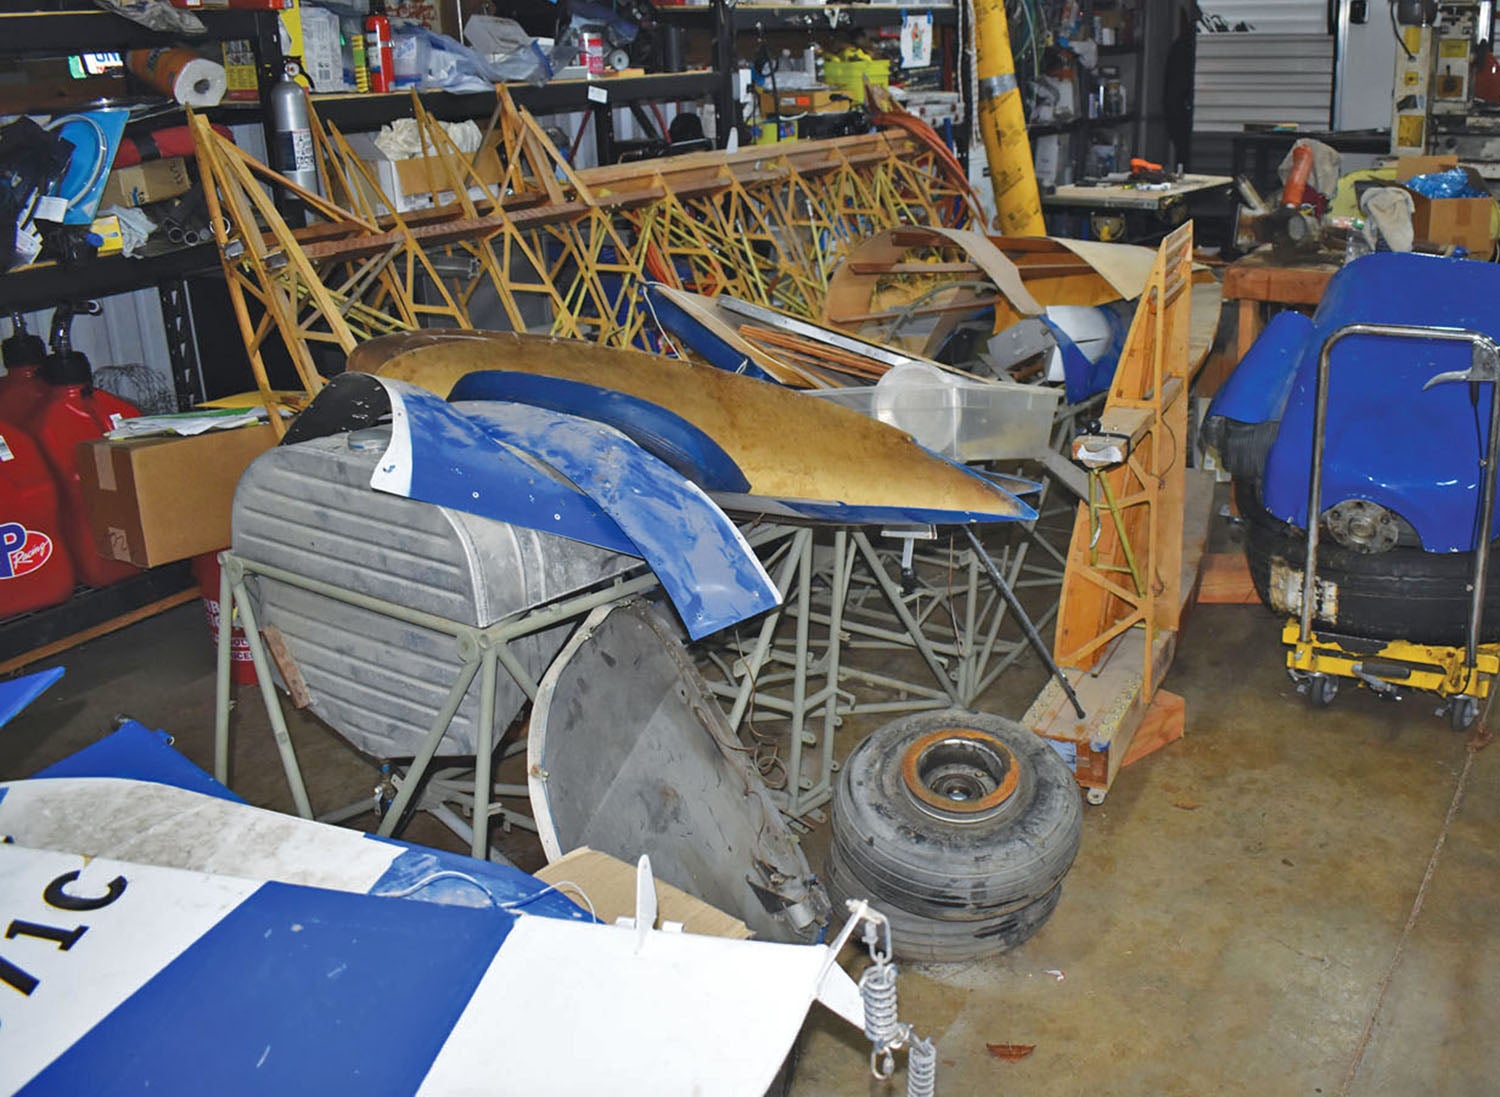
So now I find myself with two Spacewalker II fuselages, one that was part of a factory-welded kit and the other a newly cut and notched 4130 tubing kit. I have gone back and forth trying to figure out if I should weld up the tubing kit or use the fuselage that came with the project. After looking over the pre-welded fuselage, I decided to use the fuselage from Texas and sell the tubing kit, even though the tubing kit would provide much more room.

Forced Landing—What Happened?
When researching the project, the first thing I looked at was its history. I found that in 2008 the owner of this Spacewalker II apparently let a friend fly it. The friend ran it out of fuel and with no radio on board, he found himself almost landing on top of another plane that was on short final to his local airport. The pilot diverted to a nearby field and in the ensuing off-airport landing, with a total of 68 hours on the aircraft, did an expert job of removing the main gear from the bottom of the airplane.
The fuselage I received had been expertly repaired but the landing gear, not so much. Well, it had not been completely repaired. Rather than removing tubing, they elected to cut out the damaged sections, insert smaller tubing in the V-legs, rosette weld them into place and move on. My preference is to fabricate new gear legs, so that’s what I am going to do.
Wood Wings
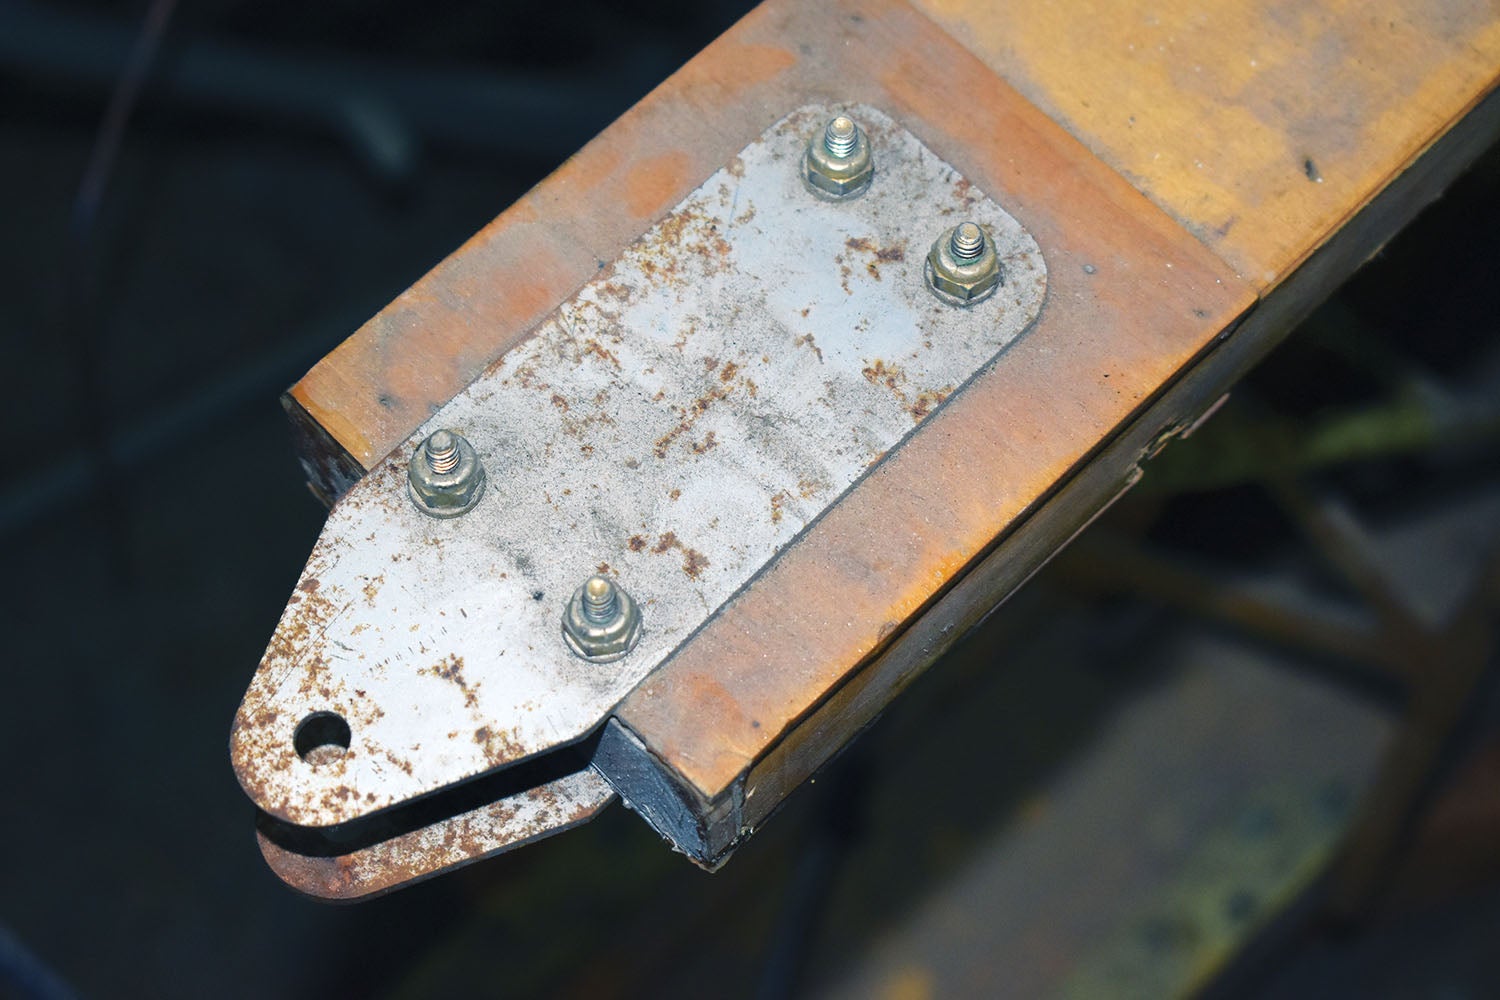
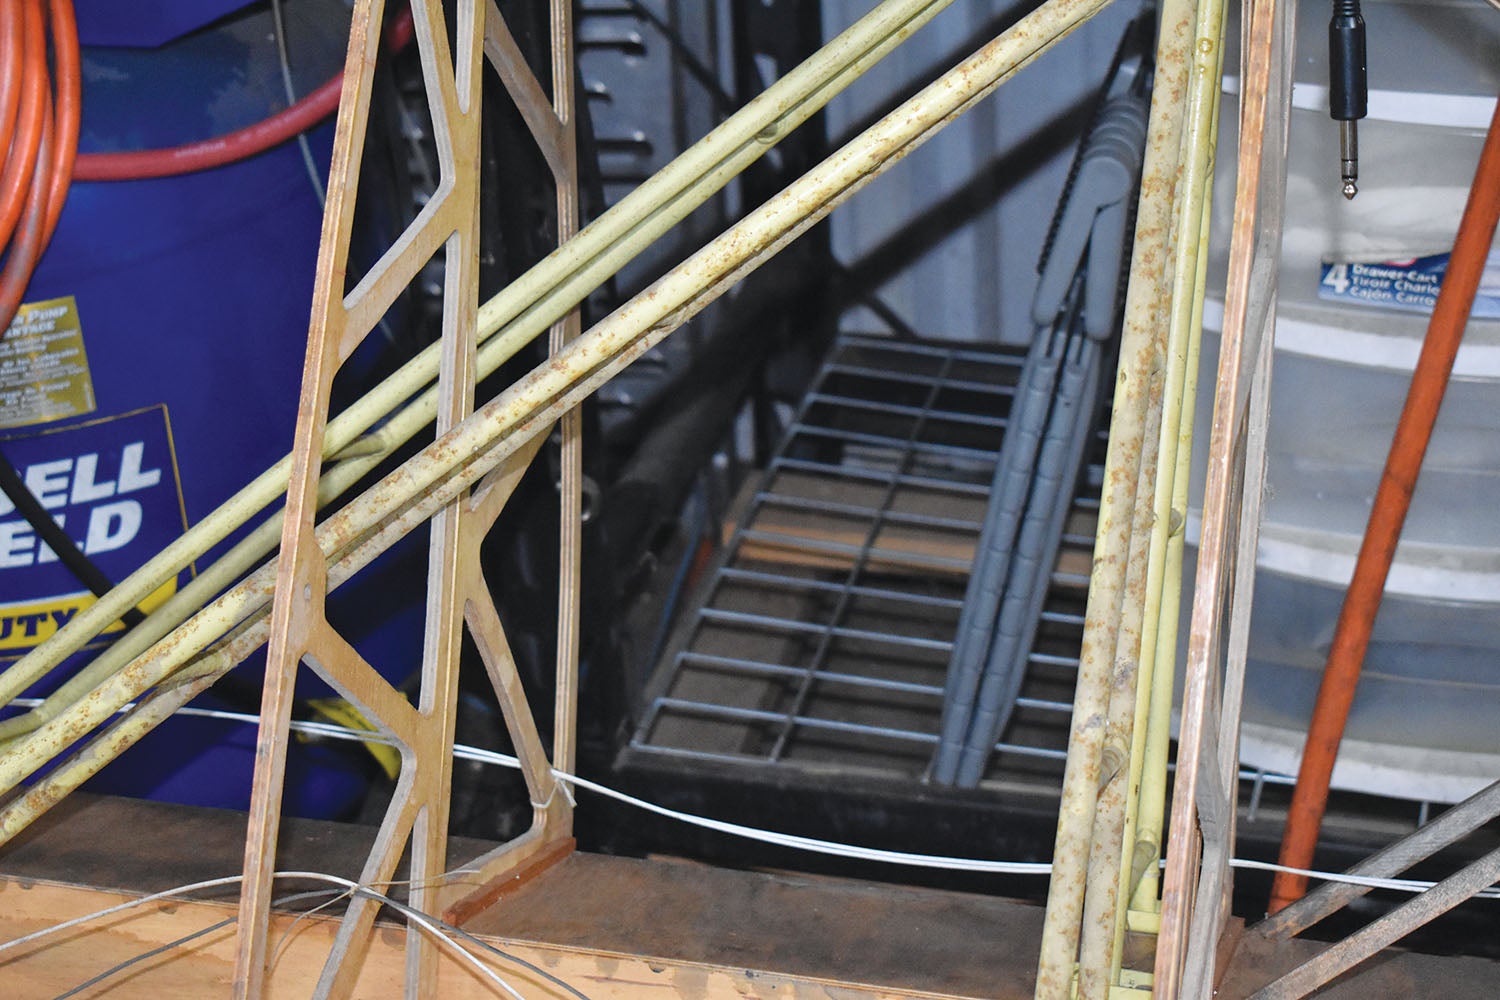
The tail group was the only part of the plane I received from the original builder that was still covered. This left the wings exposed, which is a good thing. The basic structure is in good shape. However, all the metal parts (not counting the fuselage), compression struts, wing attach fittings, etc. look like they were primed and never painted with a top coat. Thus, they all have a little bit of surface rust poking through the primer. In the next article, I’ll explain how I stripped them.
Although the wings look good, for some reason it doesn’t appear as though they were varnished prior to cover. If they were varnished, it was a very light coat. The ribs and spars will have to be sanded in place by hand and varnished.
The wingtips on this aircraft are fiberglass and one will need to be repaired, which will be rather simple. My only question is, should I add a wingtip bow or just repair the fiberglass tip? A bow will look more traditional, but the fiberglass will be faster (says the guy who started this journey as a plans build).
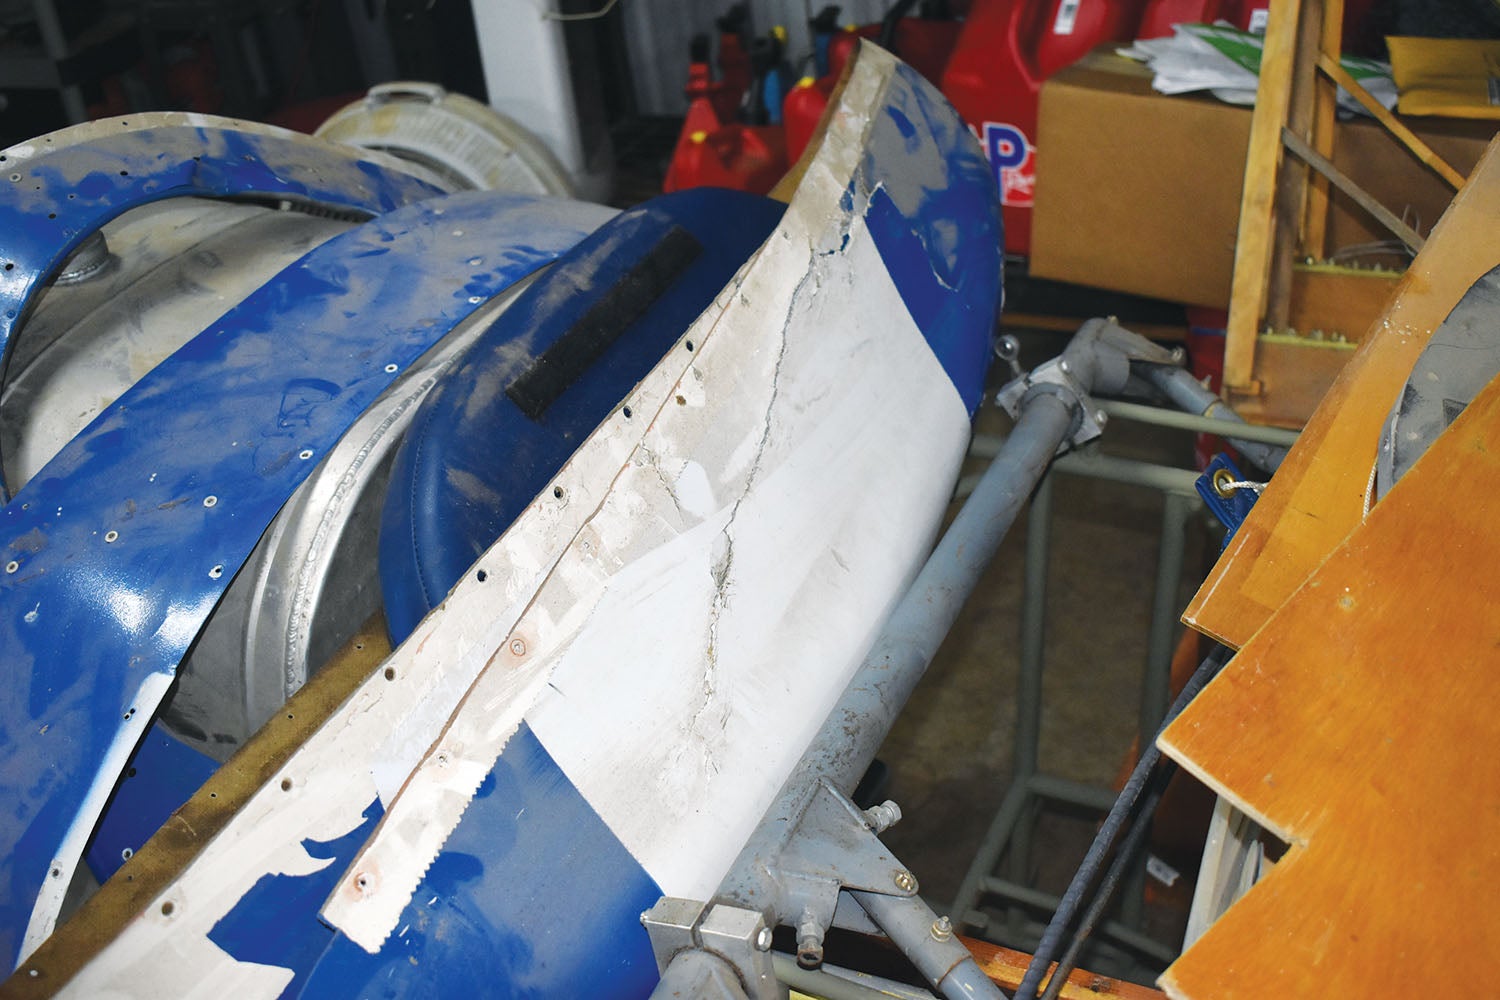
This is where I went off the path, just a little, but I came back on course. I realized the fiberglass tips and rudder have a mounting boss for position and strobe lights. This got me thinking, flying around South Carolina on a warm summer night, after the sun has set, just sounds so relaxing. The only challenge is, where to put a landing light. I know, landing lights are not required, but I would just as soon have one.
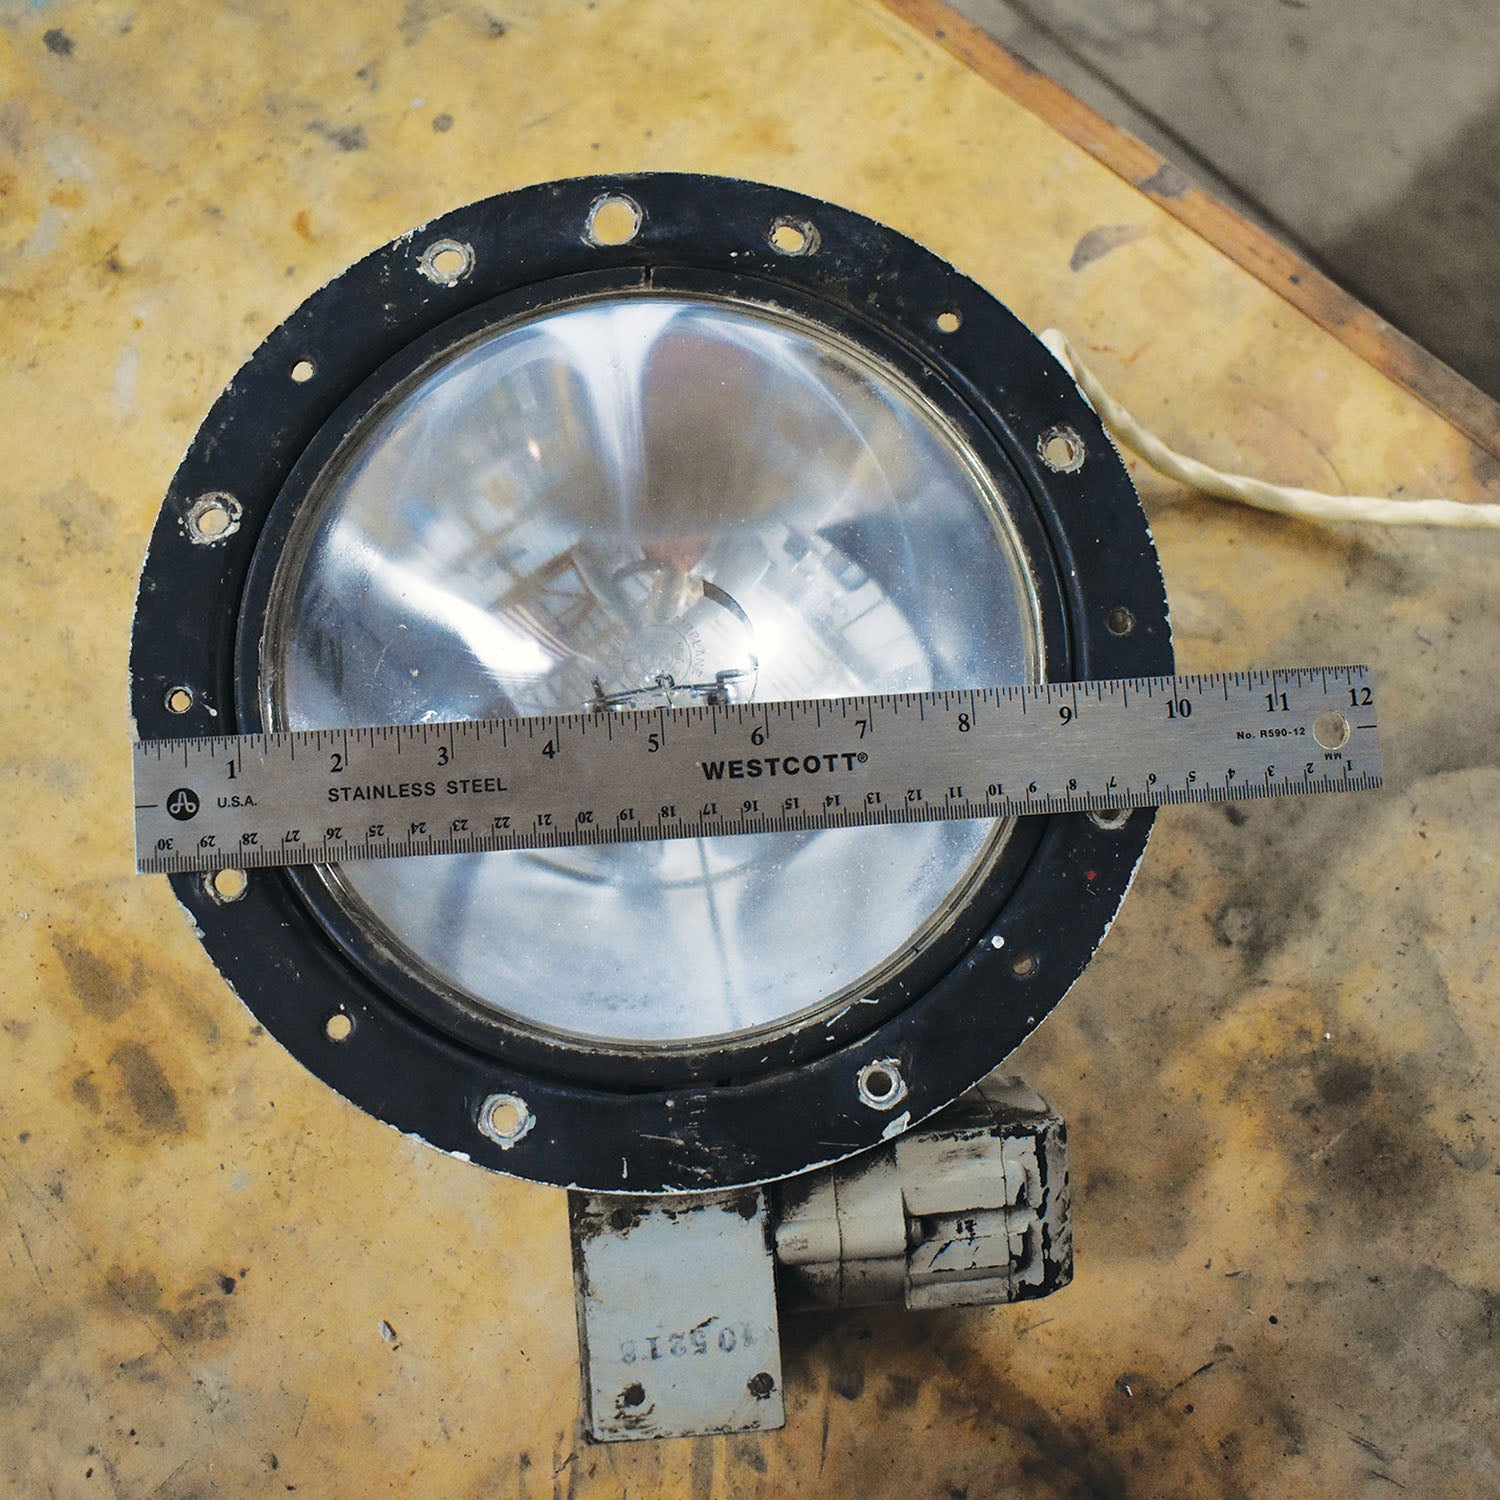
While searching the web for instruments, I stumbled across a powered retractable landing light for a really reasonable price. A quick transaction, emphasis on “quick” (meaning I didn’t research or think), had a working retractable landing light on its way to me. However, when it arrived, I realized that the light I ordered must have come from a Super Stretched 797 nine-engine airliner with a 28-gazillion-volt AC/DC electrical system. With a retracted depth of just under five inches, the light won’t fit inside my wing, which is eight inches at the main spar and tapers down from there. Umm…not to mention, should I ever turn it on, the power draw will probably reduce the total thrust from the mighty Lycoming due to the added electrical load.
This light is going to end up as wall art in a neighbor’s hangar. Bummer. Now to look for some LED landing lights that I can hide on the plane someplace that will still look “sort of” period.

It’s Instrumental
I’m a real stickler on panel ergonomics. I have seen some really bad layouts (a fuel pump switch right next to an avionics master was the worst), and this tandem-seat aircraft is no exception.
This Spacewalker II was set up with a throttle on the left side, which would normally dictate the starting switches on the right side. Other operational switches and controls are either on the left side or in the center. This layout is used so that during starting, the left hand can manipulate the mixture, prop (if a constant-speed prop is installed) and throttle, while the right hand presses the starter button or turns the key.
This aircraft was set up with the throttle (I have yet to find the mixture control) on the left and the key switch on the left. What?
The new panel will be a more traditional layout, with the mag switches and start button on the right. (With Experimentals, a thief is more likely to steal the electronics than the plane. If they elect to steal an Experimental, God help them! Thus no keys in my E/A-Bs.)
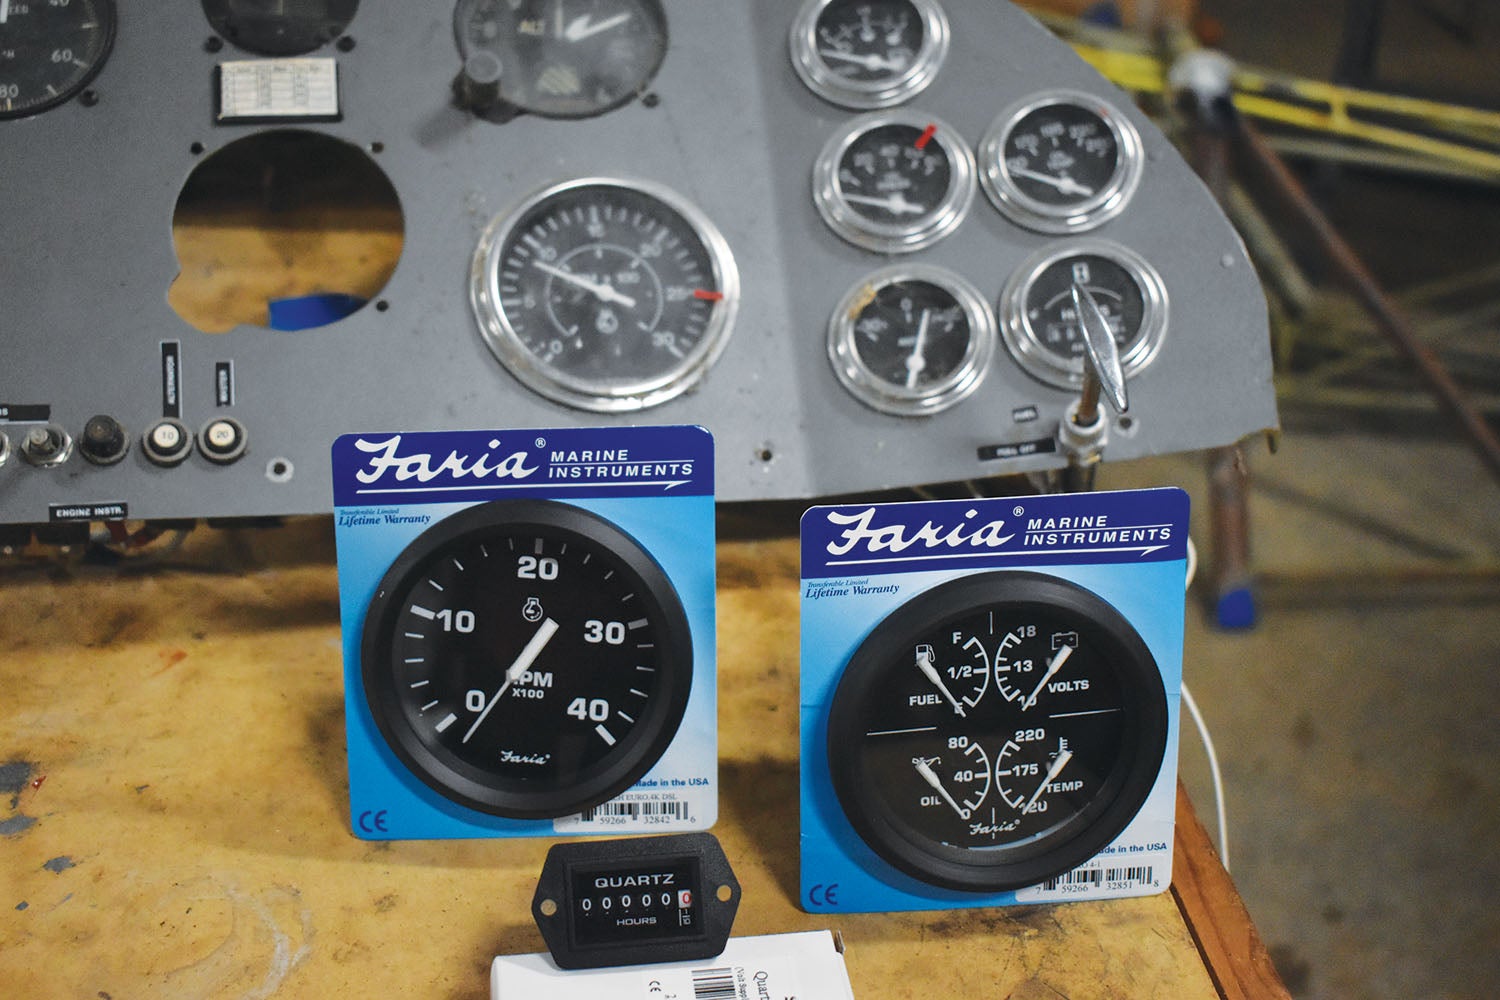
I’m also going to replace the individual chrome gauges from the auto parts counter with cluster gauges from the marine parts counter. I couldn’t find a tach that is limited to 3000 rpm, so I had to settle for 4000 rpm, which is fine with me.
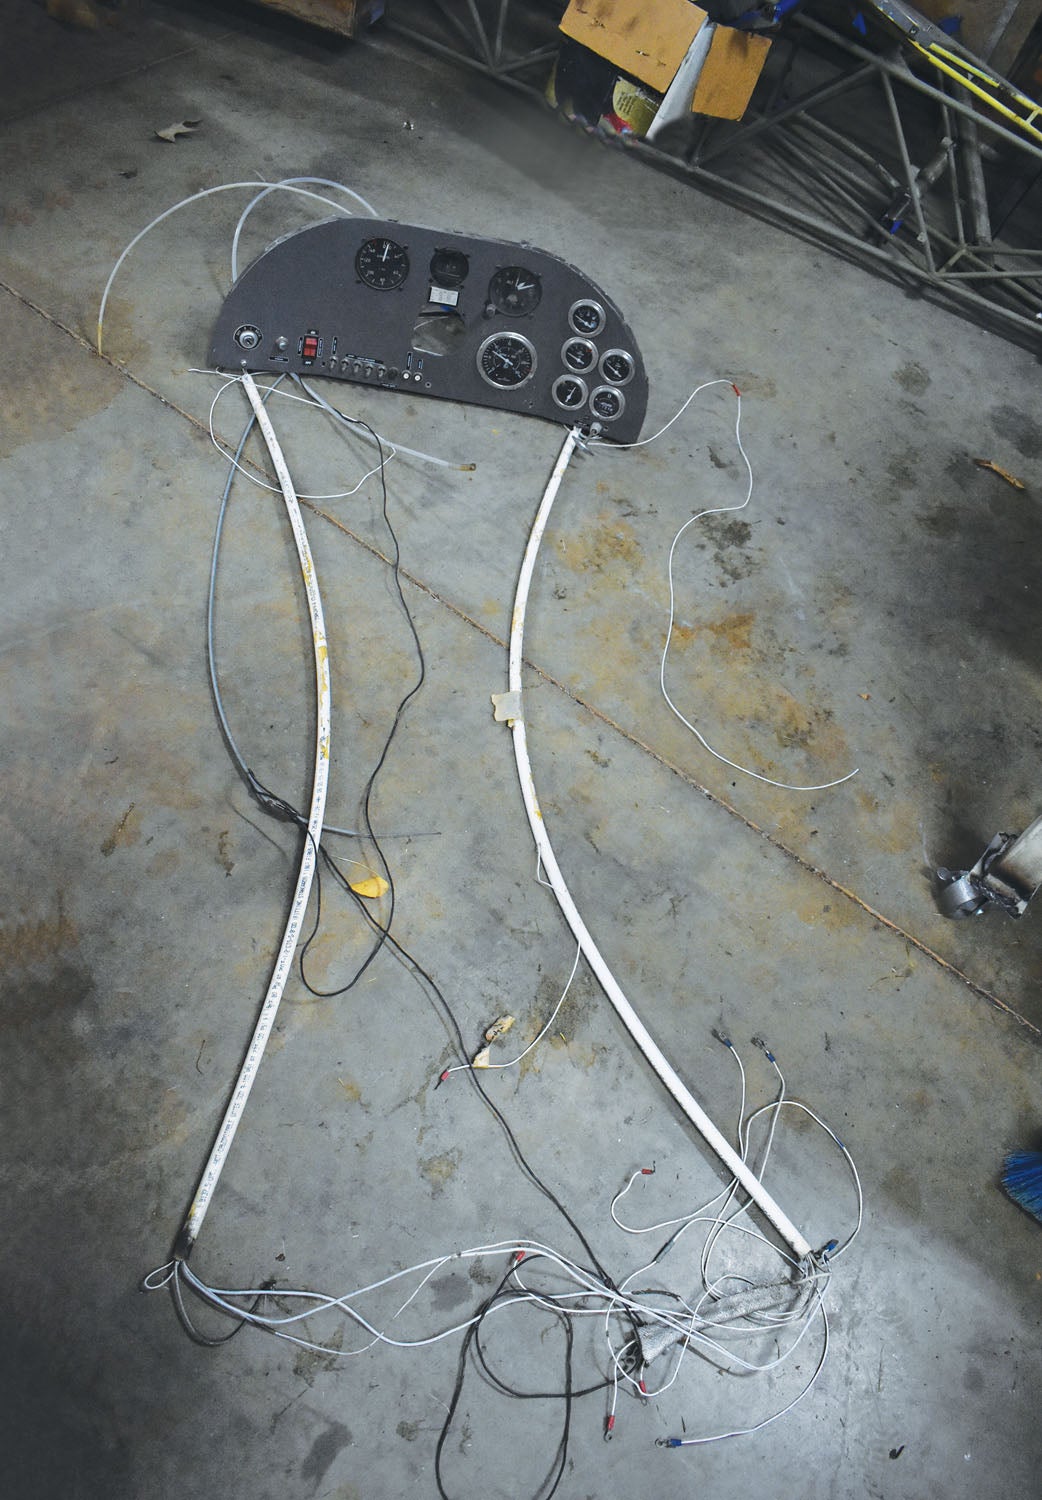
One other change I will make is to remove all the PVC tubing used for wire runs.
New Throttle Quadrants
When I started inventorying the parts, I stumbled across the throttle quadrants, still connected to each other and the throttle cable. In keeping with the original builder’s theme of questionable quality, I realized there were no large-area washers used on the throttle quadrants to keep them from jamming the controls, should a rod-end bearing fail. I point this out not to criticize the original builder, but in hopes of educating other builders to properly assemble such critical components.
One other thing I can’t find is the mixture control. The carburetor for the O-235 that came with the project has a mixture arm, but I have yet to find a control for it.
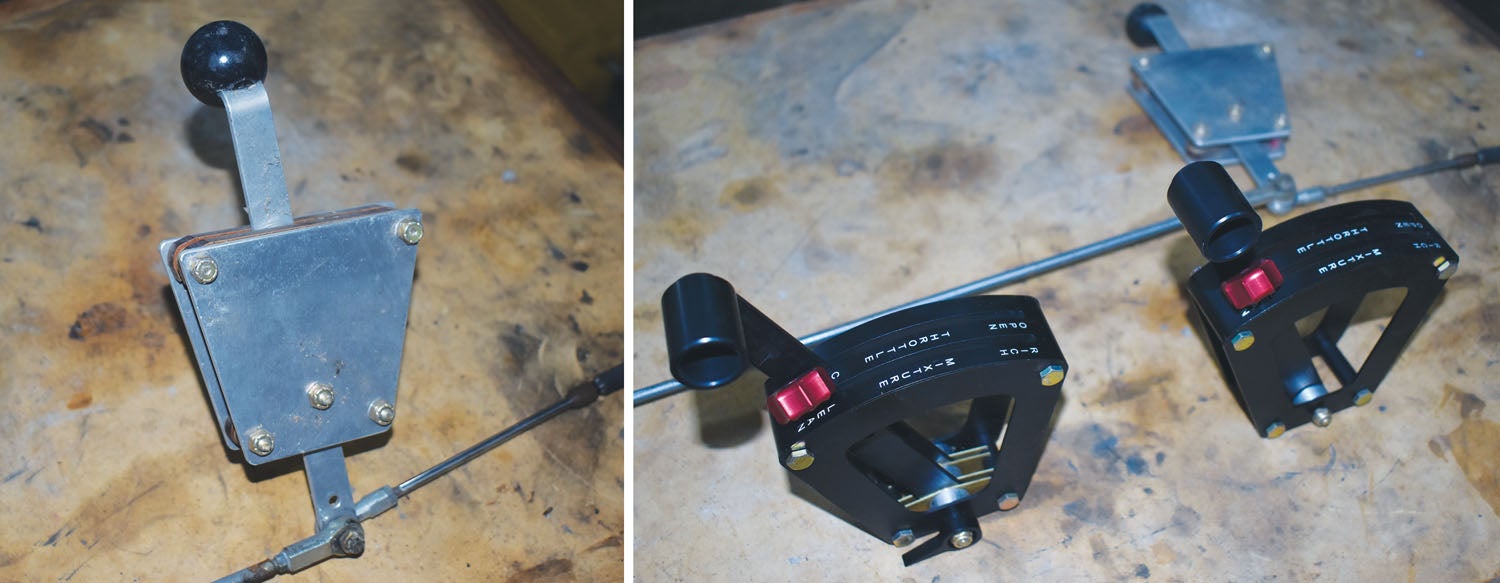
Not to worry. When I built my RV-9, I installed a DJM Manufacturing throttle quadrant in the middle, between the two seats, and after more than a thousand hours flying that plane, it is one of the best modifications I did! A quick call to Dayton Murdock had two of his two-lever throttle quadrants heading my way. Each quadrant will be able to manipulate the throttle and mixture, while the quadrant that goes in the rear cockpit will contain a friction lock. The aircraft is soloed from the rear seat, which is why the lock goes back there. I’ll have to figure out how to install the carb heat prior to cover.
When I redesign the instrument panel, I want to do so with an eye toward crash survivability. I realize this airplane has already been “gently” crashed once, and the results of that accident are still evident. My hope is to reduce some of the sharper edges, especially in the front cockpit. New five-point harnesses will be installed with the cockpit upgrade.
What else is on my short list of things to do? Hang the wing panels from the rafters. Strip and repaint metal bits and pieces. Fabricate new instrument panels and, of course, fabricate new landing gear. You don’t even want to know what the long list is—but you can be sure we’ll talk about it in the future.


Another great piece from Bill, especially when it involves a lovely aircraft being returned to the sky
Bill,
What advantage do the marine gauges offer over the auto gauges? Don’t the auto gauges offer operation even if there is a failure of the electrical system?
Thanks
Joseph,
Both the original auto gauges and the newly acquired marine gauges require electrical sending units. These are not old-style steam gauges that require a copper line from the engine.
Thus, an electrical issue would cause both sets of gauges to stop reporting. This does not concern me as the engine will continue to operate long enough for me to land, should there be an electrical issue. (My RV has similar sensors feeding its EFIS panel.)
My desire to replace the original chrome gauges is purely aesthetics. Having a reflective chrome surface on the panel could be very distracting, especially in an open cockpit.
Bill
Thanks for the education!
Joe
there are aiircraft allover the US that could be made airworthy , fun to fly much less monney than 80,000 kit built why????
Jeff,
To answer your question of “why” people don’t restore inexpensive aircraft rather than build an $80,000 kit, I can only assume it is for a few reasons;
1. Most new “builders” don’t have the skills and tools required to restore an aircraft. When you build a kit or from plans, your skills, tool inventory, and confidence grow with each completed part/assembly.
2. Finding a project that is within the person’s comfort zone is a challenge. See #1 above.
3. While there are a lot of great simple and inexpensive projects out there just waiting to be made airworthy, they may not “push all the right buttons” with prospective buyers. My other plane is an RV and while it is a great plane (goes fast and lands slow), someone who has learned in a C172 is probably looking for something much more capable. It wasn’t until about 10 years after I got my license in the 80’s that I had my first ride in a J3 and fell in love with “low and slow”. Even then, I built an RV mostly because I got tired of going everywhere at less than 100 mph in my old Tcraft.
In short, it comes down to what excites the builder/restorer.
Bill
Comments are closed.