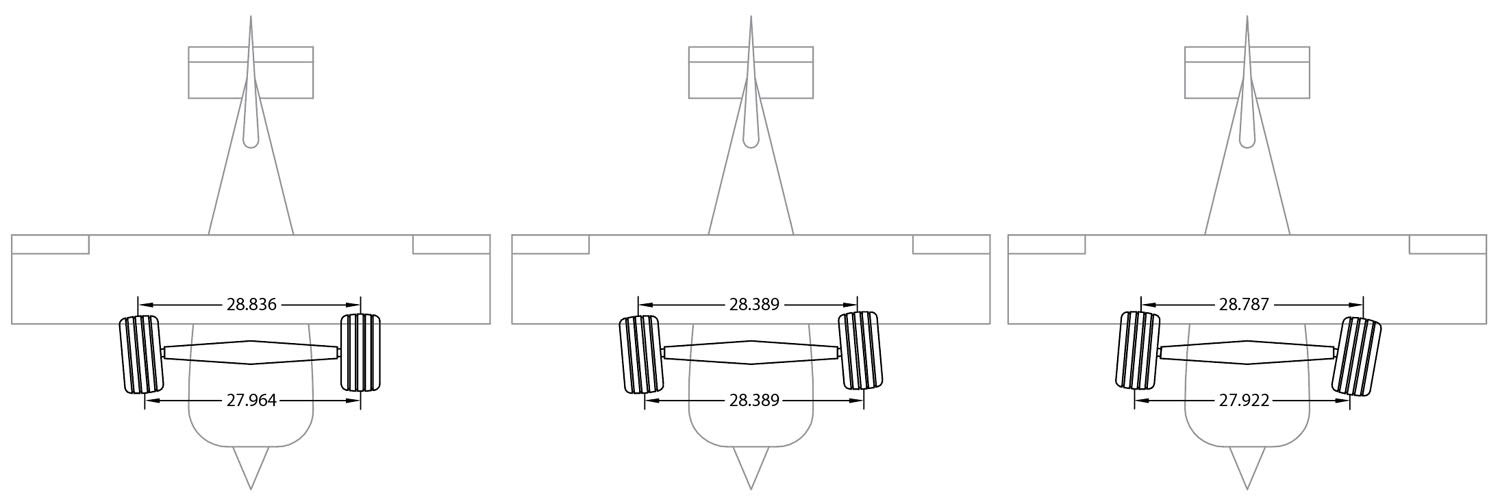
Uneven tire wear is usually an indication of a problem with wheel alignment. Most of the time, the issue will be with toe, which is the cant of the wheel, from front to back, as when viewed from above. This month’s project will show you how to make and use a gauge to measure the toe on your airplane.
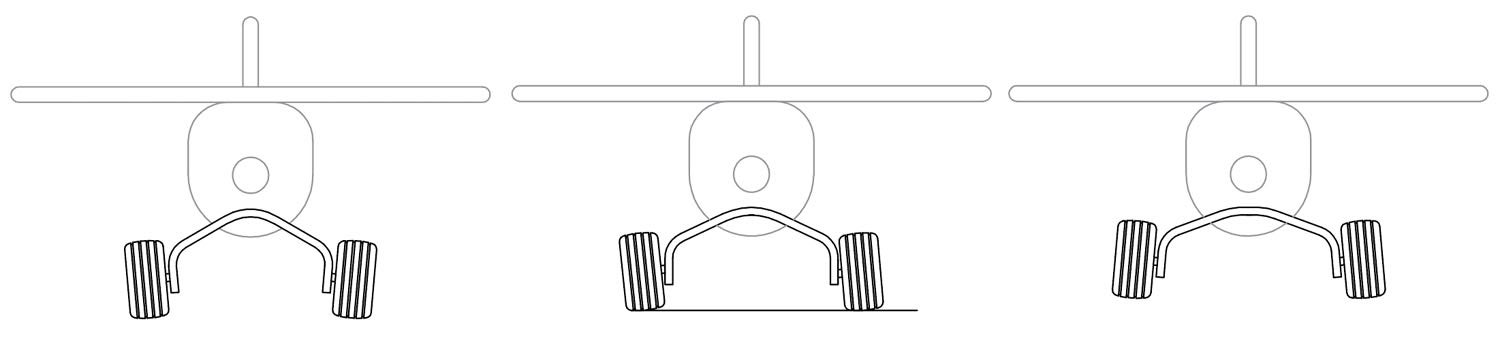

Camber, which is the angle of the wheel to the ground when viewed from the front, could also be an issue. So before we jump into making the toe-gauge, a quick look at camber is in order.
Camber is relatively easy to check by using an angle finder. Perfect would be the wheels perpendicular to the ground with zero camber. But since most homebuilt airplanes have spring-steel or fiberglass landing gear, as the gear flexes, the camber will vary depending on the loading. The manufacturer will usually specify the camber angle based on a particular loading condition, such as full-fuel and no passengers, etc. If you encounter a situation where the camber is different from the left main to the right, such as both wheels cambered parallel, you should take steps to figure out why and correct it.
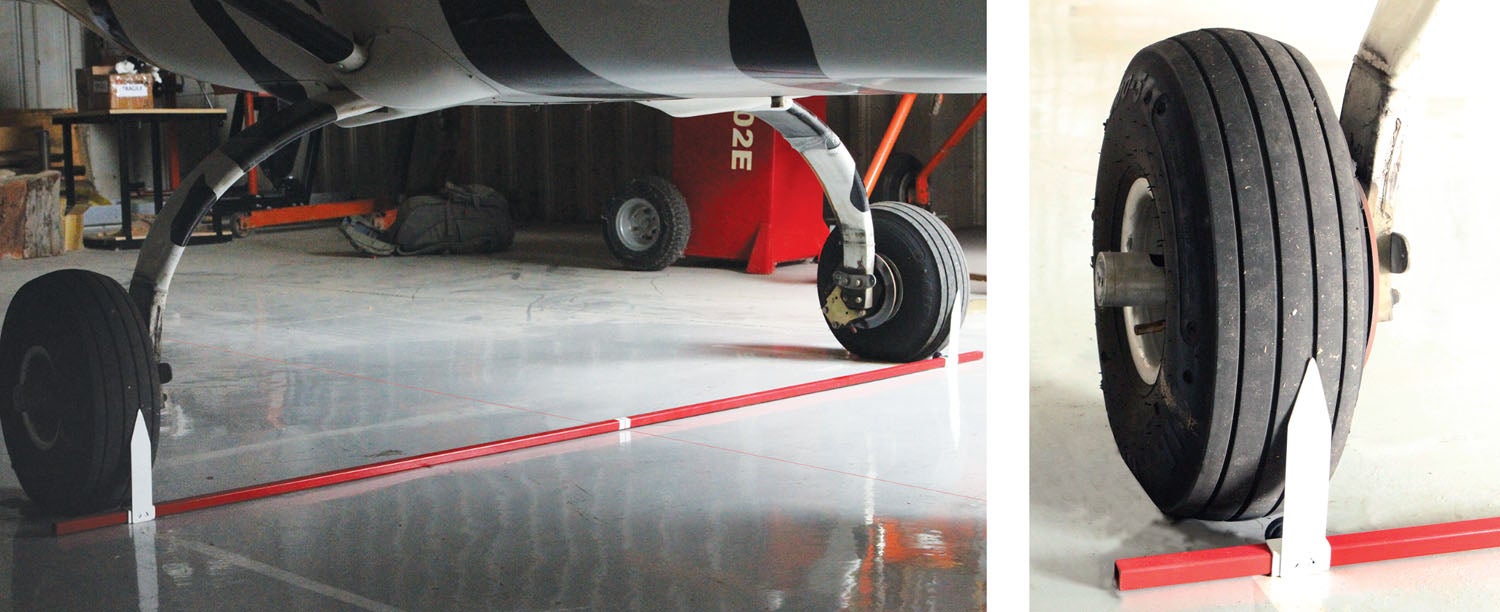
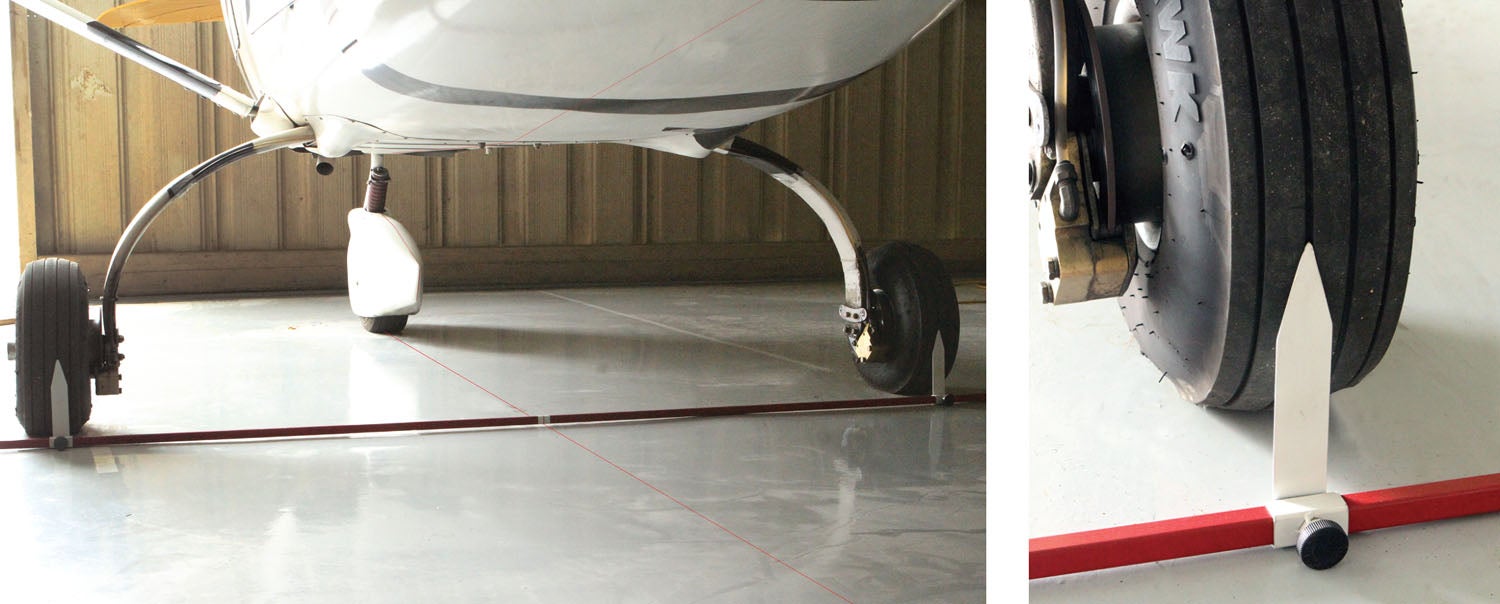
Back to toe. Critical to measuring toe is to have a good centerline reference. You can use a string or snap a chalk line along the ground to represent the centerline (front to back) of the airplane. What I use is a carpenter’s laser level to cast a beam on the floor of the hangar along the center of the fuselage.
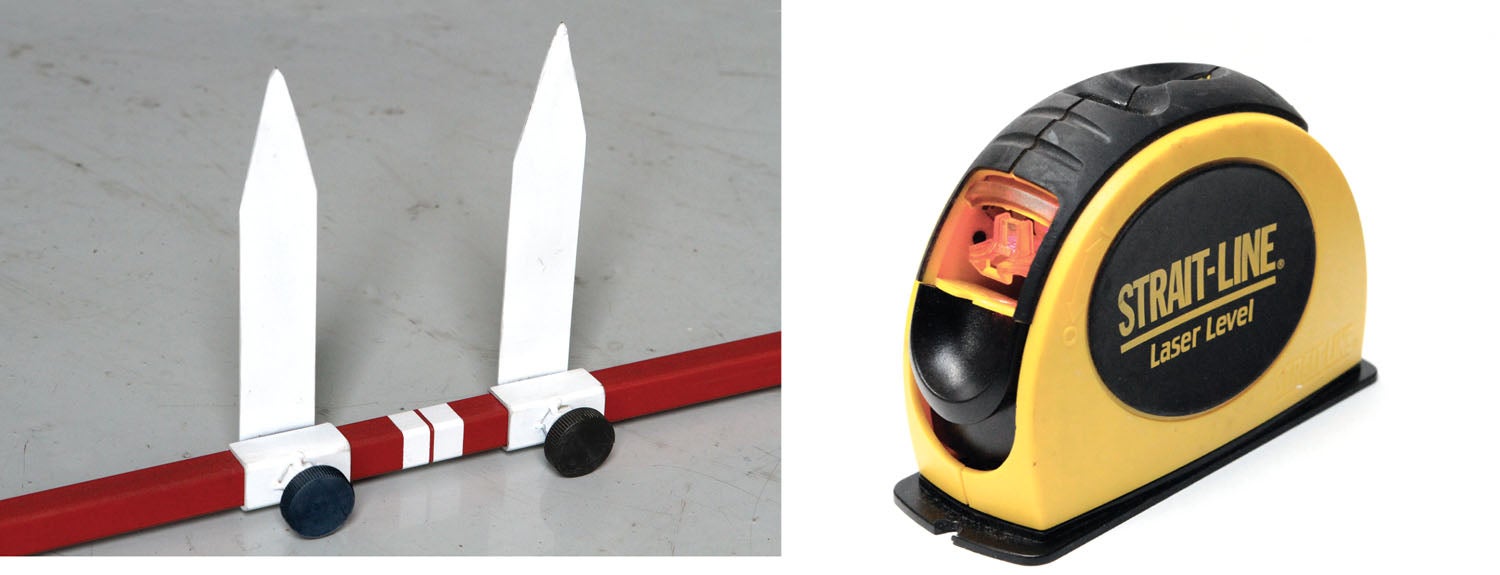
With the centerline reference in place, position the toe gauge behind the tire, center it to the laser line and then set the pointers to the tire reference line. With the pointers set, move the gauge in front of the tires and line up the centerline. The pointers will then indicate the amount of toe-in, toe-out or zero toe for each wheel.
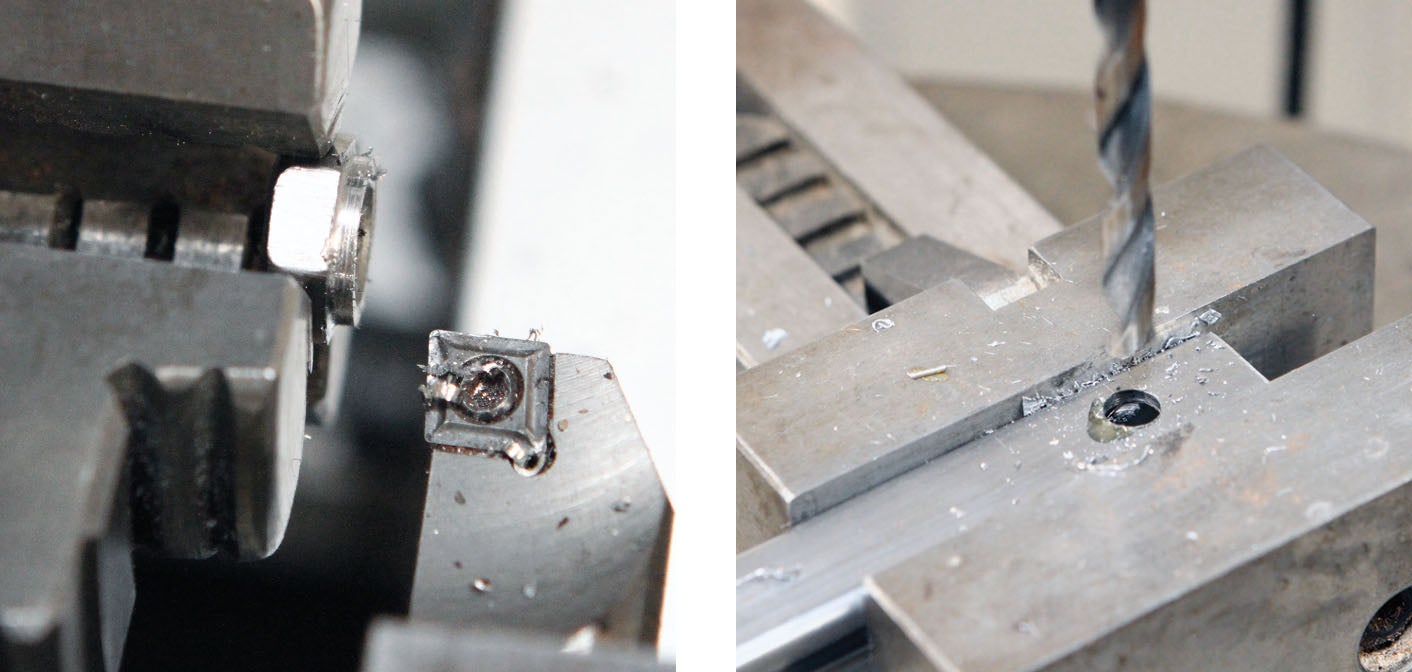
This is a simple gauge to use and almost as simple to make. It’s really nothing more than a trammel with long pointers. The material needed is a length of 5/8 x 5/8 x 0.065 square tubing. This should be at least a few inches longer than the stance of your landing gear. You will also need some 16-gauge steel sheet to make the pointers and about four inches of 3/4 x 3/4 x 0.065 square tubing to make two sliding trammels. To receive the thumbscrews that clamp the trammels in place, each trammel has a 1/4-20 nut tack-welded opposite the pointer.

If you find the toe on one or both wheels needs to be adjusted, the usual method is to add a tapered shim between the gear and the axle stub. It takes a little trigonometry to calculate what angle shim you need, but it’s worth doing because having the wheels aligned means your tires will last longer, and there will be less stress on the gear from the wheels trying to steer off in different directions.
You can buy tapered shims to correct camber and toe from Aircraft Spruce. They are listed under “realignment” shims. Of course, you can make your own! If you’ve got back issues of KITPLANES® or are a subscriber with access to back issues online, look up the “Home Shop Machinist” in the June 2016 issue.
That’s it for now, time to get back in the shop and make some more chips!


Muriatic Acid, at pool “service” concentration, can be used to “dissolve” most commercial forms of plating – Cadmium being the most widely used. Removing the plating does two things for the weld & welder. For the weld, it removes the contaminants that interfere with weld quality & integrity. For the welder it removes the toxic fumes developed when the plating is heated from the weld process. The only caveat in using the acid to remove the plating is the fume of the acid itself – a little bit upwind and a little separation will remove most of the exposure, and the acid, at that concentration, isn’t very aggressive on skin from accidental contact. Just put the washers, nuts or ? in a open container, pour the acid over (a little foaming) them until covered – when the bubbles stop (effervescing completed), return the acid to its container and rinse the parts with water to stop the process.
How would you adjust the toe-in or camber on a RV-6, where the axle is machined with the gear leg as one?
Comments are closed.