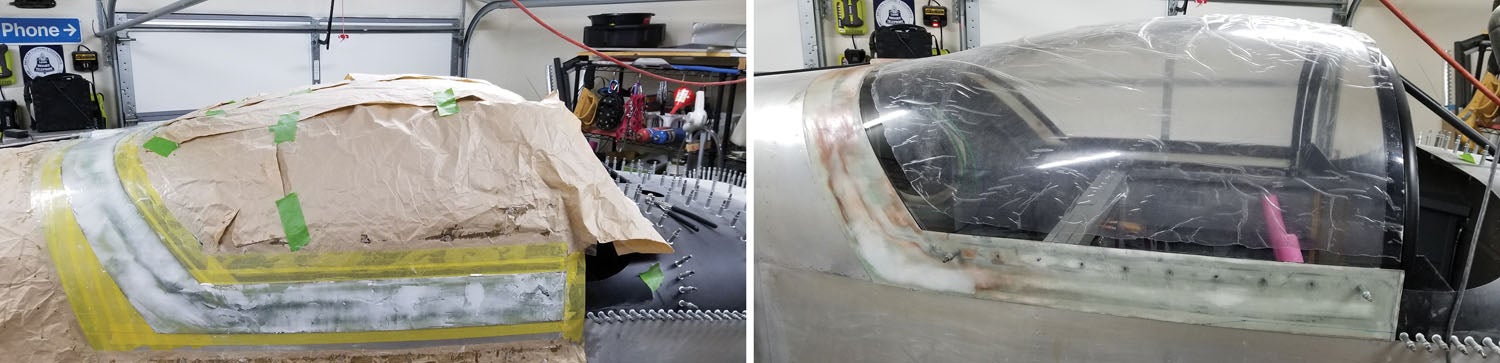
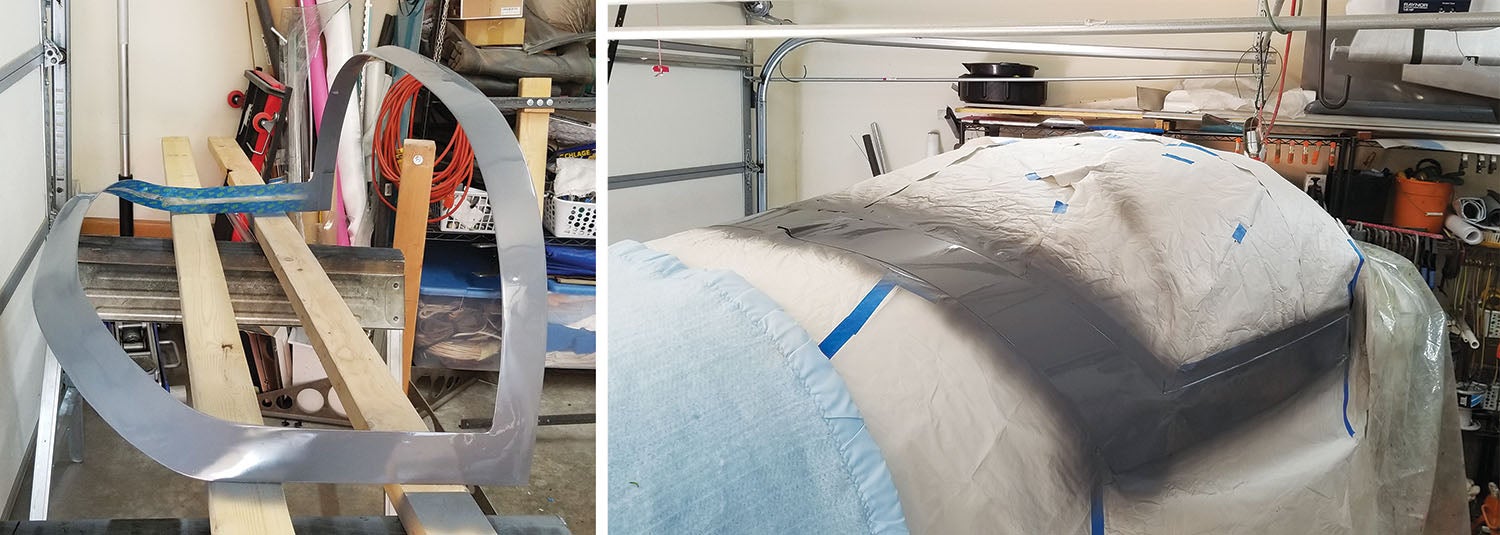
 In Part 1 we fabricated the canopy skirt and windshield fairing from fiberglass and trimmed them to final size—but that doesn’t mean the parts are finally done. It takes a lot of filling and sanding to make fiberglass components look pretty. So let’s get started by making some sanding blocks.
Rip four pieces of plywood 2-3/4 x 17 inches. Also make four 2-3/4 x 6-inch pieces. Cut and drill sections of aluminum angle and screw them to the less-smooth side of all the boards. These are your sanding blocks. The strips of sandpaper stick on and they make awesome sanding blocks. Don’t ever use your hand for sanding or you’ll get low spots. I use the long blocks to work big parts. The short blocks are great for smaller or odd shaped parts.
A Primer on Primer
Kirker Enduro Prime is my primer of choice. It’s a 2K epoxy primer, which is a fancy moniker for two parts. It mixes 1:1 and can be thinned up to 20% with reducer for a really thin coat. The best part is, it’s truly good paint at a reasonable price.
Any primer will work. Rattle can is fine, but make sure whatever you use is compatible with the final paint. I stick with Kirker products for this reason. Most are low volatile organic compound (VOC) paints. Plus their customer service is first-rate. I’ve never had a call go to voice mail. If you have a different preference, please use it. But remember that these tips were written with Kirker products in mind.
I prefer epoxy primer I can brush on or spray. One-to-one is a good consistency for a higher build applied with a brush or roller. Thin it 15–20% for an HVLP sprayer with a 1.8mm tip.
Read the MSDS sheet. Then take the primer to the local paint store and have it shaken for 10 minutes or stir the heck out if it. According to the MSDS sheet, flash time is 30 minutes between coats. Wait 45 minutes before applying the topcoat. Wet sand in 24 hours. Dry sand in four to five days. It may be topcoated without sanding up to five days later. I recommend 60 minutes between coats. It wet sands really nice after 24 hours.
Also notice I purchased one quart each of white and gray. The reason is the contrast between coats allows you to see when you break through a coat. This helps prevent breaking into the weave.
It’s not needed for brush or roller work, but Kirker Ultra-Glo reducer makes the primer easier to spray. It also works with Kirker Ultra-Glo acryclic urethane, which is the paint I prefer for the topcoat.
Stir the bejesus out of the primer. I use syringes to suck out product, so there’s very little waste. I’ve had a run of bad luck with rubber stopper syringes—the rubber plunger keeps popping off. The solution was to switch to rubber-less syringes. After a long web search, I found Norm-Ject 50 mL polypropylene syringes at Grainger.com. These are great for pulling any thickness of paint out of a can. Plus, there’s no rubber plunger plug.
Grainger has boxes of 30 (Item #45UC79). I use them for all sorts of jobs beyond paint. A section of tubing can be slipped over the tip for pulling or pushing a liquid somewhere that’s difficult to reach.
Regular rubber-type syringes are fine for activators, catalysts, reducers and fish-eye products. They are all very viscous. I just pour into the syringe with my little finger over the tip, then release into the mix. Product flows right out. Those syringes are easy to find at the local pharmacy. Get several sizes. The plungers are good for quite a few uses before they need to be tossed.
Label the syringes near the graduations with the product name, then apply a section of clear, heavy packing tape over both. It protects the markings from getting wiped off during cleanup. Also mark the plungers so they can’t get mixed up and cross-contaminated.
Always clean the syringes with a solvent before use, just in case there’s residual silicone. I’ve never had a problem, but I’ve heard a few horror stories.
Start by block sanding with 40-grit paper to remove uneven areas. Don’t break through the weave. Our goal is to prep as much as possible before bonding the skirt to the canopy frame.
Fiberglass Surface Prep
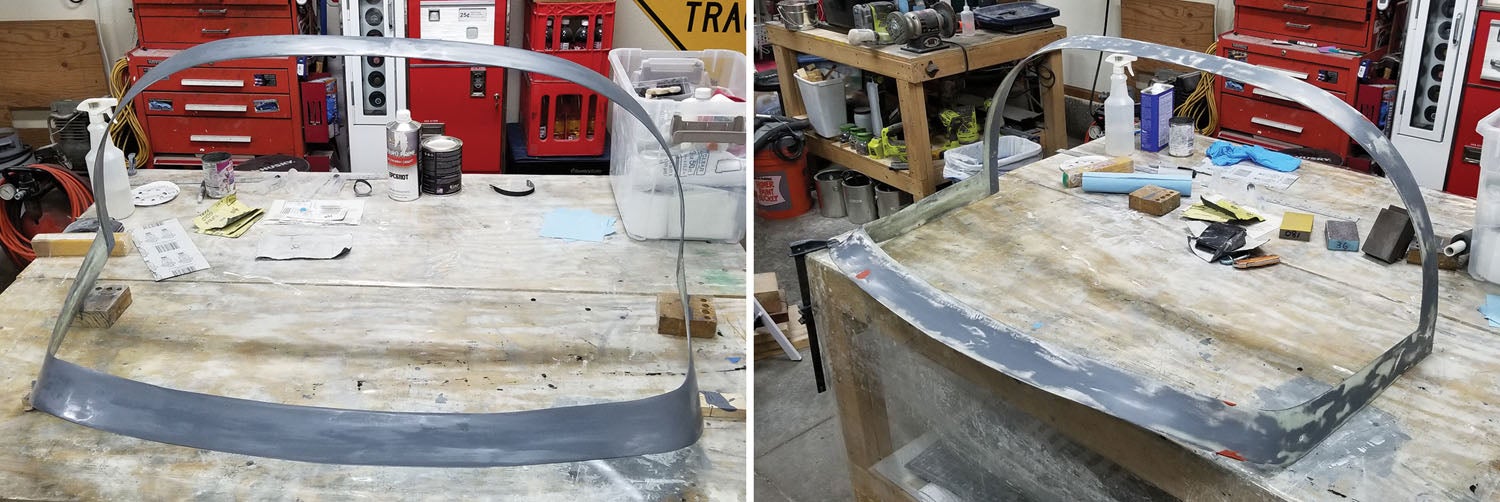
Here’s the method I used most recently and I really like it. It takes far less work and produces very few pinholes. The goal is a “blocked” surface. The flatter the surface, the less distortion in the paint reflection. More purdy!
Mix some epoxy. Estimate one layer in quantity. Apply a skim coat with a credit card. Cure 30 minutes, then mix and apply another coat. Let it cure for 30 minutes, too.
Mix some micro. Consistency is key. Too thin and it flows, too thick and it doesn’t get smooth and won’t stick properly. Thick like peanut butter is pretty close.
Skim a layer with a credit card. Starbucks and hotel key cards are my preference. The cards are just thick enough to spread. No embossing makes them easy to clean. Don’t sweat the irregularities. Just smoosh hard into every imperfection and spread a layer just thick enough to be opaque.
Here’s an old trick I used doing auto body repair: Spray a gloved hand and the part with water and slide your fingers over the part very lightly. Keep it wet enough so your fingers glide over it. Smooth out the micro and quit.
This really reduces the amount of micro needed. The water will evaporate and the micro will cure. Works great up here in Colorado, but I can’t say if it will work in more humid areas. An alternative is to slap the micro on thick, wait a couple hours until it’s semi-cured, and use a Surform file to knock it down to a workable thickness. Your call, but why waste all that epoxy and micro? Either way, cure overnight before hitting it with sandpaper.
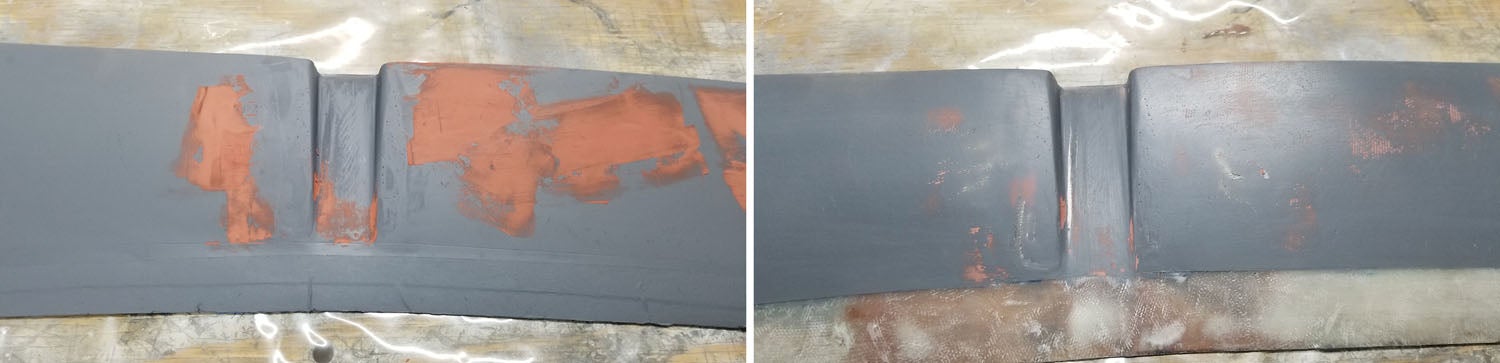
Block sand with 40-grit until the surface is fairly flat. Never sand with your hand or fingers. Unless you have perfectly flat hands like Pinocchio, it will leave irregularities in the surface.
Sand with 40-grit on a board. Use a PVC pipe or a rubber sanding block for curved areas. Just sand enough to remove excess micro and make the surface even.
Take out the high spots. Leave the low spots where sandpaper isn’t touching the surface. The 40-grit paper grinds off micro really fast, so be careful not to break into the weave. You can also use a Surform file and/or Vixen file to cut down globs.
Move on to 80-grit. Take out some of the deep scratches from the 40, but don’t go crazy. Again, don’t break into the weave. For big parts, a random orbital sander will blow through this job much quicker. Be sure to use a shop vacuum, or the whole shop will be covered in micro dust. Repeat to fill any low spots.
Clean off the skirt. Wipe it with a clean paper towel and solvent or alcohol. Don’t sweat the scratches from the sandpaper.
First Coat of Primer
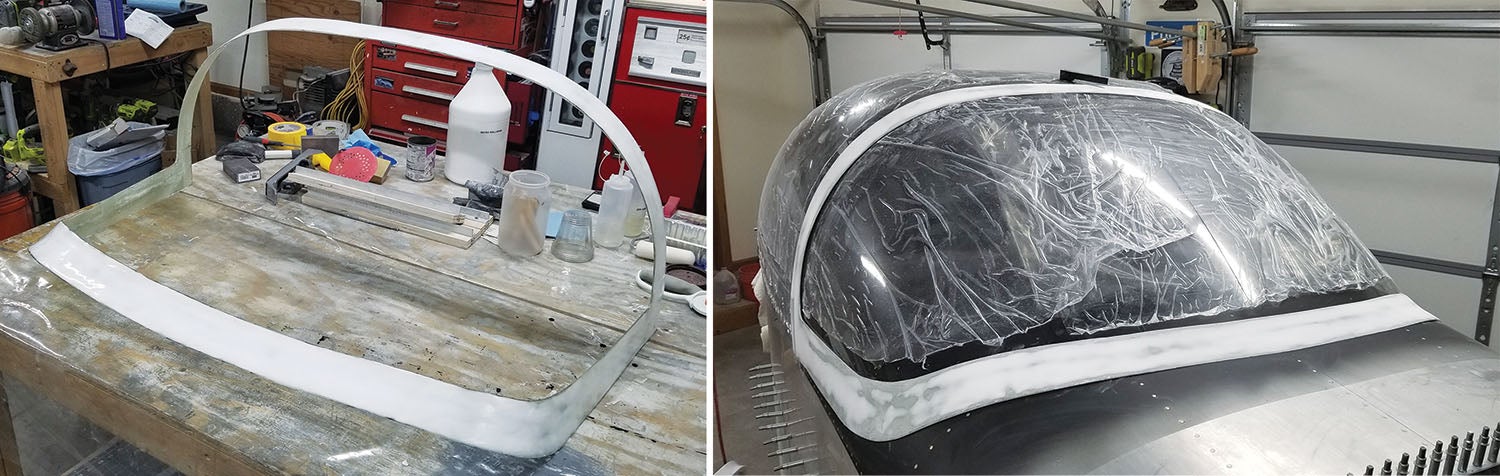
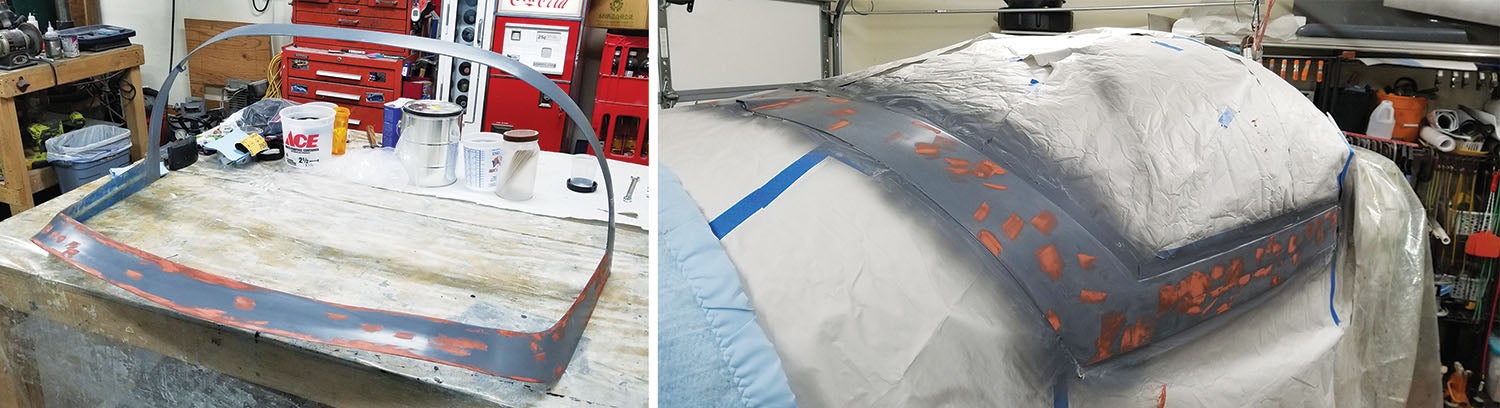
Pick a color of primer. I prefer gray over white micro because it’s easy to see breakthrough. If the gel coat is gray, I use white primer. Mix the primer neat (no reducer), and brush on a coat with a foam or acid brush. I tried a foam roller, but it left a texture and wasted too much paint. Cure 60 minutes. Apply a second coat. Walk away. Don’t mess with drips, sags or imperfections. Cure for 24 hours.
Wet sand with 180-grit on a rubber block. The trick with wet sanding is the wetness. A quart of warm water in a gallon bucket and a few drops of Dawn detergent are all you need. Change the water often. Wet the sandpaper. You want just enough wetness to act as a lubricant. Too much water and the sandpaper doesn’t cut. Too little and it loads up. There’s a sweet spot. You know it’s right when the surface gets kind of muddy.
When it’s loaded and starts sliding, wet a sponge and wipe off the sandpaper or dip it back into the bucket. Repeat. Sand until it’s even and the cloudy areas just start breaking through. Work any problem areas like drips or sags. Breaking through primer is OK at this point, but don’t break through into the fiberglass weave.
Wet sand in stages, all the way to 400-grit. It should be nice and slick, and it will look like a cloudy sky. Sandpaper scratches should be highly visible filled with primer. That’s perfect. You want minimal micro and primer left, and no exposed weave.
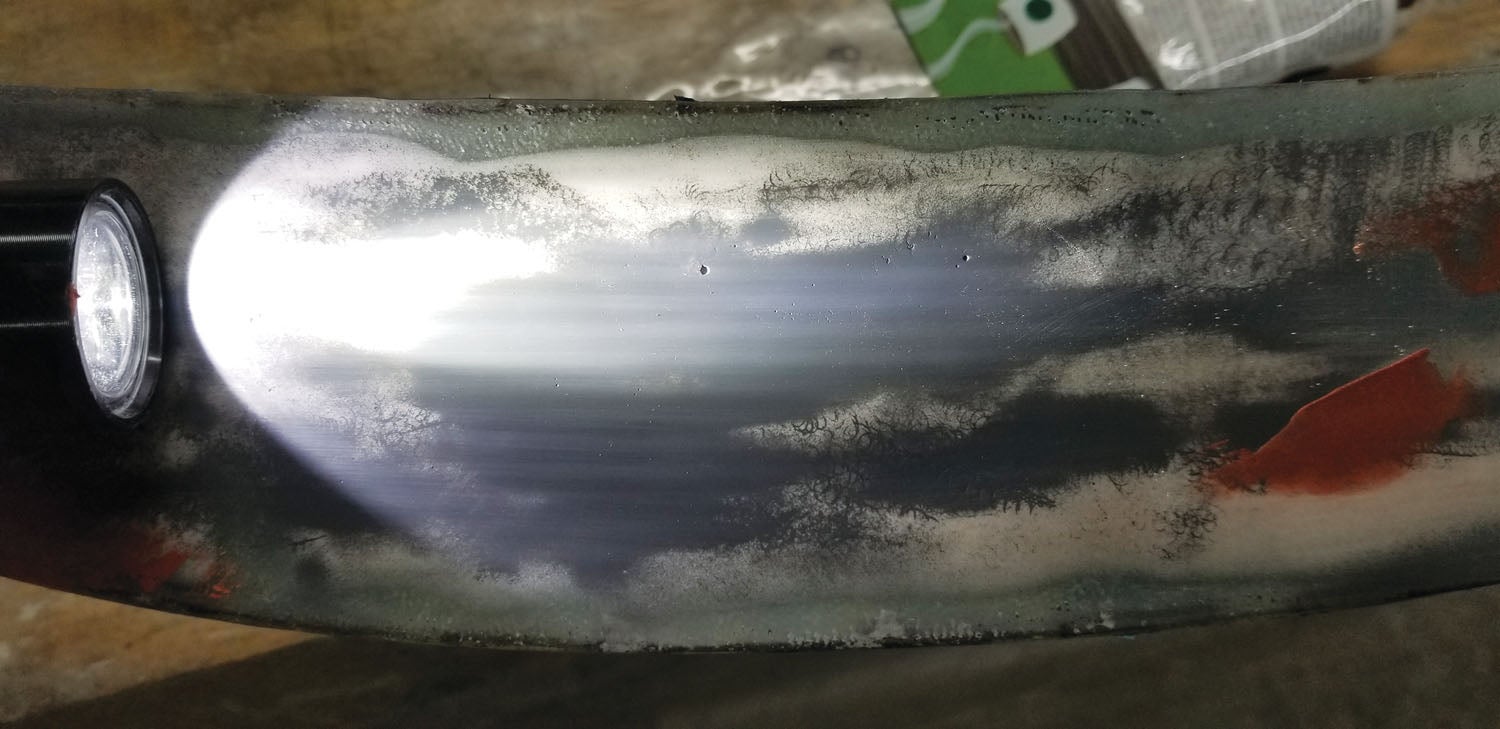
This next step is important. Turn off the lights. Run your fingers over the part with your eyes closed. Yes, close them. It focuses your sense of touch. When you feel something, shine a flashlight from the side to find it. Circle any imperfections with a Sharpie.
Apply auto body glazing compound with a Starbucks card. Tiny pea-size dollops will skim over any imperfection. Walk away for a couple hours—it cures fast.
Wet sand the glazing spots until only the imperfection is left filled with glazing. If it looks like a bad imitation of a Jackson Pollock painting, it’s perfect. Check it again and repeat.
Brush on another coat of primer and wet sand it if necessary. Remember the inside areas.
Tape off bonding areas so they don’t get primer. You want bare scuffed fiberglass for the Sikaflex. Repeat all the steps for the inside—wash, dry and it’s ready for primer/paint.
Bonding the Skirt
Time to tape again. Cleco the skirt back on. Use black electrical tape to mask off the canopy right to the edge of the skirt. If you peeled all the masking off, tape the fuselage along the bottom and aft edge of the skirt, right up to the edge of the aluminum.
Tape anywhere you don’t want Sikaflex. Clear tape over everything is useful to keep water out and Sikaflex chemicals off your precious airplane parts.
Remove the skirt and paint the inside. This should be done before you bond the skirt. Spraying paint after bonding would be a real nightmare!
Keep the masking in place. You want those areas to be bare fiberglass for the Sikaflex to bond properly. For details, refer to the article on bonding the canopy (“Sikaflex Canopy Bond,” November 2019). The steps are the same.
Get some help placing the skirt on the canopy, and Cleco it to the frame and canopy skirt brace. Let it cure completely, remove the Clecoes, and operate the canopy to make sure it’s not bonded in place.
The skirt should be flush everywhere. If it needs a bit of massaging, it can be fixed a little. Use a hair dryer to warm the area until it is hot, but not so hot you can’t touch it. Careful! It’s easy to ruin it. Massage it to the shape you need and hold it there until it’s cold. Then step back and admire your work!
Last, but not least, fill all the holes from the Clecoes with micro.
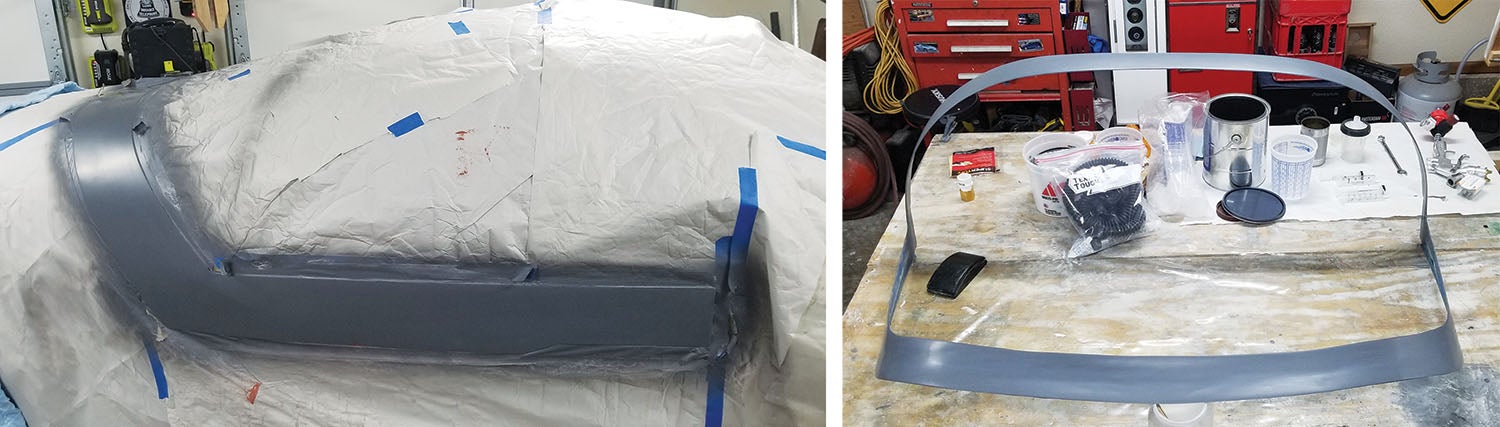
Final Coat of Primer
While that micro is curing, let’s learn about painting. Is the layup as smooth as a baby’s behind? If so, then it’s time for the final coats of primer and paint. But first a warning, with a capital “W”:
Cover anything you don’t want damaged by overspray. It goes everywhere and sticks to everything. Yes, it can be removed, but that’s yet another article. Avoid the headache. Cover it.
Here’s another list to spend your child’s inheritance on. I use the same Kirker Enduro Prime primer for prep and paint, but you’ll need a few other items too:
- Tack cloth
- Lacquer thinner or acetone
- Alcohol (99% isopropyl)
- Nitrile gloves
Safety First
Nitrile gloves please. Most of these chemicals are not good for humans, and skin absorbs them quickly. Get used to wearing them. Plus they keep oil from your skin off the part. From this point on, no touching with bare hands.
Clean the part with alcohol, lacquer thinner or Kirker 600 surface wash, which removes oils and wax residue. Whatever product you use, wear a good respirator with organic filters. I prefer 3M #60926. Label them with the date, and store the respirator in a large heavy zip bag with a desiccant pack. The filters are designed to absorb volatile organic compounds, so the life span is significantly reduced if left exposed. If you smell anything, it’s time to replace the cartridges. I usually replace them annually no matter how little they were used. They can still be used as dust filters but don’t use them for paint.
Better still, buy a Hobbyair respirator system—the best thing since sliced bread. It provides a constant flow of clean, cool air under positive pressure. Plus you will look like an astronaut. I actually use both. I wear the respirator for mixing and shop setup, then I switch to the Hobbyair for spraying.
The Epoxy and Paint Calculator on my blog estimates paints. Look under Favorite Links to find it. It has multiple entries for length and width. That should cover most parts.
Remember, holes count. Taped off areas count too. You can’t focus the fan at just the parts you want painted, so measure the whole part. Figure the mL or ounces (30 mL = 1 ounce) needed and head to the shop.
Setting Up the Spray Gun
Set your gun before attaching the cup. Hopefully, you have a decent gun with filter and regulator. I have a DeVilbiss FinishLine FLG-3 with 1.3mm and 1.8mm tips. I’ve heard good things about the new Harbor Freight Black Widow gun. There are far more expensive guns, but I’m not skilled enough to extract the additional value.
I love 3M PPS disposable cups. Six-ounce, 200-microns work well. Always check the seal after snapping the cap in place. (Don’t ask.) The screw-on ring will go on even if the cap is not snapped perfectly in place. The result is a nice big mess when you flip the gun right side up. Yep, it was black paint too!
The 1.8mm tip works well for Kirker primer. I use Harbor Freight disposable red water/oil separator filters and an RTI 1/4-inch mini regulator. The separator is good for quite a few uses. Label it with a date as well. Assemble the setup as follows: compressor, large hose, separator, regulator then gun, in that order. Set pressure per the manufacturer. HVLP is typically about 23 psi. Remember, the pressure is set with the gun in first stage, air flowing. The hose should be clean and free of oil.
The gun has a two-stage trigger, so play before the paint is attached. First stage is air. Second is air and paint. First stage is held all the time and second is triggered when you want paint to flow.
Feel free to shoot some lacquer thinner to see the fan. Fan control is a personal preference. I prefer mine rather narrow; I set it one turn out.
Set the flow one turn out to start. Spray a test target with thinner. Watch the fan size and flow. Next up, we spray primer.
Spraying 101
I don’t claim to be an expert at paintwork, but I have learned a few things, and maybe I can save someone some grief. Let me repeat—if you don’t want paint on it, mask it. Seriously. Paint overspray goes everywhere, and it’s a lot less work to mask than to remove it. Move your Lamborghini to the neighbor’s house. My old cars have so much rattle-can primer, no one would ever notice.
Mask that beautiful canopy. We have to apply finish paint on the airplane or the Cleco holes will show, so be super careful with the canopy. Mask it well. Protect important stuff with tarps, blankets, or whatever. I like old shower curtains and blankets, or sheets purchased from the thrift store.
You can remove the canopy and spray the skirt on a bench, but then you have to mask the inside as well. Yes, the paint fog will go right up under the inside and ruin the canopy. I found it easier to work it on the airplane. Pick your poison.
If you think the surface is perfect, forget it. Primer is like yoga pants. As soon as it’s on, you see every imperfection. Before you spray, turn off the lights and shine a flashlight from the side right up against the part. Surprise! Fix the flaws with glazing compound and wet sand again.
Wipe the part with a blue shop towel and alcohol. You can also use soap and water, but alcohol evaporates quicker. You’re removing any residue like wax, PVA, hand oils, etc. Make sure it’s dry.
Prep everything ahead of spraying. As previously mentioned, I use a DeVilbiss FLG-3. I also recommend a really good regulator at the gun. The RTI 1/4-inch mini regulator is awesome. Set it and forget it. You can’t be consistent if the pressure at the gun varies.
Set the pressure, then set the gun. When spraying Kirker Enduro Prime, use one turn out on the fan and 3/4 to one turn out on the paint. I use a 1.8mm tip for Enduro Prime. The mix is reduced 18%.
Lay out the hoses and everything else you’ll need. Check the gun carefully. Make sure the tip is not loose and the fittings are secure.
Put on the respirator, then mix the paint. Fumes are in the air as soon as the can is opened. The Enduro Prime mix rate is 1:1. Coverage is about three square feet per ounce. Do the math or use the Epoxy & Paint Calculator.
Just before painting, wipe the part down with Kirker 600 surface wash, dry it immediately with a clean paper towel or lint-free cloth, and wipe with a tack cloth. At this point, some painters will mist the floor and walls of the paint booth lightly with a garden tank sprayer. The idea is to keep particulates from floating and jumping to that electrostatically charged part. I don’t have a paint booth, so I just vacuum and try to keep the garage clean. It sometimes doesn’t seem to work very well.
If you’re new to painting, spray some mask paper to see the edges of the fan. If this is your first part, make sure it’s not the airplane. Your prize possession is not the place to learn to spray paint. Prep a test part exactly as your skirt was prepped.
Start spraying. Kirker paints seem to go on better if the first coat is just a light fog. Hold the first stage for airflow, then pull the second stage for paint flow. Keep the gun moving in passes, releasing stage two at the end and pulling again to begin a new pass.
The goal for the subsequent medium-thick coats is to stop spraying paint as soon as the part looks wet, like an even layer of water on a surface. Resist the urge to shoot spots or make another pass. Don’t try and spray to make the color opaque. That’s when runs, drips and sags show up. If the color underneath is showing, wait the flash time and shoot another coat. Primer typically needs one fog and two medium coats.
Walk away for 60 minutes flash time, then shoot another coat. If it’s beautiful, you have my greenest envy. Personally, I’m not that good, so my parts will cure overnight and then get some more love.
Fixing Flaws
OK, so you’ve put on your yoga pants and every flaw is staring you right in the face. What to do? Fix the flaws.
Get the magic glazing compound and a hotel key card. Hold the part under a bright light or shine a light from the side and start glazing. Fix anything that’s not right.
Put a pea-size smudge on the card, apply a tiny bit, and scrape most of it off. Let it cure for a minimum of 2 hours.
Start with wet sand and 400-grit on a rubber block. Work the glazing spots, runs and sags. Stay away from corners and edges. It doesn’t take much—400-grit cuts pretty fast and it’s easy to break through the primer. This is where two colors of primer really help. If you see the first color, you’re breaking through.
If the sandpaper falls or ends up anywhere other than the bucket, clean it in soapy water. Nothing is worse than picking up a piece of grit or an aluminum shard and dragging it all over your nicely sanded part. (Don’t ask.) If it happens, leave the scratches and fill them with glazing compound, then sand again.
Wipe off the surface with a sponge, dry it with a clean paper towel and look again. Leave pinholes and scratches alone. Those are easily filled. Just knock off any runs, drips, sags or imbedded debris. This is also the time to sand out any orange peel from the primer. You want the surface flat. Any flaw will be amplified in the final paint. Now let it dry. At this point, flaws should be filled. If not, lather, rinse and repeat.
For the final wet sand use 800-grit. It should be very smooth and ready for paint. If not, repeat whatever steps are necessary. There are no rules here. If it needs another coat of primer, go for it. If it needs more spot filling, glazing is your friend.
The part should be clean so don’t touch it without gloves. Yes, parts get cleaned, but why take the chance? A tiny bit of oil left behind could flake off a bit of paint and ruin your beautiful work.
That’s it for now. In Part 3, we’ll spray the final coats of paint.


Such an informative blog! All the information provided by you is really very helpful. I agreed that tack cloth is the best cleaning tool than any other, it is really helpful for removing tiny dust particles over any surfaces. A good tack cloth makes your work easier. Everyone should follow the tips provided by you. thank you for sharing! Keep posting!
Thank you!
Comments are closed.