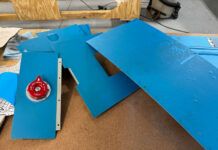
Always add a couple of extra layers of breather to any areas that may puncture the bag under pressure. In this picture, two extra layers of breather were placed over the fitting area of the part.
Some builders view mistakes as a bad thing. Throughout your project, there are areas where things can go wrong-even if you follow the instructions to the letter. The same holds true for vacuum bagging techniques; sometimes, it just doesn’t go as planned. But rather than view problems as failure, I like to think of them as opportunities to learn. Thats why I actually enjoy troubleshooting-yes, you read that right. Much can be learned from solving and fixing problems-and if you’re smart and persistent, that knowledge can be used to inform your next project and keep you from repeating mistakes.
Working with composites in total (not just regarding vacuum bagging), you will learn how to identify and correct common problems, but you should also understand that sometimes nothing can be done except to start over. Knowing when to make that decision is a lifelong search for enlightenment.

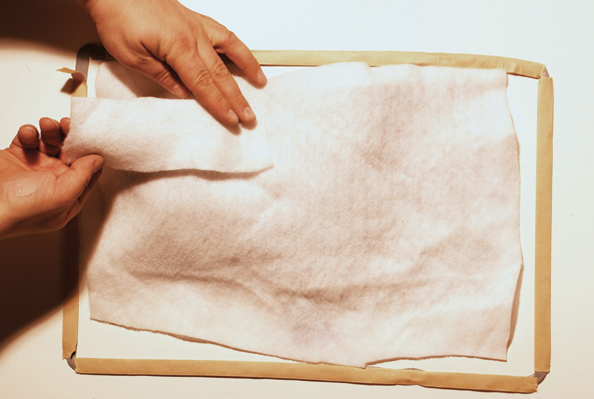
| Shown here is the sealant tape around the perimeter of the hole in the vacuum bag, and the second skin is being sized up. | The second skin or extra layer of bagging film is now being put into place on the sealant tape. In this case another layer of breather was not required. | After the bagging film or second skin is placed over the puncture or hole and pressed down, you will see the air being removed from the second skin area, forming a tight surface. |
Common Problems, an Introduction
So lets dive right in: What do you do when you have little or even no vacuum when you need it? I mean, isn’t vacuum the whole point? This problem occurs all the time. The first thing that you want to establish is that the pump is working and pulling enough vacuum for the process. My vacuum pump has a gauge in line so that I can monitor the flow of the pump, and I normally like it to draw at least 19 inches Hg.
Next, check the fittings and the vacuum line. Here you are looking for overall condition and that the fittings are secured to the vacuum line and plugged in. This may seem a little obvious, but I was working on a job once where the technician could not get any vacuum to his part. He was doing everything he could think of, but he never checked his vacuum line or fittings. Another common problem with the fittings is when resin is sucked into-and is allowed to cure in-the fitting, which can happen when the port is placed too close to the wet resin. Its likely you’ll have to replace the fittings. Sorry.
The Cure
What should you do when everything is going well with your cure and then, for no apparent reason, you lose almost all of your vacuum? Panic! (Just kidding.) Think quickly and resolve the problem, because depending on which stage your part is cured to, it can jeopardize the integrity of the part.
Under normal circumstances, when a vacuum bag is pulling good pressure, the film will be tight over the part. It should be tight enough that when you run your fingers across the film with a reasonable amount of pressure, you get little movement or slippage from the film. Another way of checking is to carefully try to lift the bagging film off the breather underneath. When you have good vacuum pressure, it should be difficult to do.
The first order of business is to find the leak. Most commonly, the vacuum pump has in some way come unplugged, followed by a breach in the seal between the bagging film and the sealant tape or between the sealant tape and the mold. Many times, if the bagging film is stretched too tight over the part, it will peel away from the film or the mold, it may not be able to fully drape over the part, and it will bridge (we will discuss bridging as its own subject). The vacuum will continue trying to pull the film down, which in turn pulls the film away from the sealant tape or mold.
Sharp objects within the vacuum bag could also be the cause. You must protect those edges from puncturing the bag, and this can be done by simply adding a couple of pieces of breather to cover the sharp areas. This in no way affects the vacuuming of the part inside the bag and is cheap insurance that your vacuum bag. Remember that you are always working against the clock. Carefully open the bag and add breather. Understand that this is not an easy task, as the sealant tape will not want to separate from the film, and once it does it will not want to keep its original shape.
The next possible solution to fixing a sharp object in the bag is to create a second skin with some protection inside. This is just a second layer of bagging film placed over the area with the problem. Once you have located the puncture, cut some breather materials big enough to cover the damaged area. Place sealant tape around the perimeter of the breather material, and then place the bagging film down on top. You should see the air being removed from the entire bag.
The last vacuum-loss problem well discuss is the vacuum bag getting too hot, melting the film. This will happen when you are trying to speed up a cure by applying heat. There are different kinds of bagging films with different temperature ratings, and some people even use a poly film with no heat resistance-a big problem when using that material to vacuum bag. To solve a melted bag, use the second skin repair technique.

| As you can see in the picture, there can be pleats of excess bagging film when securing the bagging film to the sealant tape. You can see the excess bagging film between finger and thumb. | To remove this excess material apply pressure on your finger and thumb and pull them away from each other, causing the sealant tape to stretch and the excess bagging film to come in contact with the sealant tape. Apply a little pressure to this area and it will adhere. | Here you can see the result of the stretching method. The sealant tape will suck up into the voids, and you now have good contact between the bagging film and the sealant tape. |
Pleats and Leaks
One of the most common problems is when there are leaks between the bagging film and the sealant tape. We normally see small pleats on the surface of the sealant tape. Each one of these pleats is a potential vacuum leak. You can usually see a pleat or at least where the bagging film is not completely stuck to the sealant tape.
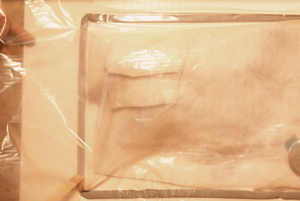
In this case there is a tall part with a fitting, and as you can see there is a large amount of excess bagging film on the left to accommodate the height of the part in the bag.
Listening for leaks can be tricky because of all the ambient noise in the room. To get a listening position you must get your ear right down to the bagging film and work your way around the periphery of the vacuum bag. There are specialized tools that use a microphone and amplifier to help you hear a leak, but these are expensive and are not needed under normal circumstances.
At least solving the film/tape leak is simple. With firm pressure, run your finger and thumb over the area where the bagging film is not stuck to the sealant tape until you do not hear the leak anymore or you see the vacuum pressure increase. If the problem is pleating on top of the sealant tape, try this simple technique: Using a finger on one hand and a thumb on the other, press down on either side of the pleat and pull the two sides apart to flatten it out (see photos). The sealant tape will stretch and allow this to happen.

| For this problem its best to use a dogs ear of sealant tape. | Place the dogs ear onto the sealant tape where you would like the pleat to go. | The next step is to secure the bagging film to the dogs ear one side at a time. |
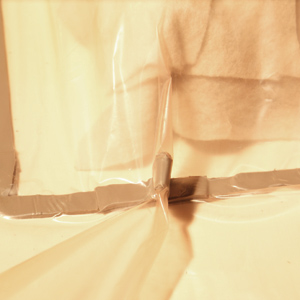
This is what the dogs ear patch looks like when completed.
What if the pleat is huge due to a tall part in your vacuum bag? In this situation you will use what is called a dogs ear, which is a small piece of sealant tape that is folded over on itself with a tab going in each direction at the bottom. (The photos illustrate what it looks like.) Place this on top of the sealant tape, and seal one side of the bagging film to one side of the dogs ear, and then fold the pleat over and seal the other side. Pleats are not desired, but they are often unavoidable, so we have to deal with them.
Holes in the Film
Imagine that you are cleaning up your work area and you accidentally drop your scissors or knife on your vacuum bag. They land in a non-critical area of your part, but they puncture the bag. Now what do you do?
All is not lost, but act quickly. Location of the puncture really determines the fix. There are only a few things that you can do with a puncture of this nature that we have not already discussed.
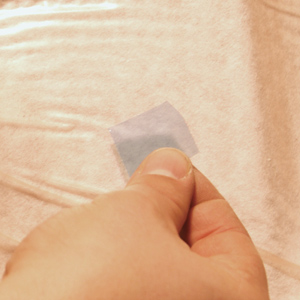
Sometimes, repairing a hole can be as straightforward as simply placing a piece of flash breaker tape over it.
The first and easiest method only works on completely flat surfaces with no wrinkles or creases. Place a fresh piece of flash breaker tape over the puncture and work it down with a squeegee or another soft-edged object. Check (listen and watch) to see that the puncture has been fixed.
The next method is used for areas that are not completely flat, but it will still not work in areas with pleats and wrinkles. Place a piece of sealant tape (or pieces if necessary) over the puncture. Keep the protective paper on the tape so that you can work it down onto the bagging film. If you require more than one piece of tape, be sure to slightly overlap the edges of the tape. The last method that works in some situations is the second-skin approach that we have already discussed.
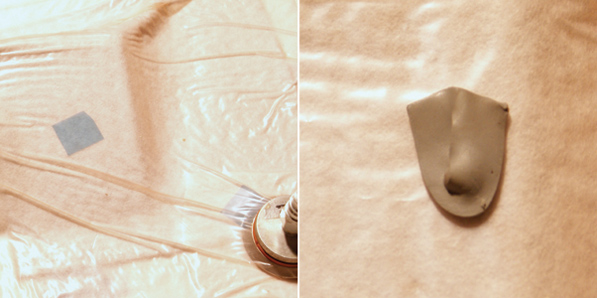
Left: Flash breaker tape works well for repairing holes that appear on a flat surface. Right: When the hole is located on a compound contour, using a piece of sealant tape is the best solution.
Any Port in a Storm
Sometimes you just cant find the leak in the bag no matter how hard you listen or look. Could be the vacuum port. There may be pleats in the bagging film between the vacuum port halves, the vacuum port halves may not be twisted tight enough to create the required seal, or the rubber gasket between the two halves may be damaged.
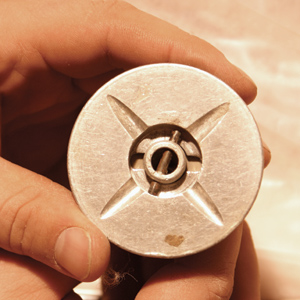
After a vacuum port is used for a long time, it can wear out. Here you can see the pin that makes a quarter turn to lock, but in this case it will keep spinning and not lock due to wear.
Pleats between the vacuum-port halves create a pathway for air to travel through because it wont be sealed. Even though that pathway might be small, it will still allow air to travel through it and will create vacuum loss. To eliminate this problem, simply undo the two halves, flatten out the bagging film, and reconnect the two halves.
There are times when the pleat doesn’t flatten out and may have a crease that could prevent you from getting the proper seal. If this happens, I have gone as far as to place a strip of sealant tape around the vacuum port where the bagging film meets the upper half of it. This will normally prevent the leak.
Vacuum port halves that are not tight enough to create the necessary seal can also be a problem. Sometimes you can replace the pin in the upper half of the fitting and that will solve a leakage problem, but often its just time to get a new one. Sometimes the ports gasket might be leaking. Replace it.
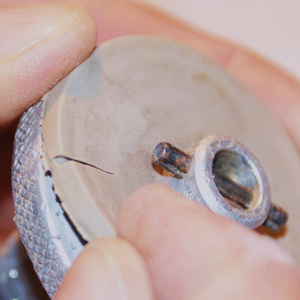
Vacuum-port gaskets can wear out or get damaged. The gasket shown here has a tear that will definitely leak.
Bridge Over Troubled Parts
Like a bridge that you drive on, vacuum bagging film can bridge space, and in most cases this is not desirable. Bridging, in relation to vacuum bagging, is when you have a part that has a large profile that the bag has a hard time conforming to, so the bag will pull away from the base of the part. Bridging doesn’t allow the bagging film to completely cover the entire surface of the part.
Bridging can create many problems, but we will discuss only two: inadequate pressure and excess resin. Inadequate pressure prevents the bagging material from conforming with the corner where the part meets the caul plate. The result of bridging is most likely a buildup of excess resin, and if there were wet laminates in that area, you would not get an adequate bond. When setting up and preparing your materials, make sure that you compensate for bridging. Always run your materials over the path that they will have to travel as you are laying them down and taping them into place.
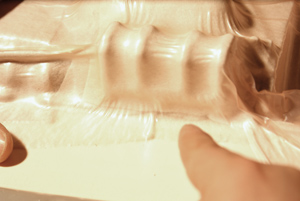
Bridging can be a real problem. Not only can it create poor quality layups, it may actually damage parts.
Excess resin can be left behind due to bridging. We are always working toward a fabric-to-resin ratio in composites. If there is too much resin, you sacrifice the integrity of the part by making it brittle. Bridging occurs 90% of the time when you are in a hurry, so take the time to make sure that you are ready before you start your bagging process, and everything will work out.
Uneven Vacuum
I know that you are trying to imagine what uneven vacuum flow across your part might look like. What you will see in your vacuum bag is a tight bagging film on one side and loose bagging film on the other. This normally occurs when the breather material has moved, not enough breather material was placed across the part to provide the required vacuum flow, or you are trying to draw vacuum across a large area. The fix is to reposition or add more breather.
Many people underestimate the pressure that vacuum has even if you are only applying atmospheric pressure. When you place a part with a core material into a vacuum bag, you must be careful to protect that core from crushing. Many core materials are strong but still susceptible to crushing from vacuum pressure, honeycomb cores especially. There is nothing worse than removing your part from the vacuum bag thinking that you completed the process correctly, only to find that you have crushed the edge of the core, and your laminates are now rolling over the edge.
To prevent crushing, first you will want to prevent bridging. This will stop the pressure from being applied directly to the edge of the part with the pulling of the materials. When you have a tall part in your bag and you need to protect the edges, build up around the part so that the support you are creating is slightly lower than the part you are vacuuming. This will stop the edges from being crushed.
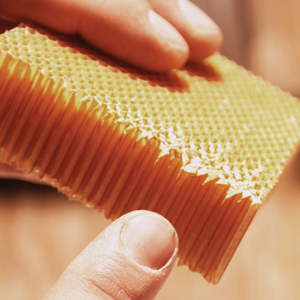
The honeycomb edge crush shown here is the result of bridging that occurred during a repair.
Wont the support be bonded to the part? This is where that magical flash breaker tape can come into play. Carefully wrap the support in flash breaker tape to prevent the resin from sticking to it, and this will allow you to apply pressure to your part without the support bonding to the part during the cure. Please note that this works great if the laminates do not go over the edge of the part. The support might not be able to apply pressure to any laminates that roll over the edge of the part.
The Last Resort
What if nothing seems to work, time is running out on the pot life of your resin and you still cant get vacuum pressure? The answer is simple, and we all hate to hear it. Start over. Sometimes it just happens that way. Don’t look at this as a failure. Always see it as an opportunity to learn. Believe me, I have uttered many colorful words under my breath when starting over, but when I look back, it is from those moments and situations that I have learned the most.


