
I think I have finally crossed over from the slow-build stage of my RV-10 to the quick-build stage. It doesn’t make the construction go any faster, but it did become more motivational once I recognized I’d crossed that point. I’ve logged almost 1100 hours to date, and the cabin and tailcone are finally connected. The floors and interior access panels are all complete. I’ll be installing the brake and fuel lines next and then moving on to the cabin top and doors. I like installing systems, the engine, and wiring, so I am looking forward to doing those. I don’t have the same enthusiasm for the fiberglass portions such as the cabin top and doors. It’s probably why I’ve never built a composite airplane. It appears working with fiberglass makes a big mess in the shop from all the sanding, and I go to bed itchy every night! Luckily, the weather is improving here so I should be able to do most of the sanding outdoors.
Once I realized how far I am along in the process, I decided to get the instrument panel ordered. Remember in one of my columns I mentioned that project management is a large part of building an airplane, so for some things with long lead times—such as engines and instrument panels—it is important to be thinking ahead four months or longer. Yep, for those of you who are wondering, I am again doing a panel from Advanced Flight Systems, but I will discuss that in a future column.
Think Serviceability
One of the things I focus on while building the aircraft is planning for ease of maintenance after it is flying. It helps to have the experience of having built several airplanes, as well as seeing many others during the year while doing DAR inspections and prebuys. One example I see regularly is gascolators that can’t be removed very easily for cleaning due to engine mount interference. The gascolator was installed prior to the engine mount, and the builder never thought about it until the next inspection cycle.
In my own experience with the RV-10, the fuel filter, which is in the tunnel, is somewhat difficult to service, usually requiring the top tunnel cover to be removed. That also necessitates removing the seats! Installing an access cover on one side of the tunnel makes this a whole lot easier. Another tidbit of information here is to not put any insulation on the floor of the tunnel, as the fuel filter will leak when it is removed. It’s really hard to get that fuel smell out of the cockpit once it permeates anything, so leave the tunnel floor just primed and drill a small 1/8- to 3/16-inch hole at the end of the tunnel just ahead of the spar so the fuel will drain out. You can make your own tunnel access plate with some scrap aluminum, or there are companies like AirWard that supply a kit for them.
Another item in the RV-10 that I have found needs servicing over time is the step. Sometimes the weld breaks and the step needs replacing, and sometimes the bolt that holds it in the socket needs tightening. Both situations require access to that bolt. AirWard makes a nice inspection panel you can add to the baggage compartment that makes this much easier down the road, so I’ve taken the time to install it this time. I’ve also decided it would allow me to leave the step out until after painting is complete. It seems I always catch the paint gun on the step and get a run. This time I won’t be able to blame it on the step!
Air Conditioning
So many people keep asking me if I am adding air conditioning, as that seems to be one of the more popular modifications for the RV-10, especially for non-builder owners. I see it requested especially by those coming from certified aircraft that do have air conditioning. We are not installing air conditioning—for several reasons. First, I do question whether Van’s or anyone has done any testing for a modification that weighs about 50 pounds and is attached to longerons aft of the baggage bulkhead. While I am not an engineer by training, I wonder how it might affect the polar moment of inertia. It also adds a lot of complexity, requiring a compressor to be installed on the engine, along with a dual-grooved flywheel to drive both the alternator and the compressor. There also needs to be a scoop (like a P-51 Mustang) added to the bottom of the fuselage, which does add some drag. Yes, I know the P-51 scoop increased the airspeed, but it was properly engineered. The current draw on the air conditioning units is quite high, sometimes 30 amps or more, which may require a larger alternator.
All those reasons aside, our experience with over 3600 hours in the RV-10 has shown that for the few times we felt it would be nice to have air conditioning, the overall cost and weight penalty is not worth it. We live in Atlanta where it can be quite hot and muggy during the summer, but it seems as though we spend less than 10 minutes in the heat and humidity. The RV-10 is a great high-altitude airplane, and in the summer, we usually fly above 10,000 feet, where we are up in the drier, smoother, and cooler air. We are usually leveling out about nine to 10 minutes after takeoff and simultaneously closing the vents and sometimes even adding some cabin heat if there is an overcast. I’d rather have the extra 50 pounds of useful load, especially for those trips to Alaska when we are packing survival gear and lots of clothes.

Saving Time
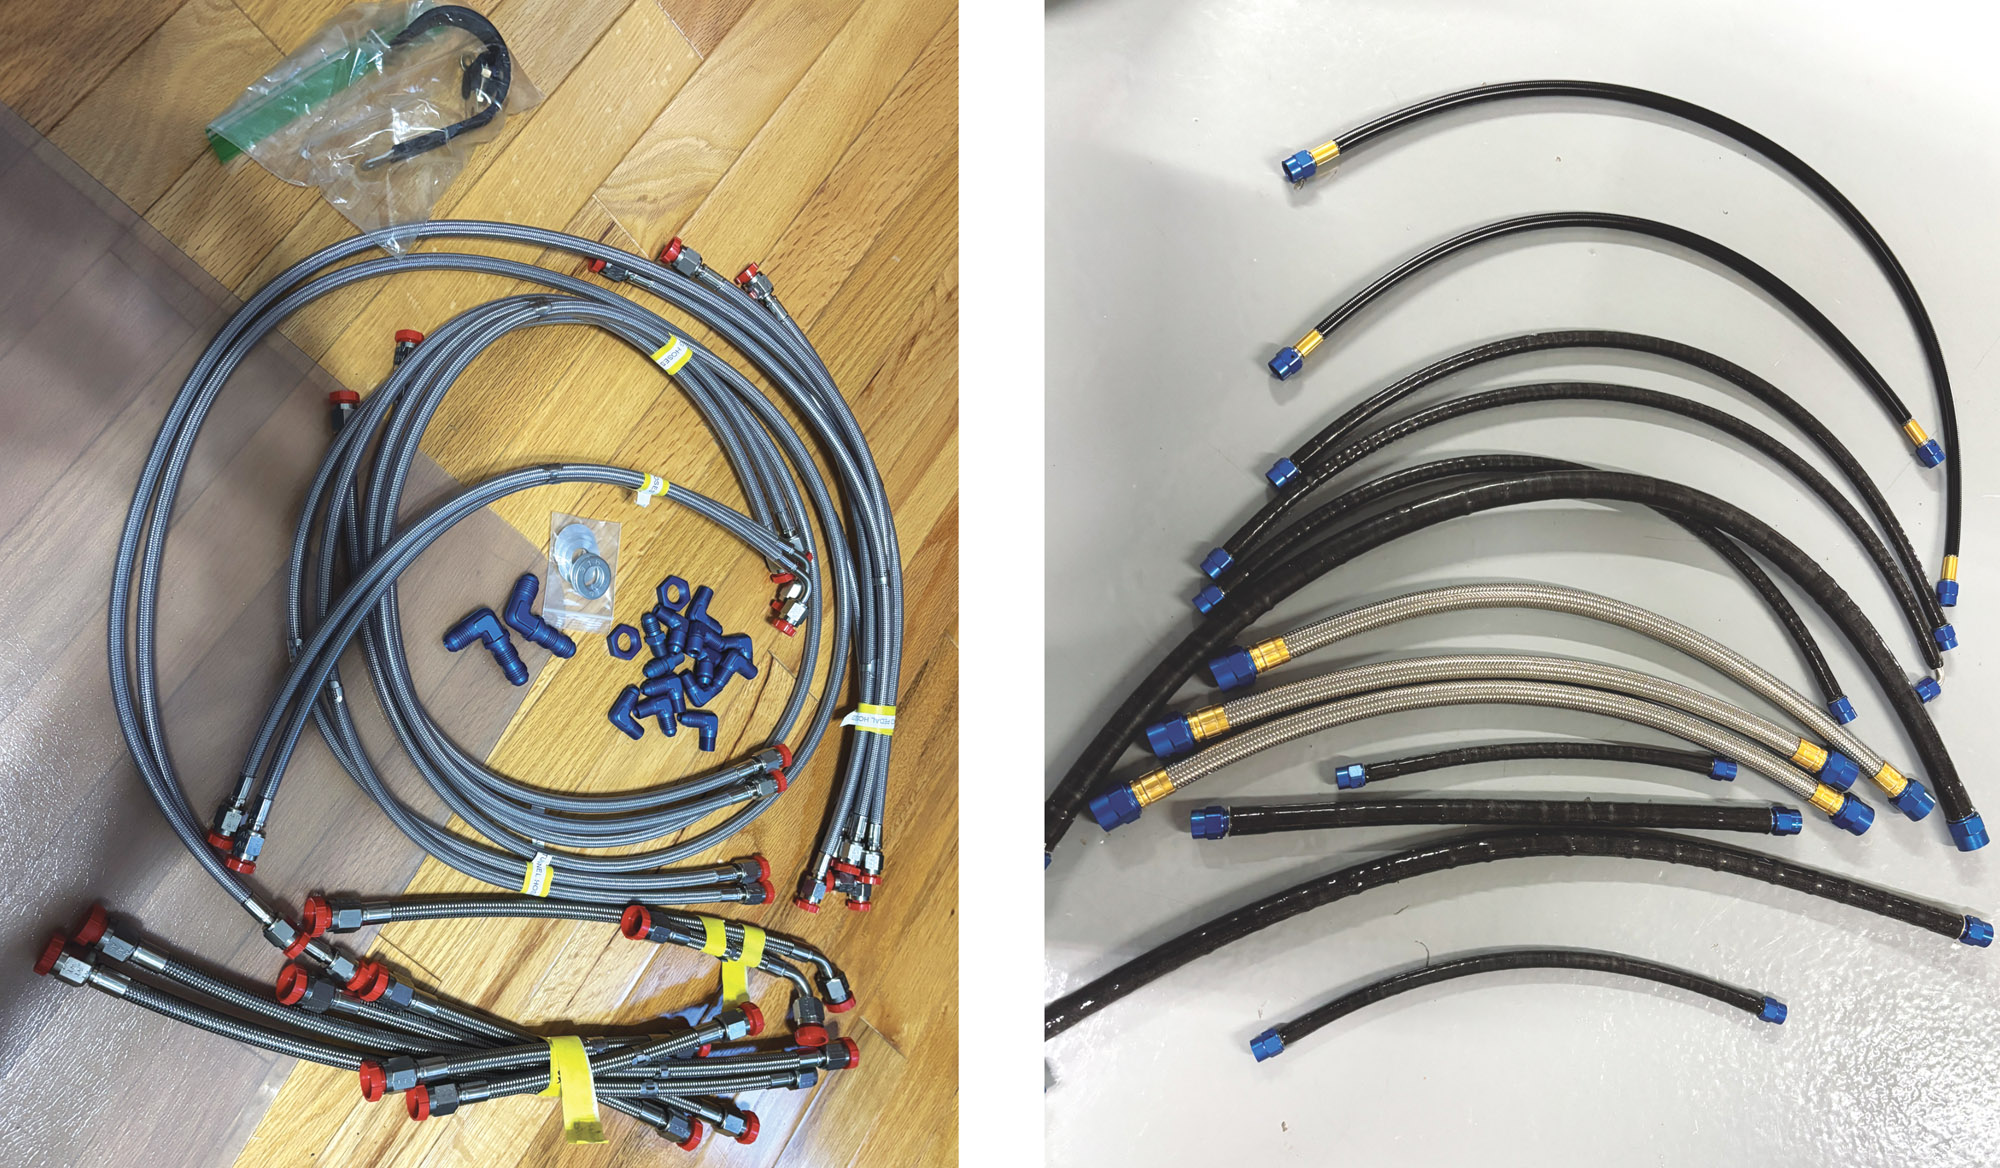
So now that it’s time to start the brake and fuel lines, I’ve already done some forward thinking about those as well. I’ve always made my own hoses for all of the aircraft I have constructed and have never had any problems with them. For this build, I thought I would try some of the ready-made hoses, since I do get asked about them, and I would like to save some build time. TS Flightlines (now Aircraft Specialty Flightlines) has been very popular over the years, and I have used some of their stuff in the past. So, for this RV-10, I am using their entire brake and fuel line kit. I’ve seen them installed on many other aircraft, and they do look very high quality. There are other manufacturers of hoses as well, such as Brown and Miller Racing, and they are also putting together kits for the RV series of aircraft. I am in the process of trying out some of their hoses on my current RV-10, and from what I have seen so far, the quality is excellent. I will keep you posted with regards to both installations in my aircraft.
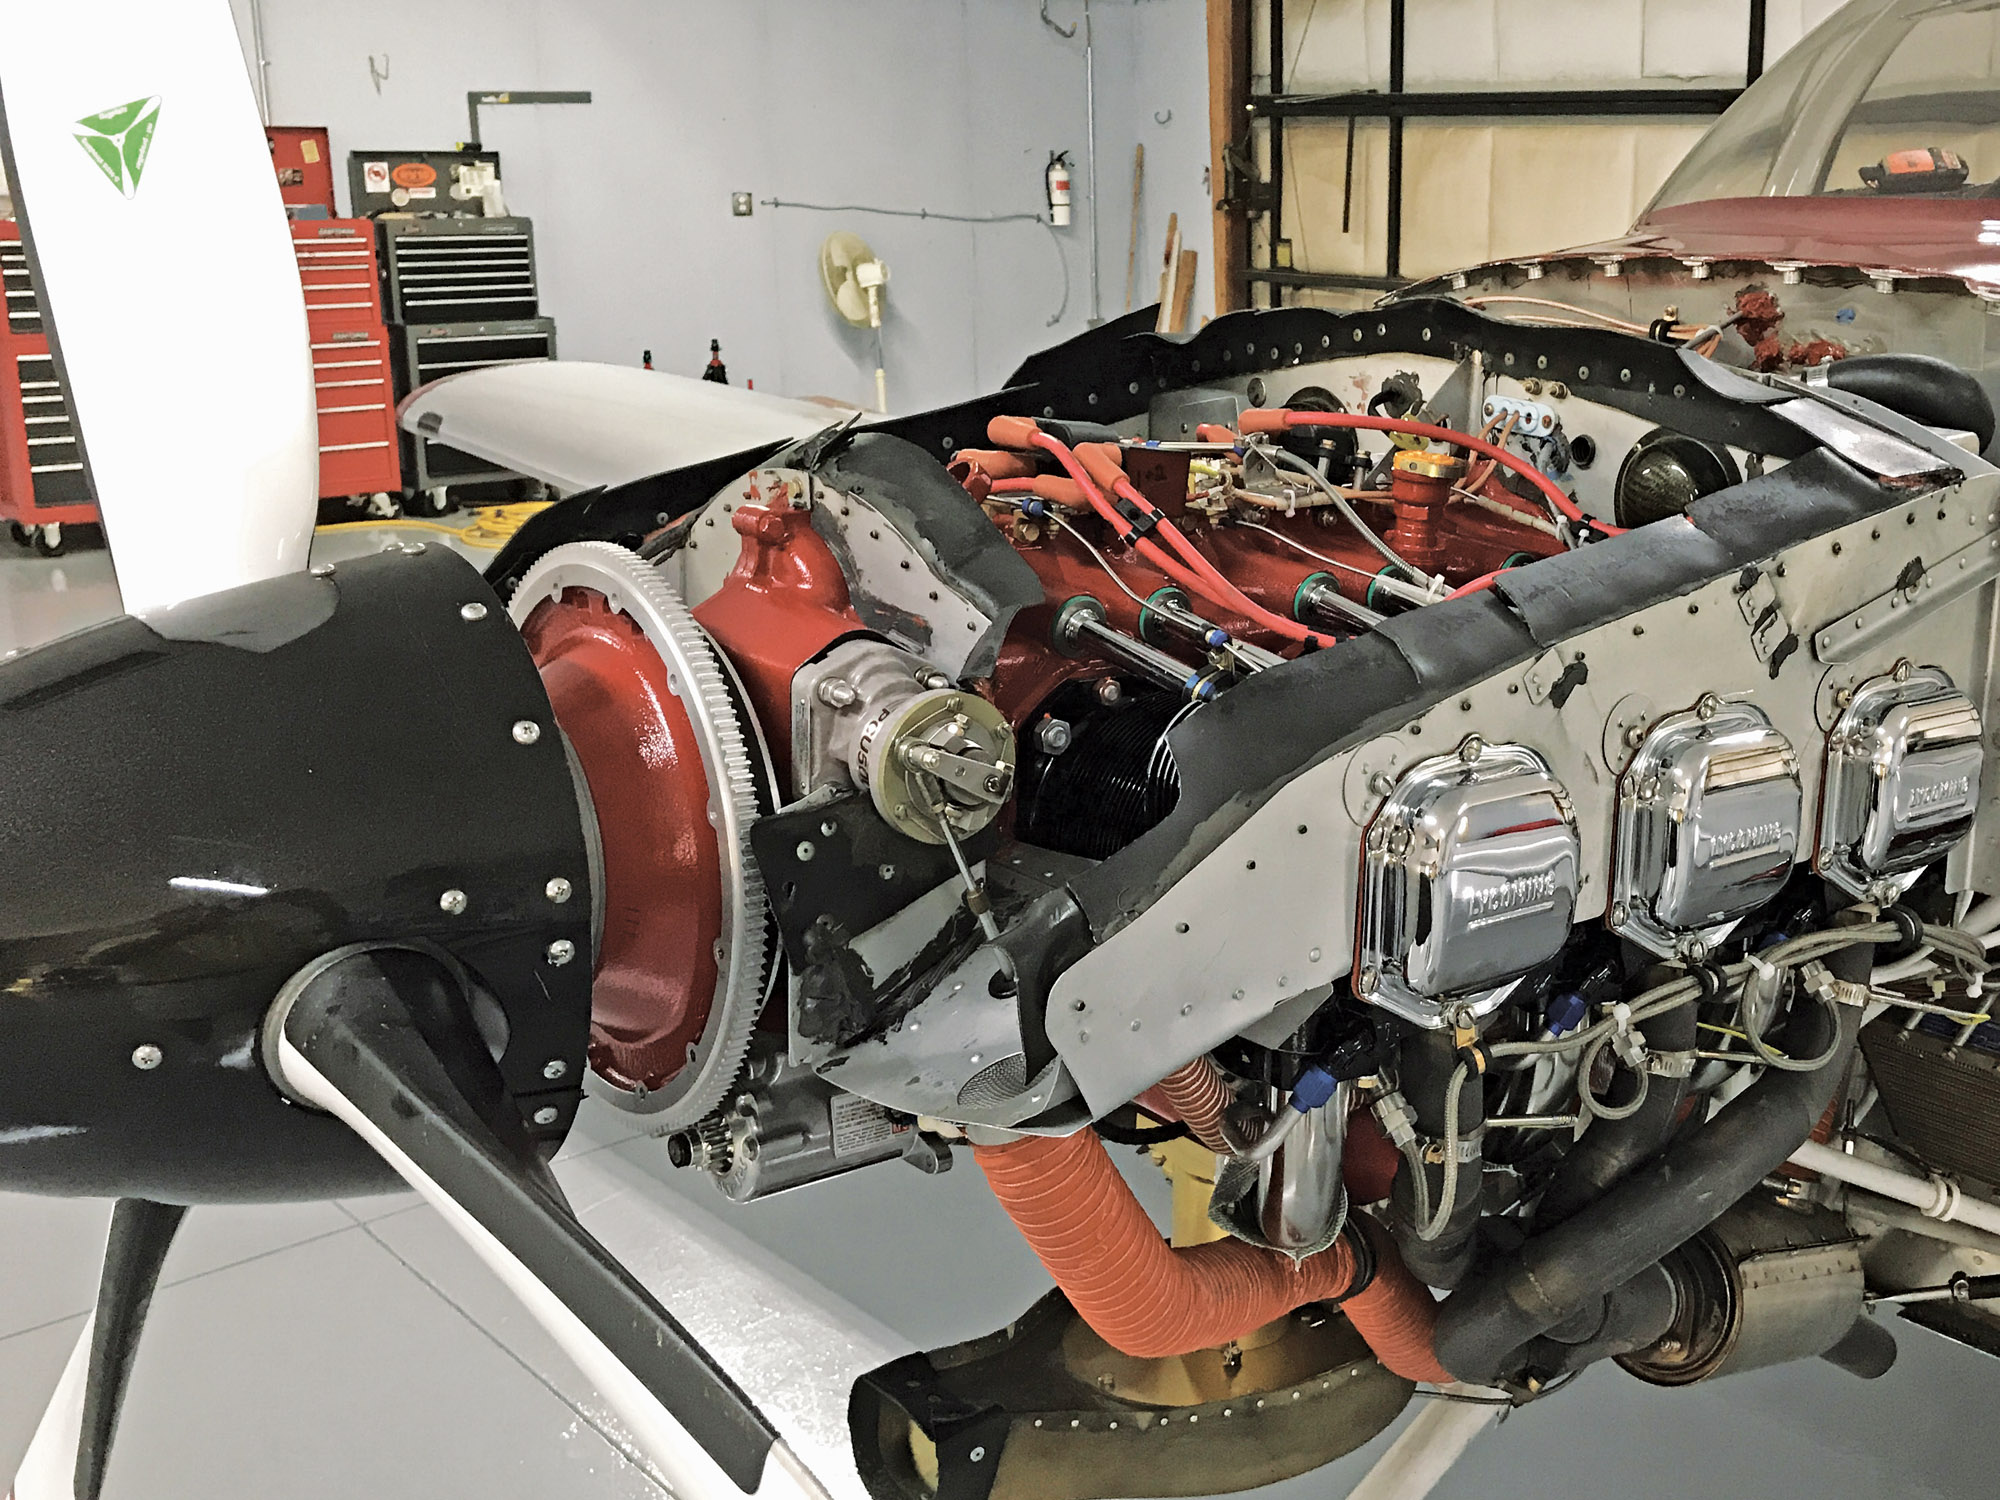
Now I’m getting to the point where two other big expenditures and choices are being made—the prop and the engine. Many of you know I have been using MT propellers for many of my aircraft, such as the RV-10s and RV-7A that I built, and I have installed them on many of our customers’ aircraft as well. I have found that the smoothness of the MT prop is fantastic, and the three-bladed one designed for the RV-10 also gives a little more ground clearance than the Hartzell two-blade Blended Airfoil, which I appreciate since I am based on a grass airstrip. So, I am sticking with the MT three-blade propeller, coupled with the PCU-5000X governor, which I have also found to be very reliable. Right now, propellers don’t seem to have the long lead times as do the engines, so that is good news.
It’s not so good news with regard to lead times on the engines, as many of you unfortunately know too well. Most new Lycoming IO-540s from the factory currently have a ridiculous lead time of 18 months or more. My favorite engine, the Thunderbolt version, has a lead time of almost three years at best. At my age, I don’t have time to wait three years, nor do I want to. This RV-10 kit I purchased came with a brand-new Lycoming IO-540, which is still sealed in the box and still within the two-year warranty period. I’ve been thinking about some different courses of action relative to this.

My first inclination is to swap the engines with my current RV-10 so I can keep the Thunderbolt. It has almost 1000 hours left before recommended TBO. It has been very reliable, through multiple trips to Alaska, and burns only about 3 quarts of oil between the 35-hour oil changes. The oil analysis is near perfect. But I also wonder if I am injecting some risk into an airplane that has been so reliable as it is, and I want the new owners to enjoy it as we have.
So, the second choice is to install the new engine on the new project, which got me thinking about how I could make it a pseudo-Thunderbolt with some tweaking. Perhaps just having the cylinders reworked with some porting and balancing? Lycoming also has part numbers for Thunderbolt cylinders, which are ported and polished, if I do elect to change them out. The engine also has an Avstar injection unit, which does not have the injectors with removable inserts like the Airflow Performance injection system, which I currently have. However, rather than replace the whole injection unit, I am thinking I will just change out the injectors with Airflow Performance injectors and be able to balance the fuel flow to each cylinder once it is broken in. This should help with the smoothness, as will a prop balance.
With regard to the cylinders, I am also thinking that by changing them I will be introducing some extra risk. I’ve always been about reducing the risk, and the older I get the more important it becomes. It’s one way of keeping the fun factor alive! I welcome any comments from our readers, but right now I’m leaning toward going with it as is.


