By Jon Humberd with Kate O’Connor
As an engineer, I look at structural geometry and design a lot. Figuring out exactly how I want my future aircraft to come together is a process that involves a fair bit of thought, even when starting with an outstanding kit. With my current project, a Zenith CH 750 Super Duty, I’m now deep into the mockup stage, testing which of my ideas will get the results I’m after.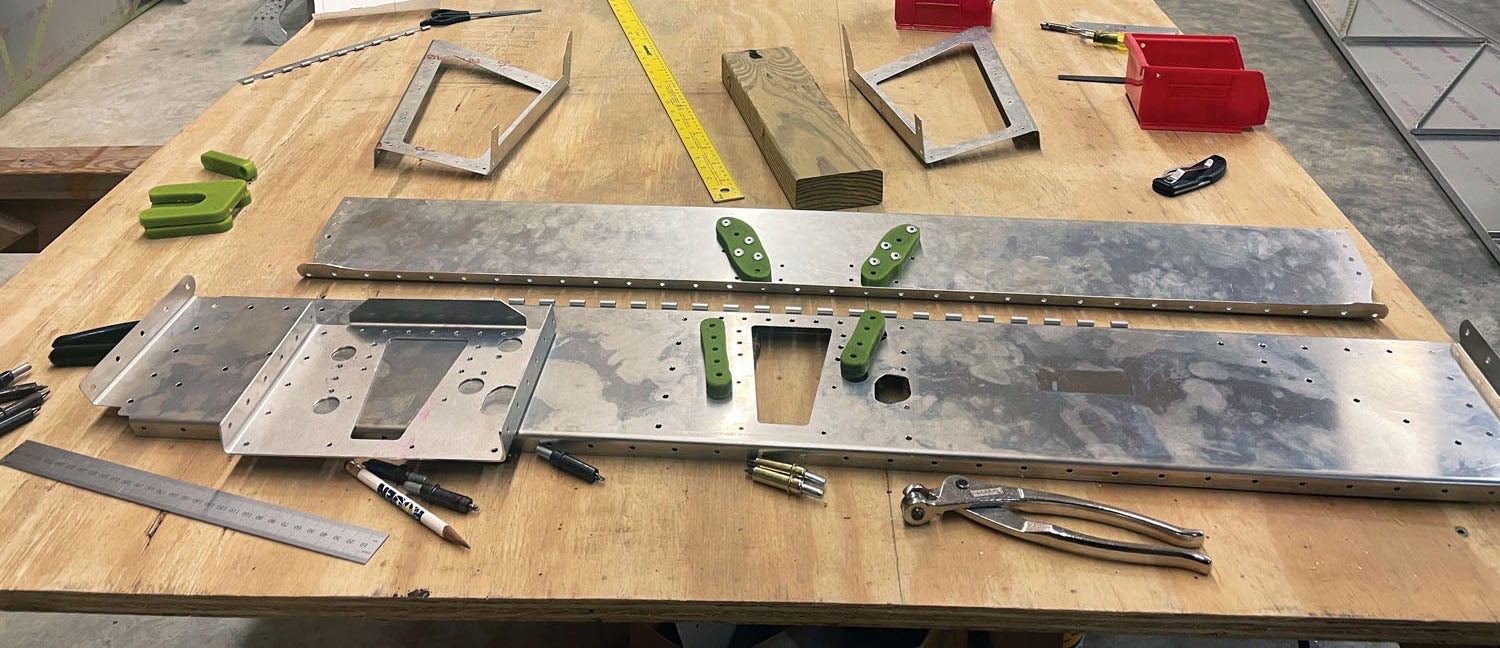
Trying out modifications and fit before construction really gets underway has been essential to my process since I built my first plane, the Zenith STOL CH 701 I’ve been flying since 2018 for everything from flights around the farm to STOL competitions. The downside is that doing good mockups can take a while and occasionally make it feel like not much actual progress is being made on the build itself. That said, taking the time to really think things through, sketch out ideas and create mockups for changes aimed at
producing the feel and function I’m looking for allows me to put together an airplane I know I’ll be happy with.
Envisioning the 750
As I discussed in the first installment of this series, I have some specific missions in mind for the 750. First, I plan to use it to carry my family of three so it needs to comfortably fit two adults and a growing child. Once complete, it will also be my primary aircraft for camping trips and some longer cross-country expeditions. I chose the 750 in the first place because it was already suited to all of those tasks, including being capable of operating off my farm’s 330-foot grass strip.
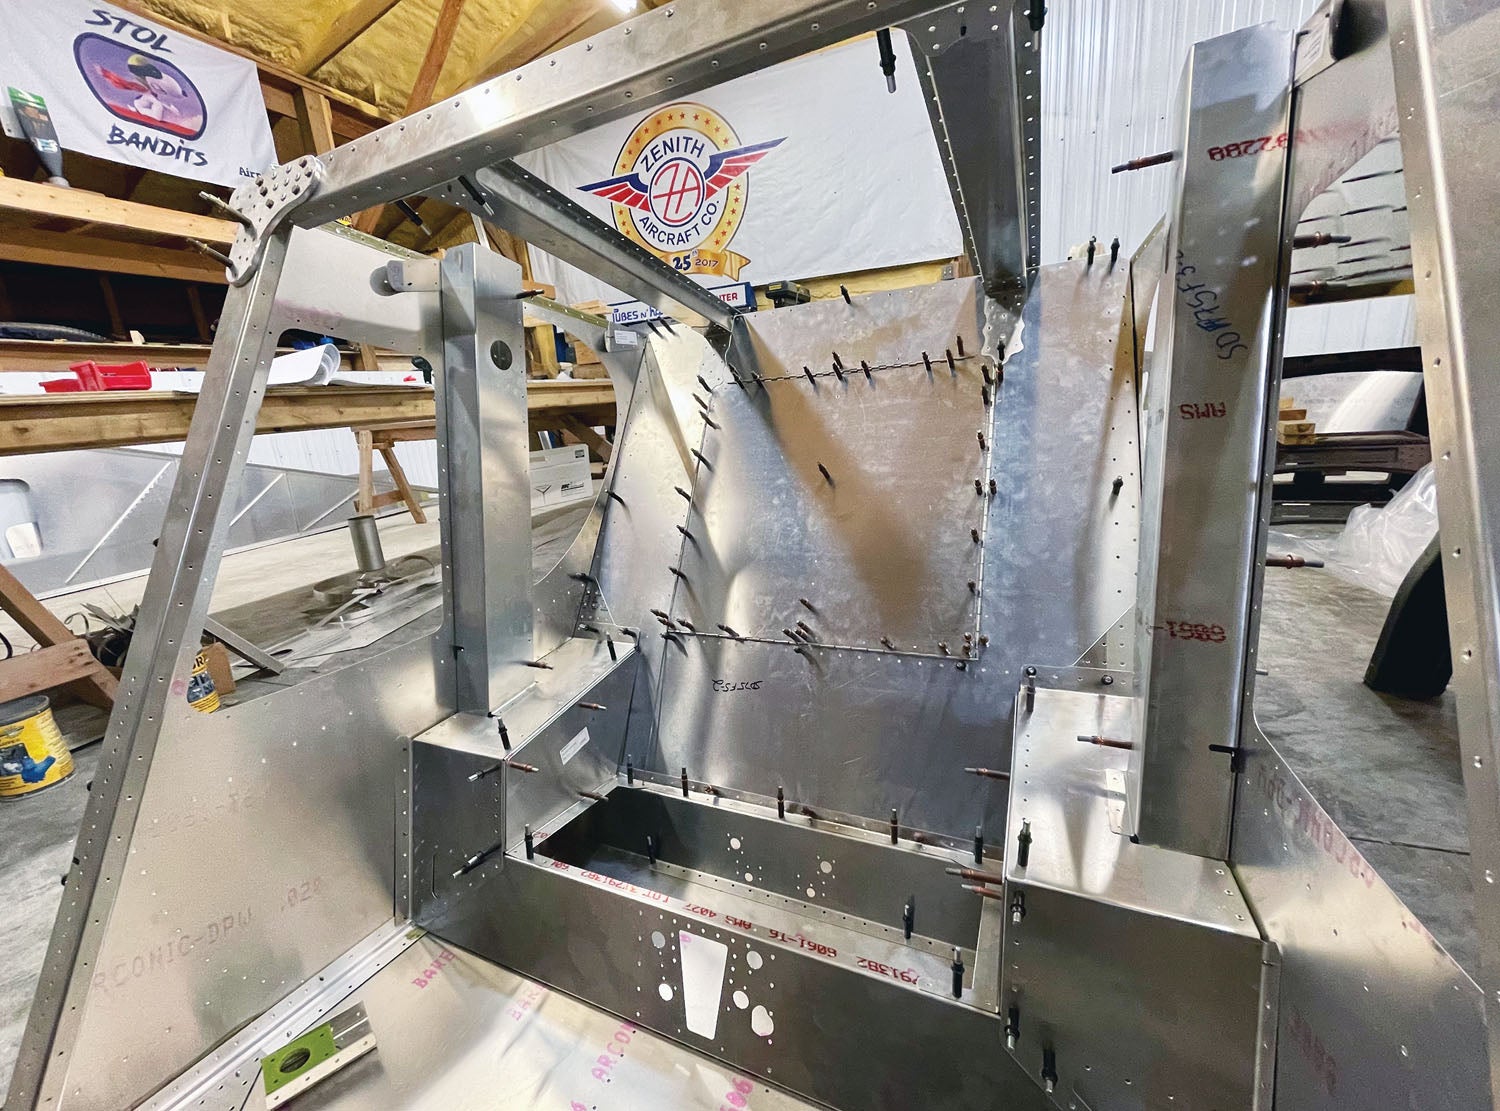
The mockups I have worked on to date have primarily focused on a couple of smaller mods designed to clean up and individualize this airplane to fit my personal influences. So far, most of the mockup work has gone into the fuselage, the rear of which has been assembled and disassembled at least a dozen times. One mod I am working on that is considered to be at least partially structural is moving the large bottom access panel to the rear cabin wall. My hope is that the change will clean up the bottom of the fuselage. However, it may prove to be very cumbersome with internal work on the rear fuselage during the rest of the build and in future maintenance.
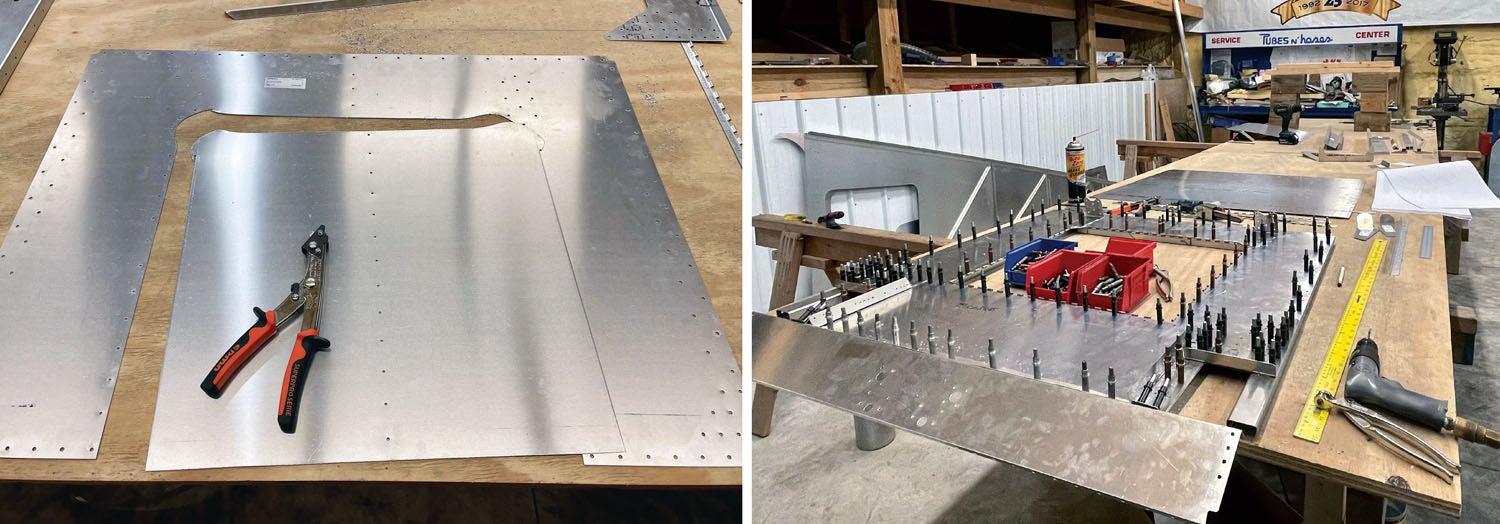
So far, I haven’t found any problem spots with the 750 that weren’t self-inflicted. As an example, I was dead set on building the aircraft without the standard jump seat skylight window. That changed when I was able to visit the factory last month and sit in the jump seat of the company’s demo Super Duty. While sitting there, I realized that the bubble skylight above the rear seat is a must for headroom comfort if you plan to have any adult passengers back there.
I had previously ordered a special top sheet without the skylight cutout. After that experience, I decided to lay out and cut the skylight hole. This was one of those extra steps where it would have been much better and easier to just follow the factory specs and guidelines. But it was good to know that the way I thought I preferred it wasn’t actually what I wanted—and to learn it before the plane was built.
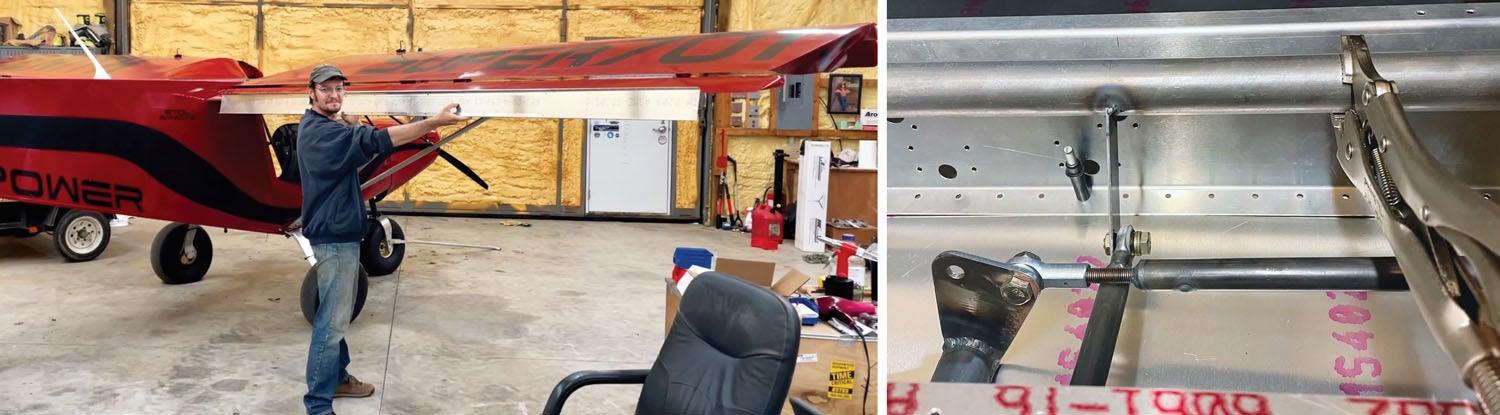
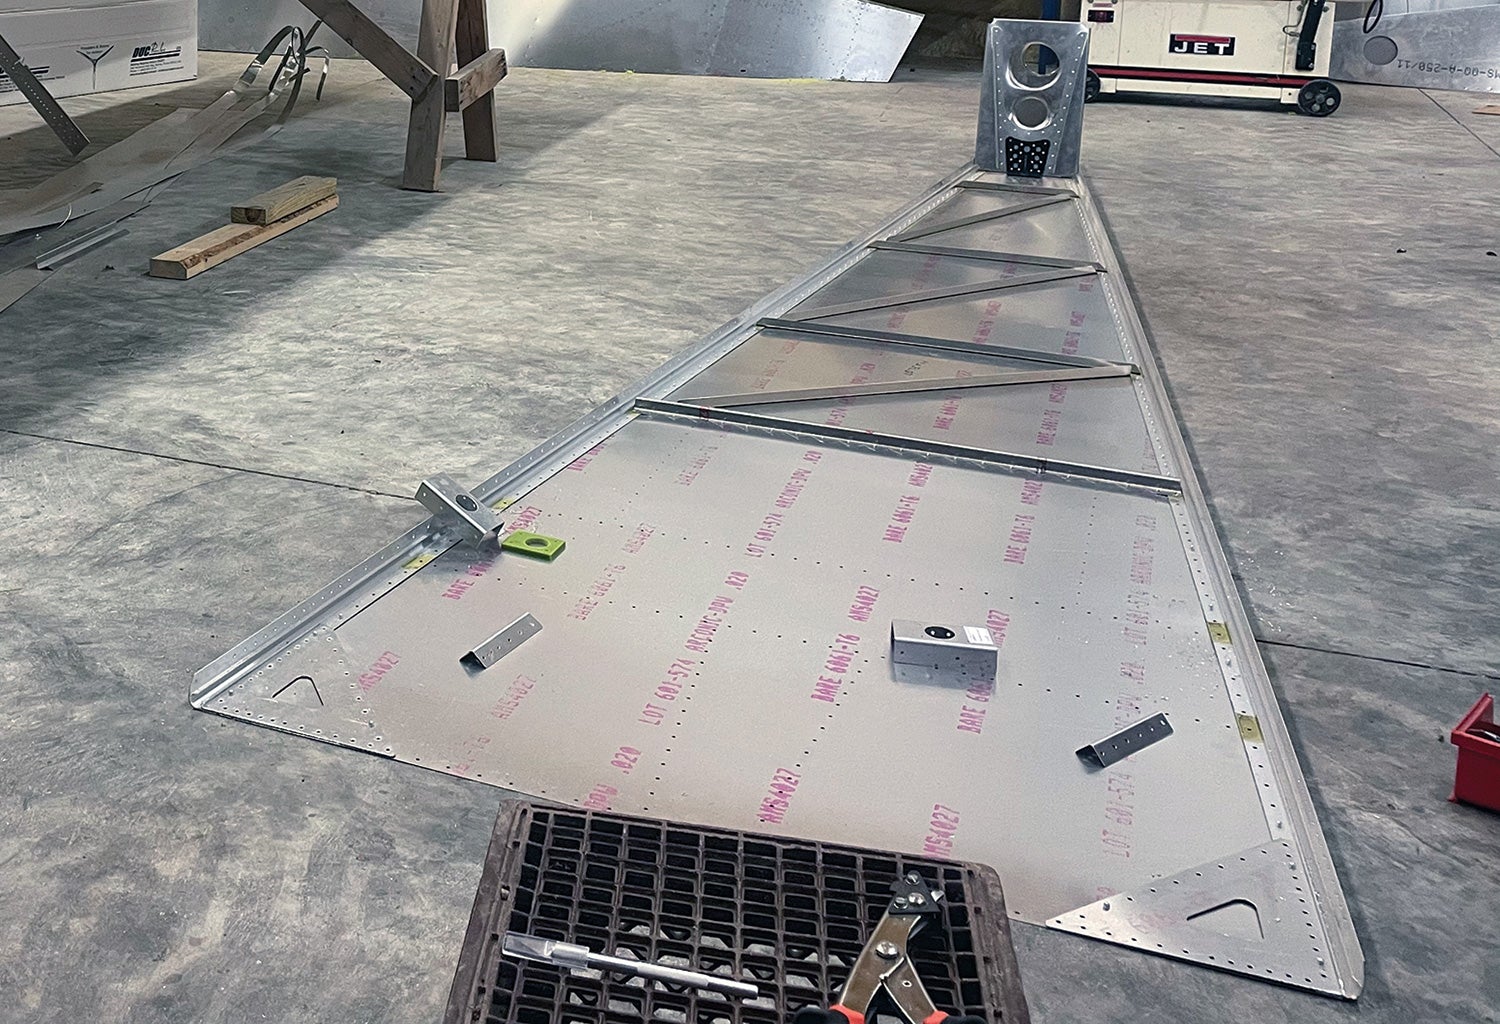
Along with the fuselage, I am currently doing rough mockups for a wing and the tail. I have the parts for both components laid out and their skeletons are now partially mocked up. Doing it this way allows me to get an idea of what I’ll be working with soon.
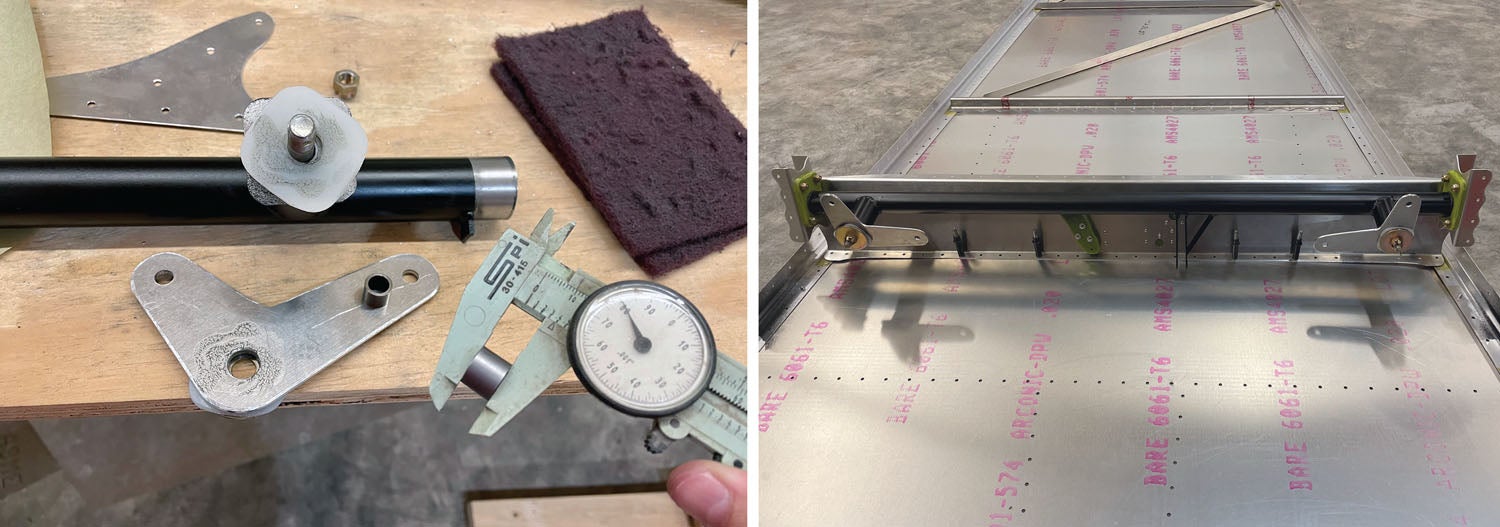
Changes to the factory design are always time-consuming and generally not recommended, especially if the modification involves the controls. Electing to pursue one requires particular care and attention. One big modification I am making is with the flaperon control system. The Super Duty utilizes an electric flap actuator, but I have chosen to modify the system for manual flap control. This involves changing some of the mixer geometry along with building custom pushrods and then installing the manual flaperon lever from the 701 upgrade options.
I built my first Zenith with a relatively clean panel. I wanted to make it as “switchless” as possible with startup and backup systems hidden behind a small door on the panel. I intend to make the SD even cleaner, and hopefully simpler, while also improving the already incredible outside visibility with a small, simple panel.
Mockup Process
Everyone tackles modifications differently. Most of the modification mockups I do start off as ideas that I toss around in my head for a while. Depending on the complexity, those ideas can become a lot more involved.
For controls or structural mods, the ideas usually get drawn out (on paper, chalkboard, farm feed sacks, or whatever is handy at the time). From there, I tackle calculations on geometry, strength and movements. Occasionally, I will do a small-scale mockup with cardboard or some cheap material just to see if things look right.
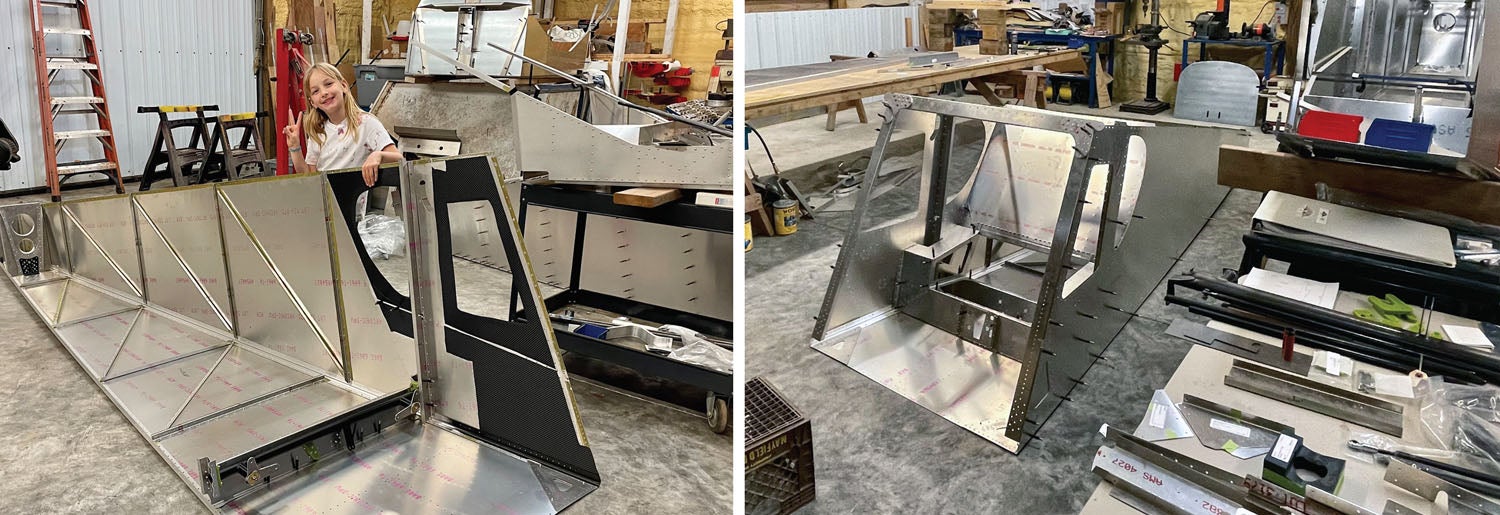
Having extra space is always a problem in a farm shop, no matter how big the shop is. With some effort, I managed to make enough room to start mockups on multiple components at the same time. This allows me to look at and think about one component while I am actively working on another.
As I understand it, this system does not work for many people. It can certainly spread focus and prolong completion of any single component. I personally like it because it gives me time to study and understand how the airplane is engineered while I am building various parts. Looking at it this way with the 750 has reminded me once again that these Zenith planes are well thought out and designed!
Mockup Completion?
Realistically, the mockup process probably prolongs the build. In the early stages, I do not focus on any one component. Instead, I am partially mocking up several pieces and implementing all my customizations in my head before the airplane actually starts coming together.
I don’t really know how to describe when it’s time to move on from the mockup stage. For me, it may be when the holes do not need to be deburred because the edges have been worn smooth from taking the Clecoes in and out so many times. For what it’s worth, the plans and build guides for the 750 are amazingly straightforward and easy to follow. Almost all of my extra mockups are due to personal customizations and trying different concepts.
Fuselage So Far
The rear fuselage is currently completely disassembled (again) and I’m now in the process of cleaning and dressing it up as it is slowly going back together. At this stage, I am paying extra close attention to details since I’m planning for this build to be more show-worthy than my Super701. I painted the first few pieces yesterday and am applying some carbon fiber vinyl as I put the rear fuselage back together—hopefully for the final time this round.
The Super Duty is my second plane, and there is one thing I have definitely learned: By the time your first build is complete, you will have learned some tricks and found things you want to do differently on your next build(s). The Super701 was not constructed with the intention (or thought) of being in the spotlight at airshows all over the country. My planned mission when I was building the 701 was to simply have a nice, capable two-place plane to enjoy local farm flying and the East Tennessee mountain scenery.
That evolved into regular cross-country journeys to airshows and events, with the Super701 seeming to have acquired quite a following and fan base in the STOL community. I have come to realize that many eyes are watching, waiting to see how the Super Duty will improve upon and compare to my last build. While I’m not ready to share too many details just yet, I promise it will be even better.
Time So Far
I took delivery of the 750 kit about a year ago, but also started building another highly modified 701 at the same time. Once I got the 701 fuselage concept mocked up, I switched gears and started focusing on the 750. The build process has gone really well so far in spite of the fact it is taking longer than I’d like. The slow speed has been completely due to personal time constraints rather than any issues with the kit itself.
I don’t have hard numbers on how many hours have gone into the project at this point. As I did when I built my first 701, I am taking pictures at the end of each build session for the 750 instead of logging time. When it’s done, this will give me thousands of time-stamped pics, a number of which will go into a photo book to be submitted as the required builder’s log.
Fuselage Work Left To Do
If I look at the whole picture, there is still an incredible amount of work to be done on the 750 fuselage. The list includes wiring, upholstery, instrumentation, etc. Progress-wise, I hope to have the main fuselage structure together and on the main landing gear in the next couple of weeks. Once the fuselage is on the main gear and somewhat mobile, I’ll be able to use the workbench to focus on the rest of the tail sections before turning to the wing structures.
In addition, I’m starting to play with paint scheme ideas and beginning to think about things like the engine, avionics, wiring and fuel system.
A Final Word on Mockups
Theories do not always work out the way we think they should. Sometimes a visual representation will reveal the bigger picture in ways nothing else can. Problems (and solutions) will arise that just cannot be seen with calculations on a focused area. Like the quote from the racing world, “If the theory does not match the result, believe the result and make a new theory.”
Doing extensive mockups has helped me find potential trouble spots, test ideas and overall be confident that I’m heading in the right direction when I begin final construction of a component. While it can be time-consuming, the process provides necessary space for thought and flexibility. Besides, since this is the Experimental world and we’re allowed to build to our own preferences, standards and styles without the strictness and extra expenses found on the certified side of the fence, it’s fun to explore what might be possible.
Videos of Humberd’s builds—and some of the fun that can be had with flying a STOL airplane—can be found at www.youtube.com/Super701.
Photos: Jon Humberd.
![Coming in for a landing at Humberd’s Farm [All Images Credited to Jon Humberd]](https://www.kitplanes.com/wp-content/uploads/2026/07/9-1.jpg?w=218&h=150&crop=1 "Overcoming Setbacks on the Zenith 750SD Xtreme")
![[Credit: Zenith Aircraft Company]](https://www.kitplanes.com/wp-content/uploads/2026/06/31142685469.jpg?w=218&h=150&crop=1 "Zenith Throws Open Its Doors for “Fly-In to Summer”")
![Members of the North Idaho High School Aerospace Program gathered at KSZT [Credit: North Idaho High School Aerospace Program]](https://www.kitplanes.com/wp-content/uploads/2026/02/IMG_3499.jpg?w=218&h=150&crop=1 "North Idaho High School Student ACES Fly the Aircraft They Built")


