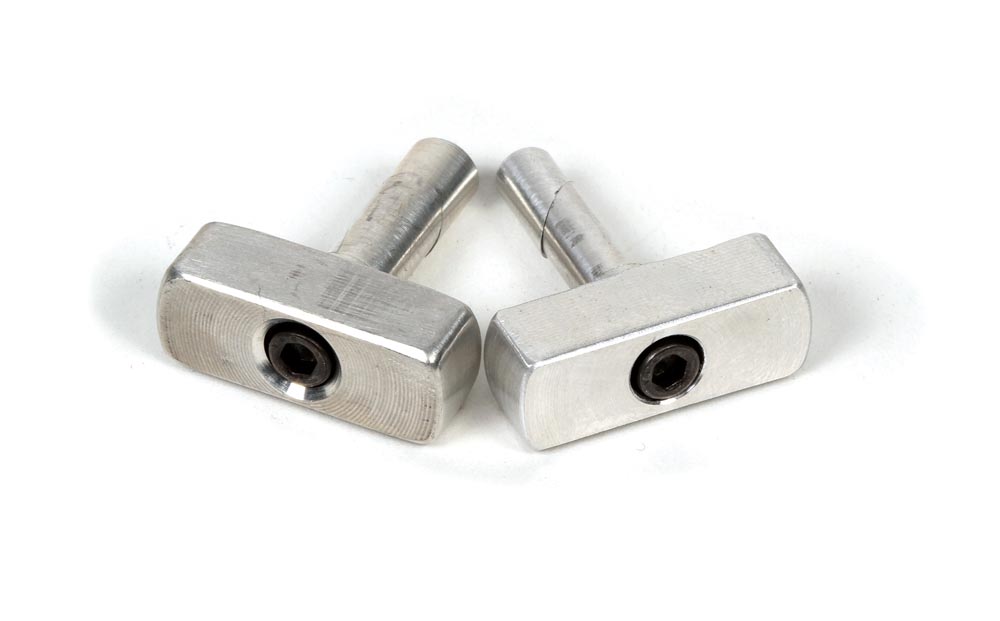
What are they? Jack hacks. You’ll need two: one for the -inch headphone jack (left) and another for the 0.205-inch microphone push-to-talk (PTT) jack (right).
When installing or tightening a loose headphone jack, it’s important to prevent it from spinning as you tighten the fixing nut. If allowed to spin, the wires will get tangled, which could cause a short or a broken connection. If your installation allows you to reach the back of the jack to hold it, all is good. But if access is limited—such as being blocked by a harness or mounted on a bulkhead or tunnel—holding the jack may be problematic and, at the least, might require time-consuming disassembly.
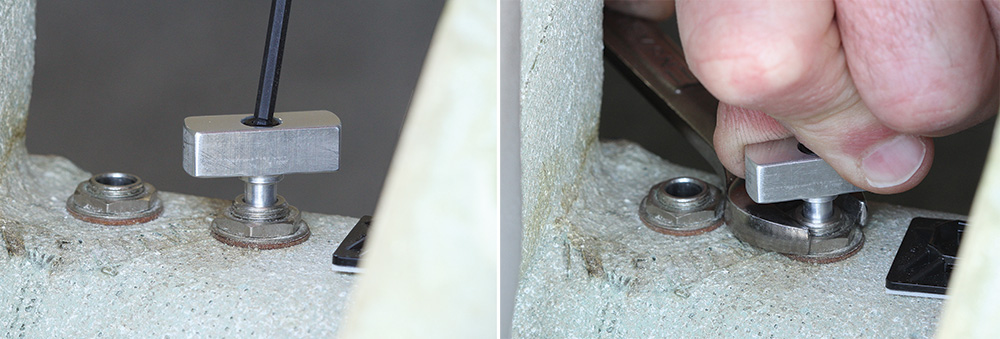
To use a jack hack, tighten the wedge using a hex key (left), hold the wings, and torque the thin nut (right). Switchcraft recommends tightening their audio jacks to 8-10 inch-pounds (about 1 Nm).
What you need is a set of audio-jack post-binders, hereafter referred to as “jack hacks.” They work like an old-school bicycle gooseneck: Insert and tighten until the wedge locks the tool into the jack. Hold the “wings” of the T-handle to prevent the jack from spinning. Tighten the retaining nut. What could be easier?
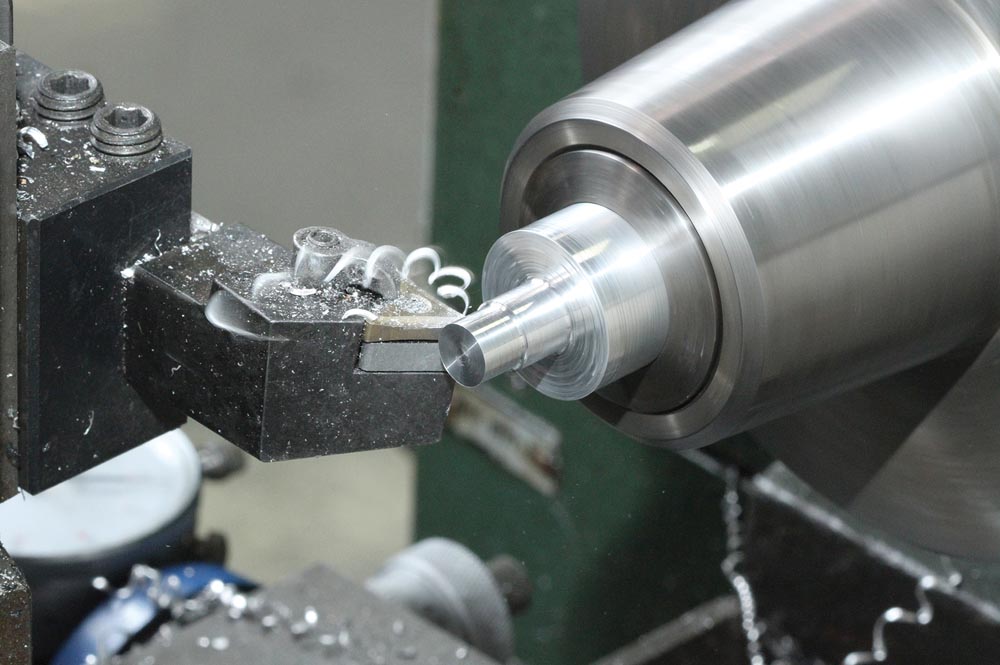
The T-handle for this article was made from one-inch OD round bar (aluminum 6061-T651) and features milled wing handles (see photos). I also made some from 1-inch x 3/8-inch rectangle stock (aluminum 6061-T651). This eliminated the need to mill the wings, but took some extra time to center the stock on the lathe with the 4-jaw chuck (see “Lathey Guy’s Guide to Work Holding,” September 2014).
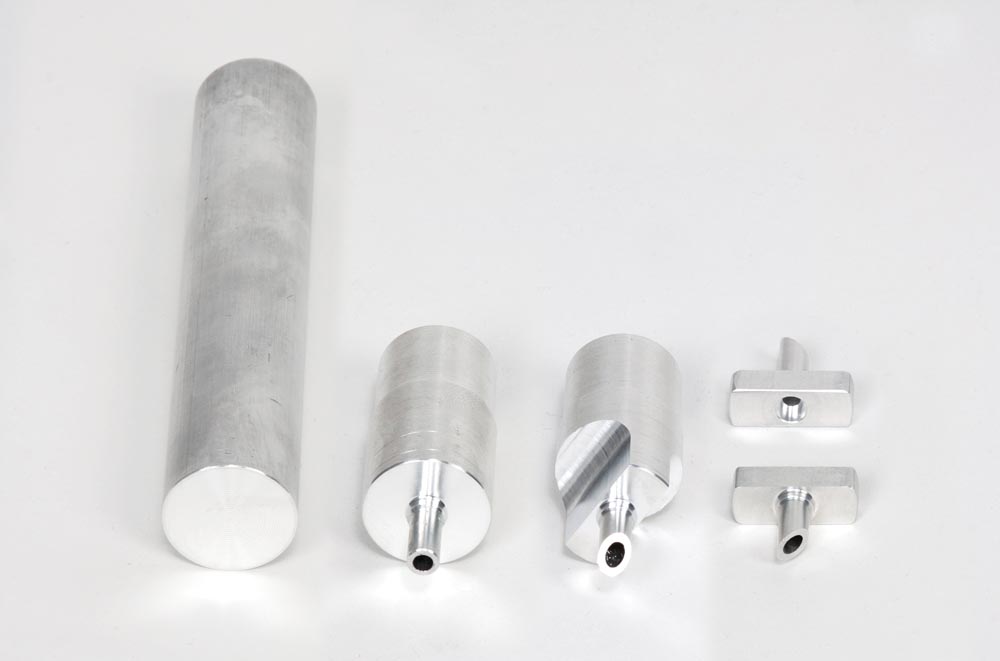
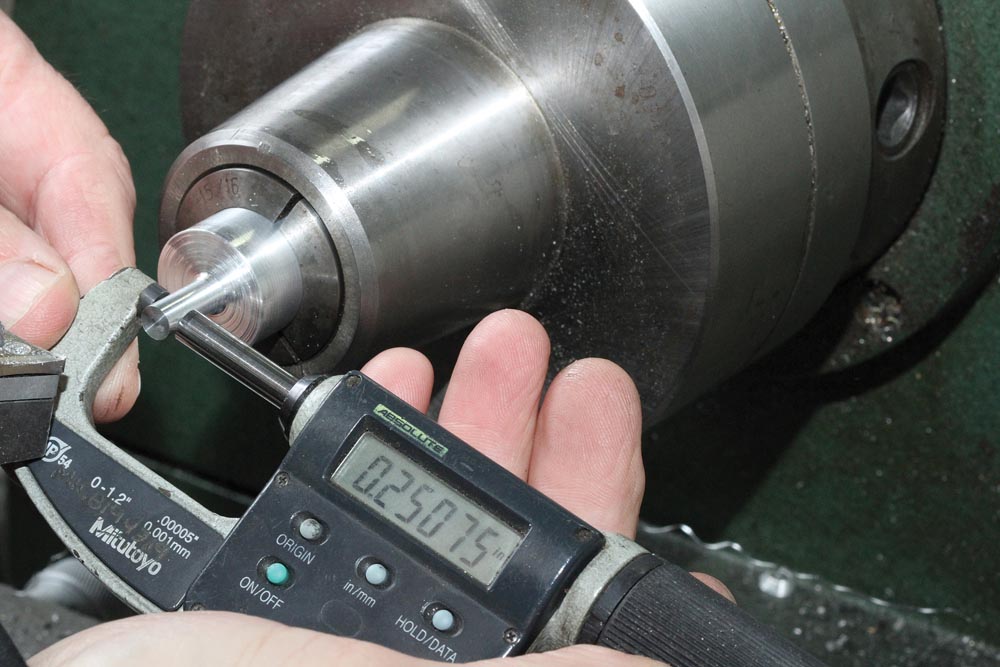
From one-inch bar stock to finished T-handle: The machining sequence is often key when making parts with unusual shapes.
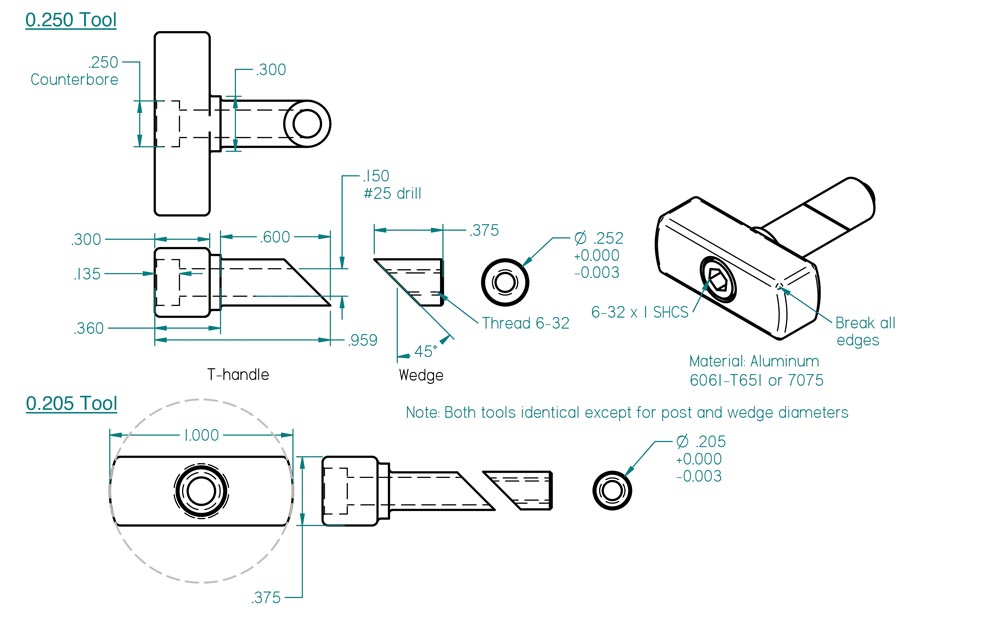
Feel free to revise the design to suit your mood! The only critical dimensions are the diameters and length of the shank, which must be just right for the wedge to hold. I experimented with a few variations, including a wingless version with a hex for a 5/16-inch wrench, which proved inconvenient to use, and one with a round knob instead of wings. It was a loser because the knob blocked the view of the jack when using the tool.
To make the threaded wedge, start with 5/16-inch or 3/8-inch OD diameter aluminum bar stock in the lathe. Turn the OD to size (either 0.252 or 0.205) and then, using a drill chuck in the tailstock, spot-drill the end, followed by a -inch deep hole with a #36 drill bit. Tap a 6-32 thread to the depth of the hole. Transfer the WIP (work in progress) to the milling machine to make the angle cut (to match the bevel on the T-handle), then put it back in the lathe and use a parting tool to cut to length.
Drilling a perfectly centered deep hole requires first using a spotting drill, followed by “peck” drilling with a twist bit to the desired depth. Peck drilling is a fancy name for incrementally drilling and retracting the bit to prevent the chips from “packing up” in the flutes and binding the drill bit, which could deflect the cut and result in an off-center hole. Each peck is an increment of 0.050 to 0.100 inch.
If you have the material on hand, it should take no more than a couple hours to make a set of jack hacks. If you have a dovetail cutter, it should go even faster because you don’t have to fiddle around setting the angle for the beveled cuts.
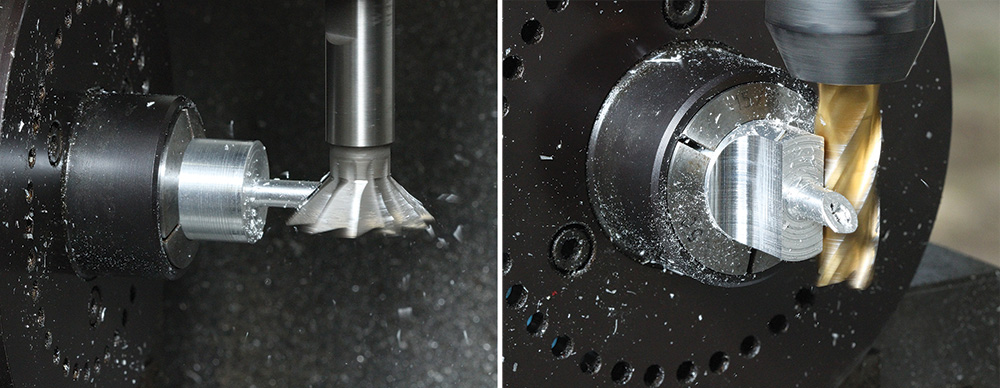
(Left) There are any number of ways to make the angle cut on the stem and wedge parts. A dovetail cutter is probably the easiest way to guarantee matching angles. You could also use a straight end mill and tilt the part in the vise or tilt the milling machine head. (Right) A 5C spin indexer and a -inch four-flute end mill was used to machine the “wings” of the T-handle. You could also simply clamp the bar stock in a mill vise and mill opposite sides.
While you’re at it, make a holder to keep your jack hack set from getting lost in the back of a drawer somewhere. That’s it! Time to get out in the shop and make some chips!
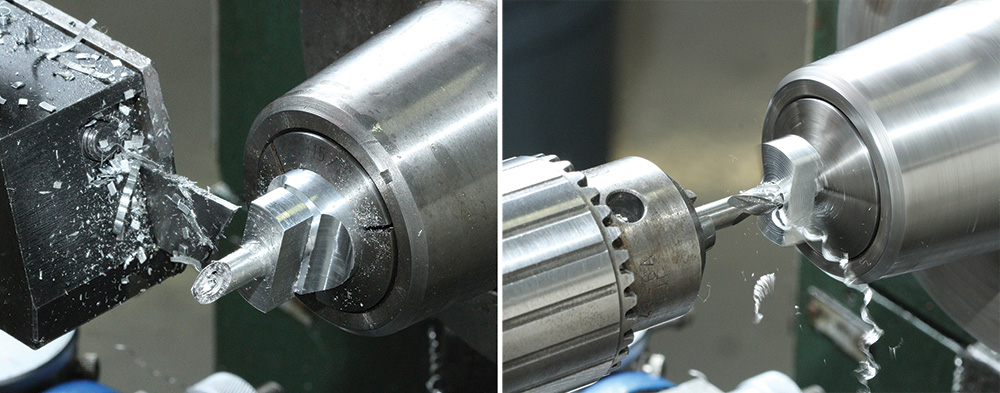
(Left) After milling the flats, transfer the WIP back to the lathe and, using a parting tool, slice the jack hack to length. The procedure for making the wedge is essentially the same: Turn the diameter, drill and tap, mill the bevel, then part off on the lathe to the finished length. (Right) Flip the part and use a -inch end mill to make the counterbore.
(Left) This view shows the wedging action. Also note the edges of the wing handles are deburred. The faces and edges of the angled cuts should be “de-flashed” of any slivers of metal, but not deburred. (Right) To keep my jack hacks organized and handy, I drilled some holes in a wood block, added a ball driver, and countersunk a magnet to the back so I could stick the set to my spare-parts cart.








Wow that’s awesome thanks for the Response