Compressed air is one of the great, yet unheralded, conveniences of the modern workshop. It’s without a second thought that we blow chips off the lathe or hook up a spray gun to shoot a coat of paint on the latest project.
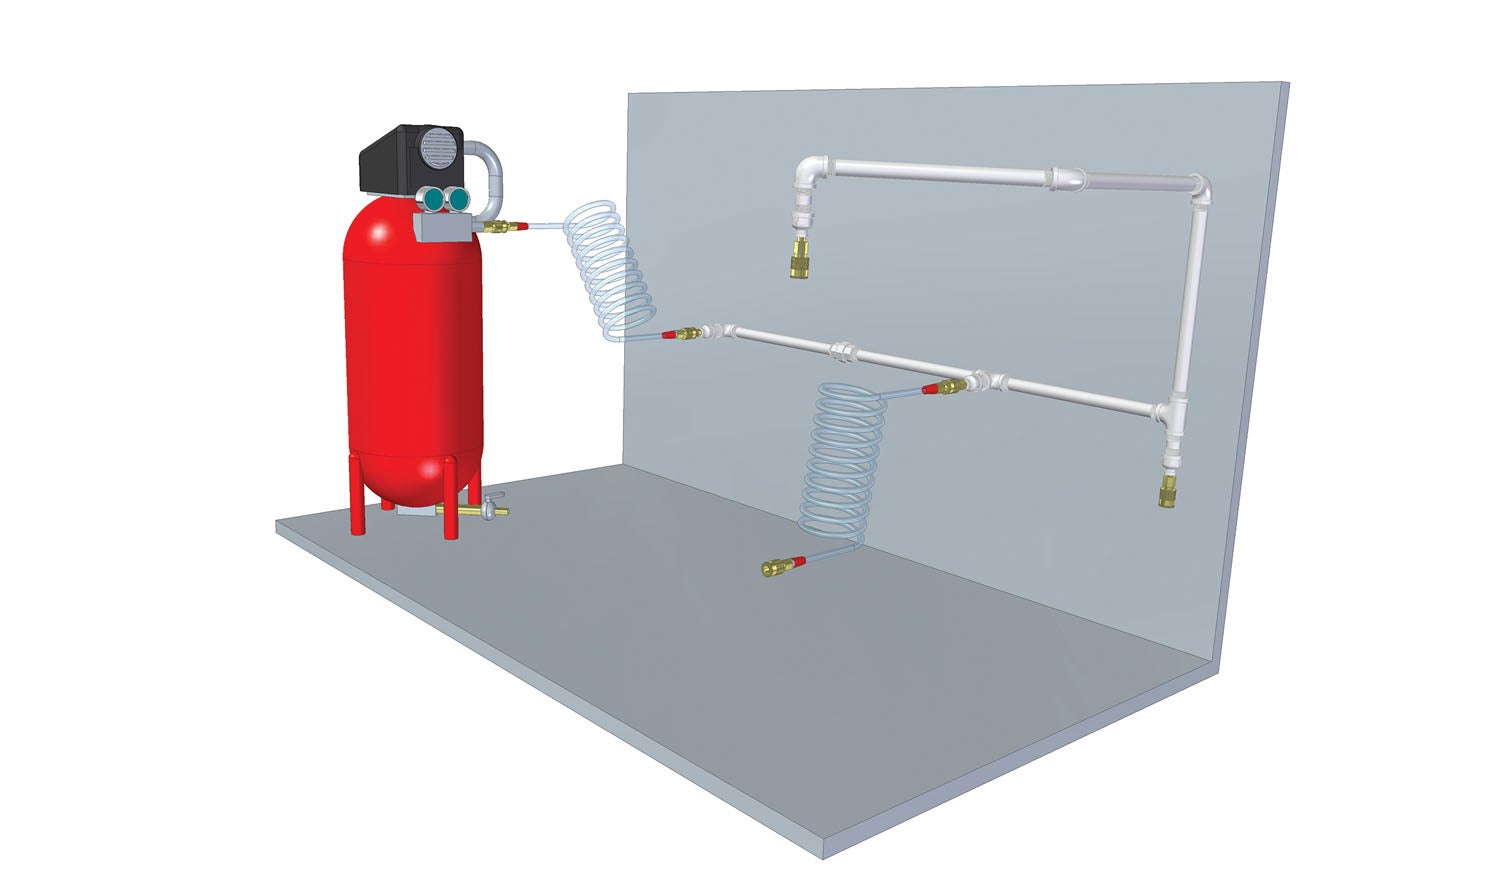
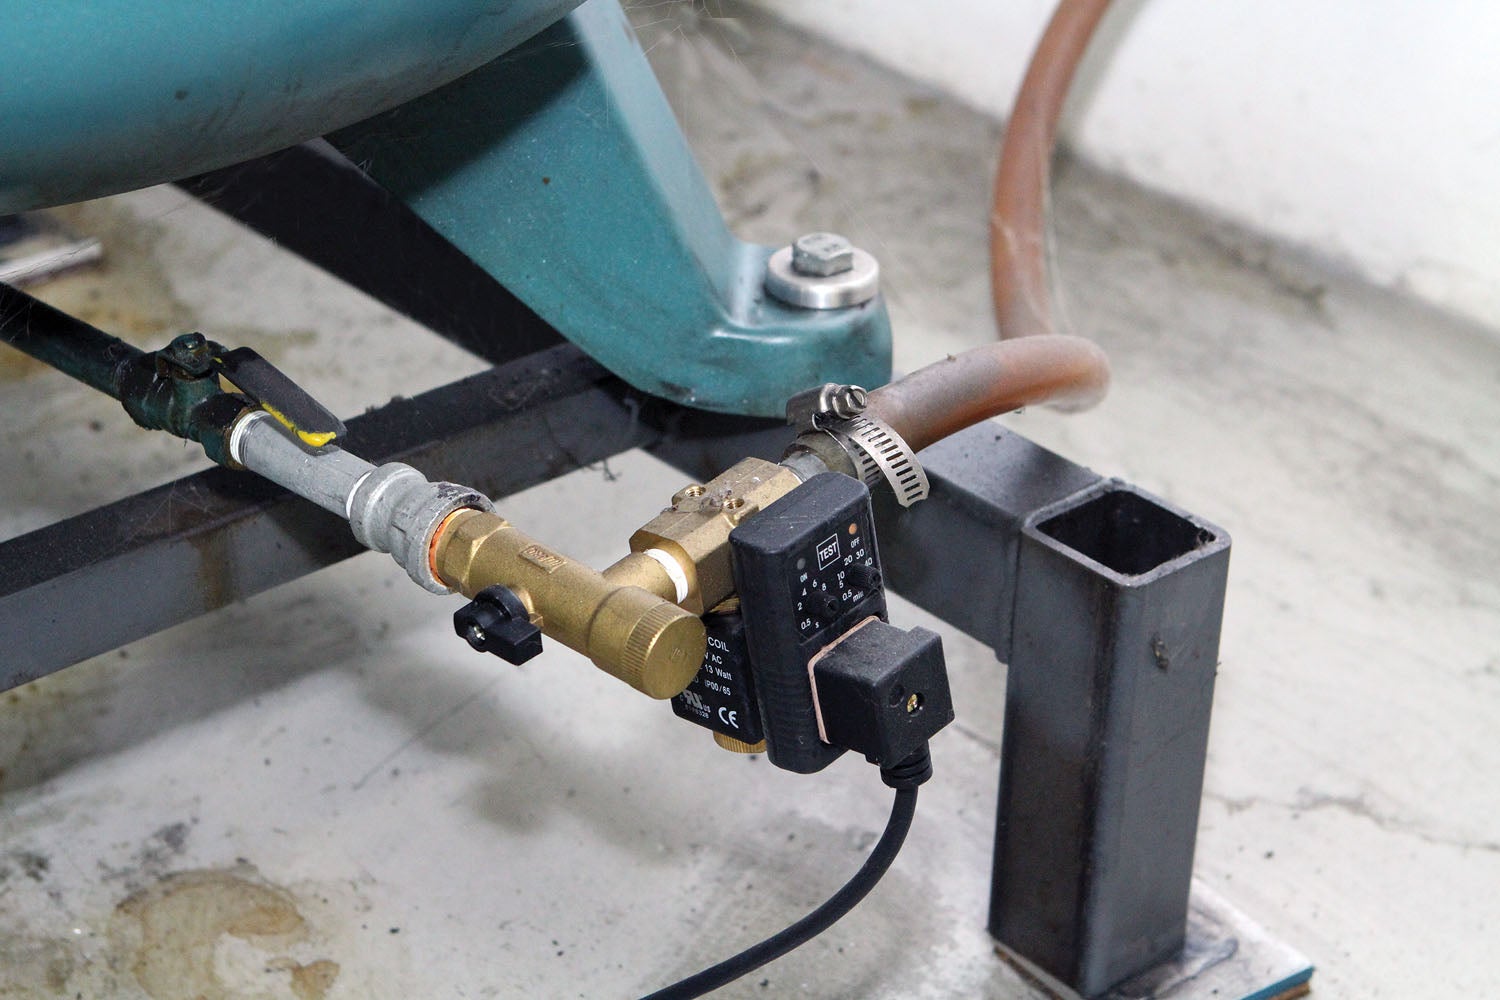
The size and complexity of an air system for a particular shop is subjective. It could be as simple as a small compressor, a flexible hose (or hoses) and a blow gun. Or it could be as complicated as a main line with multiple branches going around and above in order to provide an air hookup to each workstation. Add a filter/water separator and perhaps a dryer if you own a sandblaster or are spraying paint. If you’re in the shop every day, you should consider adding an automatic tank drain.
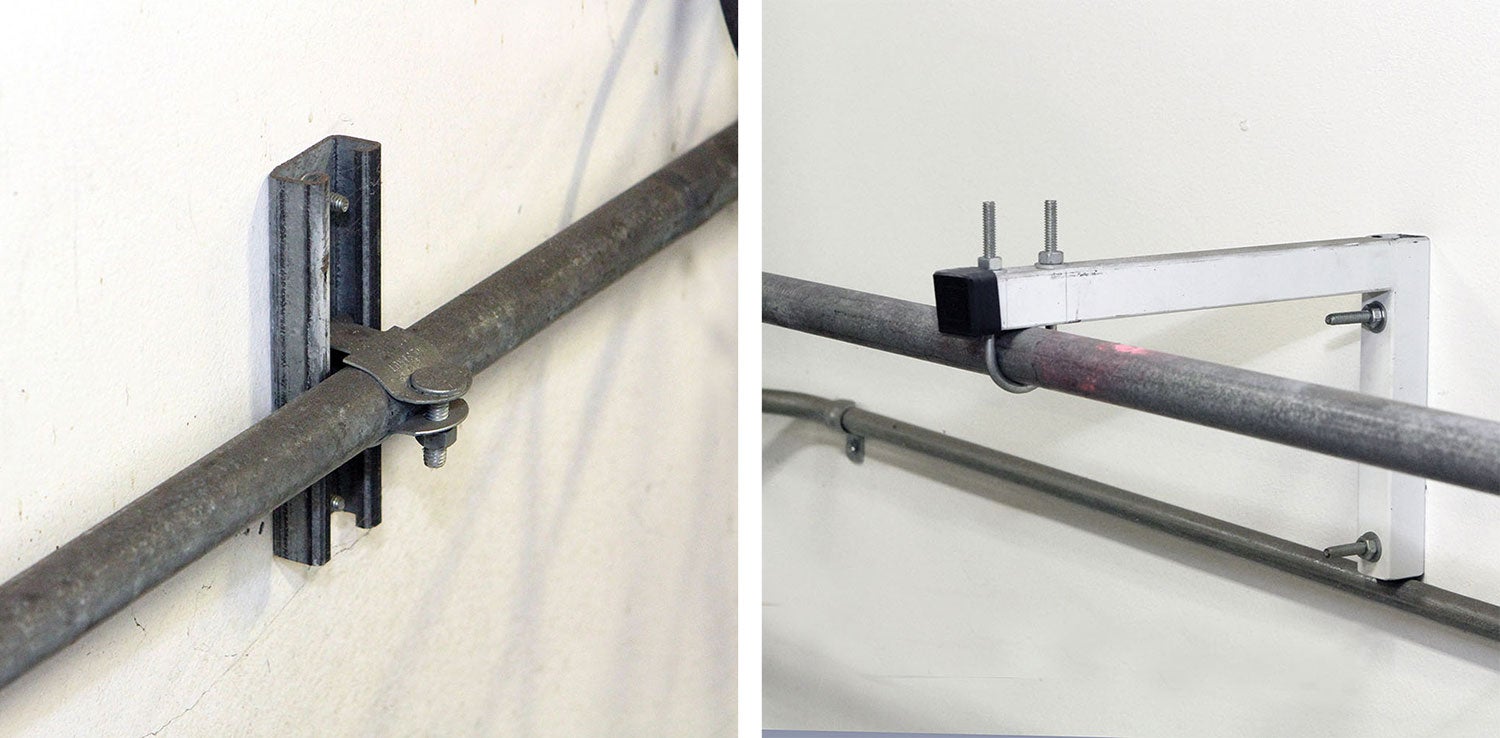
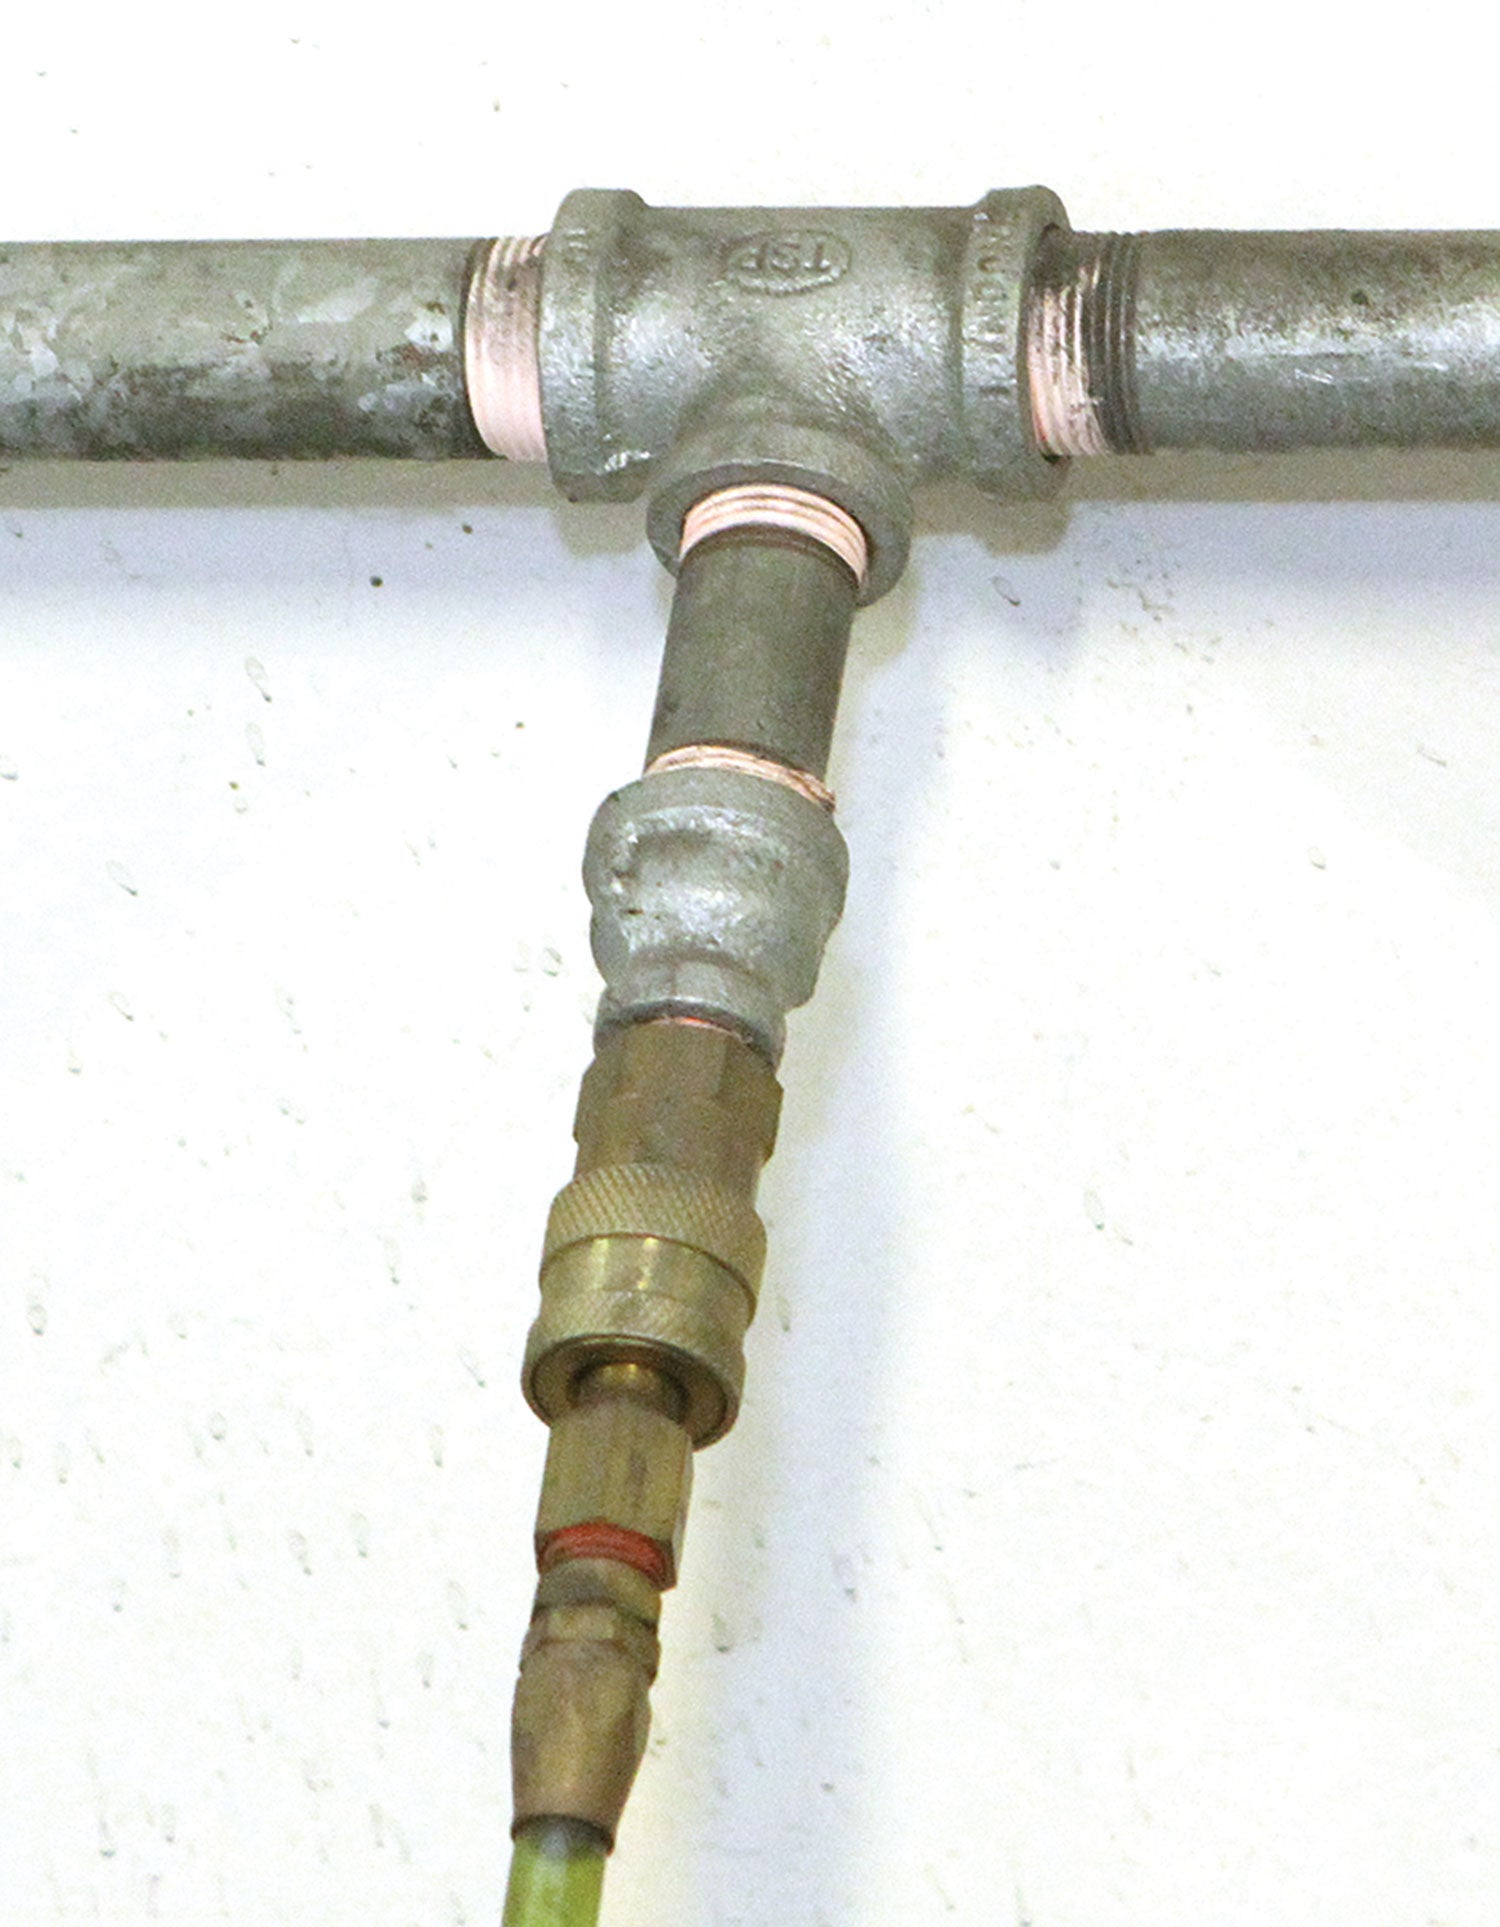
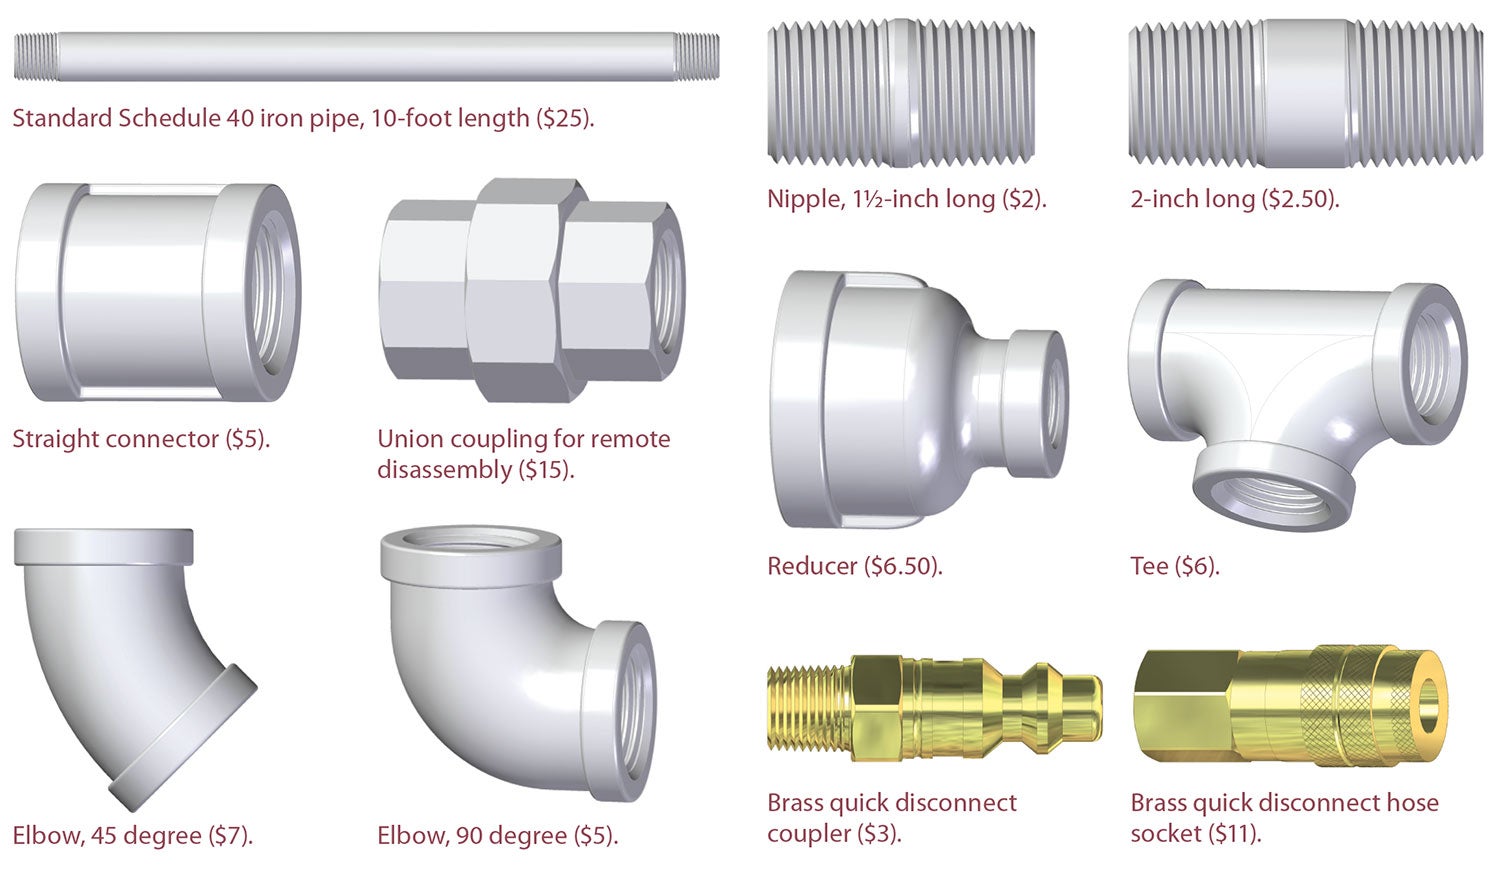
The easiest and most practical way to run air lines is with galvanized steel piping. I recommend ¾-inch (ID) pipe. The larger the better, in fact, because a percentage of airflow is lost due to the internal friction of the lines. The larger the line the more efficient the airflow, especially over longer distances. At the end of this column, I’ve included a rundown of the piping components that might go into a typical system. How many of each depends on how complex you want to make the system.
One comment on what not to do is in order: Don’t use PVC pipe.
Although rated for 150 psi water pressure, PVC pipe is not rated, nor recommended, for use with compressed air. Yes, you may have been in or around a shop with PVC air lines, but unless you’re going to keep the regulated pressure so low as to be useless for air-powered tools (below 50 psi), the risk is not worth it. The normal working pressure (the regulated output to the system from the tank) in most shops is around 80 psi. At that pressure, if a PVC pipe breaks, it will send shards of plastic in all directions. Copper or polyethene tubing are viable alternatives to galvanized pipe, but the cost will be much higher.
The heart of any compressed air system is the compressor. Stationary compressors ($500 and up) are always rated for flow (in cubic feet per minute, or CFM) and tank capacity (usually in gallons).
On the other hand, small portable compressors (up to $300) typically don’t mention CFM and instead focus on the capability of the pump (in psi) and tank capacity. That’s because small portables (the totable kind, not cart-mounted units) are designed for intermittent use—such as with a nail gun or stapler. They have small tanks with high rpm motors geared to small pumps. The pumps work furiously to maintain high pressure, and the small tank provides a volume suitable only for quick bursts of activity. In short, they are inadequate for continuous use, such as running a power sander or paint sprayer.
That said, if blowing chips, inflating tires, or nailing and stapling are all you do, a small compressor can get the job done, especially if space is a consideration. But if you can afford it and have the space (for example, you can locate the compressor outside and it won’t bother any neighbors), a stationary compressor is worth the extra cost.
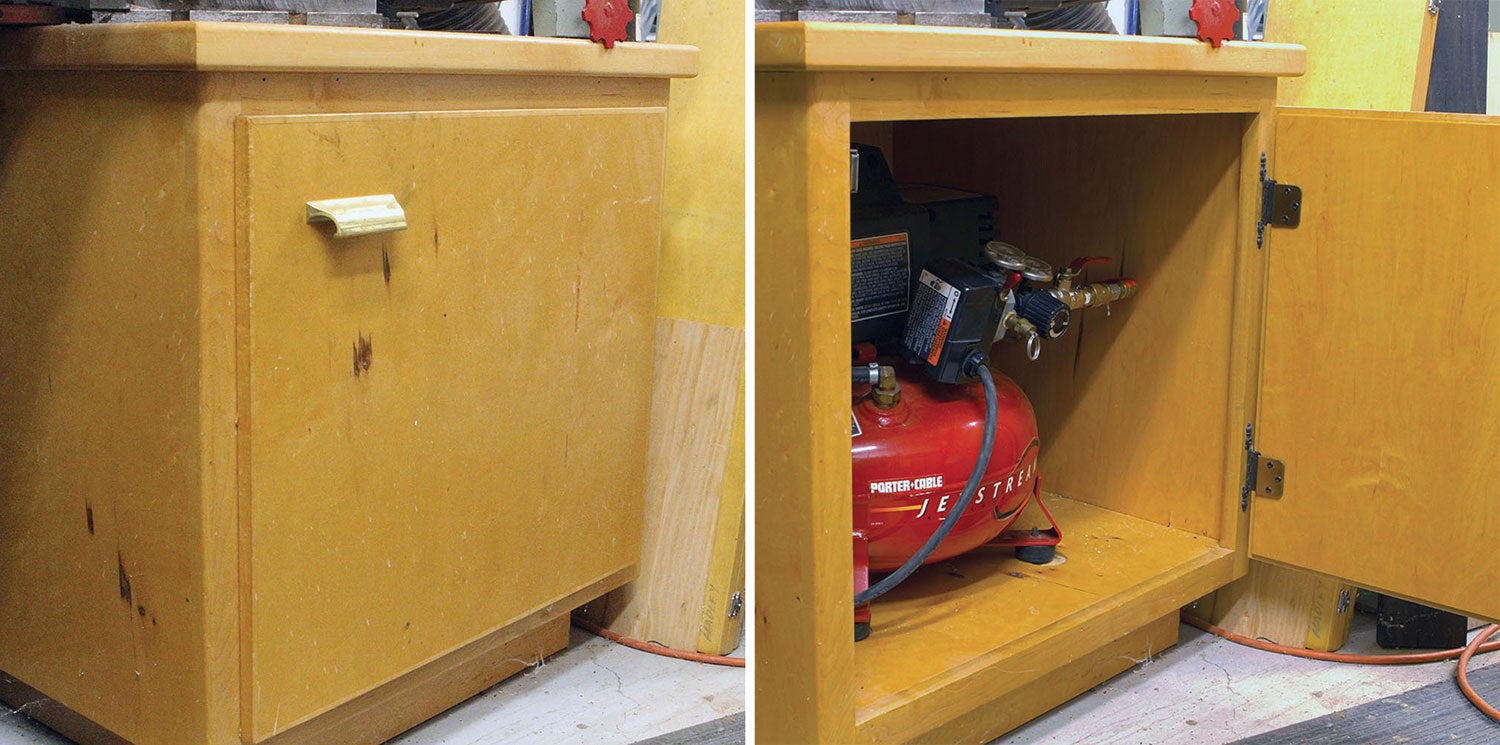
Since space is limited in my home shop, I get by with a small six-gallon Porter-Cable “pancake” compressor. The compressor itself is in a small cabinet and tucked under the wing of my table saw. A flexible hose connects the compressor to a line that goes up to the ceiling, over to the wall and down to the milling machine. I have only two connections for air hoses: one above the table saw (which also reaches the lathe) and one at the milling machine. With an extension hose, I can plug into the connection at the mill and reach the driveway to inflate tires. Like all compressors, it’s pretty loud—which is especially annoying in a small garage shop—so I put it in a shop-made plywood cabinet to muffle the racket when it’s running.
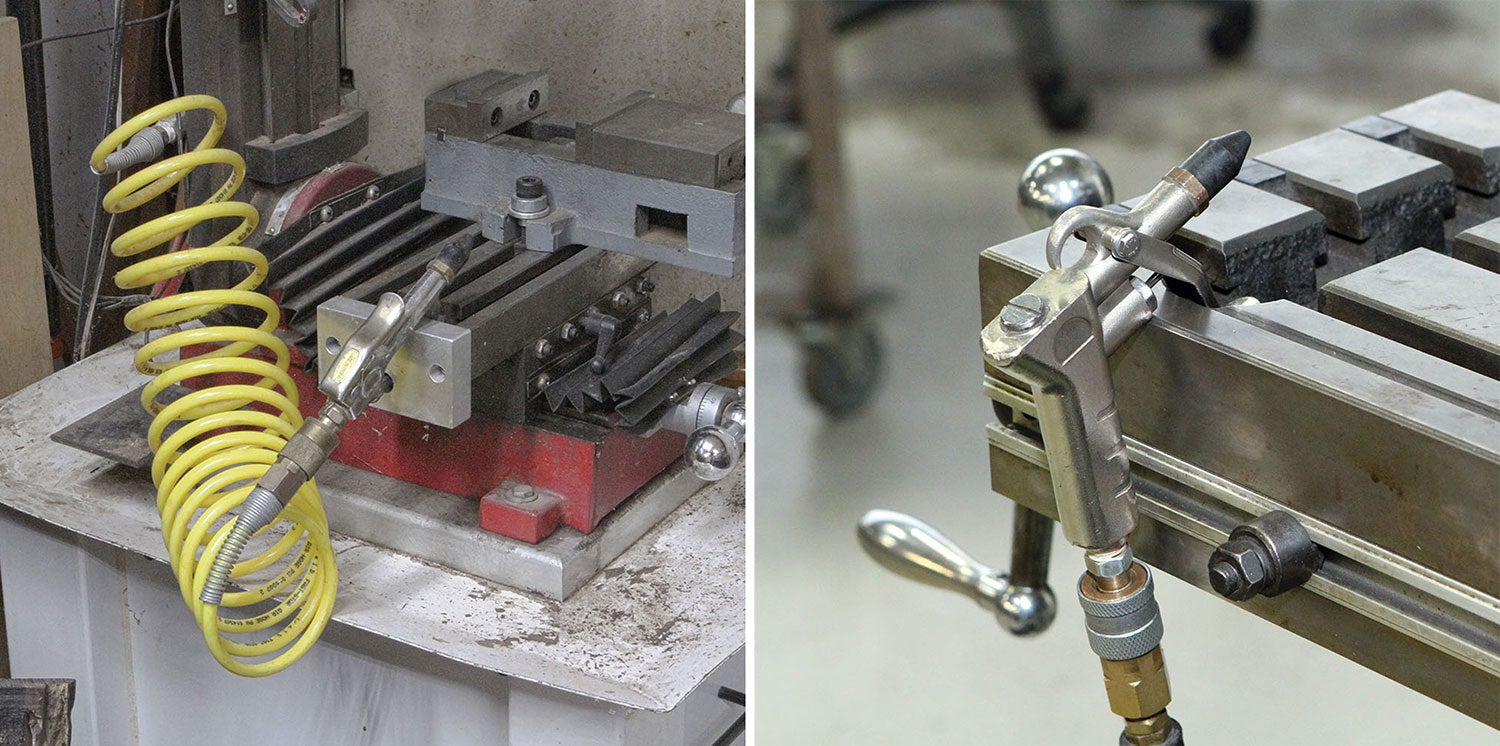
Blowing chips and dust away is the job of the blow gun. Guns come in many shapes and sizes, but the cheapest and most common are the standard top-lever blow guns. You can find these starting at under $10 just about anywhere, from Harbor Freight to big home centers like Home Depot and Lowe’s. All blow guns are made to government standards that require the air pressure at the nozzle to be muted to less than 30 psi (regardless of line pressure). While 30 psi doesn’t seem like much, it’s more than enough to blow chips and debris off any machine. Safety is a given when working around compressed air and blow guns. A direct shot from a blow gun could easily blind you, blow out an eardrum, or damage tissue. Treat the nozzle of an air gun as you would a muzzle of a firearm—with the utmost caution and respect.
That’s it for now. Time to get back in the shop and blow chips off my machines!
Basic Air Line Hardware
Photos: Bob Hadley. Illustrations: Courtesy of McMaster-Carr.
![Trimming composites gets the full PPE job. [Credit: Eric Stewart]](https://www.kitplanes.com/wp-content/uploads/2026/07/7-2.jpg?w=218&h=150&crop=1 "A Few of My Favorite Tools")


Great article, and I would just add that most homebuilders will no doubt discover that there are two commonly used standards for air fittings: industrial and automotive, and that no matter which one you choose for your system, at some point you’ll inevitably come across a situation where you’re trying to plug in a tool that is equipped with the other one. The fittings aren’t difficult to swap out but it can be pretty annoying. I used an adapter for a while, but that was never handy when I needed it. I also tried some universal couplers with mixed success — until I came across the push-button safety air universal coupling, made by Husky and Rapidair and possibly others. These things are the bees knees — not only do they work with both standards but the push-button release makes disconnecting a one-hand operation. It’s a small thing but it makes things go smoother in the shop, and I have one of these on all my air hose connections. Available from the usual suspects (Home Depot, Amazon, etc.)
The best quick connect to use, is the one with the lowest pressure drop while connected.
The lower pressure drop guarantees high pressure and airflow at the Tool. specially while drilling aluminum you want high speed drill to get the smoothest bore possible. Incredibly important wile building a spar and drilling those rivet holes.
I count on these quick connect, by far the Best:
https://youtu.be/c04Y6GoZkQk
Also used by Boeing, Airbus and Lockheed martin, to name a few.
I enjoyed Bob Hadley’s article on running an air line for your shop. Like all his articles, it was most useful and engagingly written! However, I disagree about galvanized pipe being the easiest and most practical way to run air lines. An alternative that I found easier is a product called “RapidAir”, which consists of a flexible 3/4″ aluminum tubing clad with high density polyethylene inside and outside and an associated set of fittings that attach and seal with crimp rings. It is good for up to 200PSI and will never corrode. The tubing is easy to bend, cut, and custom route and is much lighter than iron pipe. It is available in kit form with for example 100 feet of tubing and a set of fittings and terminations for a typical system at a price similar to or not much more than assembling the same out of iron pipe. You can find it on Amazon and Northern Tool among other places. Here’s a picture of some of my installation. I have the compressor in the basement so it always runs at room temperature, and the distribution feeds multiple basement and garage outlets. It makes for a very neat result!
Comments are closed.