It is sometimes easy to remember that we do annual condition inspections to find things that might be wrong with the airplane. I know that sounds basic, but the truth is, most modern kit aircraft are well enough sorted out that—if properly built to plans—they generally purr along without needing a lot of repair, sort of like a modern automobile. Every generation has a different experience with automobile reliability, of course—but it is rare to see a modern car broken down by the side of the road. Most go for years without having to visit a service department. So the expectation is for machinery to keep doing its thing.
So condition inspections often become an exercise in looking and checking off items on a four-page checklist, changing the oil and checking fittings for tightness. We can often forget that what we are doing is what is referred to in the aerospace industry as “IRAN,” inspect or repair as necessary. Yes, the inspection part can often lead to repair—at least at some point in an airplane’s life.
I don’t consider changing brake pads or tires, lubing systems or changing the oil to be repair—it is maintenance. We change things on a schedule. Even those brake pads are not being “repaired”; they are being changed when they reach a certain level of wear. The same is true with tires. But the average builder/owner/pilot might not have developed an eye for spotting actual things that need repair, things like cracks in a skin, a smoking rivet or a hole that is elongating.
This is what IRAN is for—looking for things that need repair. So the longer an airframe, engine, or component has been in service, the more likely you’ll find something.
Our RV-3 has been in service for almost 10 years and 750+ hours now. The engine is running great, the performance is just the way it was when it was new, and we fly it frequently. Every year, the annual inspection has failed to turn up any significant issues. But this year, we began to see a few signs of use—things that were not yet unsafe, but if left unchecked, could lead to more difficult (and expensive) problems down the road. If left long enough, they could even become unsafe. Addressed now, they were no big deal.
How About That Canopy Hinge?
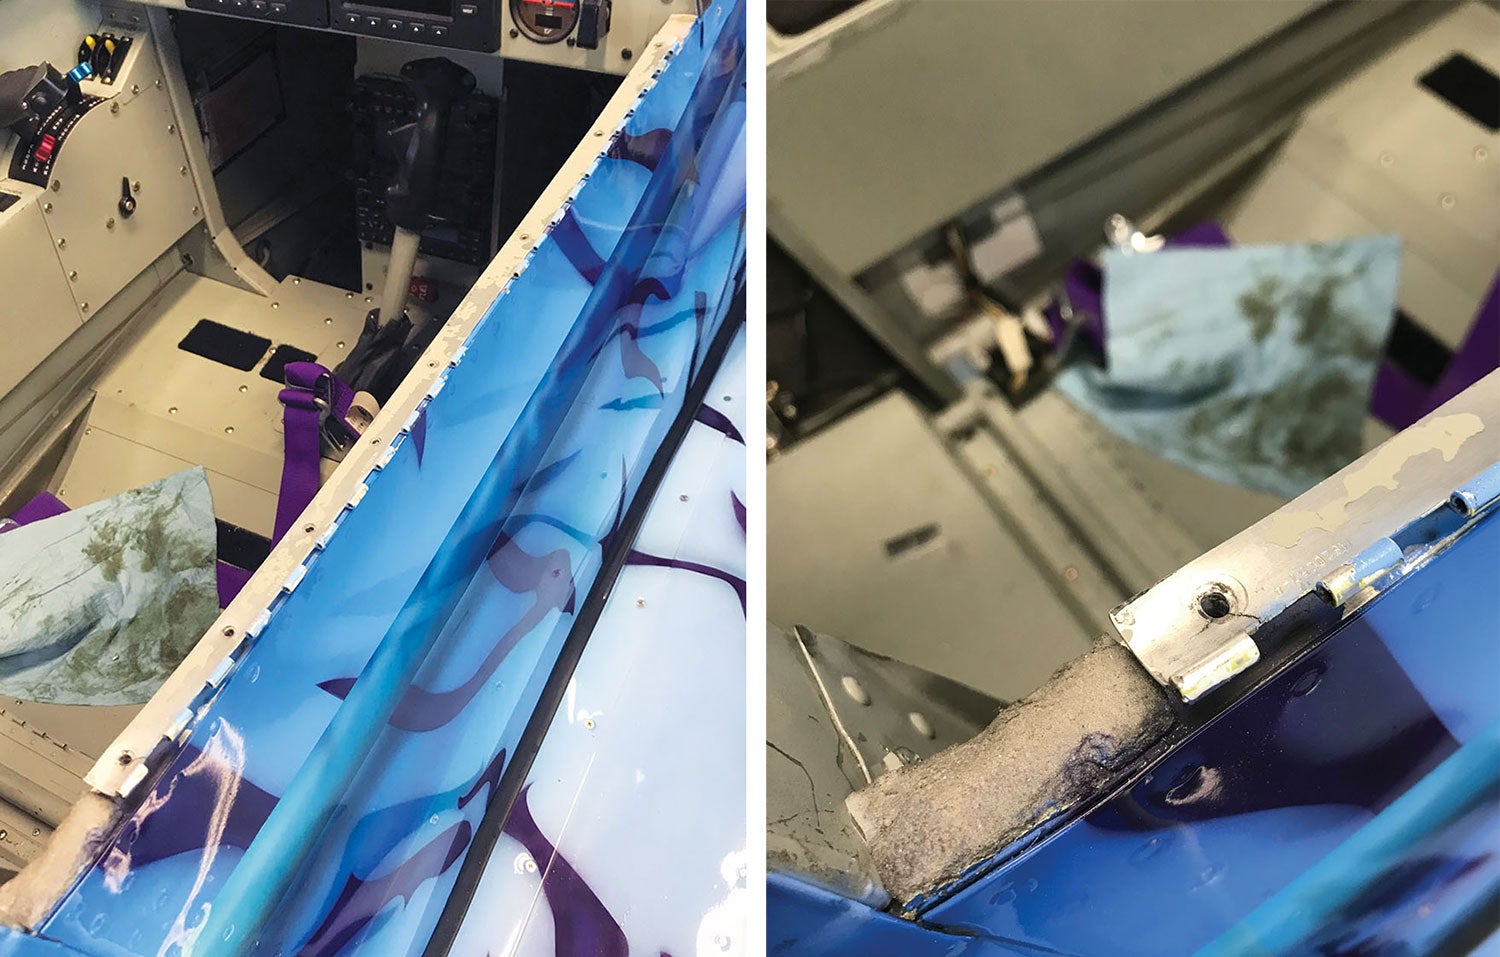
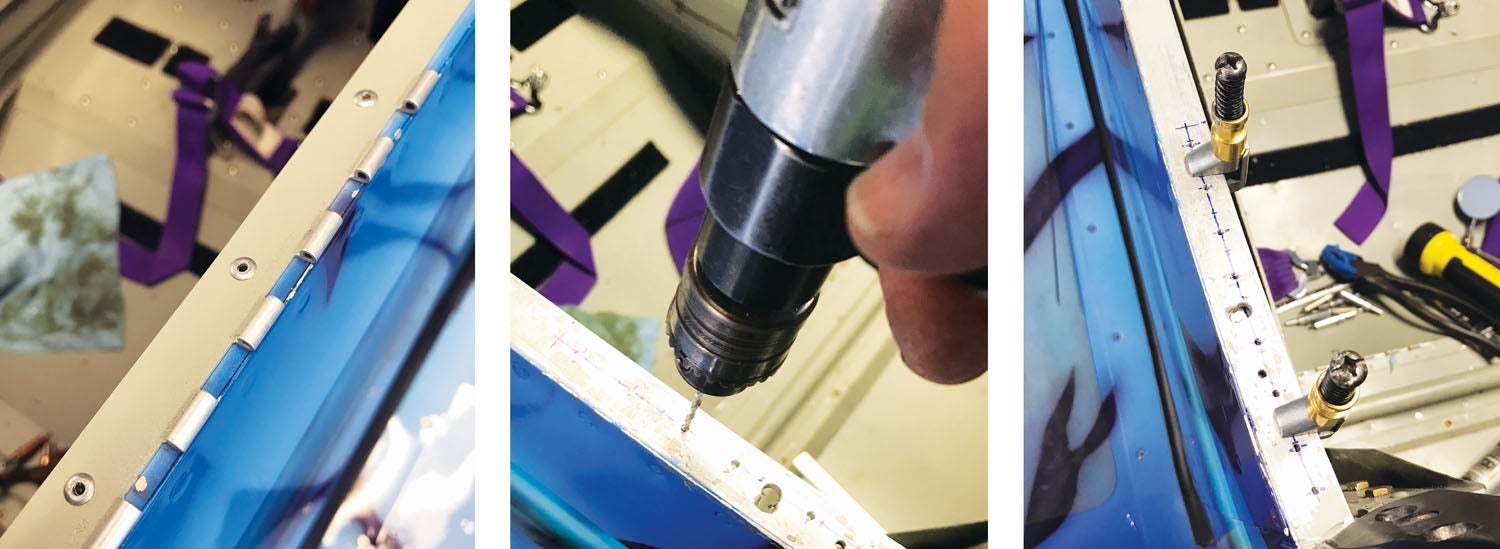
The RV-3 has a side-hinged bubble canopy. The original design called for a welded tubular frame to which the bubble mounts, trimmed out with a metal skirt that no one in recent history seems to have built to plans. These days, everyone I know has used the supplied skirt pieces as a rough pattern and laid up a fiberglass skirt. It turns out (in most cases) to be a bit heavier than the aluminum, but the curves are so much easier to get right. The single long piece of piano hinge is on the right side, attached to the canopy frame with standard driven rivets and to the longeron with aluminum pulled rivets. The theory is that if you ever needed to jettison the canopy in flight for a bail-out, you simply unlatch it and push up—and the aluminum rivets will fail due to the air loads, jettisoning the entire canopy. This method has actually been proven to work quite well accidentally by a number of RV-3 and RV-4 drivers who have failed to get the canopy latched properly before flight. I know of at least two cases where the entire intact canopy was recovered from a farmer’s field and replaced on the airplane with nothing more than a new piece of hinge!
At any rate, the constant opening and closing tends to cause the soft aluminum pop rivets to “work”—they loosen up with time. I have replaced a few of these rivets when the hinge piece has shown signs of relative movement. But this year, we not only had the rear-most rivets showing that they were loose, but the aft-most rivet hole in the hinge was also elongated and cracked, with the hinge showing signs of deformation.
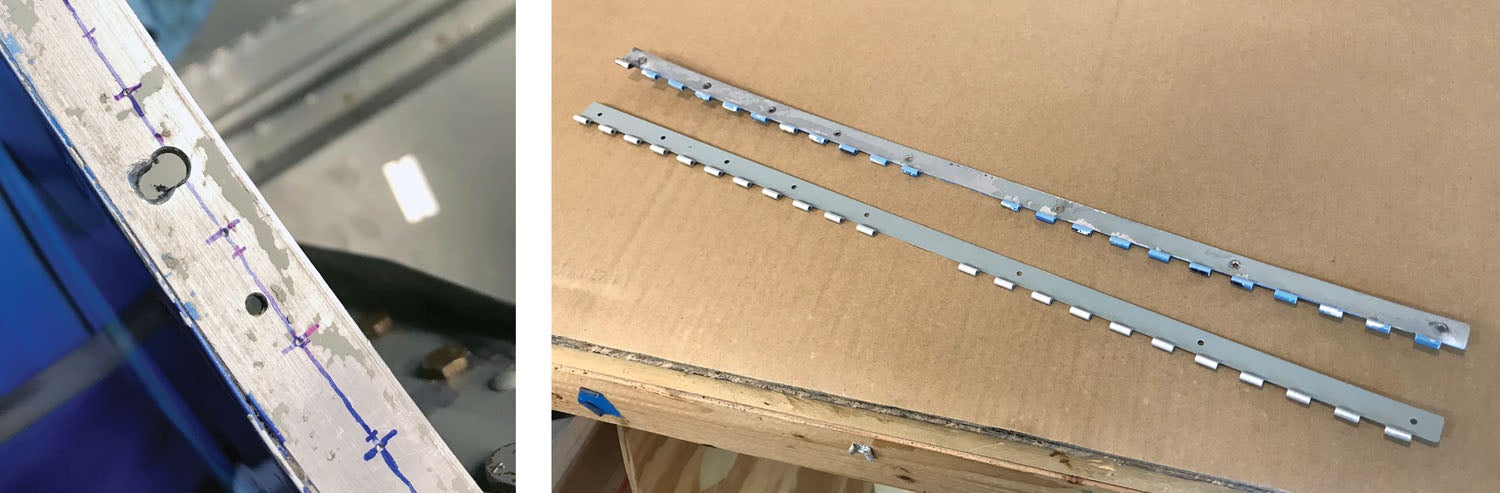
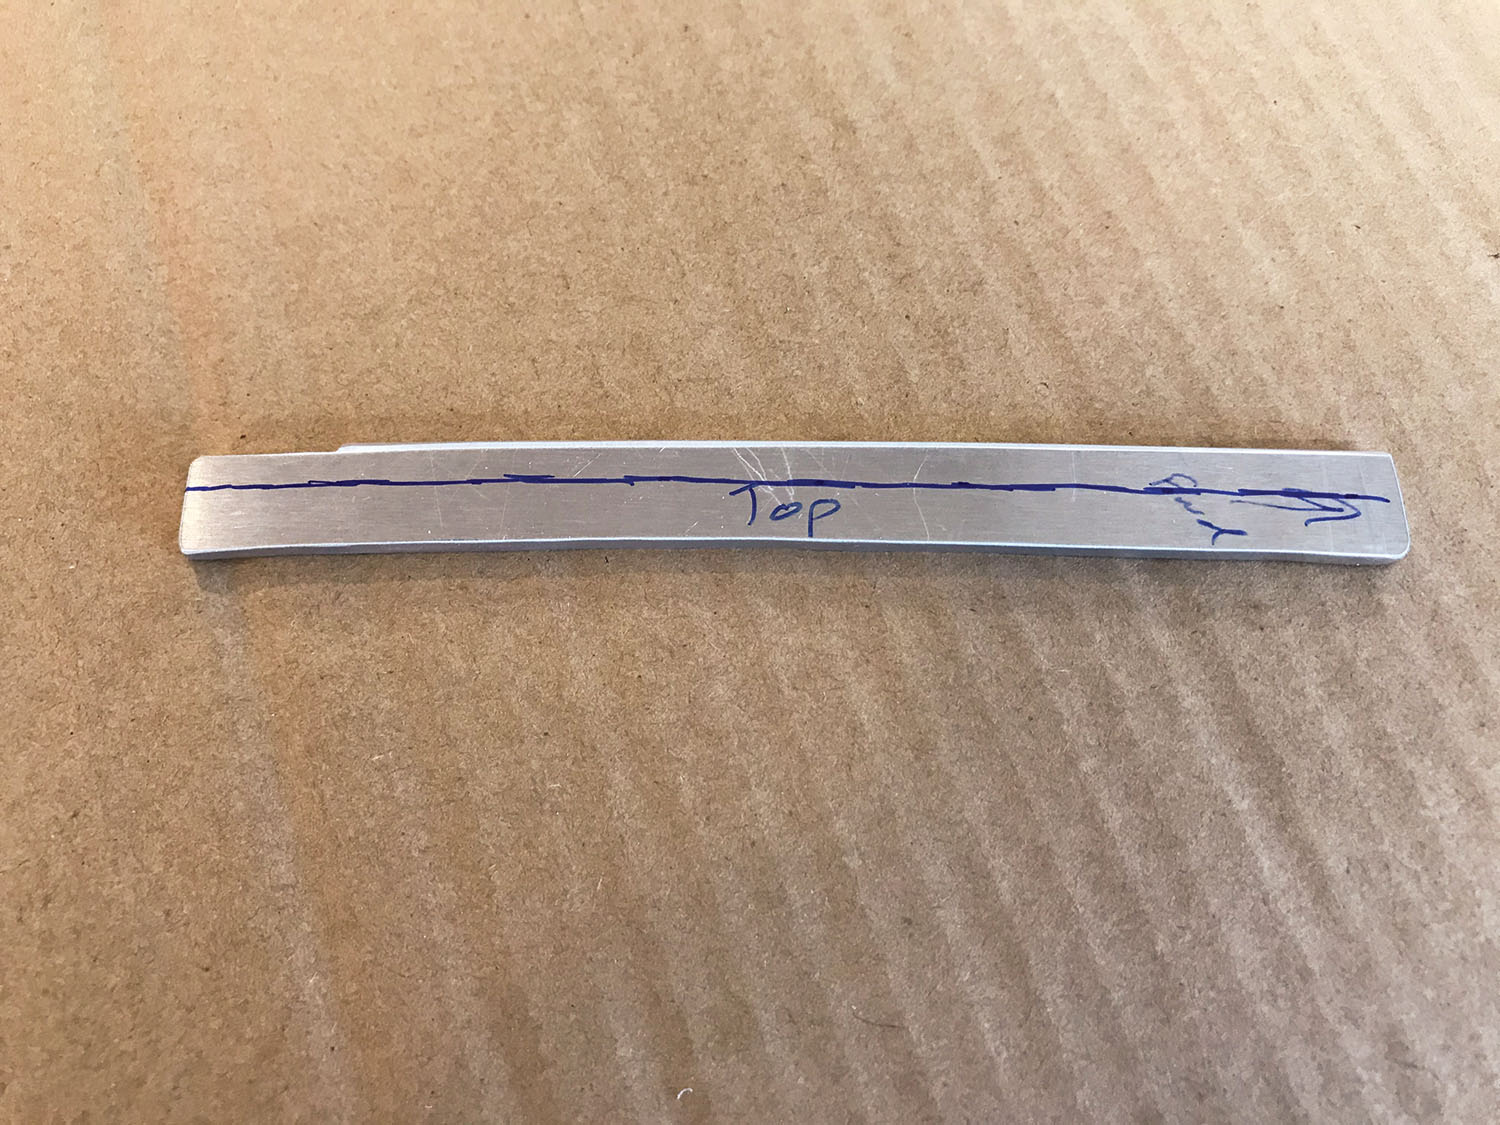
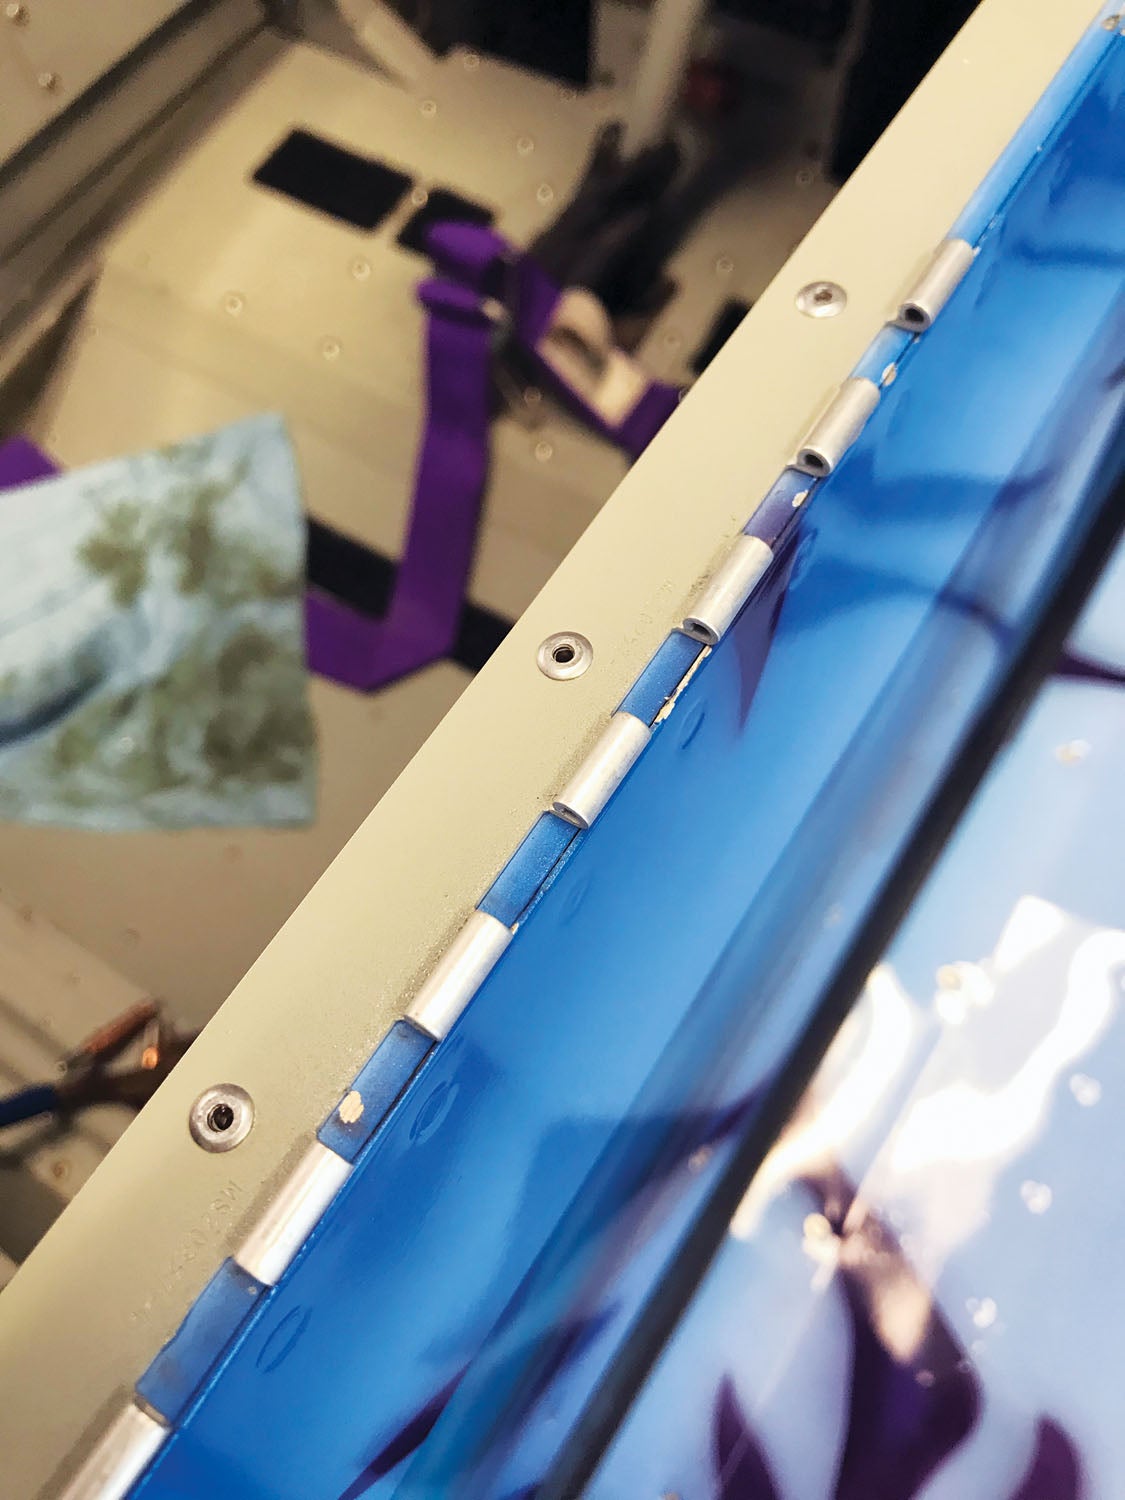
Clearly, it was time for a new piece of hinge! Fortunately, the canopy is easily removed for maintenance (we actually take it off for the annual inspection anyway), and the hinge was easy to remove because of the soft rivets. Piano hinge material is cheap, and we’ve always got sticks of it lying around, so making a new piece was quick. Match drilling the holes was a simple matter of placing the old piece back-to-back with the new and drilling through the existing holes. A quick shot of primer and paint to match the aircraft’s interior, and it was ready to pop back in place. Repaired as needed!
Holy Longerons!
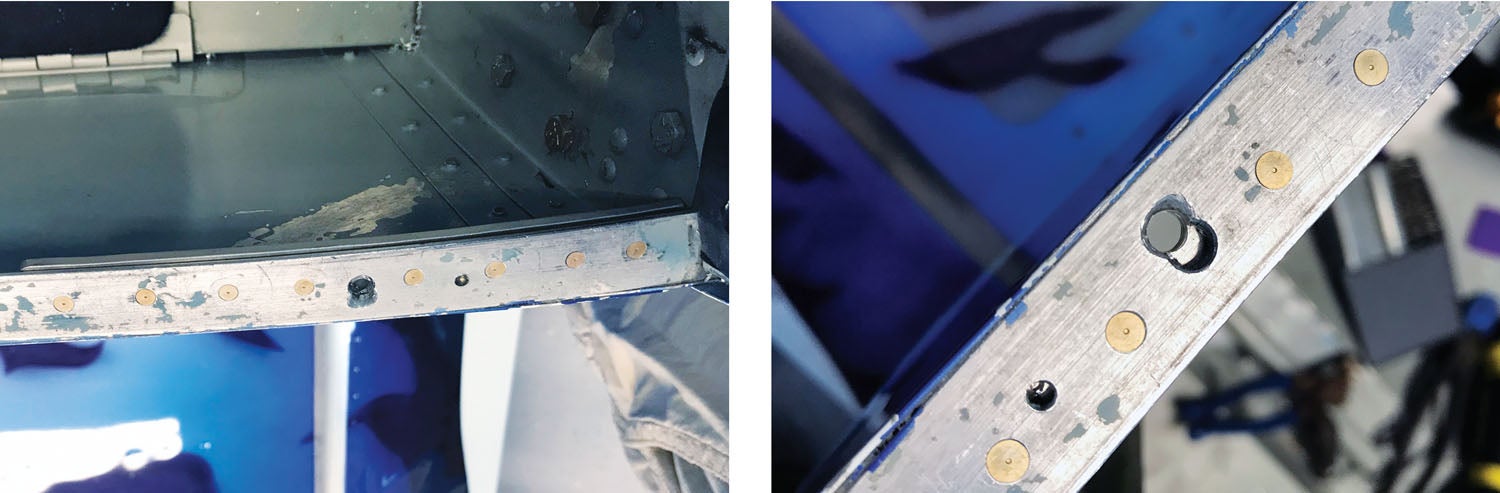
On the cockpit longeron on the opposite side from the canopy hinge, the canopy is registered in place for latching with two pins that stick down below the lower edge of the canopy and stick into two holes in the longeron. These pins are actually AN3 bolts ground down with bullet points on the end and are initially lined up with the longeron to be match drilled. They fit and work well, but over the years, vibration and the small changes in shape that come from opening and closing the canopy have enlarged the holes in the top of the longerons.
Now longerons are pretty important, especially in an aerobatic airplane. They carry primary loads the length of the fuselage, and it is easy to lose edge distance when a hole elongates in a 3/4-inch piece of aluminum angle. Fortunately, they are also relatively easy to repair using doubler plates, fitted and riveted to the inside of the angle.
We used 1/8-inch-thick 2024-T3 aluminum sheet to make the doublers, scribing them in place and shaping the edge to nestle nicely into the inside fillet of the aircraft-grade angle. Rivet holes were laid out using standard spacing from Advisory Circular 43.13 for repairs, and flush rivets were used in countersunk holes to make the surface smooth for the canopy to sit down. Once the doublers were in place, we redrilled the holes for the registration pins in the locations where the current canopy shape wants the pins to be. We’ll keep an eye on them to make sure they don’t begin to migrate again. Repaired as needed.
Keeping an Eye on Things
The “I” in IRAN is what we do every year, and as our airplanes age, it is important to keep digging into things that don’t seem quite right. It’s also a good reason to have another pair of eyes looking at the plane every few years—it is easy, as a builder, to get so familiar that we overlook problems that have been there for a while. This year, I was tired of a very, very tiny oil leak that I could never find, but it caused oil to drip down the inside of the left gear leg fairing and make a mess on the brake caliper. The engine is bone dry, but something loses a few drops now and again.
This year, I was putting wrenches on every oil fitting and noticed some engine oil on a pipe thread fitting that goes into the bottom of the inverted oil tank. Hmmm…I wonder if that is sealed
properly? Removing the hose, then the large pipe-thread-to-AN adapter, I was surprised that it came out fairly easily. And, no, there wasn’t much sealant on there. Could that have been the cause of the leak all along? Well, I guess we’ll know next time we inspect because it’s now sealed properly.
Repaired as needed…maybe?
IRAN is all about doing what is necessary without taking the airplane completely apart and magnafluxing the entire structure each year. It is about smart maintenance and knowing what needs to be done. Over-maintaining can be as bad as under-maintaining in that it wears things out, costs extra money and can introduce problems where there were none. So strive to improve your inspection chops and keep those repair skills handy for when they are needed.
![[Credit: Lisa Turner]](https://www.kitplanes.com/wp-content/uploads/2026/02/Fuel-Selector.jpg?w=218&h=150&crop=1 "Fuel Follies")


