 Now that we have the engine hanging on the front of our RANS S-21 Outbound, it’s time to get things hooked up to make it run. We will start with the basics and move on to the more advanced topics as the story unfolds.
While we tried to follow the prescribed build sequence, the wing tank installation was delayed so we would have the latest factory modifications to the neck and fuel cap. Several months after completing the wings, we got back around to deciding it was time to do the wing tanks—and lo and behold, the tanks were too big to fit into the wings! I was not too happy about that discovery, partly because we should have checked the fit a few months back, and we had put in the time to prepare the tanks for installation. Turned out not to be an issue. We talked to Shelly at the RANS factory and, magically, the right-sized tanks arrived at our doorstep in a few days. Apparently, that was a common issue early in the S-21 kits and was quickly rectified. Kudos once again to RANS!
As mentioned, the wing tanks needed a bit of prep before final installation, namely cutting a hole in the top of the tank where the filler neck attaches. Mike, of course, had devised a creative method for locating the center of the tank cutout, so look for “The Tough Cuts” below.
The Artist at Work
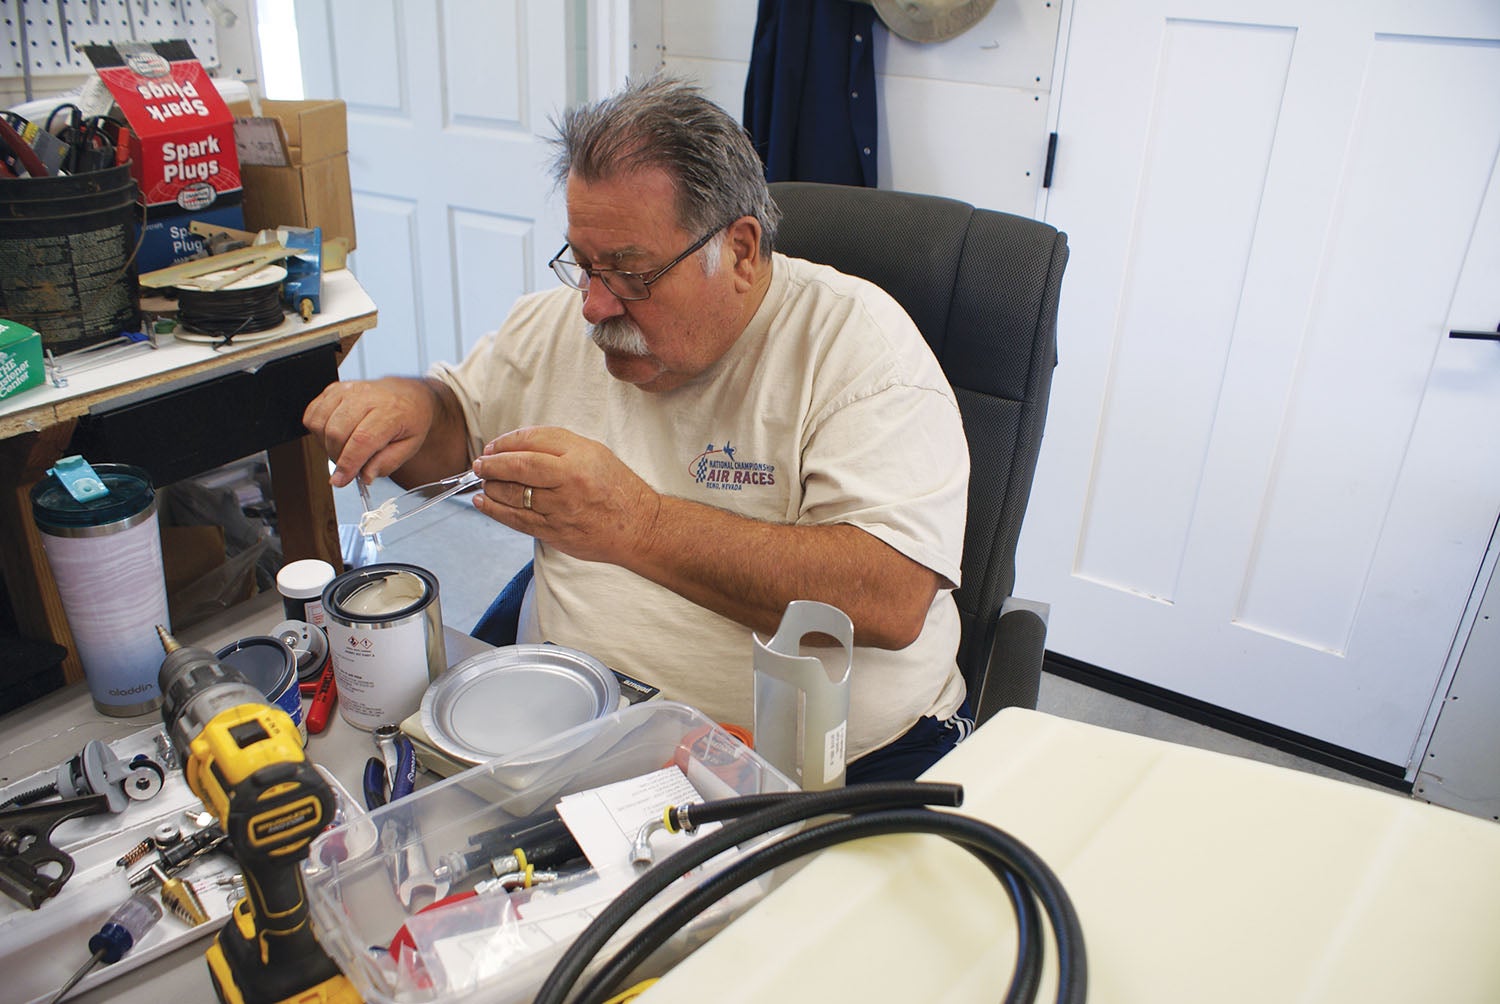
It is fun to see Mike in his creative mode because he is like a little boy getting to play with toys. His fly cutter was pretty crazy and fun to watch him “play with.” (Do most men have this many toys? After years of accumulating tools for projects, I guess the answer is yes.) Like most, Mike didn’t mind working on tanks until he got to the Pro-Seal part. Pro-Seal is a glue-type substance used around the fittings to the tank. It’s resistant to fuel and durable. I, of course, had never seen it before, and I couldn’t really understand what the fuss was all about. Plainly put, Pro-Seal is difficult to work with and makes a huge mess even when you try to be very neat and tidy. He lived through the experience, though.
Finishing the tanks meant the wings were finally complete, ready for hanging. Now, how do we do that? Mike’s creative mind determined that we could use a lift he had (for hanging sheetrock) to position each wing (one at a time) roughly in place. With the wing stable, we could thread the various wires, cables and fuel lines through the airframe and then bolt the wing in place. We liked this idea instead of bringing in a bunch of people to hold the wing while we routed the cables and such. Better yet? It worked! We had both wings attached in about 45 minutes and pulled the airplane out onto the apron for its first photo shoot with wings. What a sight!
On to Other Systems
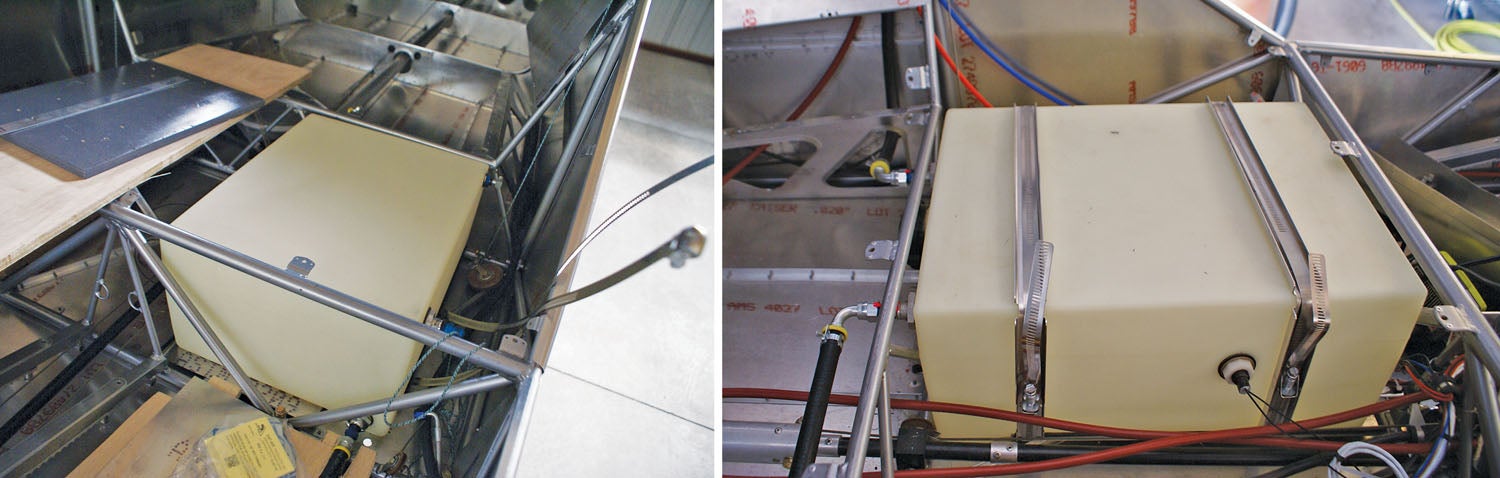
With the header tank previously installed, which was a bit of a wrestling match getting it into the space just behind the pilot’s seat, and the main tanks now placed into the newly hung wings, the real work began on the RANS’ systems. Changes from the original plans were many to accommodate the ignition and fuel system of our choosing. As we hinted in last month’s installment, our S-21 will not have a conventional injection system or magnetos. It will fly with a Simple Digital Systems (SDS) integrated electronic fuel injection and ignition system.

This choice was not a last-minute purchase or a rash decision. Oh, no. Mike has been deep in thought over this apparently for many years, even before purchasing our S-21 kit.
Years ago, when flying our RV-10, we were en route from Northern California to Yuma, Arizona, to visit family for the weekend, cruising along at altitude when it felt like we hit a momentary brick wall in the sky. The engine sounded as if it had stopped momentarily and was right back on again. Mike got to checking the gauges and confirmed that all cylinders had failed at once and then came back all at once. We were able to continue flight, deciding to land at Porterville, California, just ahead. After we made a safe landing there, Mike verified his suspicions that one of the magnetos had failed in our Slick LASAR system. We rented a car to continue our adventure as a road trip and dealt with the plane later.
Not long before this experience, Mark, who was one of our neighbors in Cameron Park, California, was in the process of installing an SDS fuel injection and ignition system into his Lancair. He would call Mike to talk through the installation and design of how to retrofit this system into his plane. (Another example of Mike’s engineer mind finding an outlet.) Through that experience, Mike became impressed with the SDS system. As a result, when our magnetos failed in the RV-10, Mike decided to replace them with the SDS CPI ignition system.
Mike was extremely interested in how the integrated injection-and-ignition system would work out for Mark. We were able to watch the Lancair’s performance in the most demanding of circumstances—competing at the Reno Air Races in the Sport Class. Mark did this for 3 years and the SDS system has not skipped a beat for him. This sold Mike. He decided that this is the system he wanted if we were ever to build again.
As we’ve discussed before, this is part of the “beauty” of homebuilt aircraft. You can do your own thing, but you have to know what you are doing and the implications of your decisions to veer from the standard. Being green at this homebuilt stuff, I would never choose to take this giant leap, but Mike has spent many hours thinking this through and is confident that this is the system he wants. So, then, it’s full steam ahead with both the SDS ignition and fuel system for our S-21.
Elec-Tricks
In the design of how Mike wanted the ignition system to work, he had to consider the fact that this is an electronic system. The beauty of magnetos is that they work (when they work) regardless of the state of the electrical system. With an electronic ignition system, your engine goes very quiet if your electrical system fails. Therefore, you need to build a redundant system to account for this event. In considering this, Mike designed our electrical system for the S-21 to have dual batteries and dual alternators to provide the redundancy we needed. Also, since our S-21 will have electronic fuel injection, backup power is doubly important. Sorry to tease and run, but we’ll discuss the electrical system in further detail in a future article.
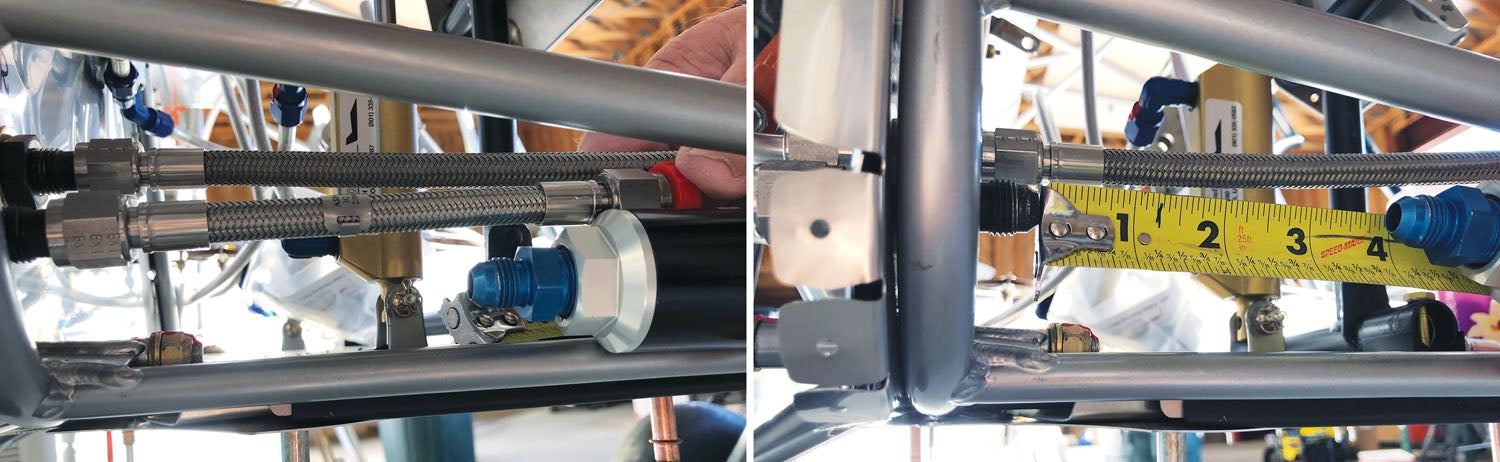
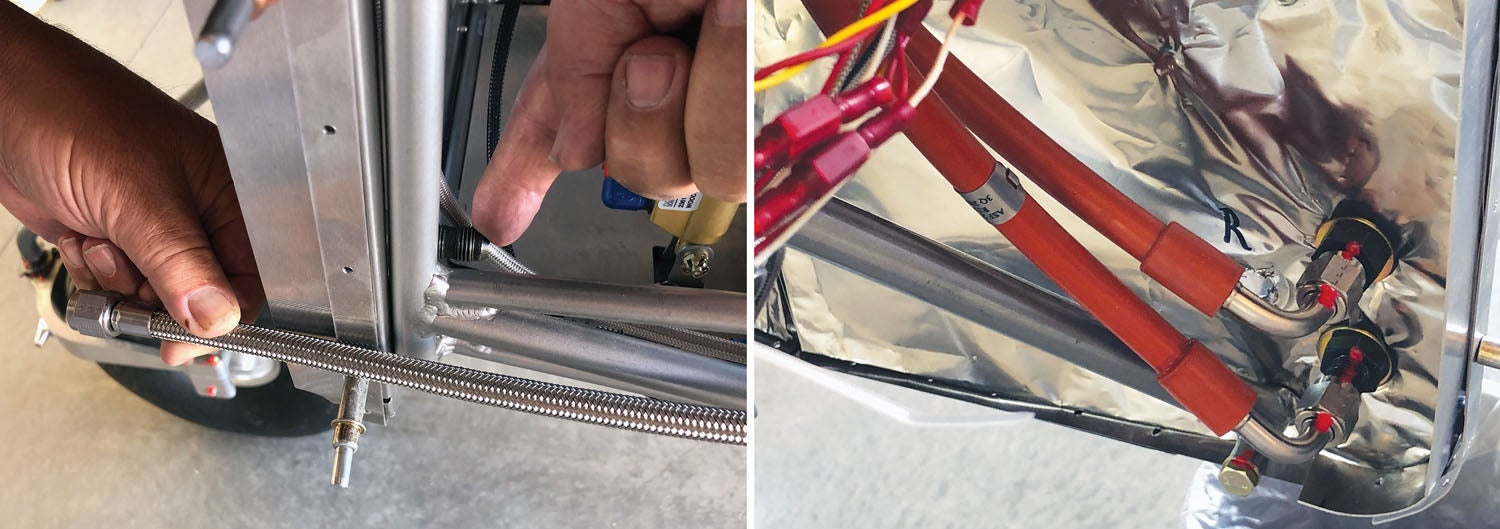
There is a lot to our fuel system that is unique and vastly different than standard. It was time to dig into the installation of the SDS fuel injection system. (See “Going to the Source” below.) Mike mocked-up the high-pressure fuel lines that would be custom-made for us by Tom Swearengen at TS Flightlines. It was essential to get this right since the lines had to be the correct lengths—and those with other than straight end fittings had to be properly clocked. Soon enough, we had the lines in place and all looked good save for one small problem: The fuel block (fuel distribution to all the cylinders) mounted on top of the engine seemed to be too high for the cowl to fit. Mike had “pre-considered” this as a possible problem, but seeing the result confirmed that it was just too high. Mike was made aware that there is another mounting option for the fuel block on the backside of the engine baffling. Steve at Aircraft Specialties, who is also a partner with Tom at TS Flightlines, contacted Mike after seeing his concerns on the internet and offered to remake the fuel lines to accommodate this change. It just so happens that Steve is building an S-21 himself and is interested in having the exact measurements for his plane and potential customers.
Mike and I discussed the change in a heart-to-heart. It is such a bummer to think you are over one section of the build to find out that something is not up to what you want or is plain old not right. It requires resources and time to redo, and I really hate to redo
anything. But now was the time to have it done right, so we decided that the rear mount was the only way to go.
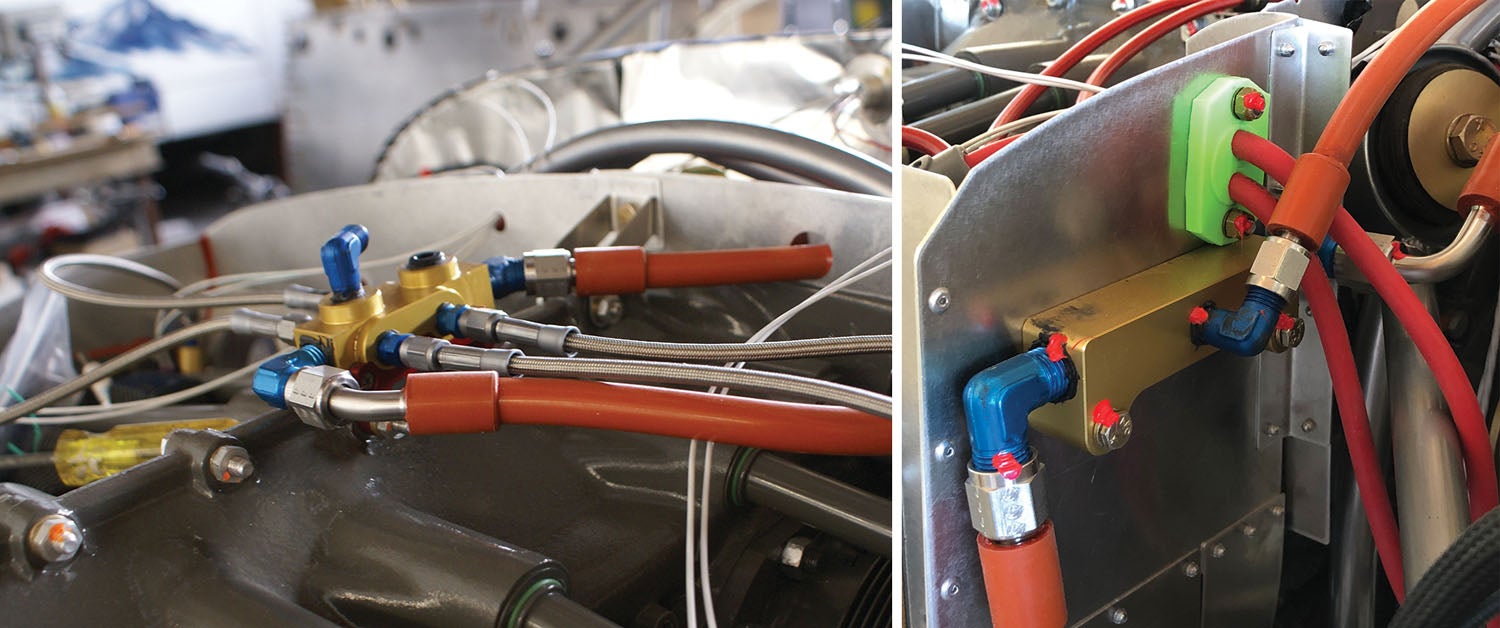
Mike and Steve discussed the plan of attack, so we proceeded down that path. We got the rear-mounted fuel block ordered from SDS and had it in hand within about a week so we could go through all the line mock-ups and measurements once again. Time passed, a bit of back and forth with communications, and we finally had the lines to the correct specs! (See “Around the Block,” below.) There is an upside to our trials. The final product is so clean with it mounted on the rear of the baffling! I am super relieved that we decided to put in the time and effort to redo our work to have the system the way that we want it and have it fit so nicely!
Wrapping for Now
This build has proved to be a real learning experience for me. There have been times when I have been able to be involved with the build and times when I simply assisted as needed from the sidelines. Now that we are entering a more technical portion of the build, I find myself feeling a bit removed from the build and search to find ways to stay engaged. One thing for sure is that no matter how well you plan a build, there will be unexpected things that come up that you thought you had figured out. My advice? Remain calm, figure it out and keep moving forward. Hitting a brick wall and stopping the build is not a good answer, but I have seen it happen to other builders. Be flexible, creative and keep moving forward.
Photos: Laura and Mike Starkey.


![[Credit: Zenith Aircraft Co.]](https://www.kitplanes.com/wp-content/uploads/2026/02/wksp-3-21-group1.jpg?w=324&h=160&crop=1 "Zenith Building Momentum With Workshops, New Options and Mosaic Opportunity")
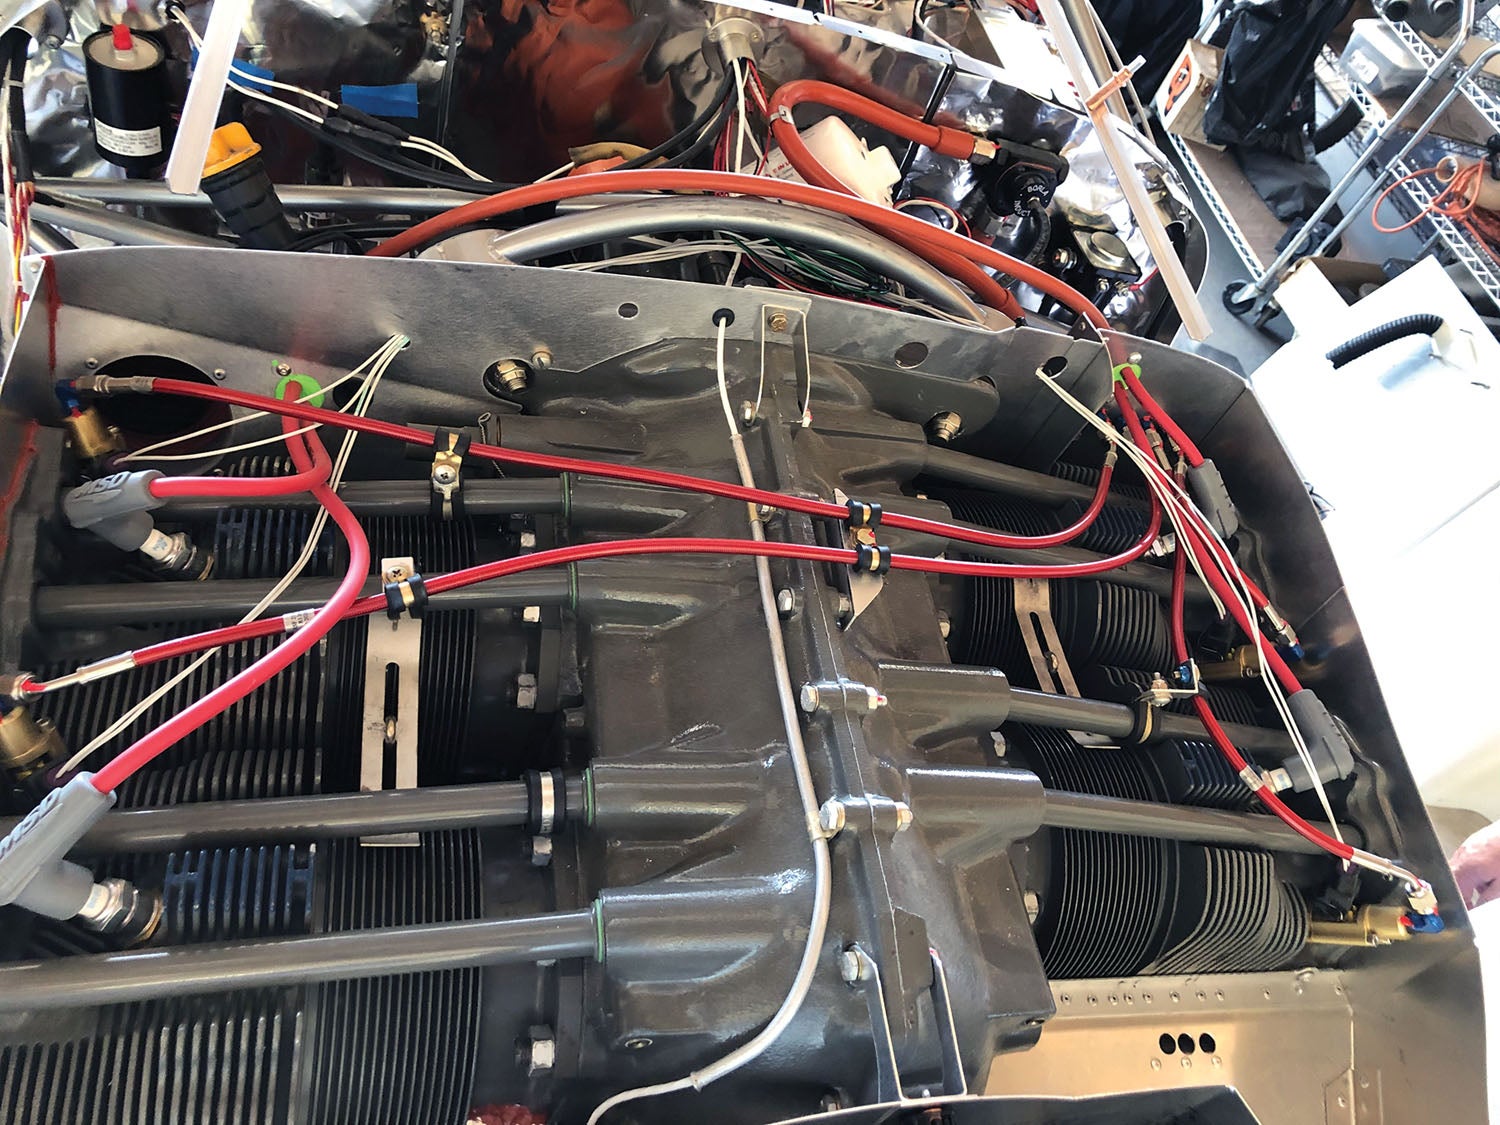
Regarding Mike and Laura Starkey’s S-21 engine installation picture (top view of the engine): What I see are fuel lines either directly touching or close by ignition lines. I do not think this is a good practice. Lines and hoses that carry anything, (electricity/fuel/oil/hydraulic fluid/brake fluid etc.) should never have the opportunity to rub holes in each other. Separating hardware (metal clips with rubber liners) should be used to secure all hoses and lines (preferably to hard points) to prevent touching each other and movement in any direction. And don’t forget drip loops. If possible, any hose carrying a liquid should have a low point (drip loop) lower than any line attach point and away from any electrical wires. This is to prevent any leak from migrating onto anything electrical or past a bulkhead.
do you remove tank after cutting or just vacuum out drill scraps from inside tank?
I did not see the oil filter in the photo of the hole you cut in the firewall. I would like to know what oil filter adapter you used or was there room to use the adapter with the filter pointing straight out the back of the engine? I will be installing A O-320 with a carburetor in my S-21. My engine has the oil filter pointing strait out the back of the engine. I am making plans to recess my firewall as well . Any info you are willing to share on this subject would be appreciated .
Comments are closed.