You are going to be spending a lot of time in your shop. If you’ve done your homework, you’ll know that manufacturers’ estimated build times are typically optimistic. Throw in family and work obligations that prevent most people from putting in more than 10 or 20 hours per week, and not only are you going to be putting in many cumulative hours, it will probably add up to a lot of calendar years as well. Be sure to enjoy it!
A little time and money invested up front making your building space clean, comfortable, and organized will greatly enhance that long journey on the way to your goal (as well as increase the likelihood that friends or spouse will want to visit, or at least tolerate, your shop). In this article, we’ll explore one project in depth: DIY epoxy flooring. It’s actually fairly easy to do, and surprisingly affordable. But don’t worry if it’s not for you; part 2 of this article will highlight a gallery of smaller-scale upgrades, including an in-depth look at shop lighting, which is sure to improve your quality of shop life.
Pay Someone Else or Do It Yourself?
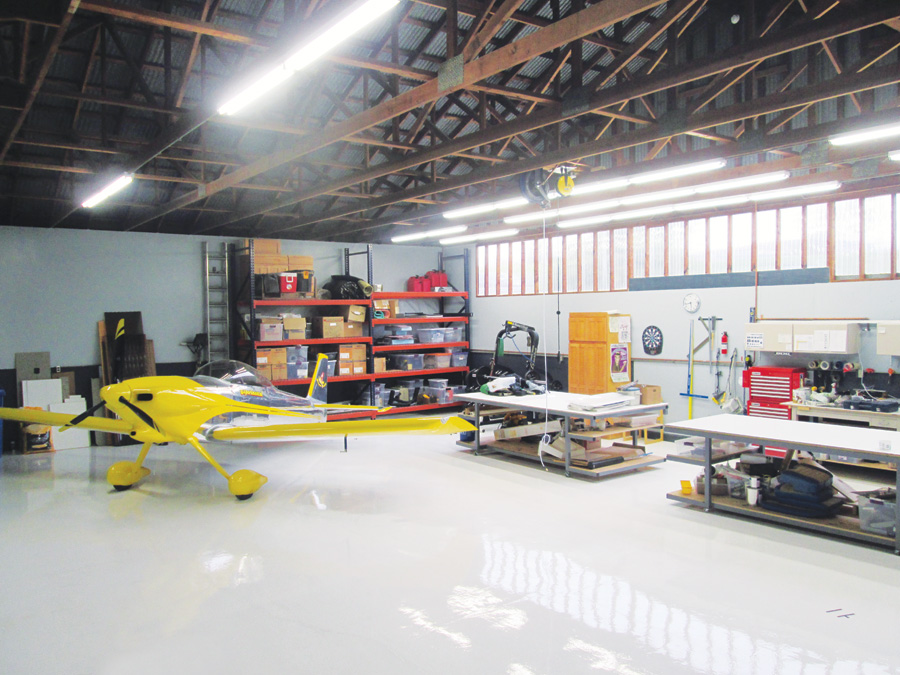
Life threw me a curveball when the hangar I bought ended up needing a complete renovation. While I would have much preferred to spend my time building airplanes, rebuilding the space allowed me to incorporate some “dream shop” ideas, including the one thing I’d always thought was the cat’s meow—white epoxy floors. Wow, easy on the eyes and you never lose a screw! But if you’ve ever gotten a quote, you’ll probably turn white yourself: $4 to $7 per square foot is not uncommon. For my 1800-square-foot hangar, paying someone else was simply not an option.
But it turns out that epoxying your own floors is actually pretty darn easy, and the materials for a top-notch job—crack filler, primer, 100% solids epoxy and UV topcoat—cost less than $2,100. Add in another $200 for equipment rental and other small expenses, and my square-foot cost was almost exactly $1.25 per square foot. Total labor was about 36 hours, or 2 hours per 100 square feet. As a result of doing a good bit of preparatory online research, the actual job turned out to be pretty straightforward.
Step 1: Determine if Epoxy is Appropriate
Epoxy floors aren’t right for every shop. The biggest obstacles are: (a) incompatibility with shop usage, i.e., you are constantly dragging/dropping/welding large metal objects on the floor, for example; (b) incompatibility with preexisting coatings; and (c) excessive hydrostatic pressure (water pushing up though the slab, either as liquid or vapor, which can cause the epoxy to lift).
In case of (a), an acid-stained or polished floor may still be an attractive option. In case of (b), you should discuss the issue with the floor system vendor. In case of (c), purchase a calcium chloride moisture test at your local hardware store and discuss the results with the floor system vendor. You can also conduct a “statistical survey”: Look around your neighborhood (or airport) and see if anyone else has epoxy flooring, and ask whether they’ve had any issues with lifting due to hydrostatic pressure.
Note that if you are doing a new build, you’ll need to wait until the concrete properly cures (typically 30 days) before applying epoxy. Tell the contractor you want a smooth trowel finish and no sealer. Preparation will be as described in Step 3 (diamond grinding or acid etch).
Step 2: Choose Your System
I spent a fair amount of time researching the various products and systems available (garagejournal.com is a fantastic, well-attended forum for researching shop-related topics). While the big-box hardware stores offer epoxy floorings, I was convinced that an industrial, 100%-solids epoxy over primer, plus a urethane topcoat, offered a much better value at only slightly greater cost. After reading consistently positive reviews about Legacy Industrial Corporation and speaking with Scotty, the owner, I chose Legacy Industrial’s HD-821 Crack Sealant, HD Standard Epoxy Coating Primer, HD Epoxy, and HD-322 Pigmented Urethane Topcoat.
The HD primer is a thin epoxy and, as such, soaks more easily into the concrete to provide a better foundation for the thicker high-mil epoxy that goes on top. The urethane topcoat provides both abrasion and UV protection (to prevent the epoxy from yellowing), as well as protection against 100LL and brake fluid. Scotty provided excellent, no-pressure support both in guiding me to the right product, as well as being available to answer on-the-fly questions while I was literally rolling out epoxy on E-day.
You will also need to consider colors (there are many topcoat colors available) and additives (such as color flakes or anti-slip material). For ease of cleaning, I did not incorporate anti-slip into my floor. Although quite slippery immediately following application, after a couple of months of use, the floor felt quite stable. However, those in wet/snowy environments will want to consider anti-slip.
If possible, you’ll want to schedule this job during a time of the year (probably spring or fall) when you can take advantage of cool temps to maximize the pot life of the epoxy. Avoid extreme temperatures; colder temps will inhibit or prevent proper curing, and higher temps may see the epoxy “kick” before you can get it all out of the bucket.
Step 3: Prep Your Slab
Epoxy bonds both mechanically and chemically. To provide the best of both, you’ll need to profile and clean the floor.
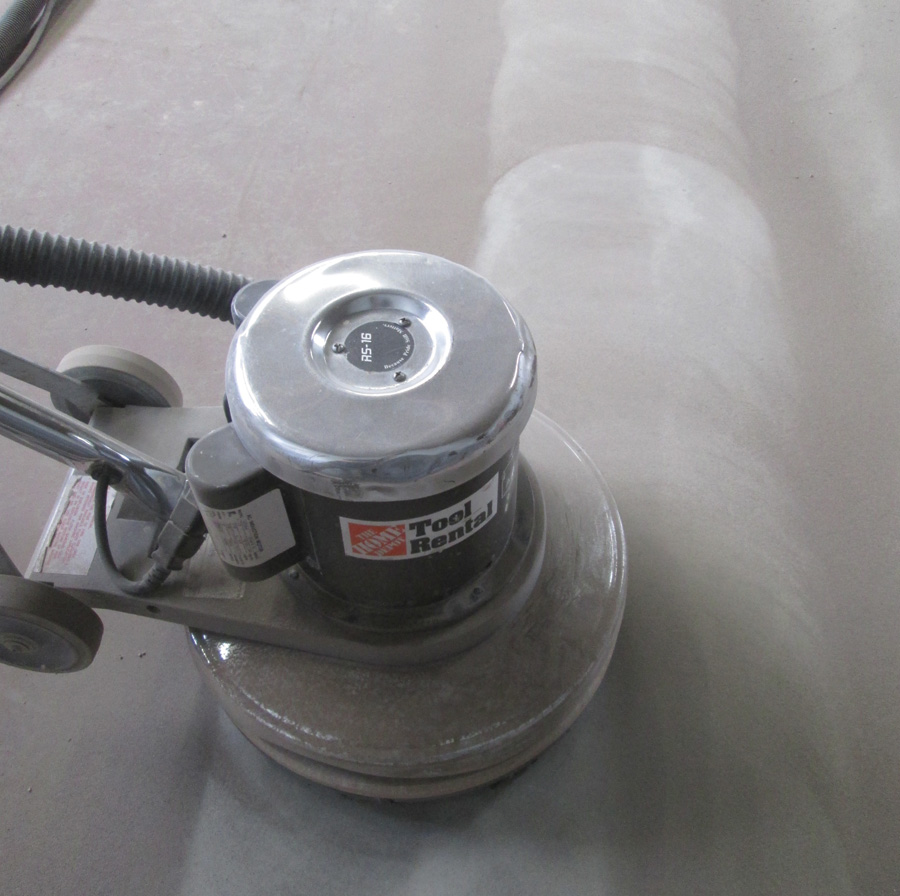
Profiling: This is the term used to describe giving the concrete a slightly rough, porous texture that the epoxy can grab onto. The most common methods are shot-blasting, muriatic acid, and diamond grinding. While shot-blasting is the preferred method, the equipment required is not generally available for rent. My research into muriatic acid suggested there could be issues with post-rinse residue. And being on an airport, squeegeeing acid-contaminated rinse water out the hangar door onto the tarmac was not an option. Again, after much research, I decided that grinding the floor offered the best compromise between cost and performance. Legacy recommends using a Diamabrush concrete prep tool, which you can rent from Home Depot. The Diamabrush is mounted to a walk-behind floor cleaner, and both Diamabrush and Home Depot have videos showing how to operate the unit. It takes a bit of practice to control the polisher, but after 30 minutes and bashing into the wall a few times, you’ll be a pro.
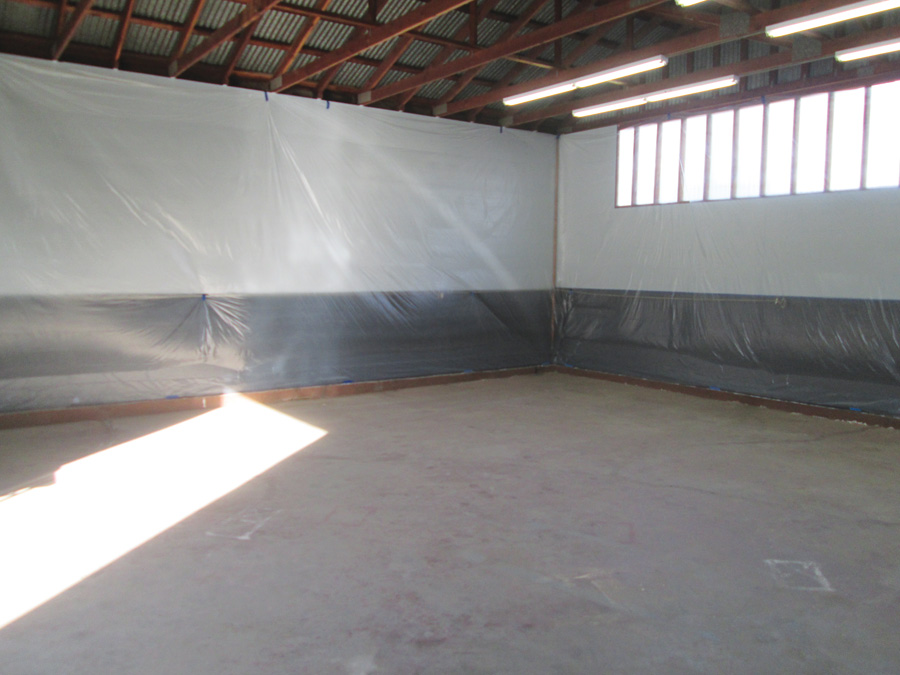
Profiling my slab took 18 hours (1 hour per 100 square feet). Although Home Depot rents a dust-vac with the Diamabrush, I found it did little good (to HD’s credit, they refunded the dust-vac rental fee). This could have been a problem with my unit (it seemed to be missing a dust skirt), or it could be the design of the system. Note that profiling concrete is quite dusty. I strongly suggest covering your walls and ceiling with a 1-mil plastic drop cloth. Although some people profile the floor wet (the Diamabrush works fine either wet or dry), this creates an additional work step to rinse the floor clean afterwards and wait several days for the concrete to thoroughly dry before proceeding to the next step. I therefore ground mine dry, then made several passes with a strong shop vac, followed by two passes on my hands and knees with a damp microfiber towel. This got me to my goal of running a finger over the concrete and not picking up any dust. Properly profiled, water dripped onto the concrete should not bead up, but absorb (if slowly) into the slab. Needless to say, you should wear a good P100 respirator when doing this.
Cleaning: The biggest concern for cleanliness is the presence of oil stains. I had a few oil spills, and kitty litter placed on them for several months beforehand helped absorb some of the oil. After profiling, potential problem areas should be scrubbed with a stiff brush and Simple Green or a citrus degreaser. Wipe the rags towards the center of the spill to avoid spreading any contamination. For heavier oil spills, discuss with the epoxy vendor. I have kept a close eye on my potential problem areas and at nine months, I see zero lifting.
I also had a corner of the hangar that reeked of cat urine. After profiling, an enzyme-based product called Unique was applied for 24 hours to the bare concrete. This worked effectively and together with the epoxy, there has been zero smell in what had once been a no-go area of the hangar.
Step 4: Patch Cracks With a Flexible Sealer
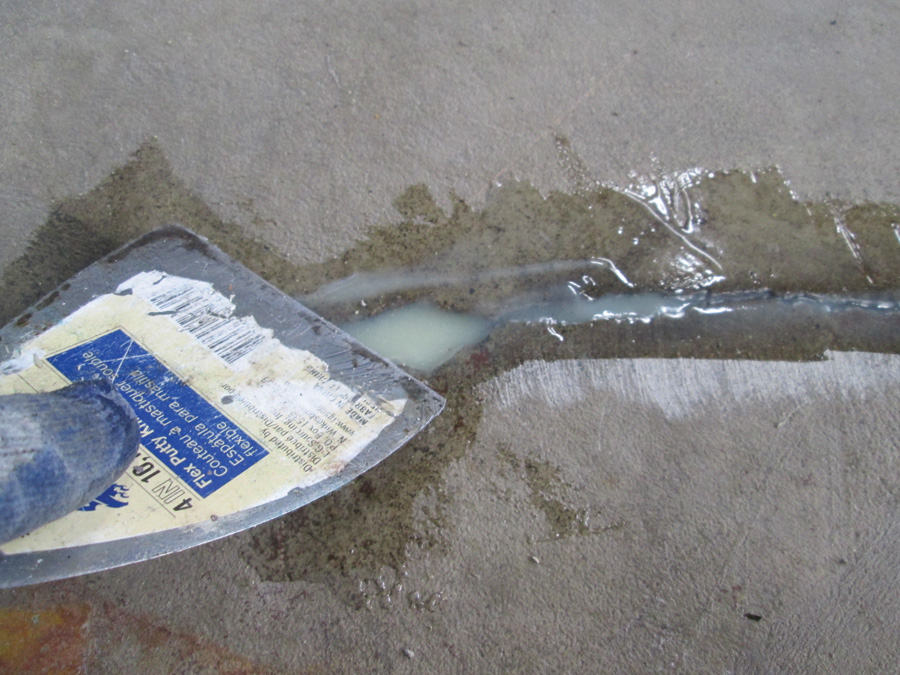
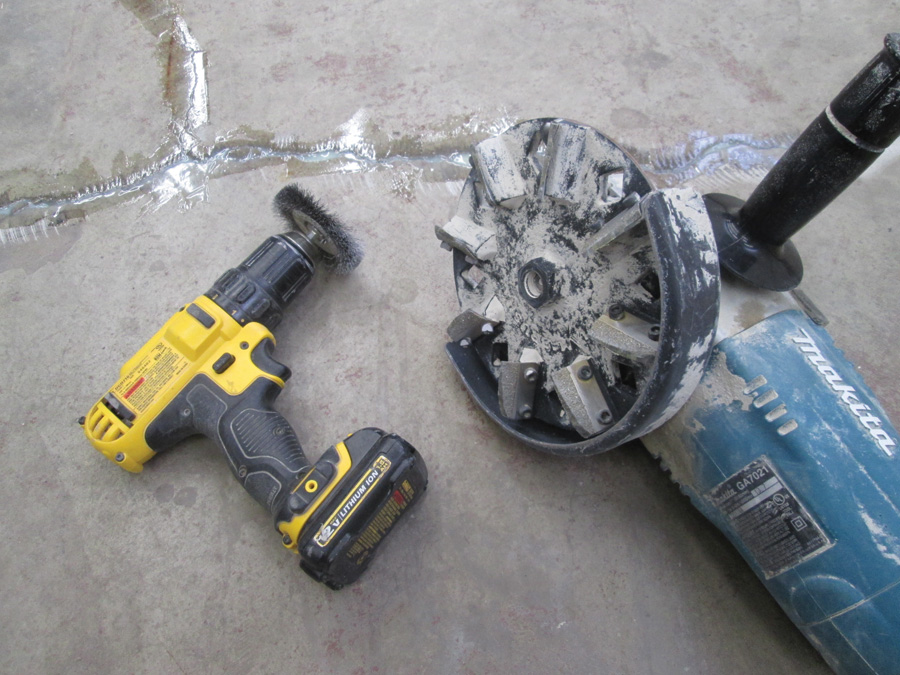
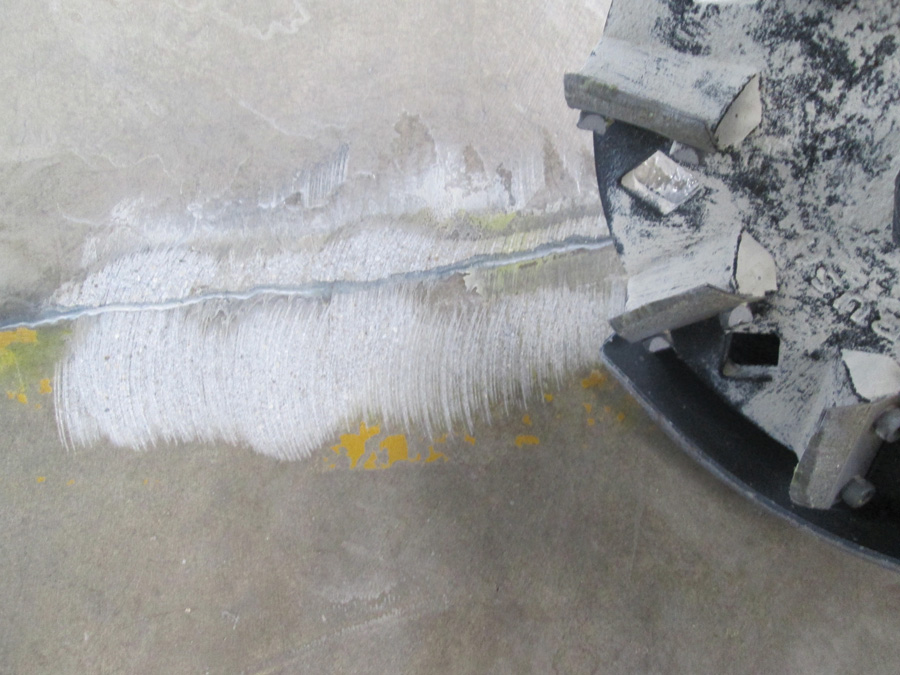
I used a putty knife to fill any cracks in the concrete slab with HD-821 Crack Sealant. Once it has cured and hardened, it needs to be smoothed. While the Diamabrush does a good job of profiling, I found an angle grinder much more effective at quickly smoothing and leveling patched cracks. The angle grinder will throw up an immense amount of dust, so I recommend doing this immediately after profiling when your tarps are still up. Note that your pad will expand/contract with the seasons, so don’t be surprised if your nice smooth patches go convex in the heat of summer. Clean cracks with a wire brush drill attachment and vacuum before filling to ensure a good clean bonding surface.
Grind the joint smooth with a diamond grit grinding wheel or 7″ Diamabrush. Try to knock down sharp or uneven slab edges though, while smoothing the joint. Use a wire brush drill attachment and vacuum cleaner to clean out cracks before applying filler.
Step 5: Apply the Epoxy
This is the fun part! In my case, primer was applied first, followed 12 hours later by epoxy, and 12 hours after that by the UV topcoat. If you use a primer and/or topcoat, be sure not to exceed the maximum time between coats specified by the manufacturer. If you do, you may find that you have poor subsequent adhesion or need to reprofile before the next coat—an avoidable waste of time.
I did this job with temps in the 60s and found the Legacy specs for pot life, 60 minutes for primer and 35-55 minutes for epoxy, to be fairly accurate. In my case, actual time was about 55 and 40 minutes respectively. As with any epoxy-based project, readiness (and helpers) is all. I was able to do this alone, but was working very quickly and had all my materials and tools ready and laid out before mixing any epoxy. Tools you will need:
- Spiked shoes. I made my own out of scraps of plywood, drywall screws and nylon rope. Theoretically, you want to avoid walking in what you just put down, but it’s going to happen, so be sure to have these ready.
- Cordless drill with a mixing paddle and backup batteries.
- 24-inch rubber floor squeegee for applying the epoxy coat.
- Paint roller with telescoping handle (8-15 feet).
- Roller pans (deep version) and short-nap – or 3/8-inch rollers. I used a standard 9-inch roller frame, but an 18-inch frame would move things along a bit faster.
- Safety gear: Tyvek suit or disposable clothes, nitrile gloves, VOC respirator, and safety goggles.
Once you’ve made it this far, application of the actual epoxy is pretty quick and fun. Expect to spend about 2 hours per 1000 square feet of floor from start to finish. Be cognizant of temperatures, and also try to avoid application before drops in atmospheric pressure (i.e., an approaching storm) or increases in temperature, either of which can cause the floor or epoxy to outgas, leaving tiny bubbles or “volcanoes” (popped bubbles).
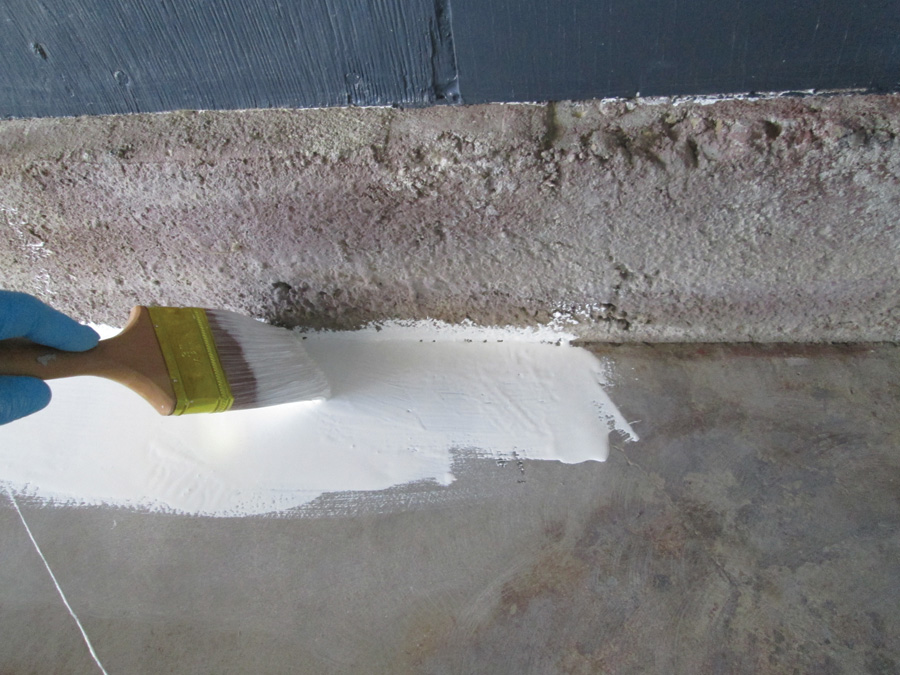
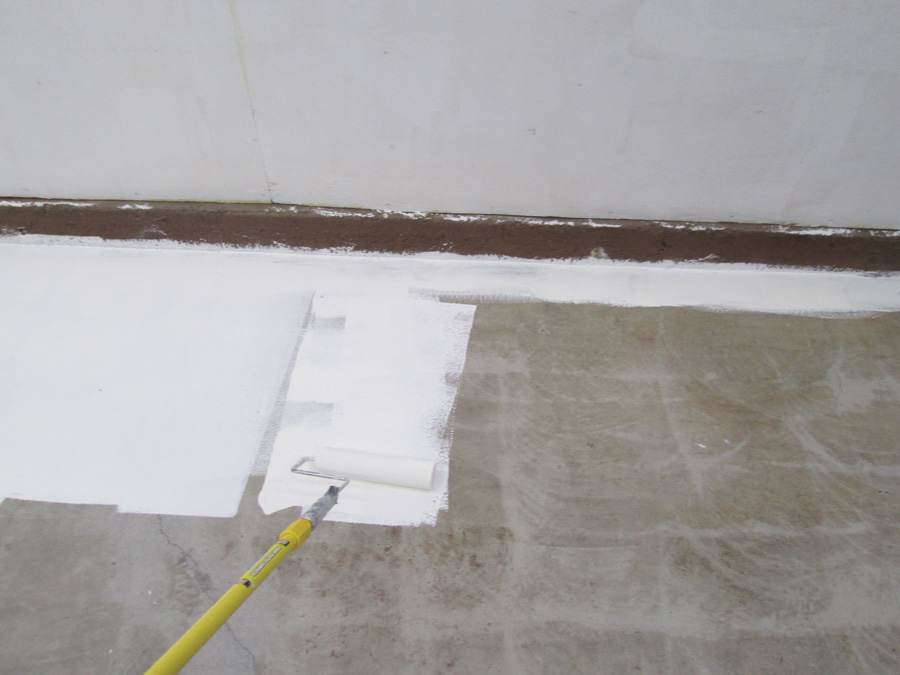
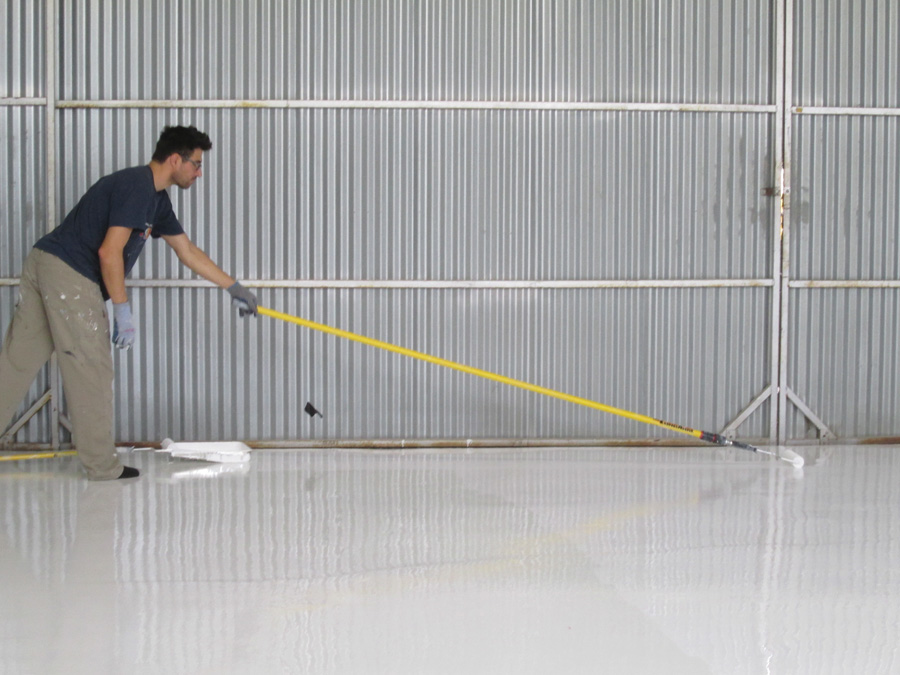
Primer: Mix well for three minutes with your drill/paddle in a 5-gallon bucket and pour into a roller tray. Avoid aerating the mixture; otherwise, you may get a lot of bubbles outgassing. Apply with a roller in a continuous V-pattern to ensure even coverage with good overlap between strokes. Move backwards across the floor to your exit point. Legacy’s coverage numbers (feet per gallon) are quite accurate, so plan accordingly. My hangar is 36 feet deep, so I placed a piece of tape about every 5.5 feet to mark 200 square feet of area. This helped me monitor usage to ensure that I was applying the primer (and subsequent coats) at the right rate for proper mil thickness (neither too thick nor too thin).
A telescoping rod allows long V-strokes and good overlap between wet edges. Here the polyurethane topcoat is going over the epoxy base.
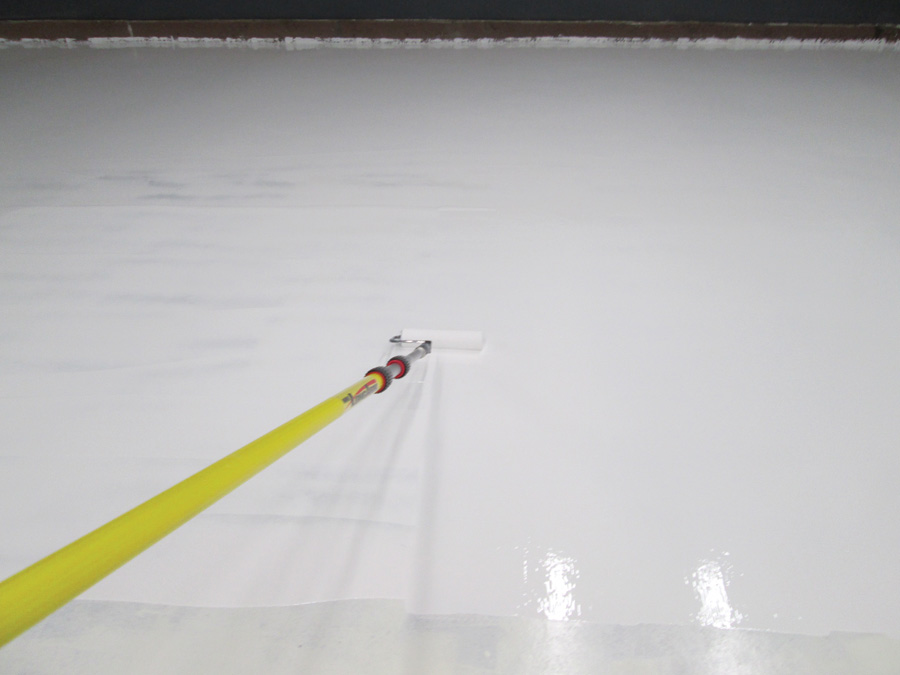
Epoxy: Rather than using a roller tray, simply pour the epoxy straight from the 5-gallon bucket in a ribbon about 3 feet from your working edge. Use the squeegee to do a quick initial spread from your working edge back about 5-6 feet, then follow up with the roller, working the same V-strokes as before to ensure even coverage. There are many videos on YouTube showing this application method—watch a few beforehand to get an idea of proper roller technique. Make sure the top of your V-stroke overlaps the previously painted area, but avoid leaving pools of epoxy at the top of your V-stroke. Though not strictly necessary, you may want to give the primer a quick solvent wipe using a microfiber mop dipped in acetone before applying the epoxy. This will eliminate any moisture or dust. (You can also use this procedure with the topcoat.)
For epoxy, pour straight from the bucket, spread with a squeegee, and go back over with a roller to even out the coat.
Topcoat: Apply with a tray and roller. Note that while the epoxy systems are relatively odor-free, urethane topcoats are extremely noxious. You must wear a good VOC respirator when applying urethane, and unless you are wearing a Tyvek suit, expect to dispose of any clothes, as they will reek of urethane.
Color chips: Sprinkle the chips (often called broadcasting) immediately after rolling epoxy. Excess will be vacuumed up later.
Anti-skid: The procedure is product dependent; it will either be mixed into your final coat or broadcast immediately afterwards.
Step 6: Go Have a Beer!
Follow the manufacturer’s instructions for cure time. Most flooring should be OK for light traffic within two days and heavy traffic within one week. If you work quickly, your shop will only need to be empty for three to six days: One to two days for floor prep, one to two days for primer, epoxy, and/or topcoat, and one to two days for initial cure. As with all epoxies, if you get any on your skin, wipe it off with a dry towel, wash with soap and water, and call it good. Washing off with a solvent (like acetone) will carry the epoxy deeper into your skin than simply wiping off with a paper towel, even if some remains on the surface of your skin.
Here’s a breakdown of the time I spent adding an epoxy floor to my hangar:
- Floor profiling and cleaning: Approximately 12 hours for 1000 square feet
- Crack fill: Depends on the condition of the slab. Typical is 1 hour per 1000 square feet.
- Primer/epoxy/topcoat application: 2 hours per 1000 square feet per layer.
Nine-Month Review
I couldn’t be happier with my floors. What was once a dark, dingy hangar now feels bright and spacious. The Roomba (see next month’s article) keeps floobydust to a minimum, and you know what they say about white—it doesn’t show the dirt. There is no peeling, cracking or signs of delamination. That said, if you drop a crescent wrench off the table, or drag a steel firebox across the floor, yes, you are going to damage it, so it deserves a bit of care.
This concludes Part 1 of our 2-part series on shop upgrades. Next time we’ll look at storage and cleaning ideas, as well as feature an interview with an expert on lighting your shop.

