Things that move wear out. That’s buried in a law of physics I once learned having to do with entropy. In this case, that “thing” is the stick bushing on our RV-3, something that was never perfect in the first place because when we built the airplane, we didn’t have a lathe or precision machining capability. What we had, and what was appropriate (for a kit as old and simple as the RV-3), were basic hand tools and a drill press—not really conducive to precision work, but good enough. The end result is that there has always been just a touch of play (backlash, or deadband if you will) in the stick of the airplane. And as it aged, that play increased – like the boiling frog parable, it was slow enough that we never really noticed, but at this year’s condition inspection, I decided that it was time to do a little touch up. The plans call for a .001 difference in size between the inside diameter of the stick sleeve and the outside diameter of the bushing. I figured I could do better!
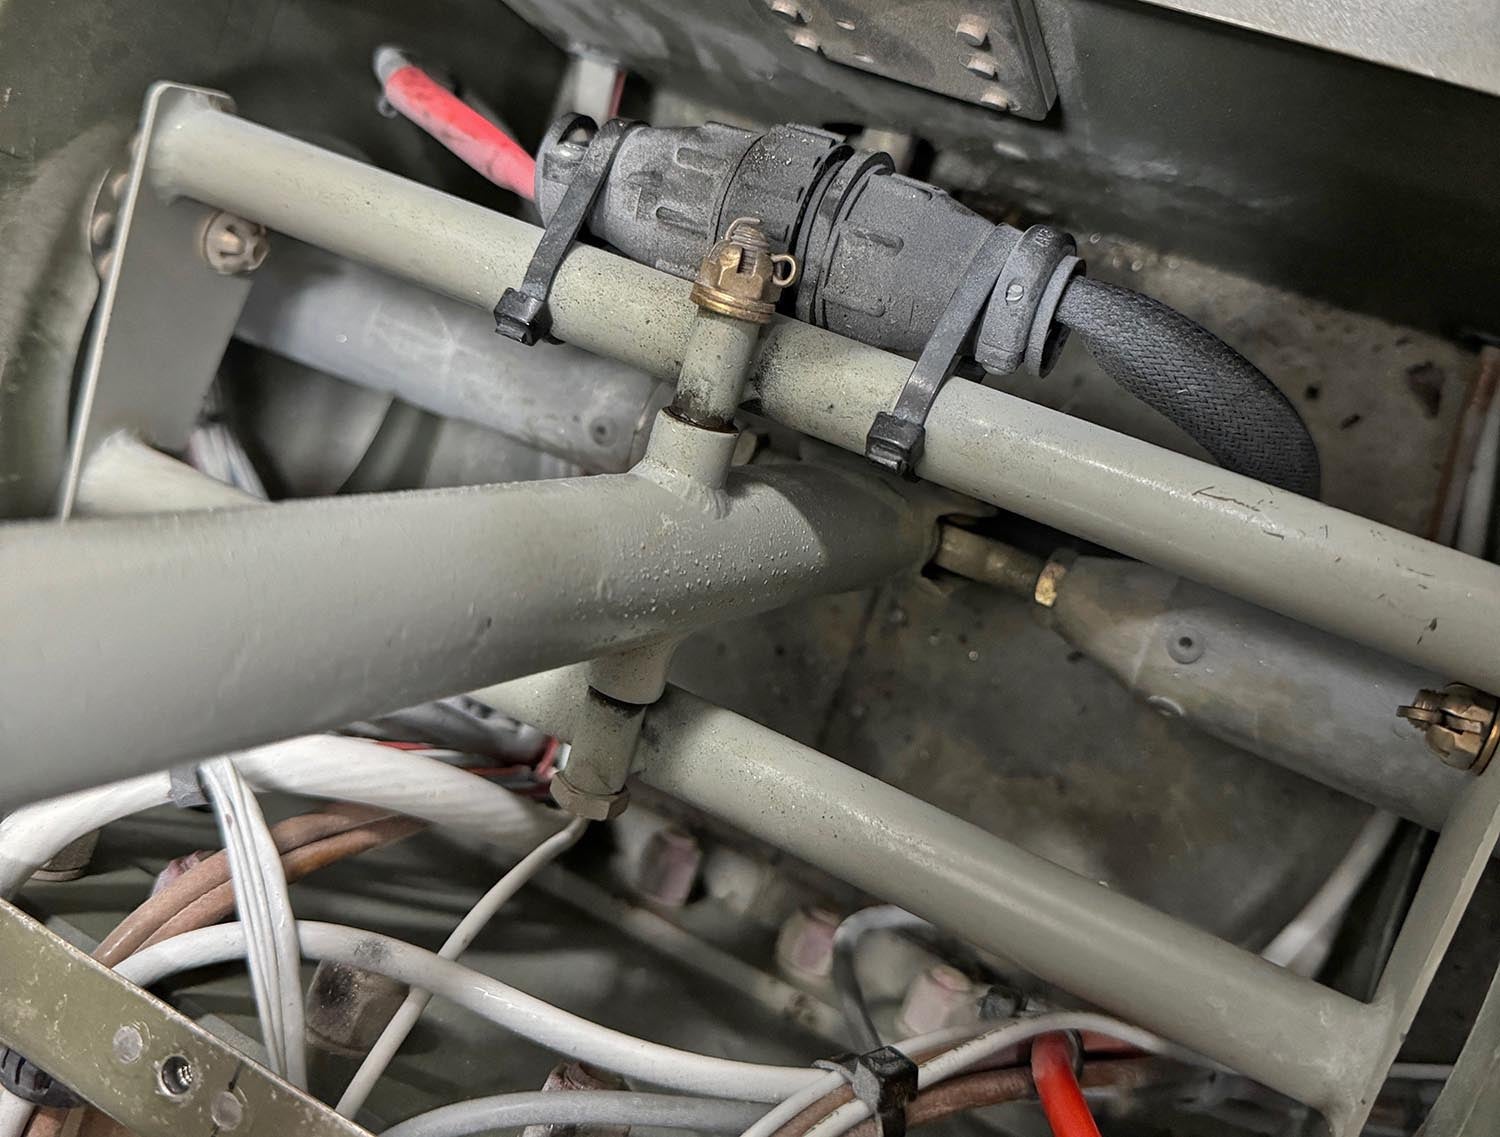
Here’s the play in the stick before we started—definitely something to fix! Unnoticeable in flight, it was annoying on the ground.
The motion is between the stick sleeve (a piece of steel tubing welded into the stick) and the bushing – the bushing doesn’t rotate on the bolt. It took about ten minutes to remove the seat and the stick close-outs, then take the pivot bolt out and remove the stick (after removing the bolts that attach the aileron pushrods). The design is simple: The stick pivots side-to-side on a bushing/bolt where the bushing is held tight onto the mixer assembly (which allows pivoting fore and aft).
After removing the existing bushing, which was originally sized on a drill press with a file (primitive, I know), it was apparent that there was noticeable play. In order to make it right, we started with some brass rod from McMaster-Carr (the flat-rate shipping costs more than the material, so always order extra). The first step was to use a reamer to clean up the sleeve in the stick – this was a few thousandths oversized from stock, but since I was customizing the bushing, the drawing sizes weren’t as important as the final fit. With the sleeve reamed, we then chucked the raw stick into the lathe and began to turn it down, stopping when it was almost – but not quite – small enough to fit in the sleeve. I then stopped using the cutting tool and switched to a file (checking fit at each step), then emery cloth, and finally 1,000 grit sandpaper. Brass is soft—it’s easy to take too much away, and then you have to start over… hence, the need for more stock than you need!
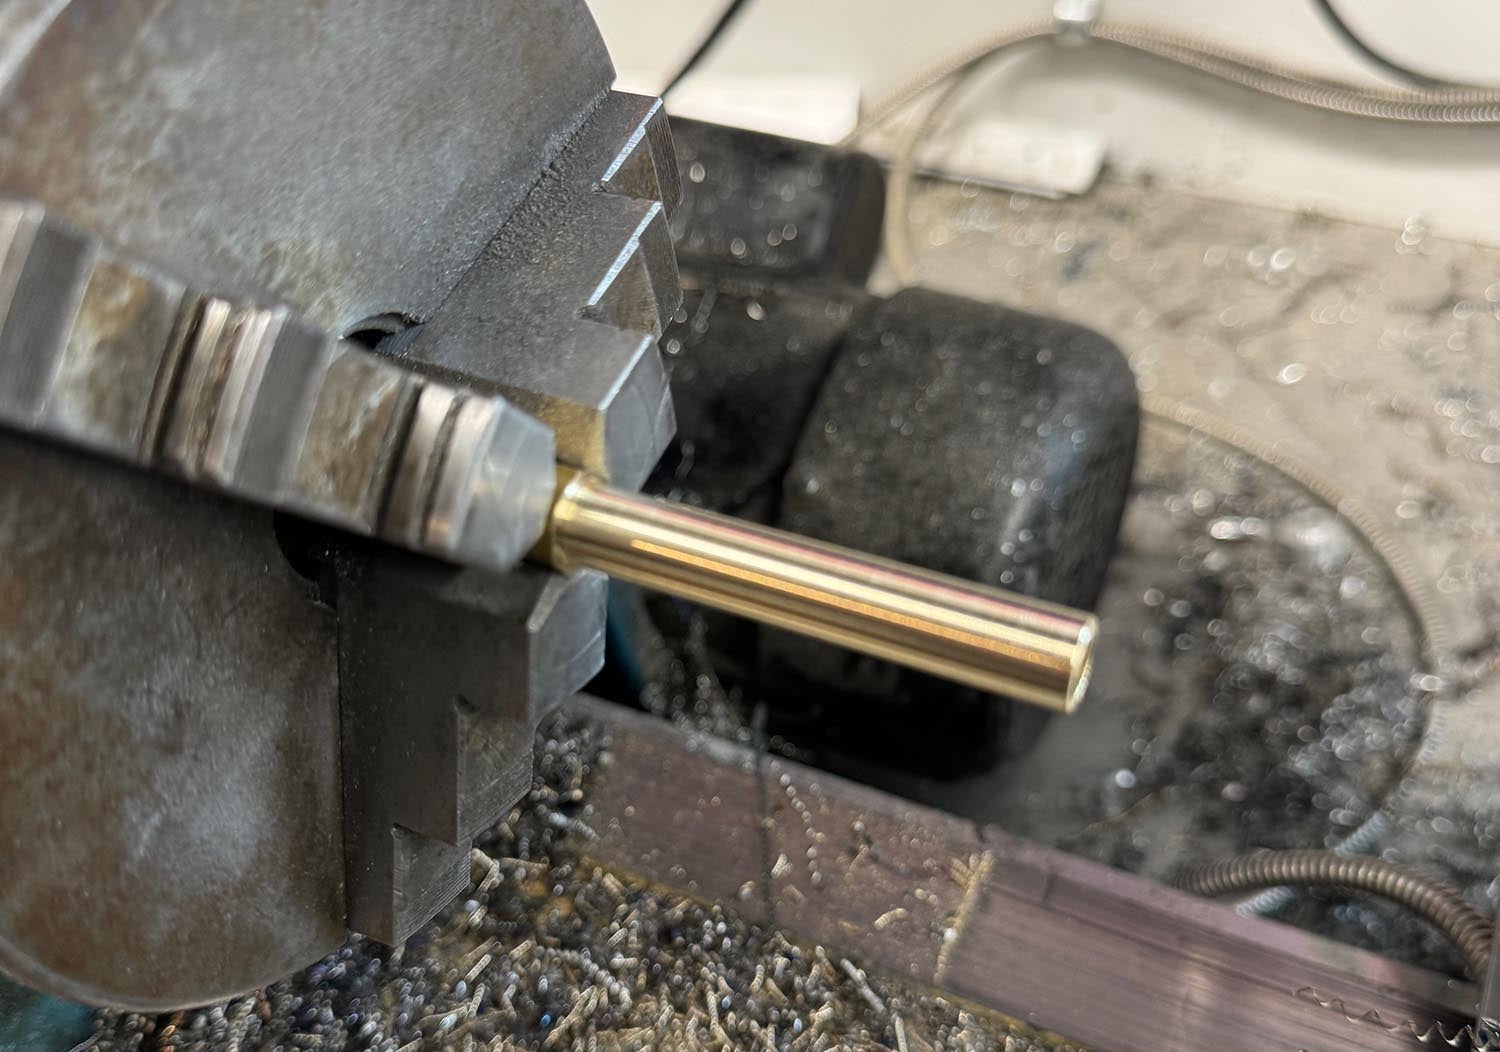
I tried the new bushing in the stick sleeve quite a few times in the process, finally achieving a smooth fit with no apparent play – the stick was in the vice, and I had to remove the work piece from the lathe chuck each time but getting a good fit was worth the effort.
With the outside diameter finished, I then began to bore out the center, which needed to fit the AN4 (1/4”) bolt. I started drilling it out with an “A” sized drill, then proceeded in steps (B, C, D) until I had a perfect fit with the bolt I was using—that turned out to be a “D” drill, and the bolt just fit through with a light tapping. Again, the brass is really soft, and it doesn’t take much in the way of chips or dust to change the fit, so blow it out as you go. Oh yes, the first one I did with a 1/4” reamer—the fit was sloppy, not because the reamer was out of dimension, but because the bolt was a thousandth or so too small. This was a custom job, done by sneaking up on the final size.
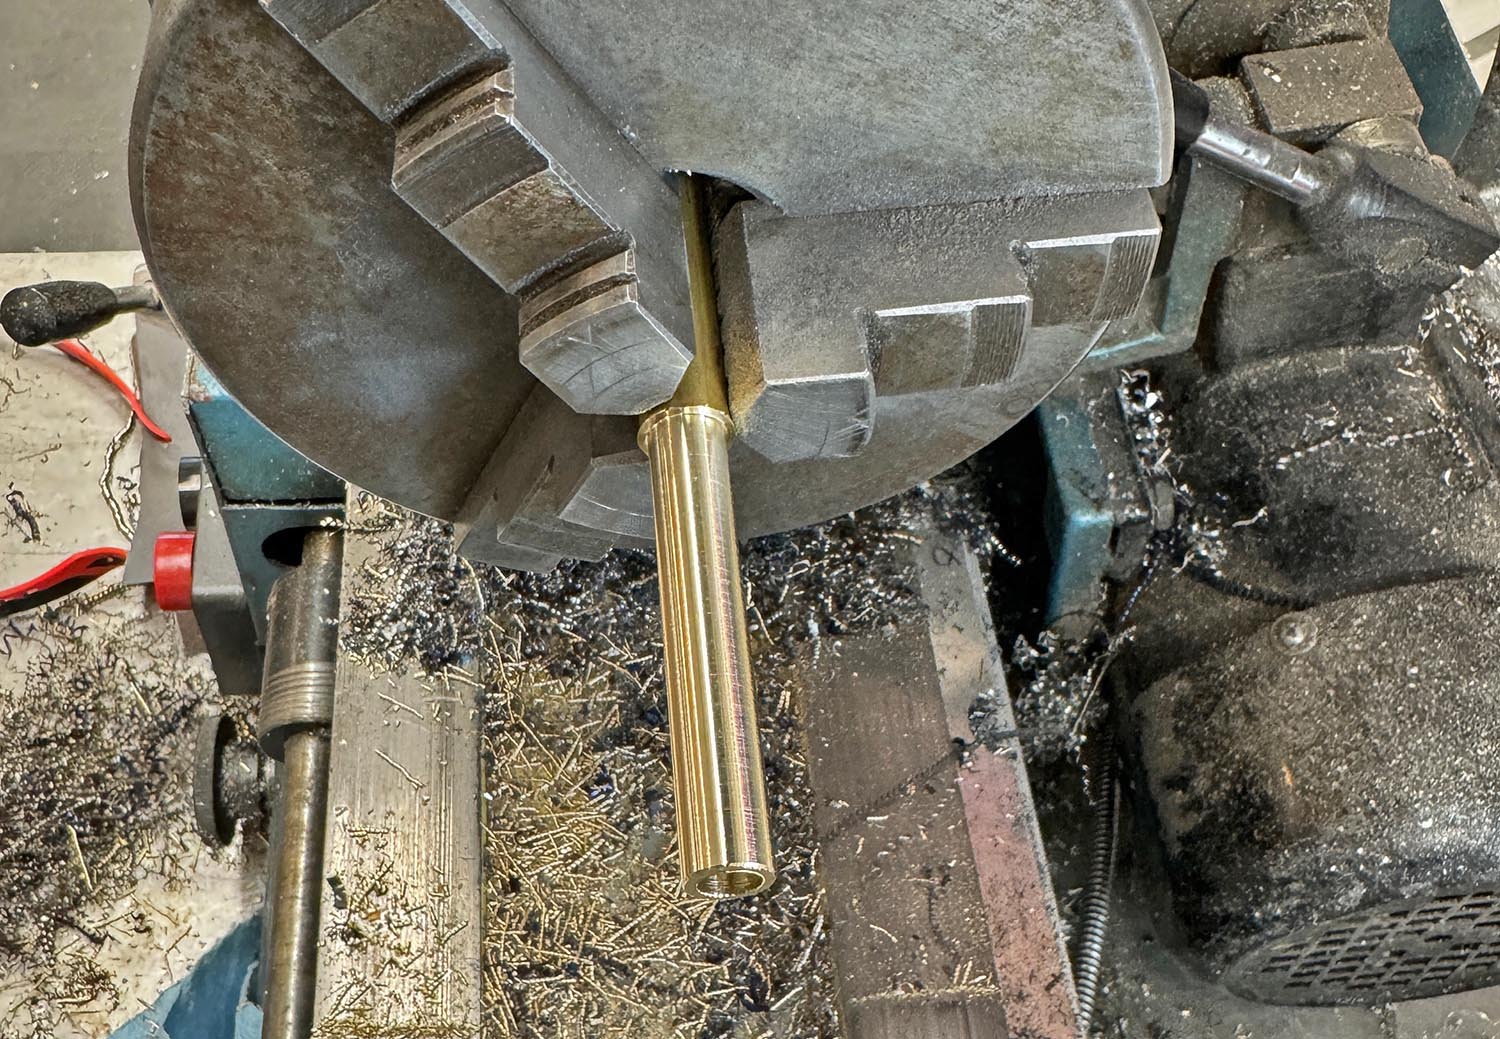
The stick was clamped upside-down in the bench vise the whole time, so I was able to check the fit as I went – fitting both the bushing and the bolt to the stick ensured a perfect fit with no play. I used a touch of oil to make it perfectly smooth until satisfied.
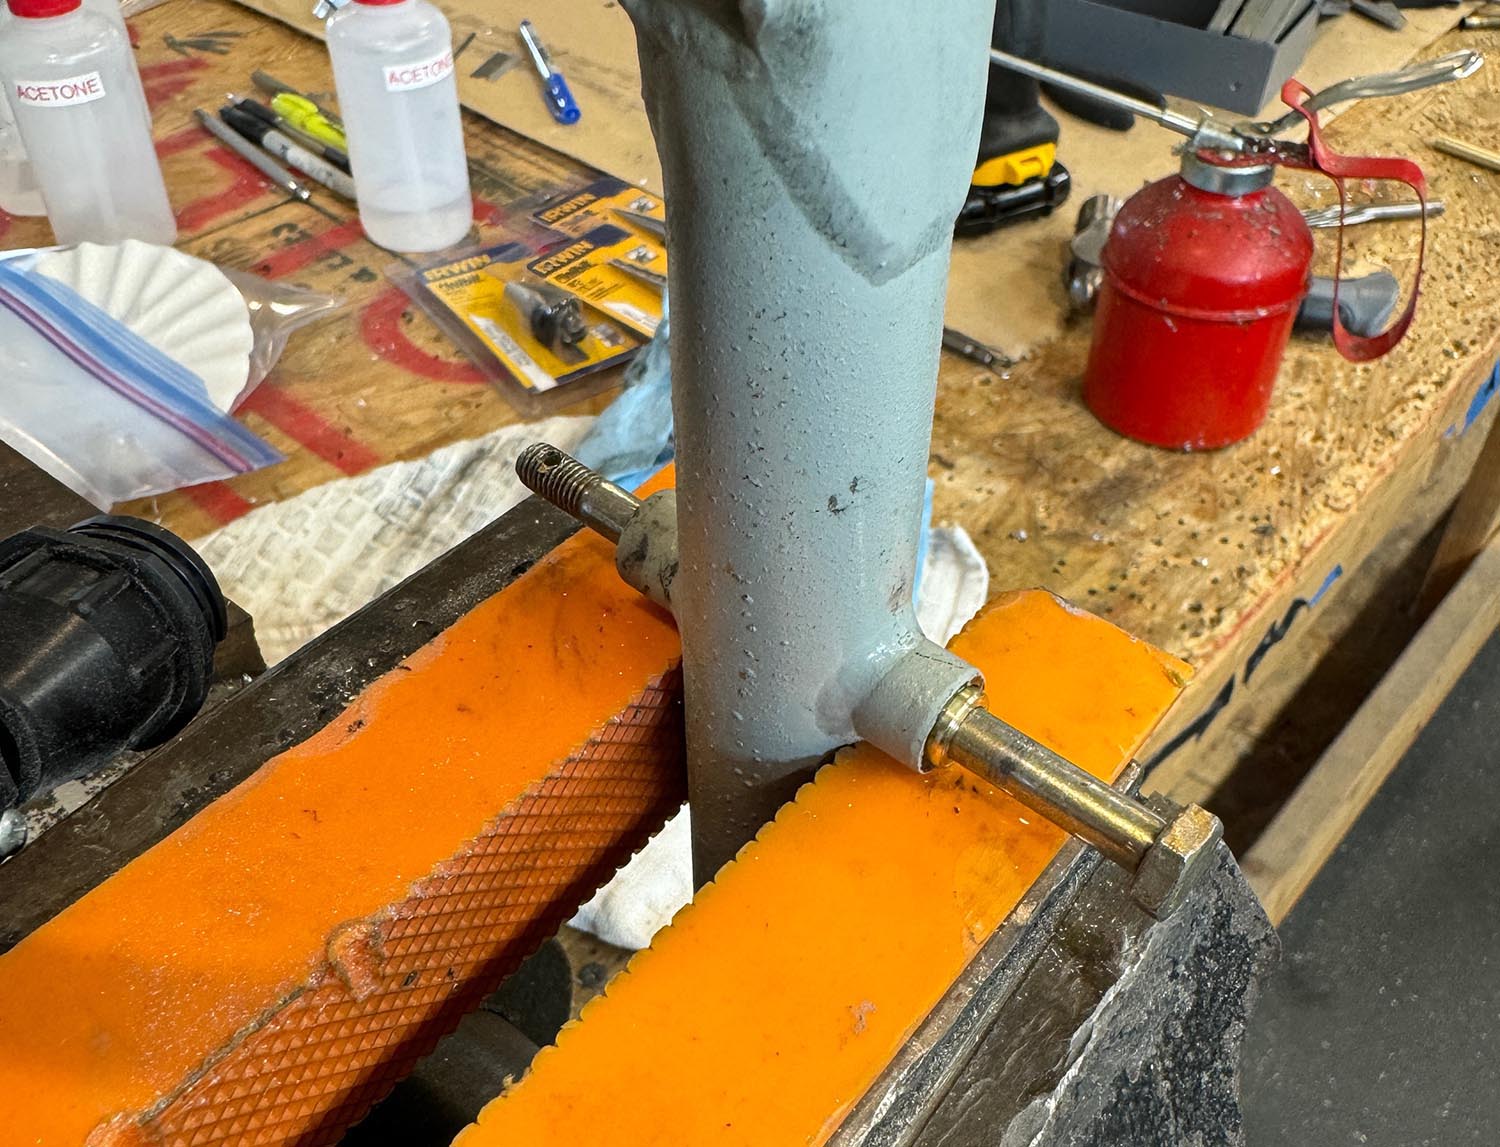
Finally, I re-installed the stick, and getting those aileron pushrods re-attached took considerably longer than the ten minutes it too to take them ff – there is darn little room to work in the RV-3, and getting the spacer washers in place is fiddly. But the results were remarkably better!
It’s hard to get a perfect fit without precision machining capability, but once you have flown with no play in the controls, there is no going back!


With such tight tolerances you might consider installing lubrication point on your sleeve. Another thought, have you considered the effects differential thermal expansion . Just thoughts.
Those are good thoughts Bob, but basically all I was doing was restoring the functionallity (and precision) to the way Van designed the mechanism back in the 1970’s. It works great if you build it right! I do know builders who have chnaged the bushing design to one with needle bearings, and that feels phenominal – I just didn’t want to go that far down the rabbit hole…
Comments are closed.