Even the simplest of homebuilt aircraft have electrical components, so every builder needs to know how to keep their wiring neat, tidy and, most importantly, secure. Traditionally, aircraft wires were bundled together using lacing cord—a waxed string that holds knots well.
Lacing cord began to be replaced with nylon wire ties (sometimes called zip ties) a few decades ago, and while quick and easy to use, they do have their drawbacks. While beauty is in the eye of the beholder, zip ties are not very symmetrical—the large bump of the fastener creates an obstacle to running your hand down the bundle at each tie. More importantly, wire ties frequently leave a sharp little tail; you can tell someone who does lots of maintenance underneath instrument panels by the cuts on the back of their hands. This has led many wire technicians to circle back to their roots and return to lacing cord for securing wire bundles.
Note that since lacing cord is waxed, this technique is excellent for wiring bundles throughout the airframe, except under the cowl. For firewall-forward work, we prefer high-temperature wire ties (with their tails properly trimmed to prevent scratches) to secure bundles and preserve order.
You can buy a spool of lacing cord from any of the regular aviation supply houses, and a single spool will last through many projects. The knot is simple and easy to learn: a clove hitch around the bundle, with two overhand knots to secure the tails. Place a knot every three inches or so, and your wire bundles will look like those in professionally wired aerospace vehicles.

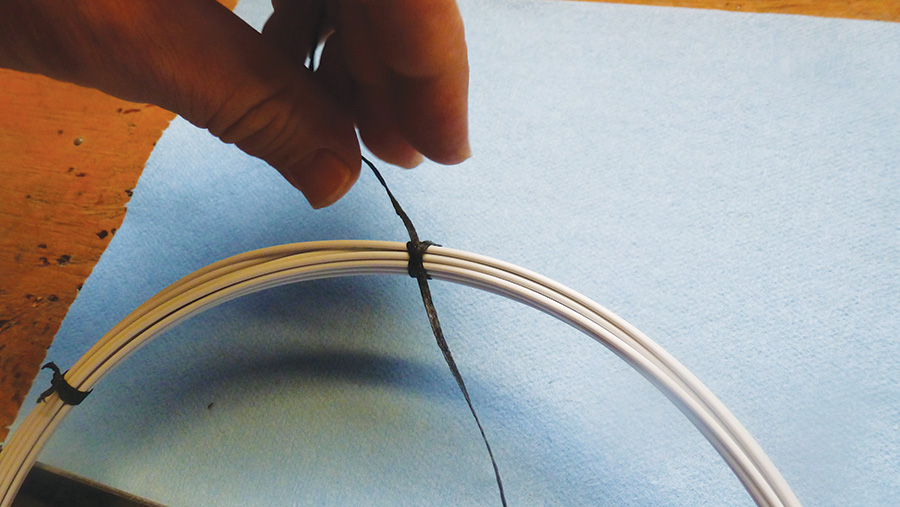
Start by cutting a length of lacing cord about nine or ten inches long. Loop this around the bundle once.
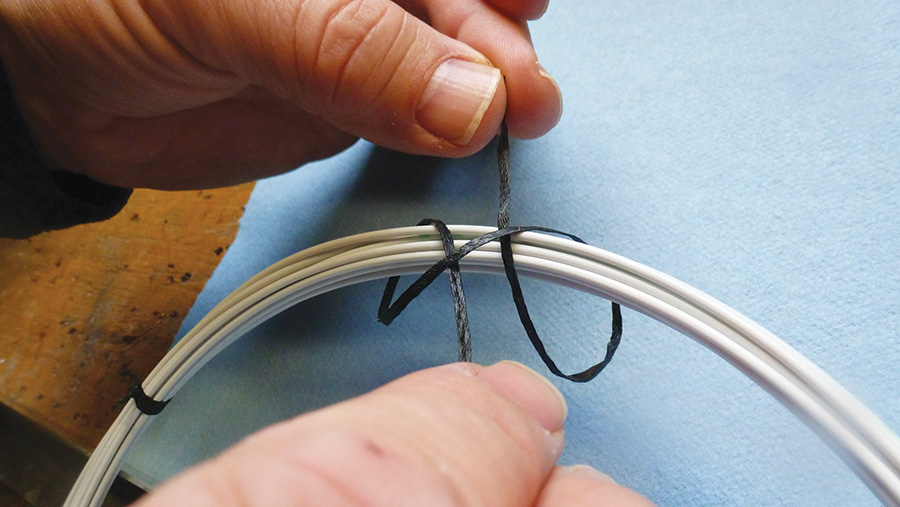
Loop it a second time, tucking it underneath the first loop. This is sort of a figure eight, with the wire bundle running through both loops of the eight.
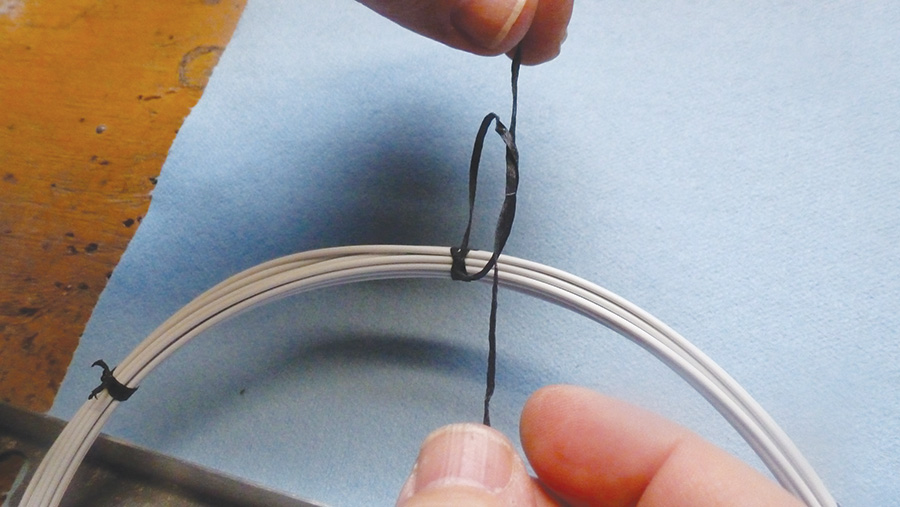
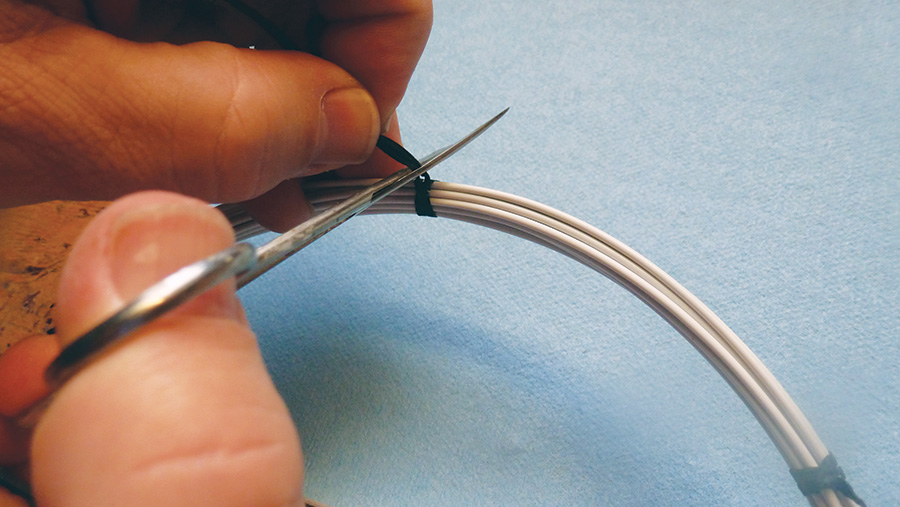
To secure the ends and make sure the wires stay bundled, tie the ends in a simple knot, like the first step in tying a shoelace.
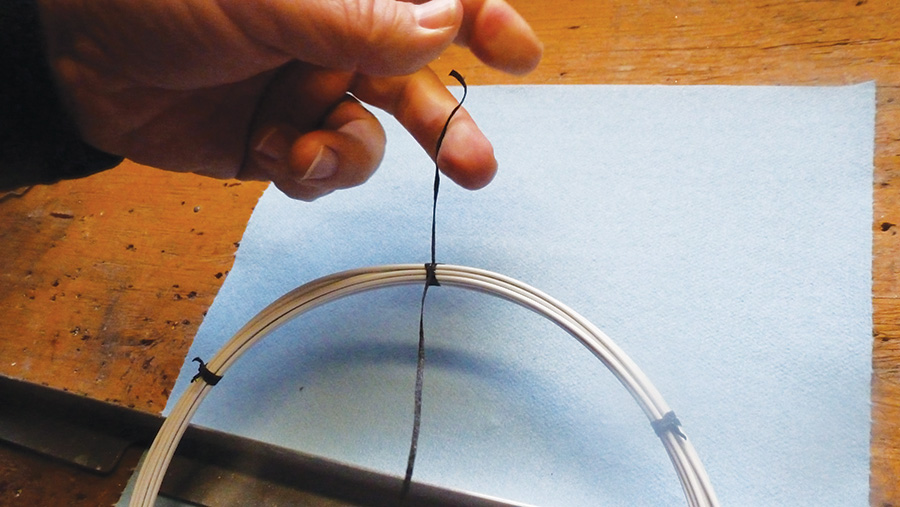
Pull tight and tie a second hitch on top of the first. Essentially, you’ve tied a granny knot on top of the clove hitch.
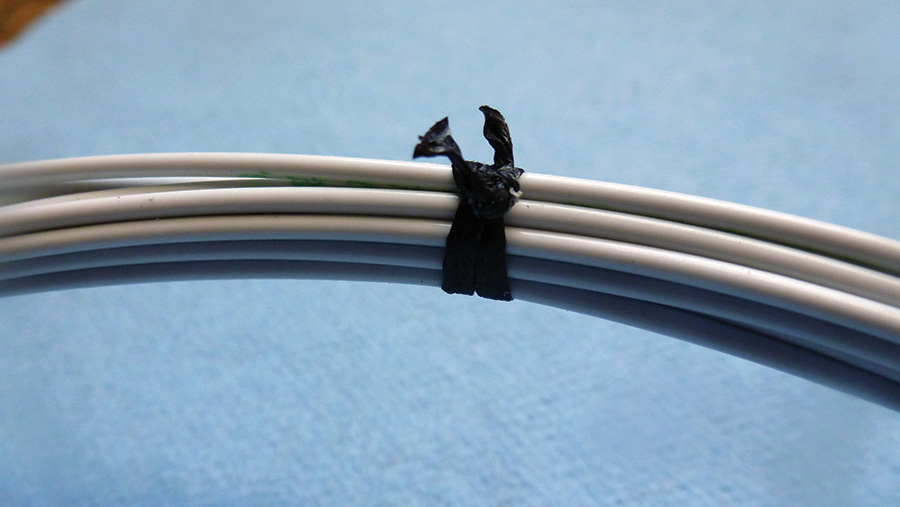
The resulting knot is tight, holds the bundle neatly in place, and will be easy on the hands of the technician (usually you) that has to work behind the panel later on.




This brings back memories from my days in an aerospace shop. An addendum to this is using a soldering iron to cut the lacing tape. This prevented the ends by the knot from fraying. The iron can also be used for cutting off lacing from bundles without damaging wire insulation where high temperature wire insulation is used.
Used to go thru a roll of lacing cord a year when I worked as a avionics tech for the Air Force at MCC. We used pair of wire cutters with very tight cutters and a pointed end. This allowed us to cut the cord after the knot and with the pointed end we could cut the cord loose with out damage to the wires in the bundle.
Whooah!
Please not a granny knot, the second hitch must lock the first, and the strings will exit transverse to the bundle, not along it.
It’s just like a bowtie, if the loops go up-down it’s a granny and will untie itself. If the loops go across it is square and will stay tight. We all learned this in kindergarten.
But we’re using waxed lacing, Niklas, not monofilament line…granny knot should hold with the wax, fine, unless it just doesn’t fit your sense of order and you have to tie a square knot that could—oops!—become a full hitch, and then slip.