
With so many different pieces of the puzzle in the works, it can sometimes be difficult to concentrate on specific components. This has been something I have struggled with during all my airplane building because I want to have multiple things in process at the same time. However, one of my main goals as of lately has been to get the 750 SDXtreme on its own feet.
This has proved to be quite a time-consuming challenge due to many factors, the biggest being that I have taken this project to such a highly modified level. As I make my way through the amazing Beringer wheel and brake setup, I have to remind myself that these particular parts have not been installed on a Zenith before and this makes it a prototype. When building a prototype, it is very rare that everything will go together perfectly and without any hiccups. I will say this, though: For the most part, I am very pleased with the entire Beringer setup.
As stated in my last article, the long-awaited, back-ordered 29-inch tires have arrived and I am eager to get them mounted to the beautiful 10-inch Beringer main wheels. I already had the 21-inch AeroClassic tire and the Beringer nosewheel sitting here, but I wanted to wait to mount all three tires at the same time.

Going Tubeless
Mounting the tires is really very straightforward. The Beringer wheels are unbolted and separated into two halves, exposing an O-ring groove in the middle that seals the center, allowing for a tubeless setup, which is exactly what I wanted. A similar tubeless setup on my Super701 has worked flawlessly. I personally like running tubeless tires because it is the lightest tire option I have found and also allows for relatively easy field repairs of small punctures.
I had this happen once on the Super701 and I was able to use a cheap tire plugging kit and a handheld air pump to repair it and fly the rest of the day with no problems. That happened years ago and that tire is still holding air. With small punctures, you can usually do a field repair without having to carry a lot of tire tools because most repairs can be made without removing the tire from the wheel. There is no cumbersome and heavy inner tube to contend with, either.

I know you will hear plenty of feedback that tubeless tires can’t be deflated to low air pressures without worrying about them coming off the wheel. As a remedy, on the Super701 I used a small amount of silicone caulk and smeared it on the tire bead before mounting it to the wheel. This practically eliminates any potential leaks around the tire bead. Once the silicone is cured, it also acts as a glue to help hold the tire in place, even at very low air pressures. I have stated before that I normally run my Super701’s main tires at around 4-5 psi, which creates a really nice cushion when landing on unimproved surfaces. Even with quite a bit of off-airport abuse and side-loaded landings, I have never had a problem with running low air pressures in my tubeless tires, so I am opting to use the same method for the 750 SDX.
As mentioned, the tire mounting process is pretty easy. One wheel half is placed into the tire, then you just make sure the O-ring is in the center groove properly. Then place the other wheel half into the other side of the tire. Then all you have to do is line up the wheel halves and start threading in the wheel fasteners. There are quite a few fasteners, so it takes a little time to get them all hand-tightened before the torque wrench comes into play. A little later, with all the fasteners properly torqued and adequate air pressure applied, you have a full wheel/tire assembly ready to go on the plane.

Well, at least that is the first thought. With further inspection of all the parts, there are still all the brake and axle components to figure out. The brake caliper and massive 10-inch brake disc are easy enough. The axle seemed pretty simple, too, until I ran into a little problem with tolerances, spacings and basic mounting for this modified setup. The setup comes with an axle and also a spacer that slides onto the axle, taking up a little of the unexpected side-to-side slack. The supplied parts did not take up enough of the space to stop the wheel from having some slop or free play on the axle, so it looks like I will need to have a couple of custom spacers machined for my application. Turns out, “close enough” is not good enough for me.
The mount pattern to the main gear is something I had anticipated for quite some time and I will have an undrilled main gear from Zenith soon so that I can match-drill for the Beringer axles. After that, the only thing left is having some custom axle spacers made to match the mount pattern that will allow enough tire clearance from the main gear. With all that being said, each of these things is in the works.
While trying to get the main gear, tires, wheels and brakes mounted and going, I am also trying to get things “rolling” with the new custom/prototype nose strut/shock assembly. We are trying to make this a very simple yet robust swap-out with the stock part, all without having to modify the standard Zenith kit parts too much. I have the first prototype to play with, but several of my airplane parts are still in California so they can be used to get specs and mock up the second prototype.
This leaves me pretty empty-handed for being able to get the 750 SDX up on its own feet. I have been waiting for quite a long time—the reality is that I am a little fish in a big ocean when it comes to being a priority with a big shock company. Nevertheless, I am still excited about what this could bring for availability to the Zenith lineup for a quality upgrade once it is complete and ready to go. Anyway, enough with the frustrations of the landing gear and on to some things that I can control.

RV Cabin Vents
With several other cabin area modifications wrapping up, it is time to get things flowing with the cabin ventilation again. I talked about the goals for this in the February 2025 issue. With these vents already in use with the Super701 and also previously mounted in the back of this 750 SDX for the rear seat, I finally decided on a location for adding the same extra vents to the front of the cabin.
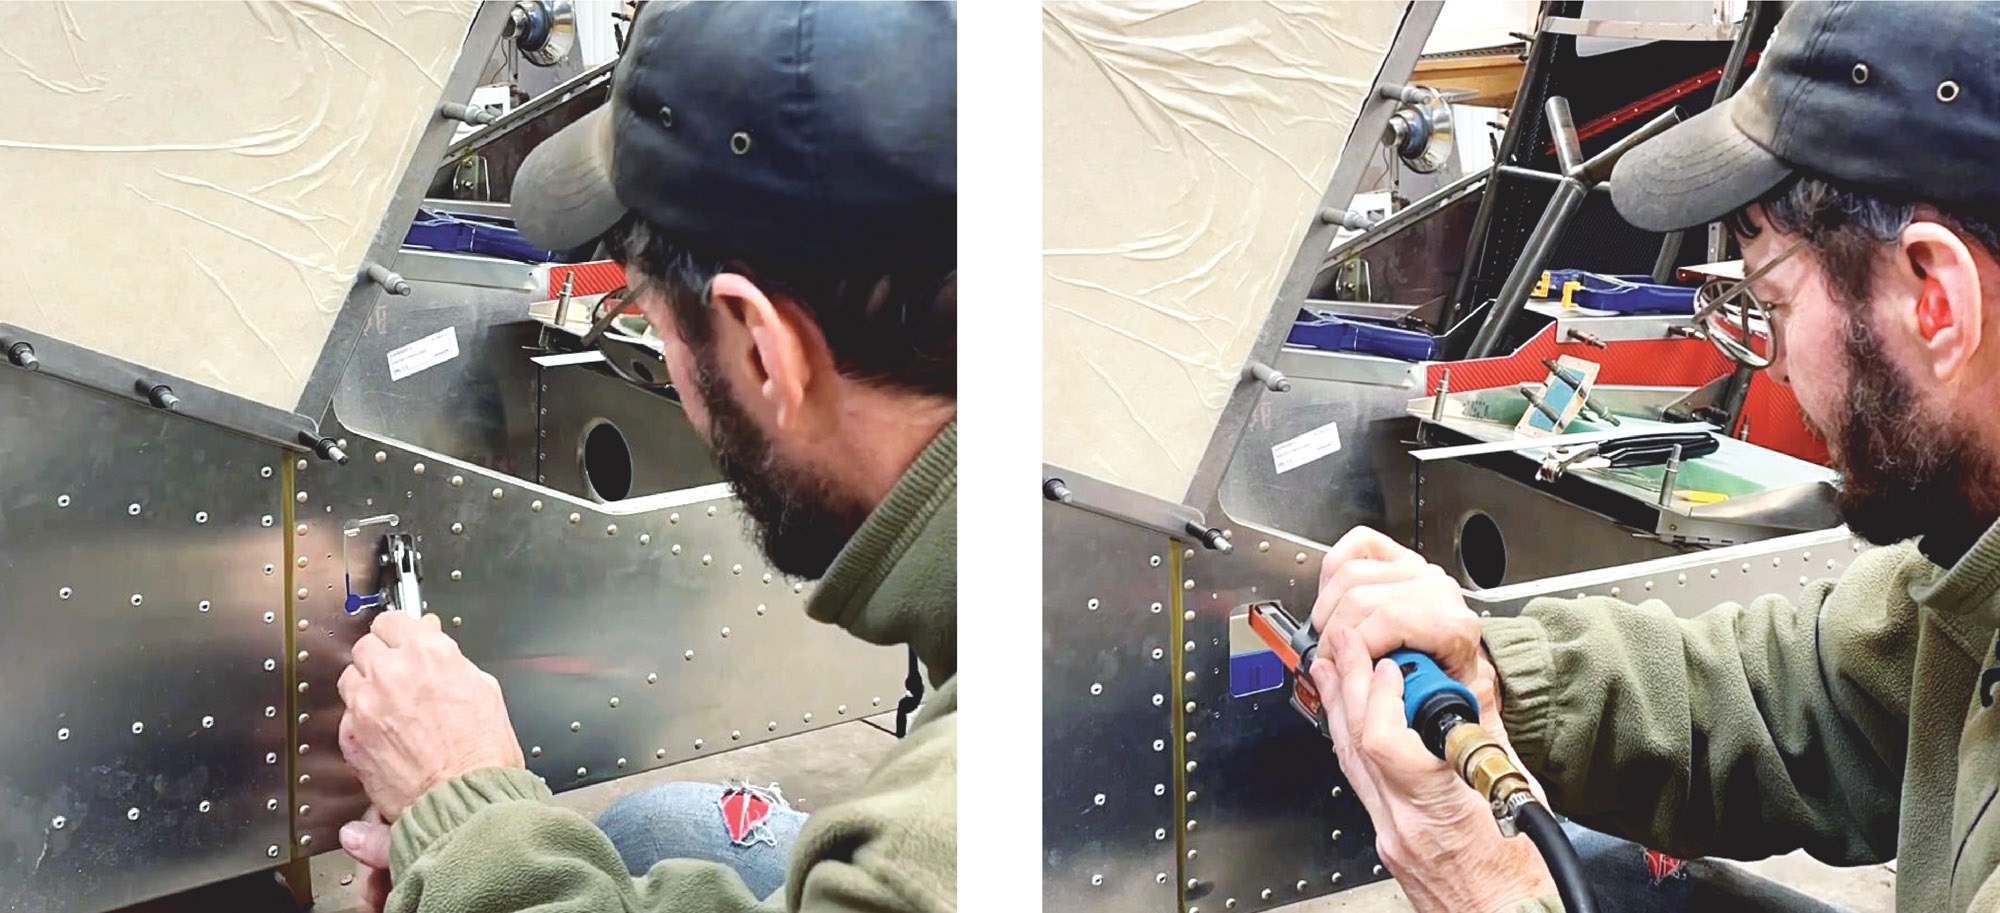
The available space for a vent in the aluminum cabin side skins is limited in the 750 SDX because the windshield is designed to come farther down on each side compared to the Super701. There is one spot I have been looking at for many months with thoughts of adding a vent. It is a little lower than I wanted, but it should work well in combination with the eyeball vents in the center console/tunnel.
These aluminum vents are lightweight and simple to add and come with everything needed to install. The only thing you do need is a little time and patience to do the marking, cutting and trimming that is required to make them fit nicely into the side skins of the airplane. Once they were assembled, fitted and mocked up, I was very satisfied with the overall look and believe the practical usage will be excellent as well.

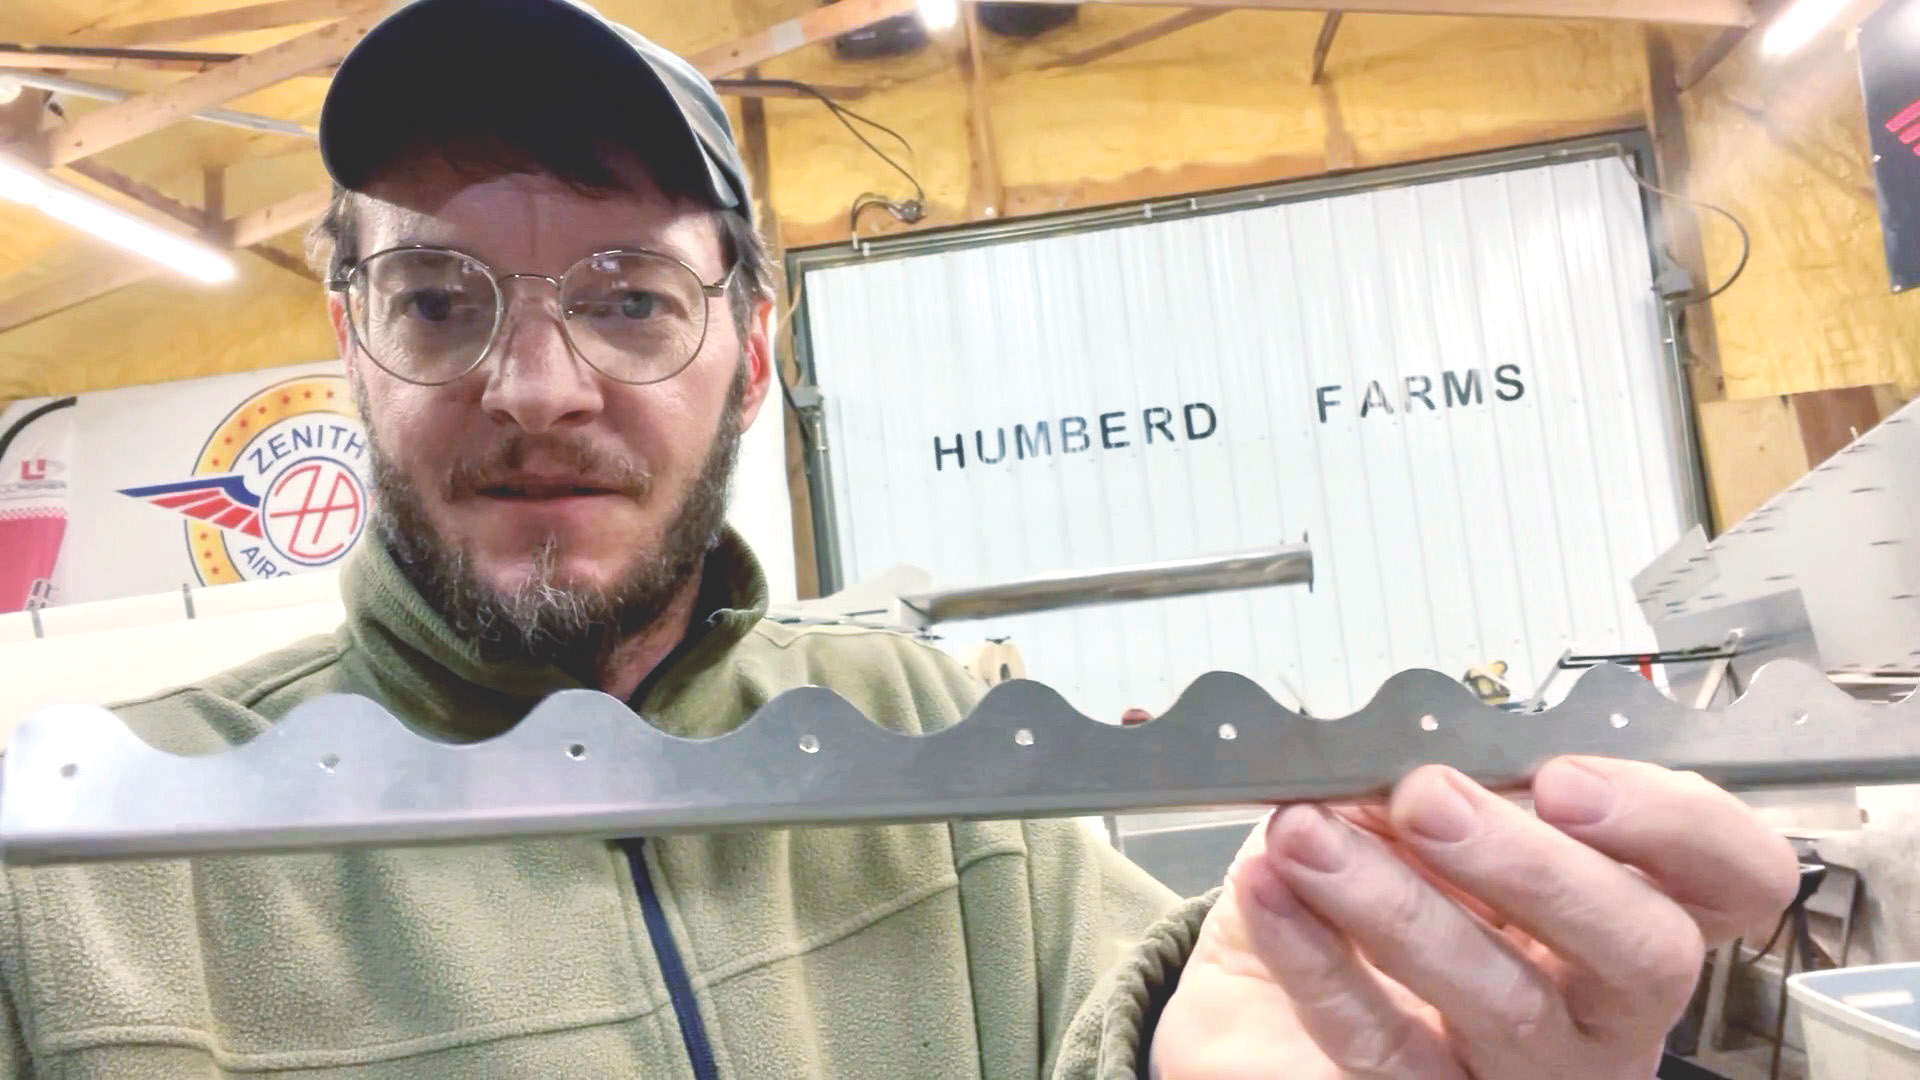
More Scalloping!
I have talked about scalloping parts a few times during this build. Usually it’s only done for an almost negligible weight savings because most of the pieces I have scalloped are internal to the plane and will never be seen. However, after looking at the rear door trim pieces for a while and debating if it could look good or not, I finally took the “plunge” with the punch/die on my hand arbor press and scalloped these pieces as well.
Once these parts are finished with paint, I believe they will look great along with the carbon fiber vinyl showing on the parts they are riveted to. All of this will be a bit tricky to sequence correctly with the painting and vinyl, but it should make for a very nice finished look if I can make it come together the way I have envisioned it.
Now it is time to disassemble everything on the nose of the plane. Again. This time I am drilling many of the holes to final size and making the last modifications and adjustments to the cabin frame and several other components with the hopes of doing a “final” assembly on them soon. Taking all this apart and reassembling has become almost second nature with all the times I have done it. However, it is nice to be swapping out the silver (small) Clecos for the copper and other larger Clecos. You know things are making progress when the silver Cleco pile is growing and the copper Cleco pile is shrinking.
Once the firewall is disassembled and removed again there will be elbow room for more brake work, inside the cabin this time. I’ll be mocking up the pedal and toe brake assembly. I have opted to give the Beringer Rudd’Air pedals a try because I think they will fit and work well with my setup. I was ultimately hoping for some slight weight savings over the stock setup, which uses a heavy stainless hinge for the toe brake pedals attachment. The Rudd’Air pedals are a fairly thick aluminum and it doesn’t look like there will be much weight savings, but it will definitely be more robust and have less flex when pushing on the toe brakes.

The Rudd’Air pedals slide onto the rudder pedals instead of attaching using a hinge. The hole where the Rudd’Air pedals slide over the chrome-moly rudder pedal tube is slightly larger than the standard ¾-inch tubes that come with the CH 750 Super Duty kits, so I have an extra tab up on my computer screen while I am writing this, researching thin plastic bushings and figuring out how I want to make this customization come together. As with everything else, it will be modified and different from both the Zenith setup and the Beringer setup.
I’m so deep into this project with modifications at this point that I nearly cringe with the thought of yet another modification, but I am determined to do this as correctly and “my way” as possible. There is a quote that goes something like, “Do it right the first time or do it again later.”

Some of the things you have to do later with ongoing maintenance are inevitable, but a lot of the things I see people repairing on airplanes could have been extended much further out on the timeline if they were done correctly to begin with. I am no exception and I really don’t know of anyone who wouldn’t do something slightly differently if or when they have to do it again.
This all brings me back to doing seemingly continuous mockups and planning with several more pieces of the puzzle inside the cabin of this 750 SDX. Until next time, I will continue to plan, fabricate, assemble, disassemble and repeat. Practice makes perfect, right?
![Coming in for a landing at Humberd’s Farm [All Images Credited to Jon Humberd]](https://www.kitplanes.com/wp-content/uploads/2026/07/9-1.jpg?w=218&h=150&crop=1 "Overcoming Setbacks on the Zenith 750SD Xtreme")


