
I faithfully read every one of Vic Syracuse’s articles about the things he finds during his airworthiness inspections. While we were building the ForeverHawk—our seemingly never-ending Bearhawk LSA project—we constantly asked ourselves, “What could Vic find wrong with this?” Well, a few things did go wrong as we neared the finish line, and they were wrong enough that we didn’t need Vic to find them!
The First Problem
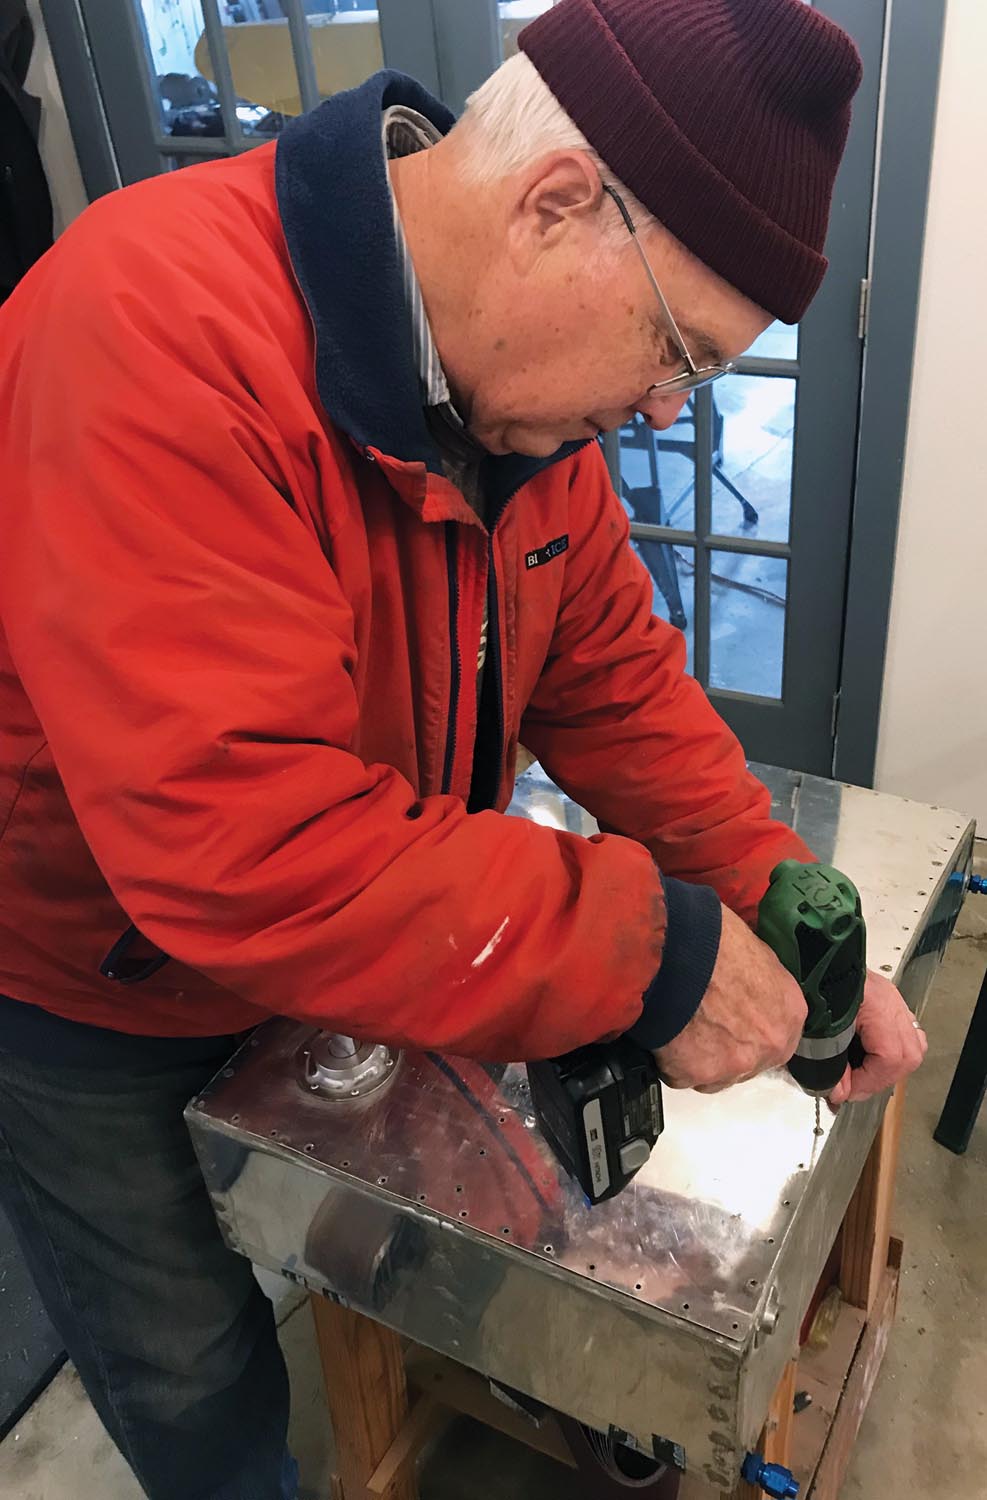
The biggest ugly came when we put the last five gallons in the right tank. It was immediately apparent we had a serious leak in the tank itself. Well…shoot (forget the o’s)!
I really, truly, did not want to pull that tank. We had a very difficult time installing the machine screws in the tank straps when the wing was upside down on the bench, and I could envision an hours-long fistfight doing it again, this time up over our heads. I thought of everything I could that would allow us to fix the tank in place.
A lesson years of building airplanes has taught me is that it is always—always—better to disassemble things until you can get to the real problem, fix it right, and put all the pieces back together, than it is to cobble together some double-reverse backwards solution to avoid the disassembly. Now it was time to remember that lesson yet again.
We disconnected the straps and fittings, pulled the tank, took it into the warm room, and pressure tested it. Getting the tank out, finding the fittings and a gauge (I had a gauge that read in inches of water column that I’d kept from my gas-fired kiln days 40 years ago. I knew it would come in handy some day!), sealing up the vented cap, and putting in several inches of compressed air took all of two hours. Finding the leak took about 30 seconds. You could hear air whistling out between the top skin and one of the sides. Putting a brush full of soapy water over the spot resulted in a stream of bubbles.
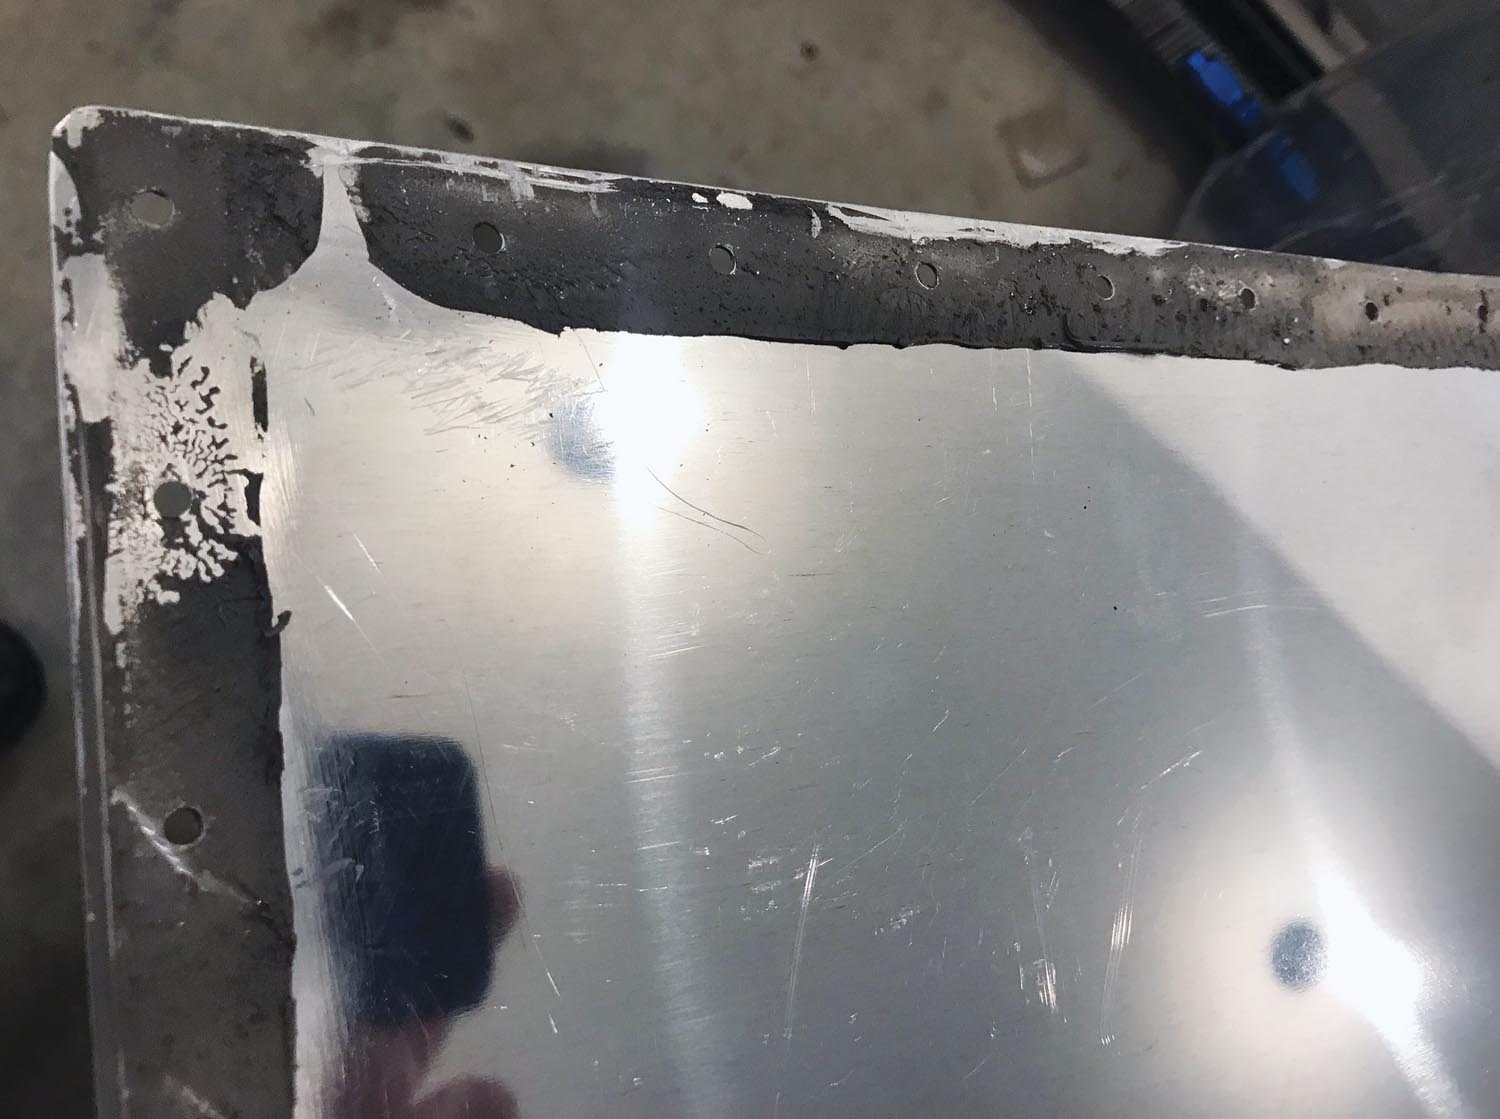
We drilled out all the rivets holding on the top, used a wire wheel on a fast drill to clean off all the tank sealant, resealed the tank, riveted it back together, retested it, and reinstalled it in the wing. Total time from discovering the problem to having the repaired tank back in the airplane: 40 elapsed hours, 35 of those waiting for the sealant to cure. Getting the clamp screws started and tightened took 10 minutes. As a bonus, we were able to center the filler neck in the wing skin much more accurately, allowing us to use neat little filler neck “collars” a friend printed on his 3D printer.
Repeat after me: You are always, always, better…

The Second
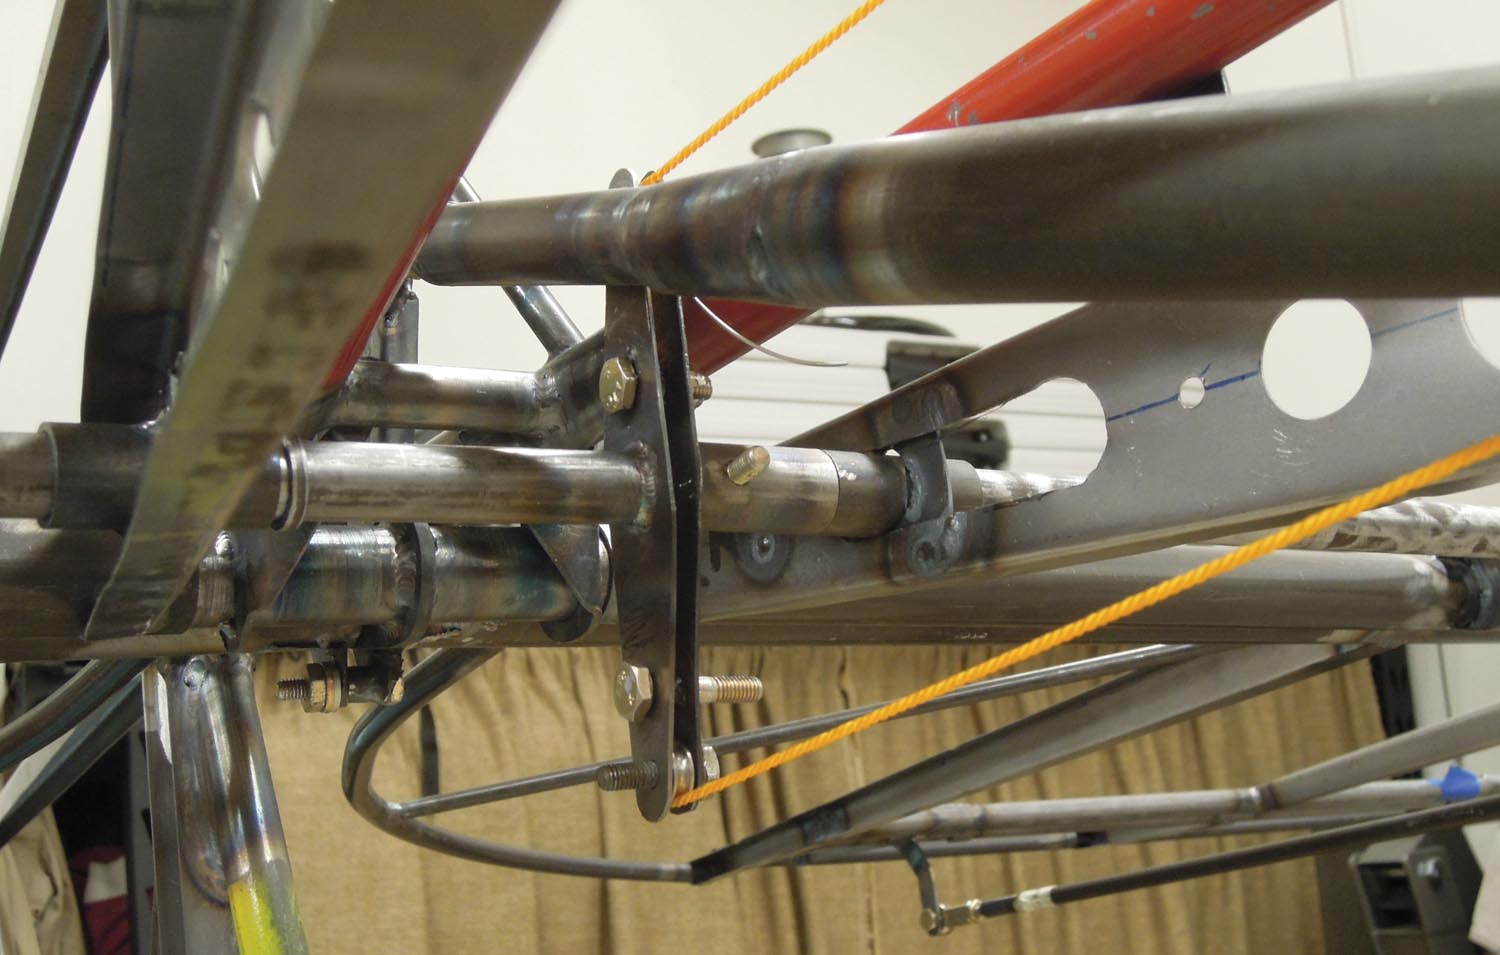
Next on our list of malfeasances Syracusian were several tiny mechanical interferences in the control system. Most of the problems we encountered were caused by our own mistakes, either of commission or lack of foresight. We didn’t have many cuss-the-designer sessions on this project, but if we had an opportunity to sit the designer down, plunk a cold beer in front of him, and ask him a single question, it would be: Why does everything in the control system have to be so…darn…tight?

For instance:
- The trim tab bellcrank and elevator pushrod live side by side between the rear longerons and miss each other by a very small fraction of an inch as they move through their necessary arcs.
- The pushrod between the two sticks runs inside a tube, and if you cut some threads off the bolts, use thin nuts, and hold your lips just right, it will move back and forth without scraping. If you’re lucky.
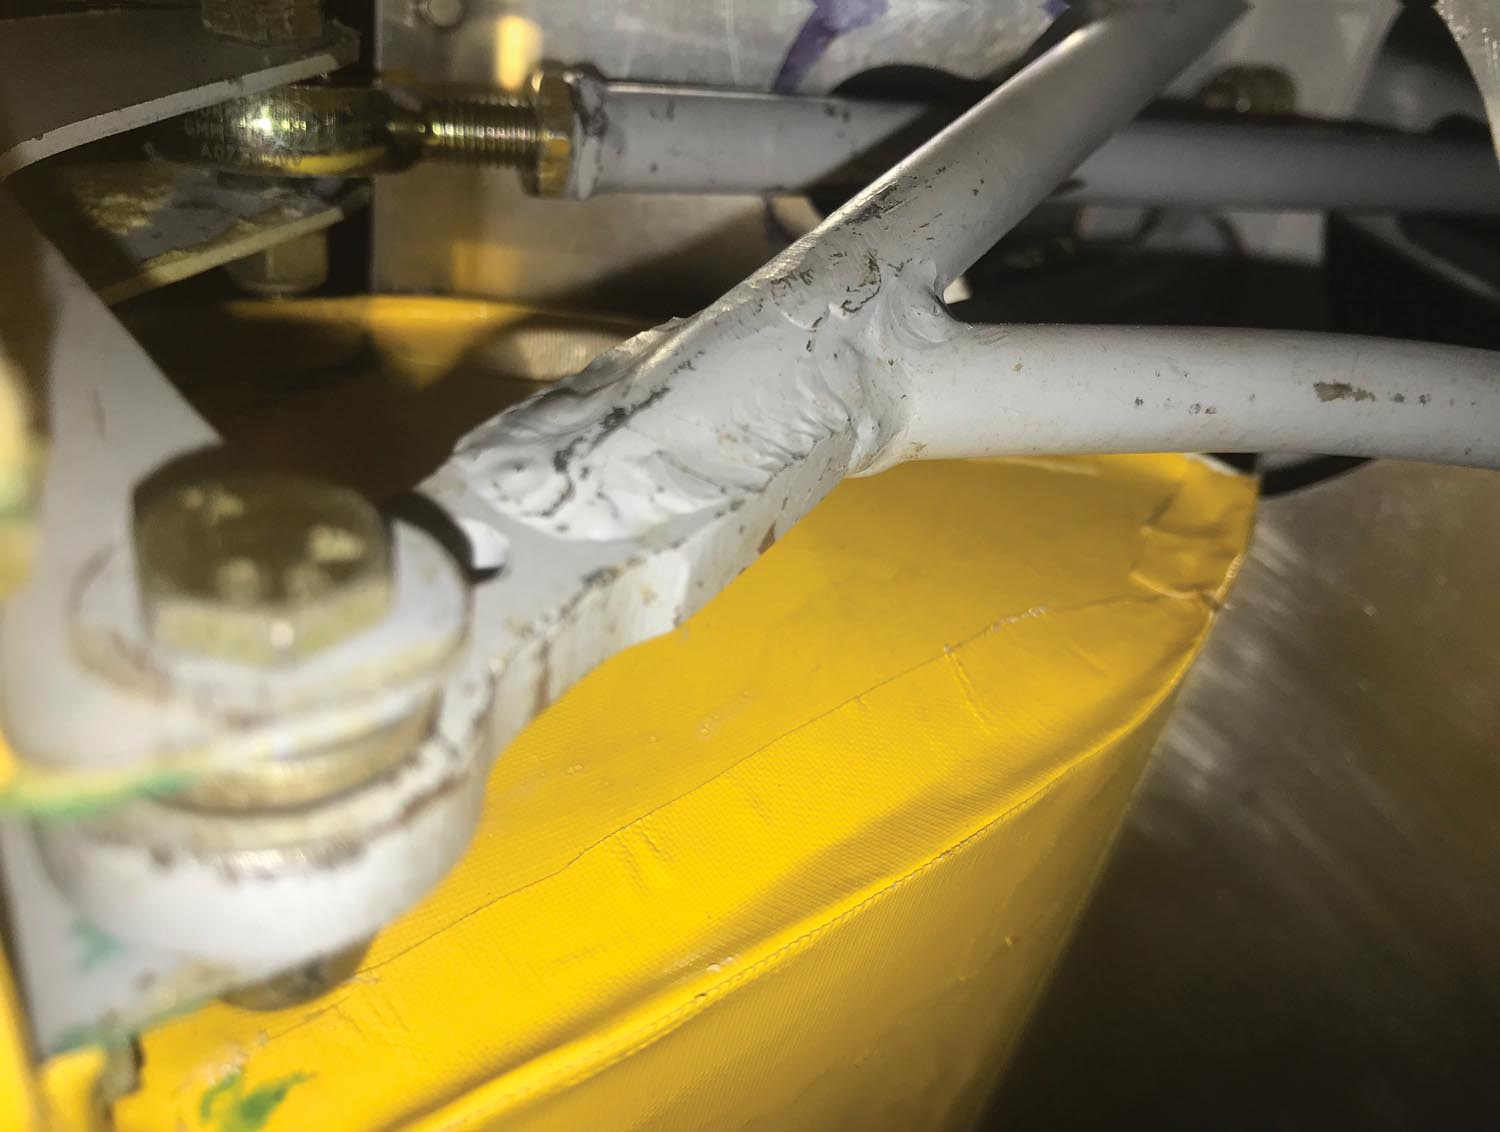
- The aileron pushrod runs between converging tubes on the aileron hinge bracket, and if you’ve got a tiny bit of weld bead in the wrong place, you can feel the “grab” through the stick as the parts collide.
- If the pulley mounting locations in the fuselage and wing spar are not exactly aligned with the wing strut (and until the wing and strut are installed, it’s impossible to know exactly where they will be), the aileron cable will rub the inside of the strut…and…well, you get the idea.
The answer the designer might rightly give is that, if you’ve built everything exactly to the plans, it will all work. That may be true, but I don’t think many builders are that good. The parts are built years before they’re assembled, and until you’ve put the airplane together and find how they interact, it’s very difficult to foresee these problems.
We couldn’t tolerate the scrapings and bindings any more than Vic could, so with patience, surgical forceps, a magnet on a stick, and more patience, we juggled washers, filed pushrods, and twiddled and cajoled parts. We eventually achieved an interference-free control system, but a bit of designed-in forgiveness and adjustment would have saved a lot of frustration.
And Yet More
Our panel and avionics are pretty simple. The engine gauges are inexpensive round ones, accompanied by a brand new Electronics International UBG-16 engine monitor for $60 at a local hangar sale. Flight instruments are the same: The UMA company cheerfully and quickly re-masked an old airspeed indicator with appropriate markings. One of us—we can’t remember who—had an old altimeter. There is no VSI or whiskey compass.
Avionics consist of one radio, an antique PS Engineering intercom, a new Garmin aera GPS, and a used Garmin GTX 327 transponder with a new encoder. Since my electrical skills consist of putting tape over wall sockets to keep the electrons from spilling out at night and staining the carpet, I was thrilled when Philip Groelz, a retired electrical engineer, tackled the wiring. He turned in an extremely tidy job, with everything labeled and bundled professionally. Despite that, things did go wrong—nothing we did would make the radio (a 2.25-inch Becker given to us by a friend in England where it was made obsolete by the adoption of tighter frequency spacing) transmit. After hours of troubleshooting, we finally took it to a local avionics shop. They couldn’t get more than an estimated one watt of transmitting power out of it, so we reluctantly put the lovely little thing on the shelf and bought a new radio. It received and transmitted just fine—until we started the engine. It would receive, but crashing static on the sidetone and in the transmissions made it impossible to use with the engine at anything more than idle power. As this is written, we’re still trying to sort that out.
And One More
I mentioned starting the engine. Yes, we finally made it to the point where we were ready for that big day. With neighbors and fire extinguishers gathered round, we cranked it up. Well, we cranked it, anyway. The little EarthX battery spun the O-200 ’round and ’round, but it never fired.
Now, a piston engine only needs a few things to run: fuel, air, compression and timed spark. We knew we had fuel—after cranking long enough, it was dripping out of the exhaust pipes. We were all breathing, so there was air. A check showed decent compression on all four. That left timed spark. This, however, was extremely unlikely. The mags had less than two hours since overhaul, and the engine had been timed by a friend who’d received the Charles Taylor Master Mechanic Award and had over 50 years of experience on small Continentals. So why wouldn’t it run?
Remember Sherlock Holmes’ dictum: When all other alternatives have been shown to be impossible, whatever remains, no matter how improbable, must be the solution. Sure enough, our friend found (to his intense embarrassment) that he’d timed the engine on the exhaust stroke. When it was retimed, it started on the second blade. Temperatures and pressures looked OK, and the carb-heat temp gauge showed a significant increase when we pulled the knob.
And a Problem Bigger Than Just Us
Is any of this unusual? No. There are always last-minute problems in any build. They always seem especially annoying when the airplane is so close to being finished, and when all the fixes have to happen in a hangar just a few degrees above freezing. There were plenty of times when it would have been easier to just walk away from it, at least until warmer weather. However, partnership prevailed and whenever one of us had had enough, one of the others would step up. One by one, the punch list shrank. After six years we finally arrived at the point of scheduling an inspection.
Vic Syracuse lives on the wrong coast, so our local inspector (who handles, by himself, four states and a bit more) put us on his list—just after he got back from a long-overdue vacation. Unfortunately, this happened just in time for the most recent government shutdown, including the FAA. For weeks, our inspector couldn’t get the authorization he needed to sign off our airplane, and in the meantime, winter decided to come to Oregon.
So for now, we double-check all our jam nuts (thanks, Vic!), taxi up and down the strip, and wait for politics and weather to give us a break.
Someday soon…


Boxing Day")


