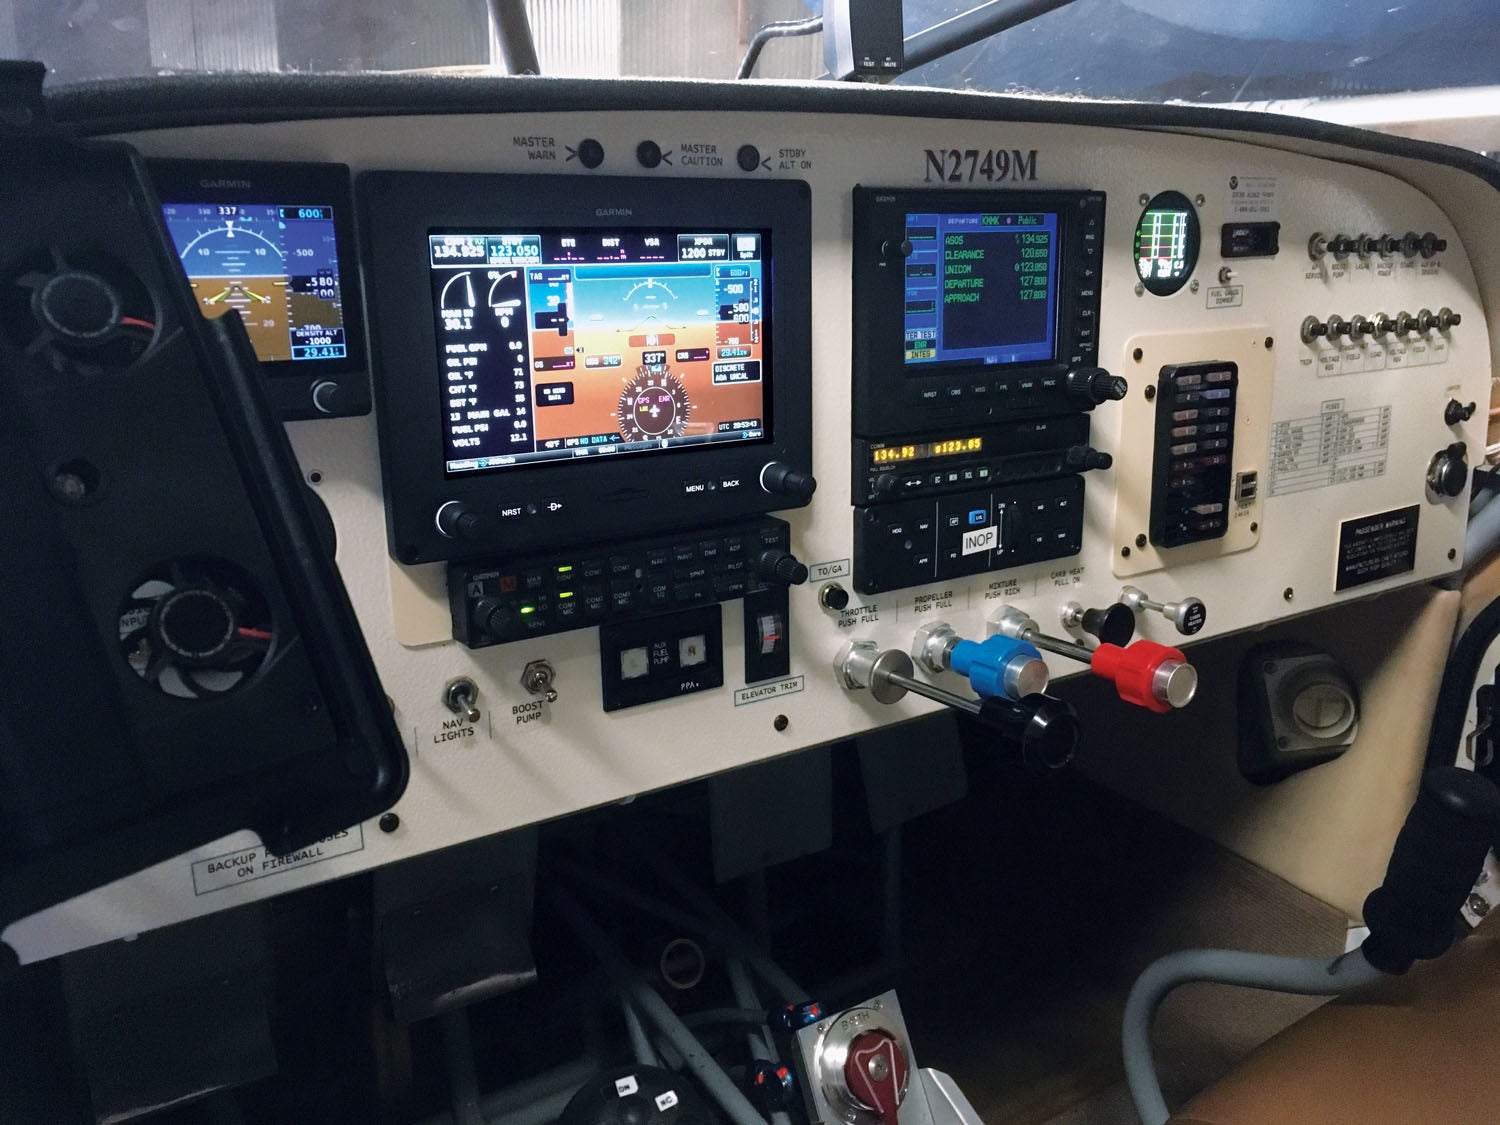
 We started this two-part story with my desire to replace the analog instrument panel in my GlaStar with a Garmin G3X Touch system, including an engine monitor. I left off last issue with much of the physical installation done and a good portion of the wiring, but there was much still to do, including clean-up, troubleshooting and test flying.
January 17, 2020
I was able to put in another 90 minutes today. I replaced the oil-temp probe with the one that came with the Garmin sensor kit, and it was instantly recognized. Another example of similar-looking probes not being electrically compatible.
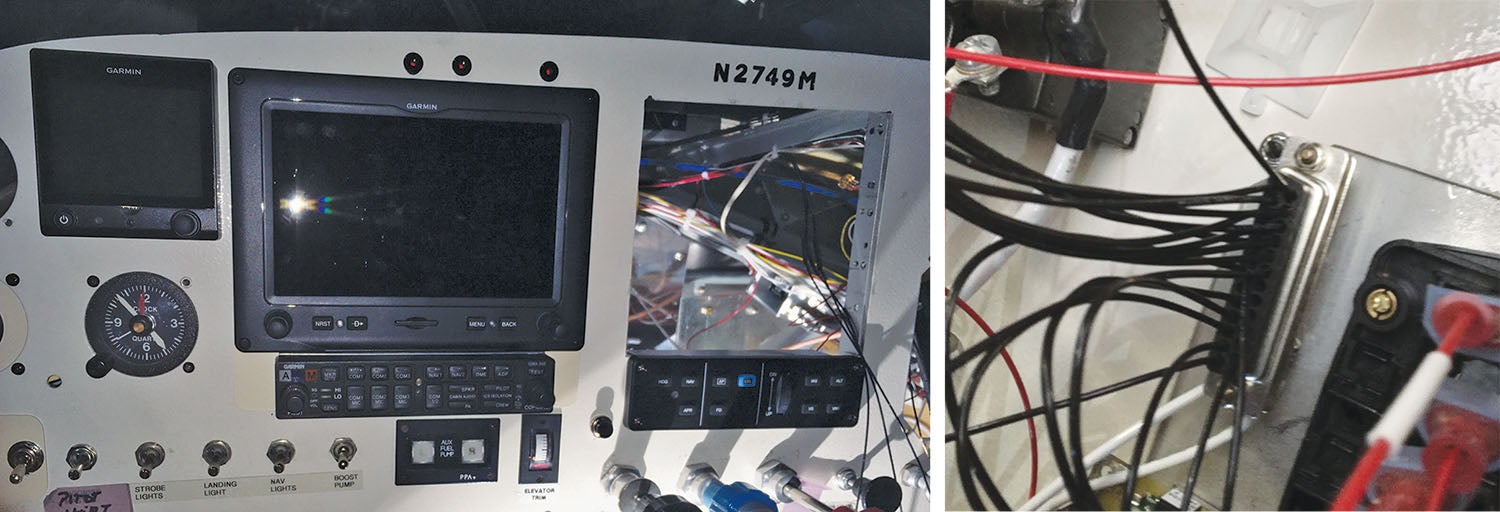
You might remember that I’d mounted my Garmin GTX 327 transponder remotely—even though it’s designed to be panel mounted—because I could control it with the G3X Touch EFIS. However, it got mounted in such a way as the face was hard to see, and I needed to change some configurations to get it to work. Solution: I found that by using my iPad as a giant magnifying viewscreen, I was able to read the transponder enough to enable remote control from the G3X touch. Necessity, mother of invention.
January 19, 2020
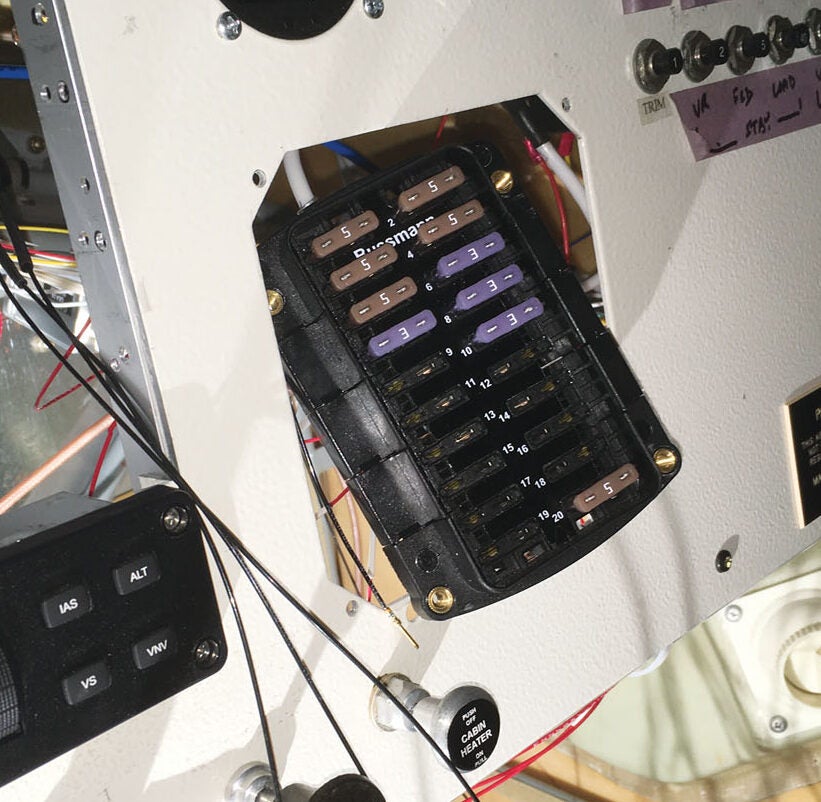
Another milestone day! First, I tackled the fuel-gauge problem. Easy to diagnose as the end of the fuel sender is reachable and revealed it had no power. With the help of a flashlight, a mirror and some head craning, I found a lonely pair of wires nicely terminated in a ring terminal buried in the bundle running behind the panel. For some reason, I had labeled it “panel power” when I originally disconnected it back when I rearranged the circuit breakers. That’s an oddity and not an explanation for why I lost it. Once I fed it some volts, the Belite fuel gauge came to life. I tidied up the remaining wires, closely checked everything in the engine compartment, reinstalled the oil cooler SCAT tube (access to the back of the engine was easier without it in the way), pulled the plane outside and started it up!
On the good-news front, it started and ran like a champ. I had plugged the engine heater in when I first arrived so it was toasty warm. That also gave me an early indication that the CHT, EGT and oil temp sensors were working.
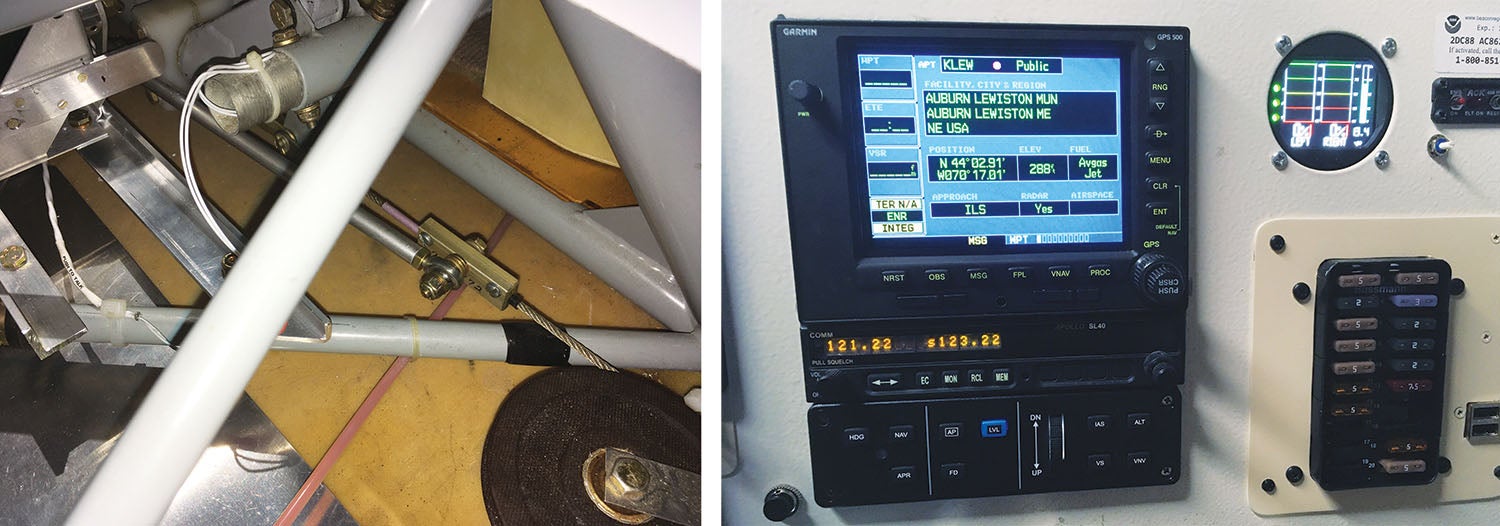
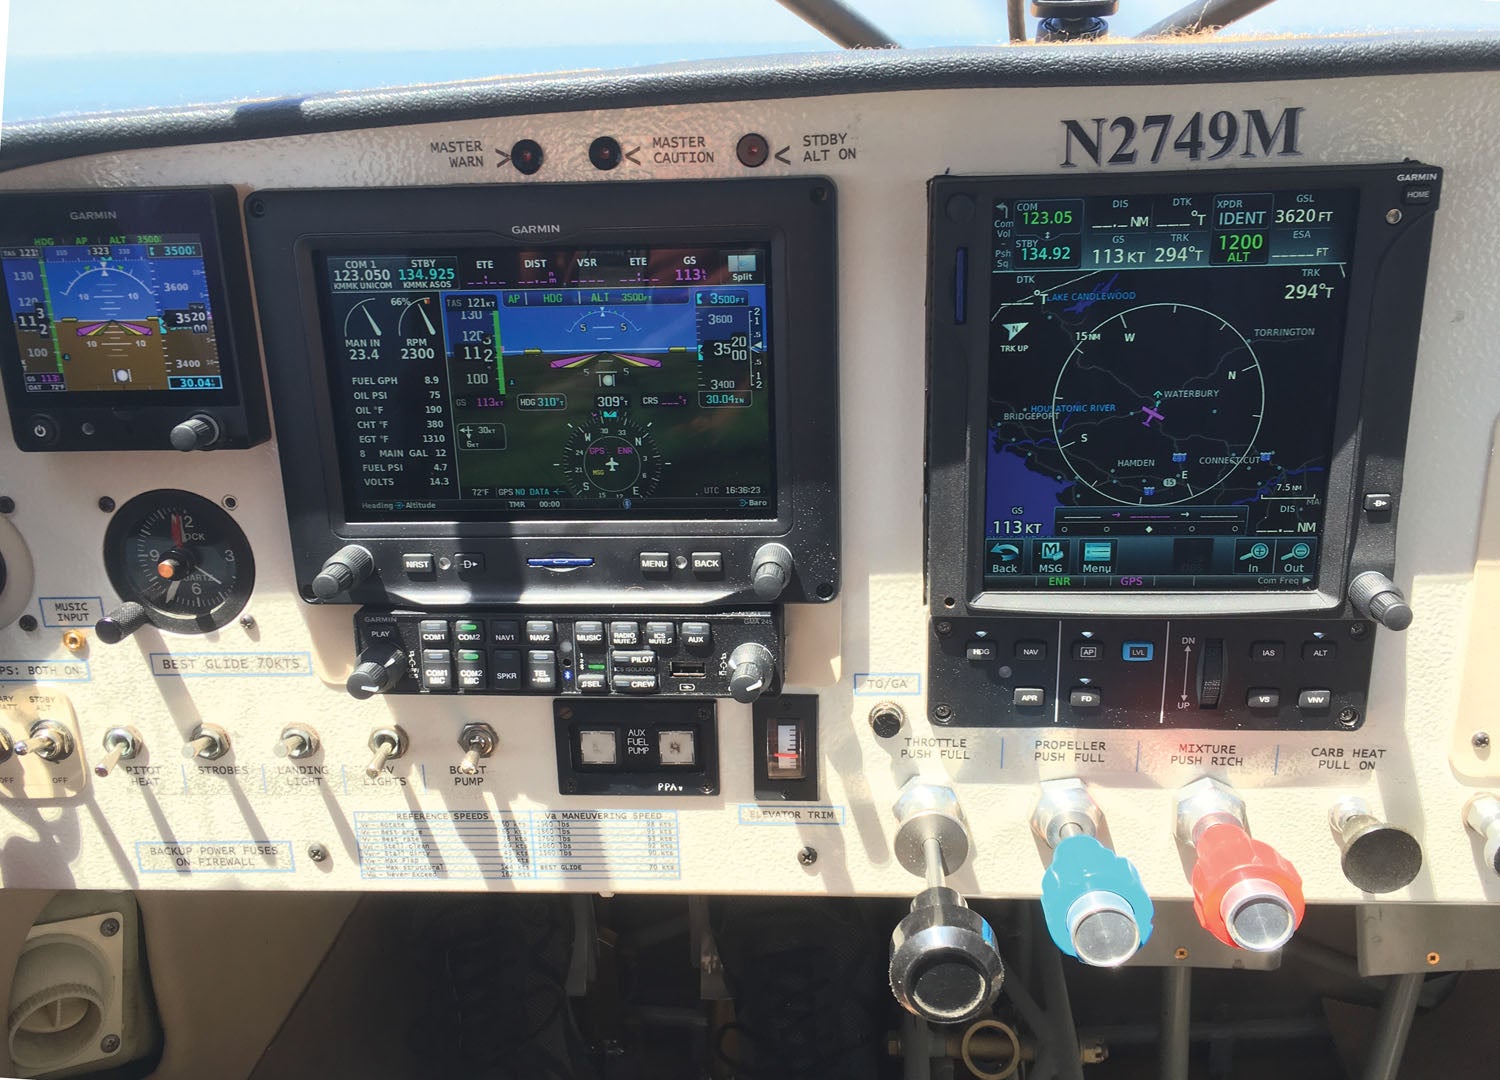
Just for fun, I plugged in a course to KBDL and was pleased to see it show up on the G3X and the G5. Of course, I’d seen that in my basement, but it was very pleasant to see it in the real world. (I never had the G5 in the basement to test these features.) Setting baro or heading on either the G5 or the G3X automatically changes it on the other box as well. If I lose the G3X in flight, the G5 is also capable of feeding the autopilot. It’s a reason to stick with one brand.
Open items: The oil temperature seems low to me, so more testing is needed there. And it’s time to hit the manuals again and refresh my memory on reading the engine display during leaning.
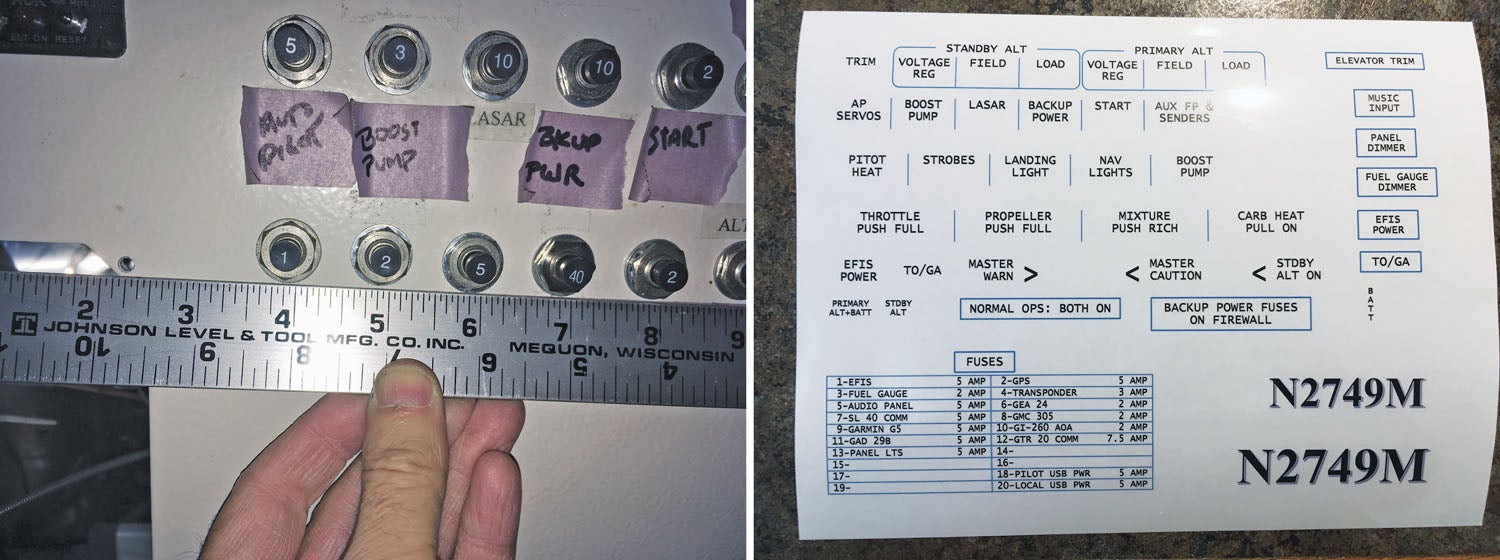
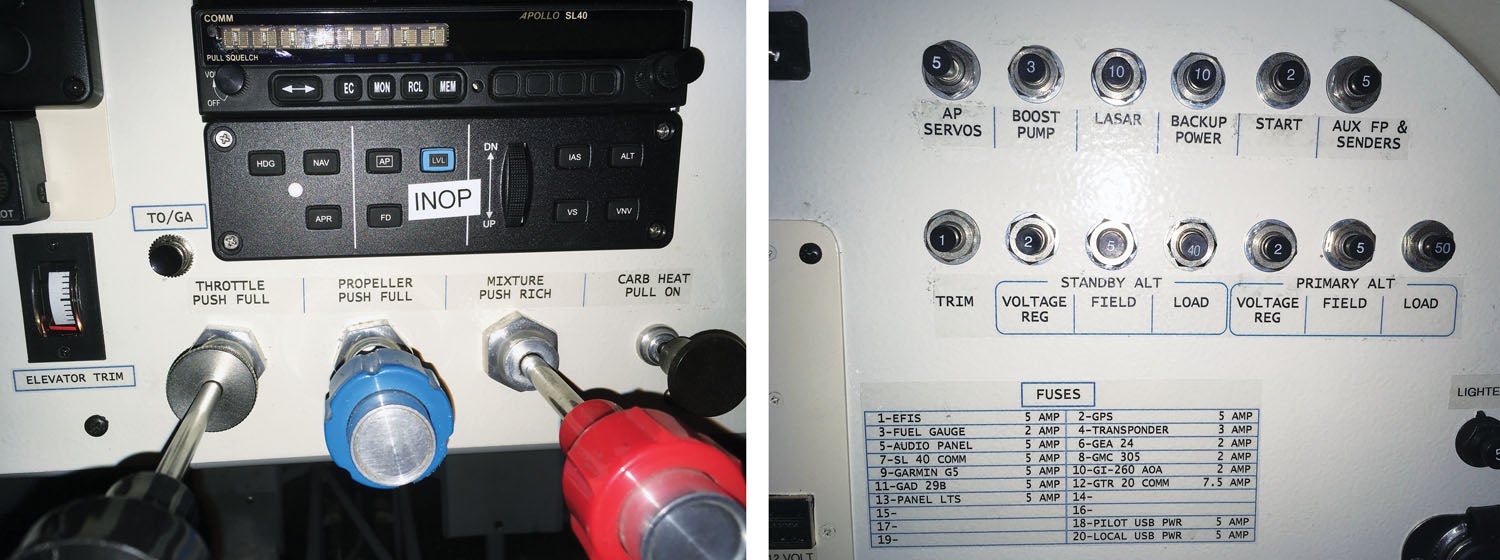
Fuel pressure and flow look right. I won’t get fuel level indications on this until I calibrate it. That is planned for tomorrow. I have an indicator issue on the standby alternator, though. When I turned the main alternator off, the warning indicator lit up properly and the voltage stabilized where it should, but the indicated load on the secondary alternator was zero, which was clearly not the case. My guess is one of the pico fuses is bad, and silly me, I didn’t test them before I installed them. Fortunately, they are fairly easy to reach. I’m seeing a load of 9 amps on the primary with everything on except the pitot heat and landing light. When I turn the former on, it goes up to 15 amps, well within the capabilities of the 40-amp main and 30-amp backup alternators. It is a little amazing how electrically efficient new avionics can be.
The radios are a bit of a mess, I’m afraid. Today was also the first day I plugged a headset in. I hadn’t bothered before because I know from the experience that the hangar is a great Faraday cage. Listening to the AWOS on com #2 (the GTR 20) was OK, except there’s a lot of static. And there’s static on the other channels I tried as well. When I switch to com #1 (the SL 40), there’s a loud crackling—and with each crack, the TX light on the SL 40 flickers. I could hear the AWOS, so it is receiving. When I plugged the headset into the copilot’s jacks, the audio was the same, but when I plugged the mic in, there was a lot of noise and the selected radio light on the audio panel started flashing. I was very careful to use shielded wire and the shield is only grounded at the audio panel, but clearly, I have to recheck all that wiring carefully.
After I put it back in the hangar, I carefully went over the engine, checking for leaks and found none. That is actually the final step in my condition inspection that I started on October 6! So now I can get that bit signed off.
Tomorrow I’m going to drain the fuel, weigh the plane and then go through the fuel calibration routine.
January 25, 2020
A couple of hours after work on Thursday and then all day today, and a few more things are off the checklist. Thursday was all about calibrating the fuel gauges. I decided to give the system plenty of points of reference, so I put the fuel back in one gallon at a time. Tedious but done. I did have to resort to draining about a gallon and a half out of the starboard wing to complete filling the port wing. It’s worth taking your time with this step so the fuel gauges have good resolution. You could do it in bigger chunks, but the accuracy between the measurement points is compromised.
Then I worked on the audio problems and the issue with the copilot mic. It was annoying taking things apart, but I found that I had shifted the three pins from the copilot mic over one space in the plug. Now both mics seem to work properly. I still have a lot of static, though. It’s not coming from the radios as it doesn’t change volume when I change the radio volume. The heat shrink I put on the cables near the jacks has completely eliminated the crackling I heard before.
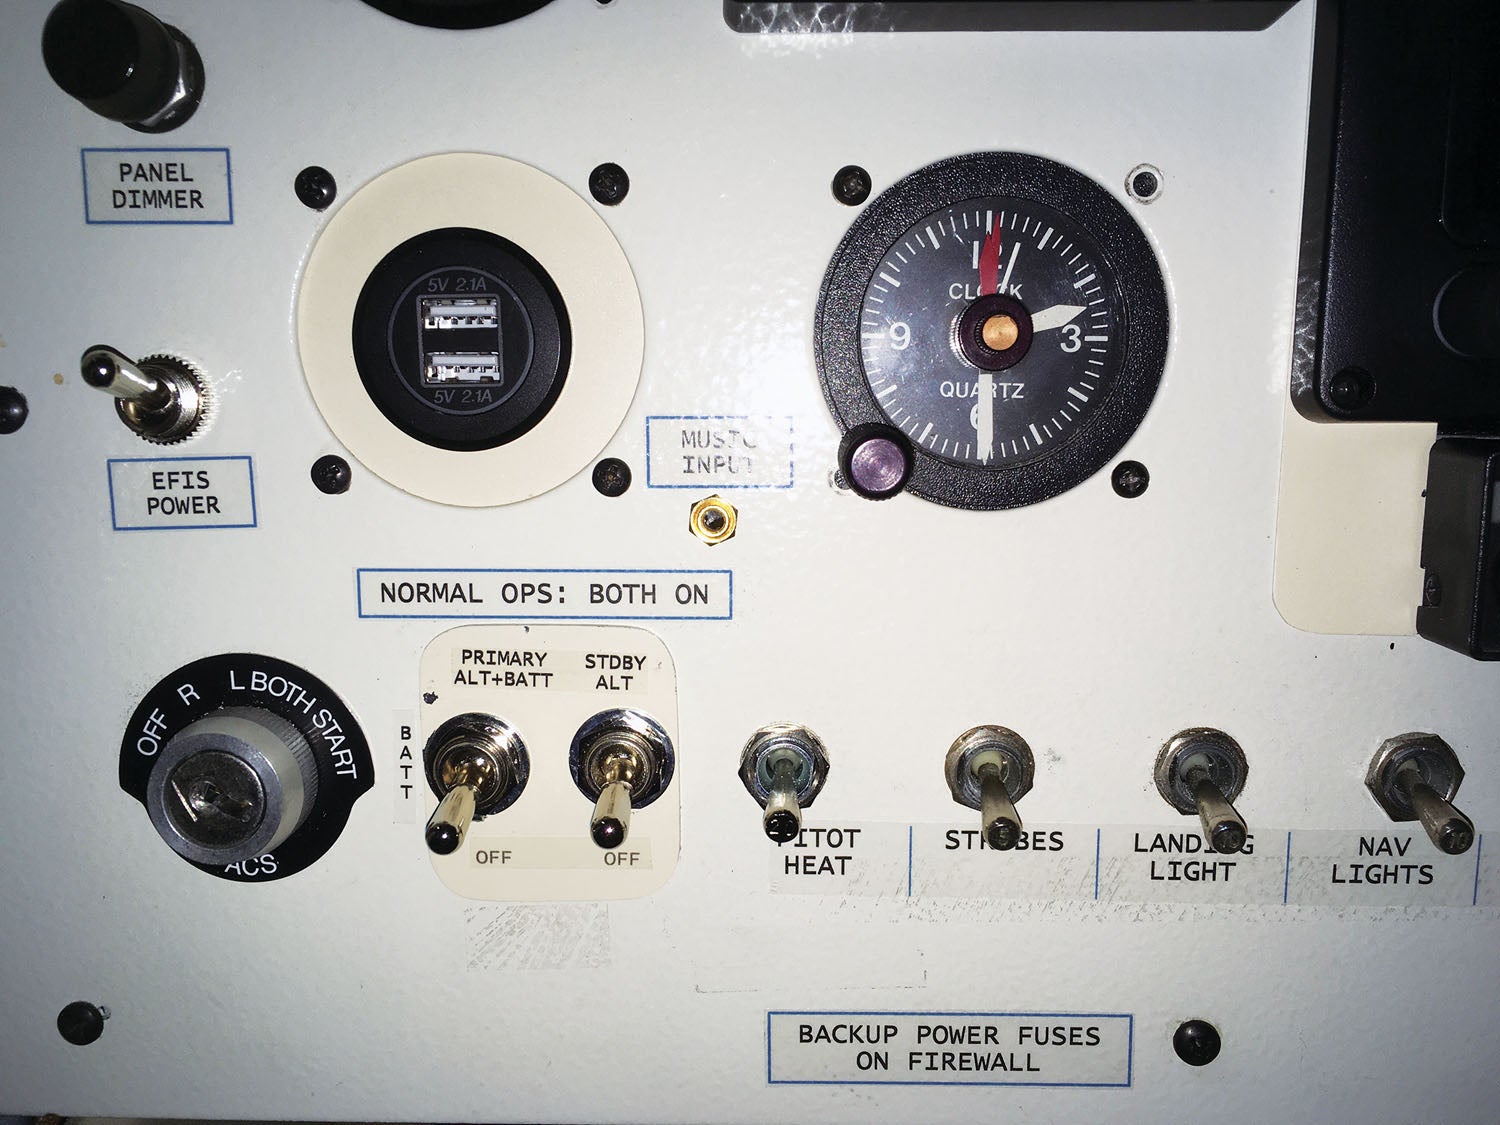
I spent the last bit of the day making new labels for all the new bits on the panel. I needed another 30 minutes to finish them, but cold and hunger won out.
February 3, 2020
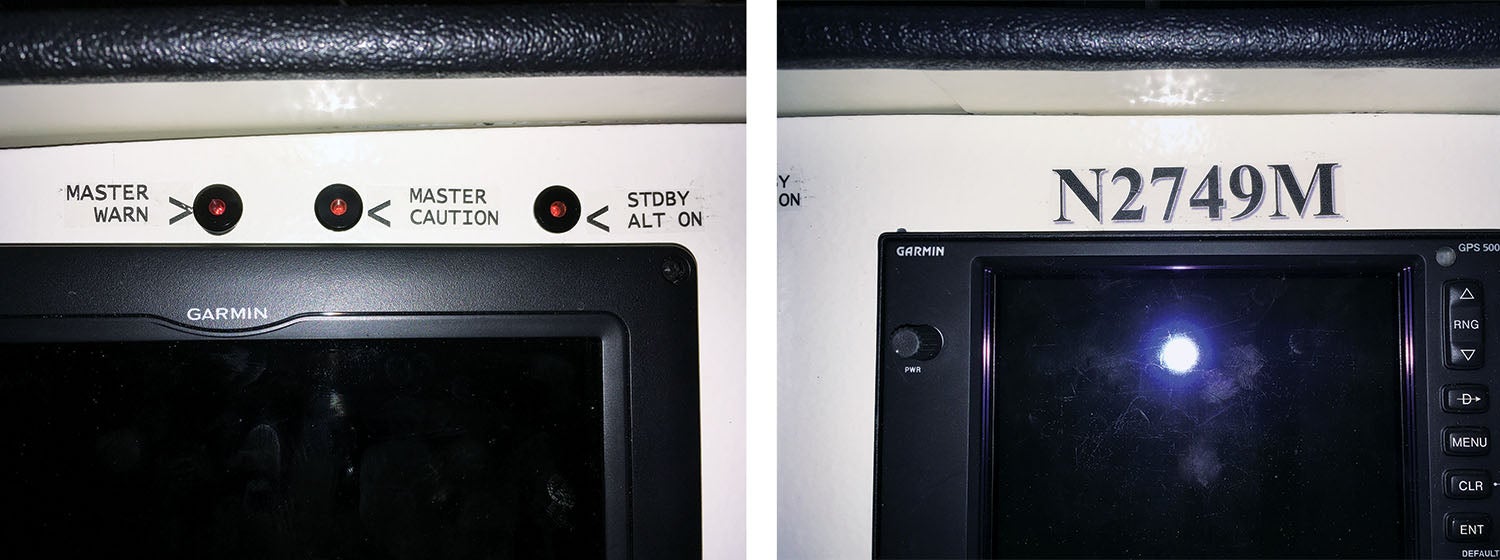
Back to the alternator indications. I verified connectivity to both sense wires on the standby alternator shunt and that they were in the right spots in the connector. I did find that I didn’t have it set up right in the G3X—the default was a gauge with zero in the center to read positive and negative. Since an alternator B-lead should never see negative, I reconfigured it for positive only. This time when I tested it, it worked. There is some amount of hysteresis, and maybe I just didn’t wait long enough last time. When I switched to the backup alternator, it was probably 5 to 10 seconds before the number changed from zero.
I pulled the plane out of the hangar and fired it up. Saturday was a low IFR day here with ceilings at 800 feet, but it was calm and with little to no rain. I ran down to the compass rose and swung the compass. I was missing a compass card for the magnetic compass, so that’s sorted now. And finally, a high-speed taxi down the runway shows that the airspeed indicator works.
I mentioned last time that I labeled the panel using a Brother P-touch with 1/2-inch clear tape. It’s nice in that it can print two lines. When I bought the plane, I used it to relabel the panel, and it was fine. Functional but not pretty. I had been researching other options and decided to try inkjet-printable clear labels. I bought some from Amazon (search product B07HFF1PH7), and so far I’m really happy. I used Microsoft Word to create a page of labels. Word lets you insert tables and specify the exact width of cells, and I used that to get the spacing right.
On Saturday, I brought the sheet to the airport and started applying labels. I was a little disappointed that the text was a little translucent, but it was still readable. Then I realized that I got the labels for the landing light and nav lights backward. And finally, the big box listing all the fuses was a bit too large. That evening I tweaked the page to fix those. When I printed it this time, I said it was on “matte presentation paper” and to use high quality. The page that took 5 seconds to print out the day before now took over a minute, but the blacks were clearly much darker.
At this point, the project is physically complete. I should be able to get the four-month-old condition inspection signed off. Then I can start doing some calibration flying and debug the headset noise issue. I’m going to see if I can find a GMA 340 audio panel on the field to borrow. I bought my unit used. It behaved oddly enough on the bench that I sent it back. He put it in his plane and said it worked fine and returned it to me. It’s behaving properly in the plane, but I’m still suspicious about it.
February 13, 2020
I went to the airport to debug the audio panel problem. Painful though it was, I started by pulling the G3X, the audio panel and its rack out of the panel. I have a test lead with a male DB pin on one end and a female on the other. I can plug it into any pin or socket on a connector, and I clip the lead from my multimeter to the other end. Using the ohm function, I can verify where it’s connected at the far end of the wire. I started with the GTR 20 and discovered I had the mic return (ground), and PTT swapped. The SL 40 was wired correctly.
Today I spent a few more hours and discovered that I consistently swapped the tip and shield on every single jack. No idea where my brain was when I was wiring that the first time. I got it all sorted out, and now the intercom works! And the radios appear to. I tried to hail the FBO for a radio check, but I was inside a metal hangar.
February 16, 2020
It flies! We had an EAA Chapter meeting this morning, and I met with my A&P to get the long-awaited condition inspection signed off and then it was time to see if I remembered how to fly! It was a pretty nice day—45°, smooth and with good visibility. A thorough preflight and long run-up, and it was time to take to the skies. The plane still flies great, and I’m glad to report. I do have a couple of squawks, with the biggest one being that the airspeed is reading low. I flew 30 miles in a straight line showing a ground speed of 112 knots, and then turned around and flew back along the same line and got 135. So my airspeed should be somewhere in the middle—around 124 knots—which would be right. Unfortunately, both the G5 and the G3X read 90 knots. It must be a plumbing problem. I had installed a new pitot, but I did that earlier, and the G5 and the old airspeed connected to it showed reasonable numbers.
The other issue is a high-pitched whine from the primary alternator. If I turn it off and run on the backup alternator, everything is quiet.
February 23, 2020
Spent some time on a 32° ramp with an avionics guy and a pitot-static tester. We found that the connection between the pitot and AOA lines to the Garmin heated pitot just wasn’t airtight. In the end, I used a heat gun to heat up some short sections of hose and forced it over the metal pitot tube. Then conventional hose connectors made an airtight seal.
April 6, 2020
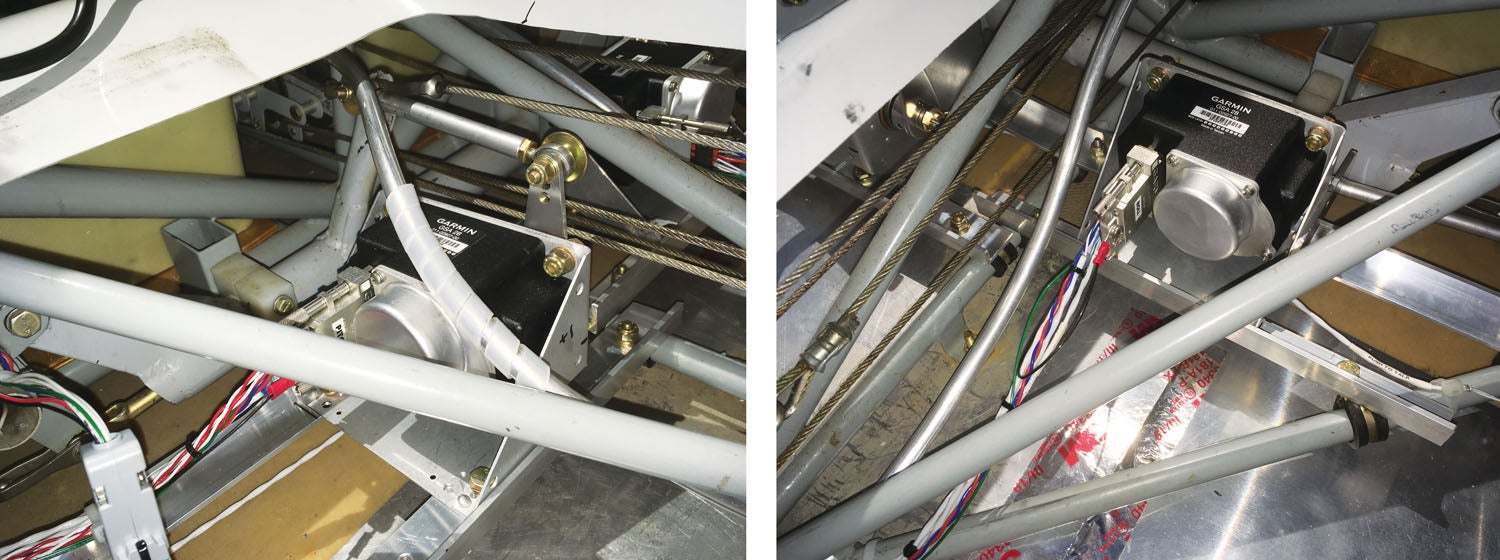
Took the penultimate step in my panel project this weekend. I installed the autopilot roll servo. I took the plane up for 45 minutes this afternoon. I had to tweak the max torque once but after that, it flew great. The first part was heading mode, and I enjoyed zig-zagging around the sky. When I got about 20 miles from the airport, I plugged a VOR then the airport into the GPS, hit NAV mode and let it fly me home.
April 19, 2020
99 and 44/100% done. This weekend I got the pitch servo installed. Yesterday was the mechanical bits. I ended up having to redo a bit of the roll servo mounting. The forward angle bracket I used interfered with the location of the pitch servo, so I made a new one that extends the width of the cabin, and both are mounted to it. (For the benefit
of non-GlaStar owners, the pitch and roll servos are located beneath the seats near where the sticks transfer their motion to the control cables.)
I got it all back together about 4 p.m. It was sunny and 60° today but blustery. The winds were 15 knots and gusting to 24, but it was more or less down the runway, so I went for a quick test flight. It was pretty bumpy up there, but the autopilot seemed to do a good job maintaining altitude and following the heading bug. I didn’t try anything fancier than that as I needed to get home.
April 26, 2020
I reread the installation manual and got the CWS (control wheel steering) button enabled. I also enabled auto-trim. I took another test flight today. It was sunny with very light winds on the surface. It was surprisingly bumpy up in the air. I flew from Meriden (KMMK) to three nearby VORs (HFD, ORW and MAD) and then made the GPS 36 approach back to home base.
On the test flight, I took off from Runway 18, then did a U-turn, climbing on downwind. At 1500 feet msl, I engaged the autopilot in altitude and nav mode. I’d plugged the flight plan into the GPS, of course, and dialed 2500 into altitude pre-set. “George” flew the entire flight from that point until after going missed. I hand flew the circle back to reenter downwind for a landing back on 18. At first, the AP was hunting in pitch mode—40 feet low then 40 feet high. I disengaged and found the plane was way out of trim. I changed the pitch gain from 2.5 to 3.5, and the rest of the flight was as rock steady as the turbulence would allow.
Lessons Learned
As with all things in Experimental aviation, it was a learning experience for me. I had a lot of wiring experience, having previously built an electric pickup truck, but there were still new skills to learn and new tools to buy.
Patience. The plane was down for five months while I did this project, and almost exactly six months before I proclaimed it done. There were many parts of it that took much longer than I could have envisioned. They were often “simple” things—finding the best way to route a wire or where to mount a box.
Flexibility. I spent a lot of time and effort trying to make the 10-inch G3X Touch fit in my panel before finally making the leap to the 7-inch unit. Not only did it fit easily, but it also saved me almost $2000.
Learning. Not only the installation skills but also the hundreds of pages of pilot guides for all the new instruments.
Persistence. There will be days where you’re stuck, and nothing is working right. Take a break and work on something else or get away completely. I solved several problems in that dozing state right before I fell asleep at night.
Epilogue
I didn’t sit still for long. I flew the plane for 15 hours after finishing the epic instrument panel upgrade and loved it. I love the G3X Touch interface, and I especially love a rock-solid two-axis autopilot coupled to a WAAS-capable GPS. At the time, my choice of GPS and com radio—a Garmin GPS 500W and an Apollo SL 40—were driven mostly by my budget. Both are good units, and they worked really well. I spent the money to get the GPS 500W upgraded to the latest software so I could use Garmin’s Connext feature to transfer flight plans from ForeFlight on my iPad. That’s an awesome feature as I’ve certainly done my share of knob twisting flight-plan entry in the past. But still, my original dream was a touchscreen GTN.
Things came together a mere three months later (July 2020). First, Garmin had come out with its updated “xi” GTN units, which meant fairly new GTN 750s started showing up on the used market for “only” 70% the price of a new one. And the second thing was the meteoric rise of Tesla stock. I don’t claim to understand it, but the share price tripled in a month. I sold a few and promised my wife I’d get some of the money back by selling the parts I’d pulled out. I spent the weekend back under the panel–this time hot instead of cold.
Fortunately, the GTN nicely fits in the spot previously held by the GPS 500 and the SL 40, and it was a simple matter of swapping racks. Access to the wiring with the glareshield off is easy, and this whole project has made me an expert at moving wires in connectors! I moved control of the transponder over to the GTN to gain some space for more data fields on top of the G3X screen.
I’ve flown another 20 hours since then, and the whole system is living up to all my expectations. I especially love Connext because I can make flight plan changes on my iPad or on the GTN 750, and they flow to the other device. And having a fully coupled autopilot—including vertical navigation—makes instrument approaches so much less stressful. I can’t imagine going back to round gauges.
Photos: Rick Beebe & Andrew Scott.
![[Credit: JetStream Rider]](https://www.kitplanes.com/wp-content/uploads/2026/04/AdobeStock_345999332.jpg?w=218&h=150&crop=1 "2026 Avionics and Lights Buyer’s Guide")
![[Credit: Radiant Technology]](https://www.kitplanes.com/wp-content/uploads/2026/04/550095_5165745cc27748a598699799d796fd94mv2.jpg?w=218&h=150&crop=1 "Radiant Technology Unveils SafeGyro")
![[Credit: Dynon]](https://www.kitplanes.com/wp-content/uploads/2026/04/EMS-stand-alone_HDX.png?w=218&h=150&crop=1 "Dynon Unveils Scalable Engine Monitoring for Kitbuilders")


Message for Rick Beebe,
Hello, noticed a circuit breaker labeled “Lasar”., assuming this is for Lasar electronic magnetos, I have recently removed two working Lasar mags from our Lycoming IO360. If you may want them, controller, wiring and timing box as spares or for parts we’ll happily make him a great deal.
Thanks and oh, nice job on the Glassair panel!
Glad to know “my plane” is still flying. It was built in Paradise Valley and Overgaard (Mogollon Airpark) Arizona. I gave it up because the stubborn and antiquated FAA wouldn’t recognize recreational flying (at that time) for many. My 166 combat missions IN A4/A3’s didn’t have any weight.. As the Pres/VPres of EAA chapter 1044, I got some help bucking rivets and attaching wings, but I didn’t want to spend money and time on elaborate electrical systems. I do greatly admire those who wrestle with those systems and modern technology surly has a batch to choose from. I graduated to a light sport RV-12 and continued to fly until I was 86. I passed my 91st birthday on Veteran’s Day and still miss recreational flying.
Comments are closed.