 Let’s take a moment to catch you up on our RANS S-21 build: So far we have a fuselage constructed, sitting on the wheels, and many of the miscellaneous interior components have come together. Yes, it’s beginning to look like an airplane. We’re in that part of the build where we start considering hanging the engine. Although most S-21s are built with the Rotax 912—and the Titan 340 is now an option—we decided even before we started building that we would use a Lycoming IO-320 with a constant-speed prop. Randy Schlitter, the owner of RANS, confirmed at the time that the IO-320 would be a good fit for the S-21, so we felt confident in our choice.
What’s more, Randy happened to have a used Lycoming IO-320 out of a Piper Twin Comanche available. It had been overhauled 20 years prior and pickled. We brought it home from Kansas with the airframe kit and it has been sitting, untouched on a pallet, waiting for our attention. I had never heard of the “pickling” process for anything other than food items, but the preservation process is, in theory, the same. Now was the time to finally give our engine the attention it needed to verify it was ready to be an airworthy powerplant again.
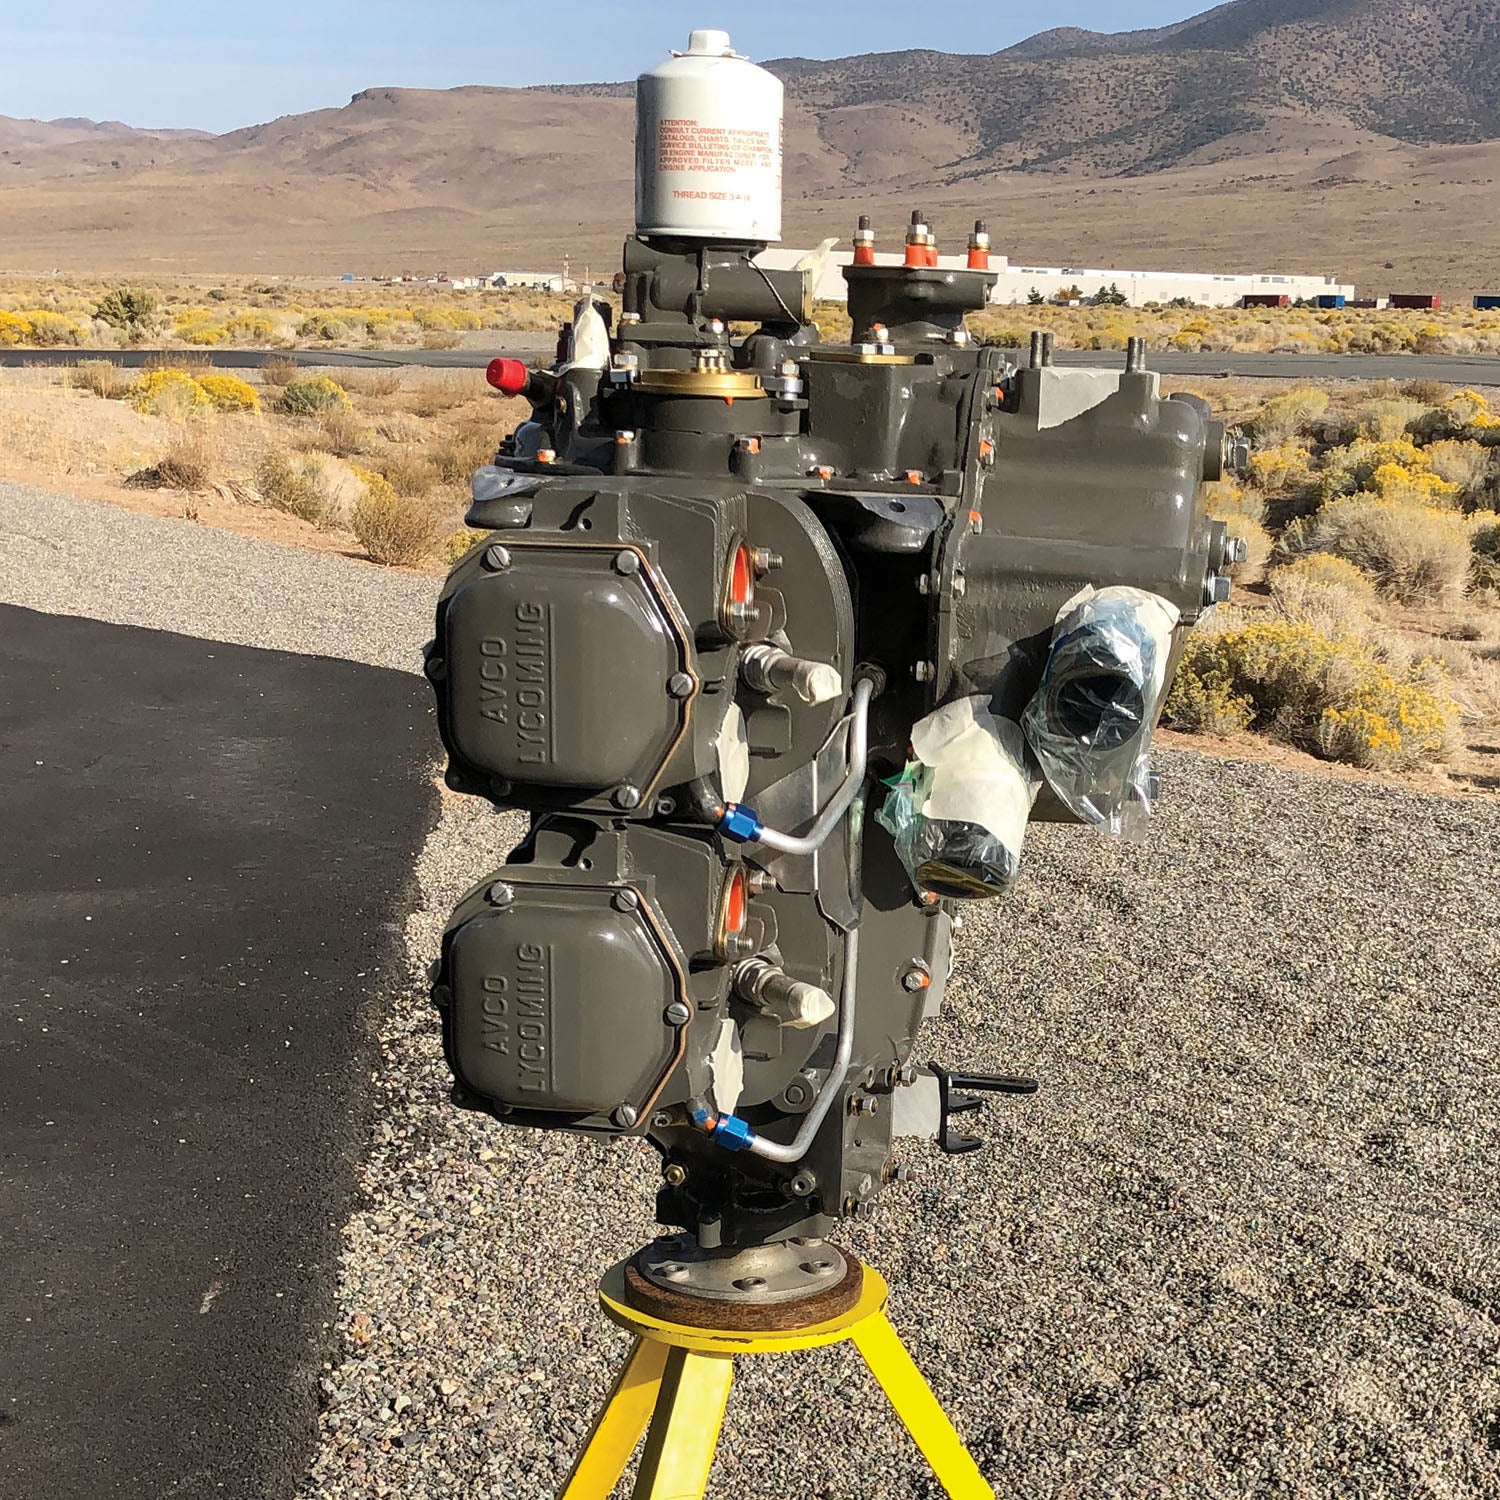
There were some details in the interim that Mike took care of. The first was a change in the Lycoming’s induction system. Since it came from a Twin Comanche, the IO-320’s sump (the area that holds the oil) was configured with a rear intake for the throttle body. But we needed the vertical, or updraft, configuration. The nice thing about this is that you just change the sump to the configuration you need—Lycomings are helpfully modular in that respect. My other concern was: Would it fit the area we have with our cowl? Several sources assured me that that would not be a problem. Mike purchased the sump we needed and it was awaiting its time to be attached. Another weird detail of this was that the sump that we purchased was not painted the “right color”! What the heck? It needed to be “Lycoming Gray.” I really thought he was pulling my leg about the name of the color. But, no, there really is a paint out there called Lycoming Gray, so we ordered some of that up and had it on hand.
inspection after it dried out a few
days. Not a problem in Nevada!
Experienced Eyes
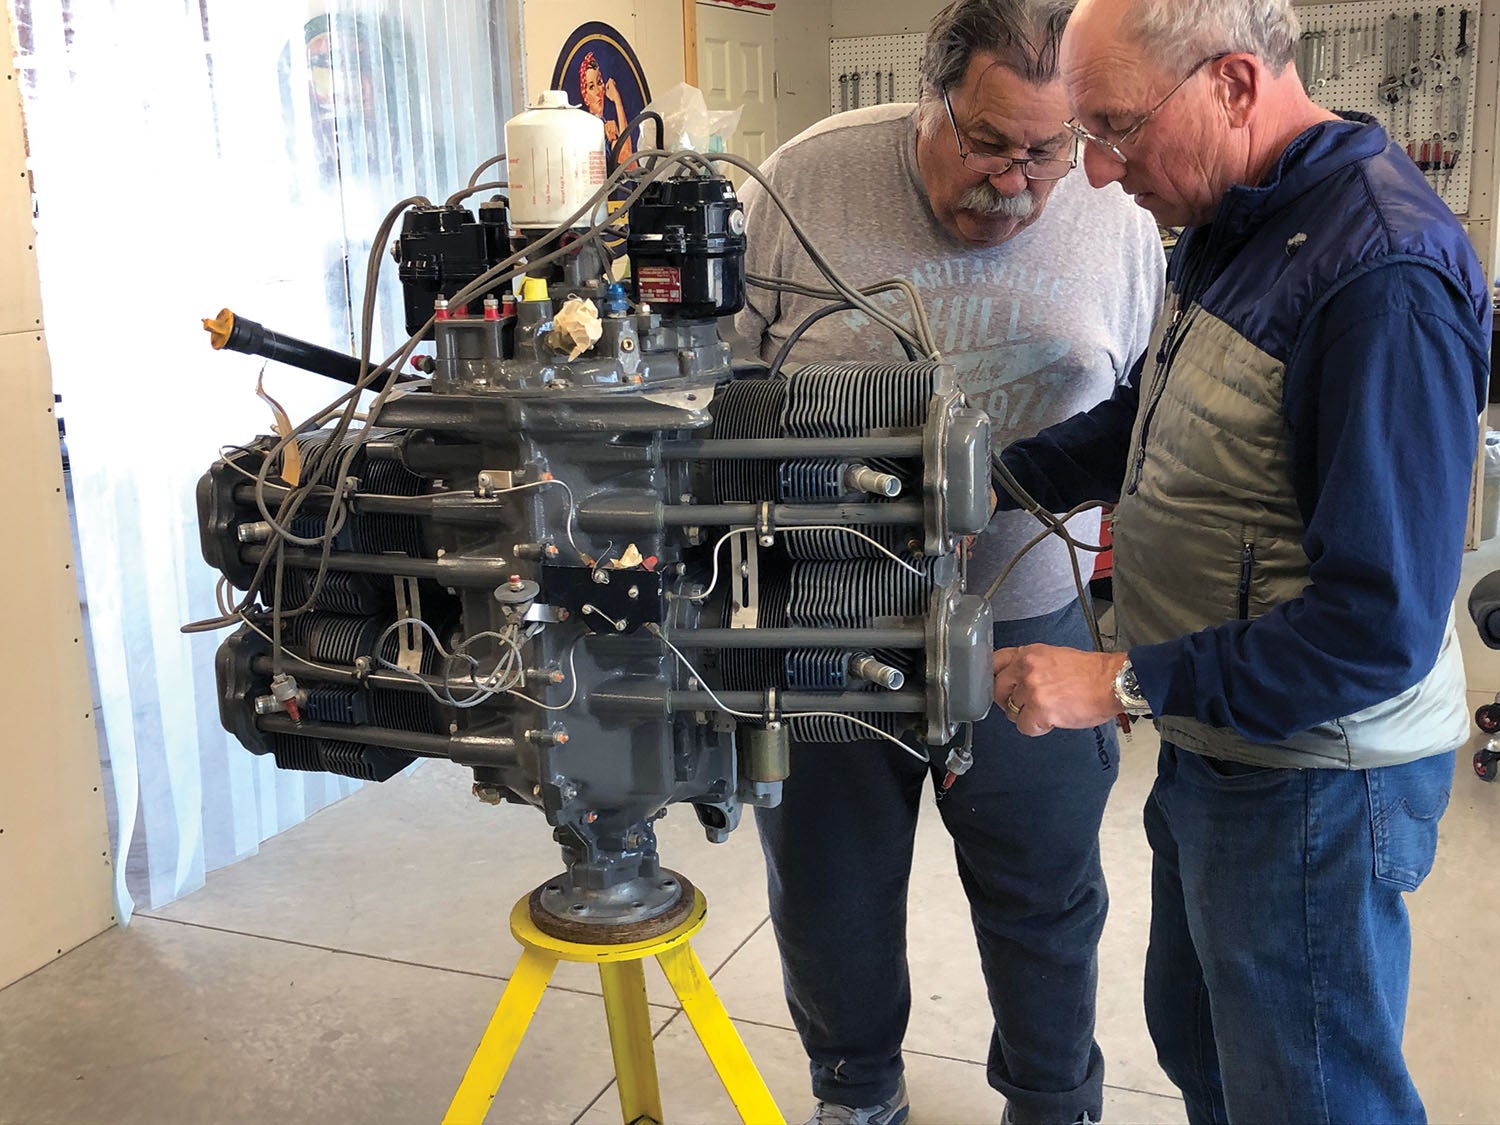
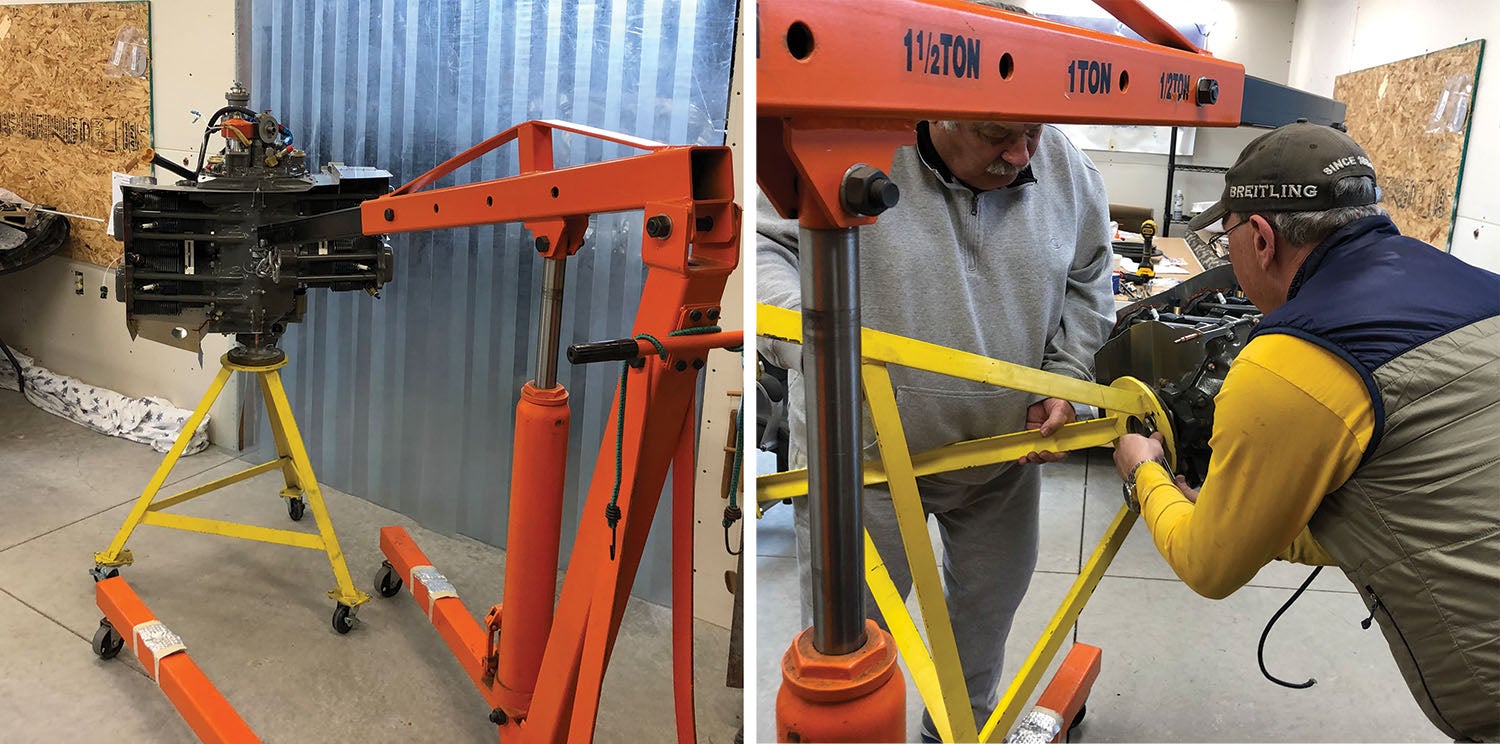
It was time to give the engine a brief once-over with our neighbor friend, Paul Dye (you may have heard of him), who happens to have been through the Lycoming engine school and has all the right tools for the job. Paul is loaded with the knowledge and expertise to assist us through this process. Mike, Paul and I wheeled the engine into the workshop, lifted it with a “cherry-picker” (engine hoist) and attached an engine stand to the prop hub.
My first impression was how dusty it was! Although being covered, it was, after all, not a new engine—and before opening it up at all, I wanted it to be clean. That’s the best way to keep dirt from getting inside the engine. Mike and Paul quickly looked around the engine for anything that looked unusual or was a “show-stopper,” but all looked good on a cursory review of the engine’s exterior. Paul gave me some helpful tips on areas that needed to be plugged and taped over so I could proceed with cleaning the engine.
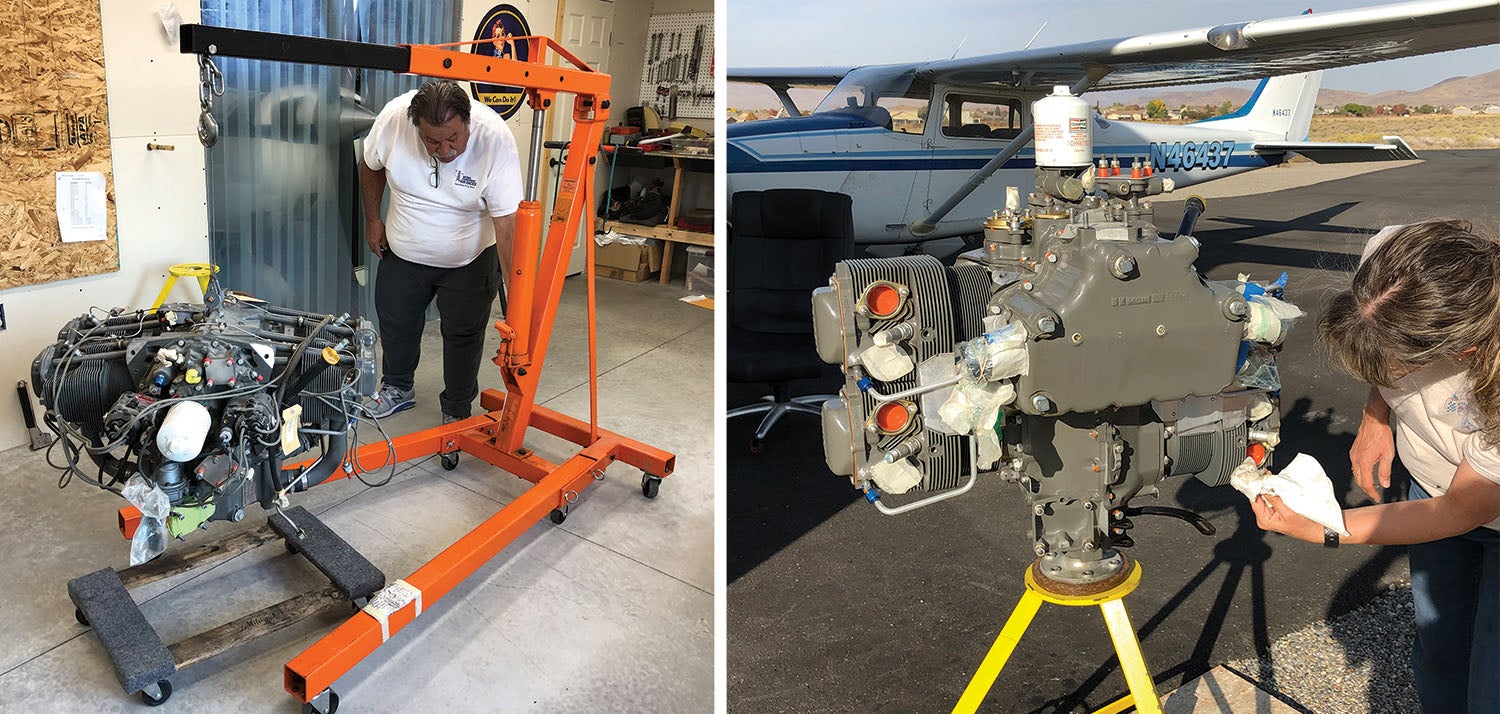
Mike and I got the engine prepped for cleaning and wheeled out onto the asphalt apron behind the hangar for its first bath in many years. Mike, with all his cool tools, just happens to have a siphon gun that uses air pressure and mineral spirits as a pressure washer—that turned out to be perfect for the job. Oh my, it worked so well and it looked so much better after I was able to get in there with a toothbrush and get it down to the details of being cleaned up! Now I could finally see some hope that all would be OK.
Paging Dr. Dye
After a few days of drying out, it was time for us to begin the teardown. Paul was like a surgeon getting ready for a major operation and had the plan in his head about how we were to proceed and assist in the process. I was the “surgical nurse” setting up the table covered in a towel and labeled 1,2,3 and 4 with taped separations and an IN and OUT for each cylinder. I was ready to be handed pieces and parts to put them in the directed areas. Mike was his surgical assistant, prepared to assist in the “operation” as necessary. I have never seen an engine apart before, so this was a new and exciting experience. Mike goes further into this; see “The Unpickling,” below.
I was handed so many pieces and parts and just did as I was told, trying as hard as I could to pay attention to what Mike and Paul were doing and learning the names of the parts—so that when I was asked in the near future to hand them back, I would do so appropriately. It was so cool being a witness to this process. Talk about an education! It is one thing to read about how an engine works, but I have a much better appreciation for how many moving parts there are. I was so relieved that when they got to the point of the teardown that was “far enough” to inspect it, they were both satisfied that there was no corrosion and the engine “looked clean.” It was time to put Humpty Dumpty back together again. This was cause for celebration!
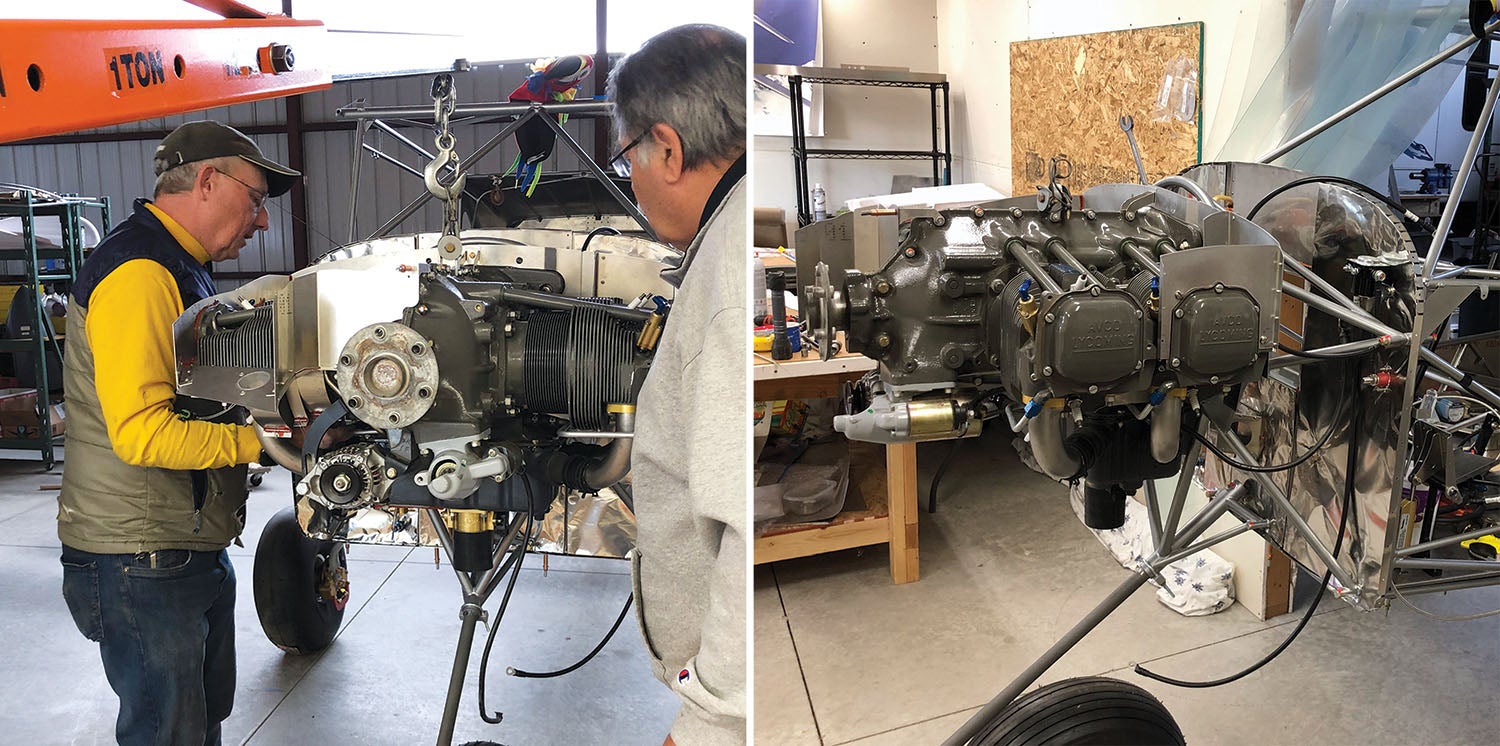
It was now time to prep the engine for hanging. One major act of construction that I somewhat remember from the RV-10 build was Mike spending much time on the airflow to the engine, assuring that the engine has what it needs, where it needs it, for proper cooling. And even though the IO-320 is dimensionally very similar to the Titan IO-340, there are differences in the baffling, so using baffles for the 340 would work for some but not all of the areas. Of course, since the engine was now clean and offered with Paul and Mike’s blessings, it was time to work on some of that baffling before we hung the engine. Again, see Mike’s thoughts on this: “Baffled,” Page 50.
Finally, in Place
The next major leap for us was to finally get this engine where it belongs, which is on the plane! We asked Paul back, this time with Louise, to assist us in this process. Having four people worked out great. The plane’s nose was poked into the workshop area where the now-hoisted engine was hanging. We got alignment to the engine mounts just right with height and slowly crept the engine up to the mount. We used the most common dynafocal mount, and it was explained to me how the bolts all point inward toward the center of the engine to provide an exact location and mounting strength. I was incredibly relieved to see that the prop governor fit perfectly into the “doghouse” that Mike had designed to provide clearance through the firewall. Within a half-hour, we had the engine aligned and bolted in place. Being that this is the first time I have been involved in this process, I was told that it doesn’t always “go this smoothly.” I was happy to get the engine on where it belongs and have it secure!
Props to Us
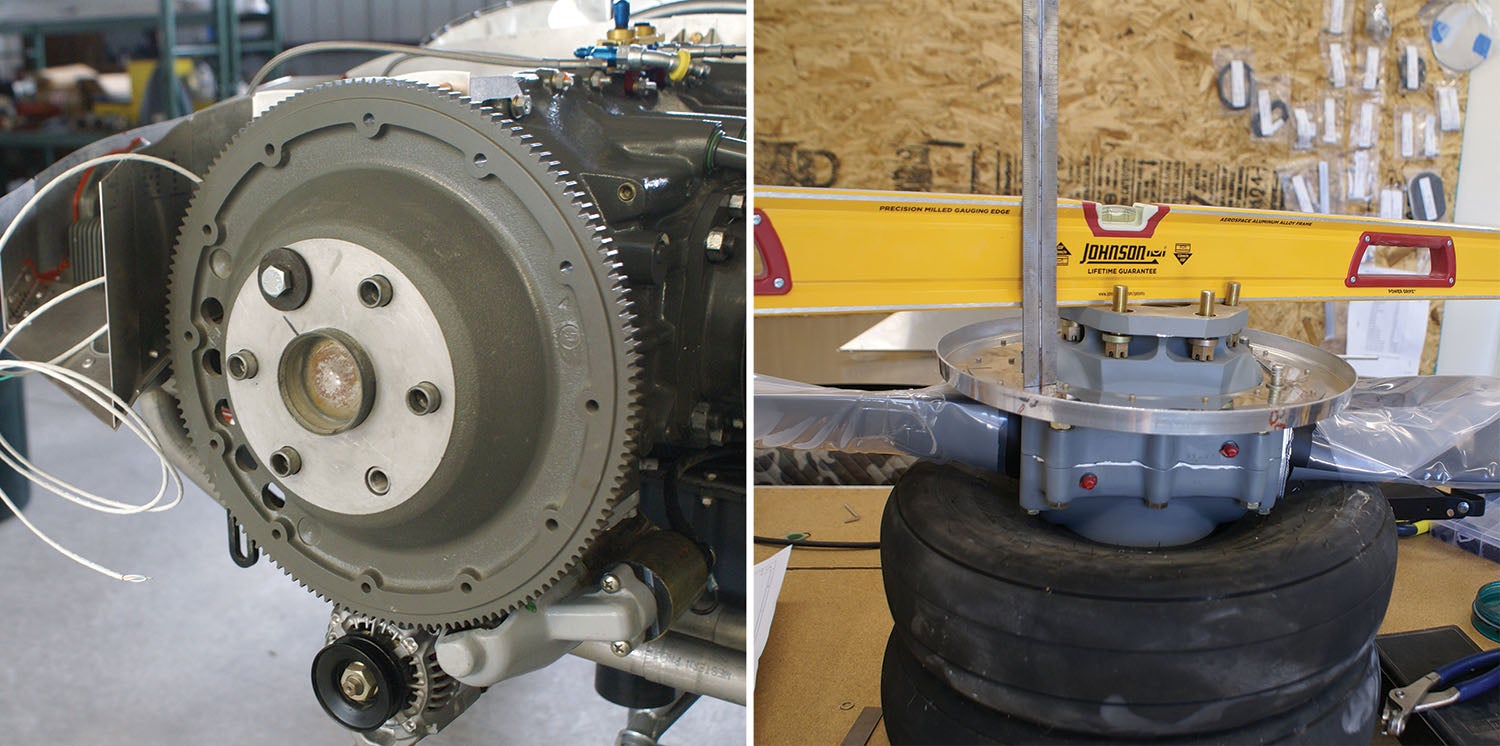
The next and final step to the process, which came several months after getting the engine mounted, was to get the prop hung. I wanted to get the prop in a safe place (hanging on the plane and off the floor of the workshop), but Mike didn’t want it “in the way” when he was working on getting the engine hooked up with all the various items that needed to be attached, wired and completed.
Finally, though, it was time and with Mike and our son Jed, they were able to lift the prop in place and secure it. The prop needs to be on for the engine cowling measurements that would be coming up soon in the process, but it was not final-mounted at this point with the alternator belt, O-ring and safety wiring still needed.

Even though my involvement at this point of the build was limited due to my overall inexperience, I learned a great deal. One observation made by builders, one that I’m just starting to come to grips with, is that if you decide to veer off of the track suggested by the kit designer, you better know what you are doing. If that’s not the case, you either need not do it or have people available to assist you through the process.
Because RANS recommends the Rotax 912 or the Titan 340 for the S-21, there are detailed instructions for them in the manual. Not for the IO-320, so we did our best, following the instructions for the Titan as closely as possible. That’s because the Titan is dimensionally “almost” the same as the Lycoming.
There is a ripple effect when making changes and all aspects of these effects need to be considered. As a new builder, I would never have known about these ripples and been in over my head had I not been surrounded by people who knew what they are doing and took the time and energy to think things through. Part of the beauty of building a homebuilt aircraft is the freedom you have in building the plane to your desires and needs. This is why it is called Experimental. I am in a terrific place to be able to have a plane built that will both meet our needs and have the incredible people surrounding me to make it happen.
Next up, we’ll start installing the electronic fuel injection and ignition system and look at how that system sets off yet more ripples in our build!
Photos: Laura and Mike Starkey.


