When it comes to doing the firewall forward installation on a homebuilt these days, there are two kinds of builders—those who are going to follow a set of plans and those who have to go it alone. Some kits and plans are very specific and supply everything you need to create a finished, flying airplane. The first category of builders fit into this niche. And frankly, if your goal is to have an airplane to fly as quickly and painlessly as possible, this is the way to go.
The second category of builder—the ones who are going to have to make decisions about where lots of stuff has to go in limited space—might be there for a couple of reasons. Some kits and plans leave much to the imagination (and believe me, I have seen some pretty wild imaginations). Then there are the builders who have very specific ideas of how they want to equip their new airplane, and these ideas are different than those of the kit or plans designer. There is nothing at all wrong with going off in your own direction; it is what homebuilding is all about. But if you are going to go this route (by desire or necessity), I suggest that you bone up on your chess playing.
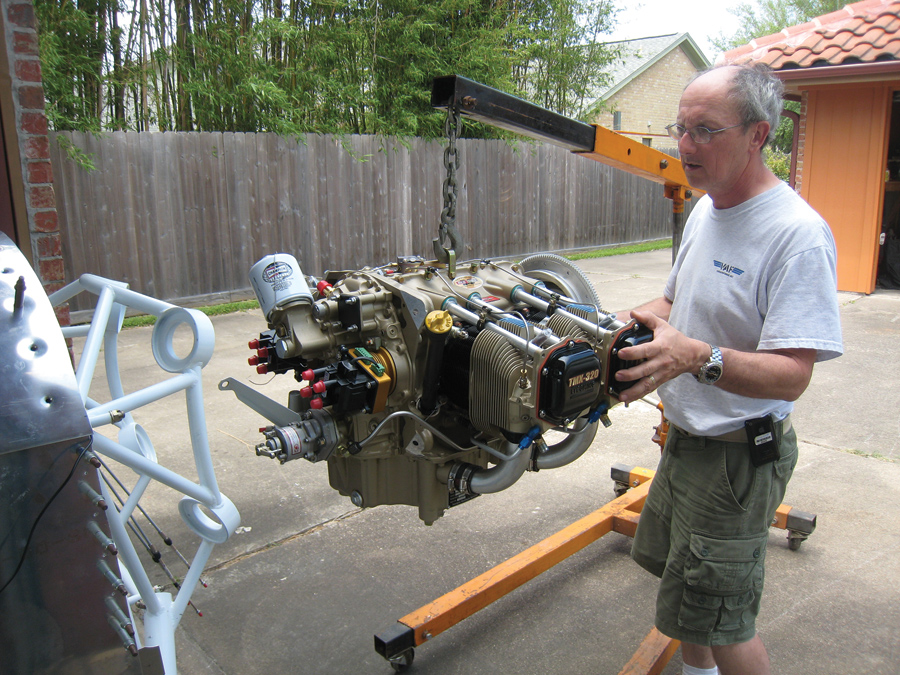
If you have to design your own firewall layout, plan an early fitting for the engine to get an idea where the challenges might lie. It’s a chance to introduce your airframe to its new engine!
Why chess? Because laying out a firewall is all about looking ahead. If you put one thing here, then it prevents you from putting another thing there. And just like chess, you have to look ahead at moves and countermoves by your “opponent.” The difference, of course, is that in chess, you have an opponent who is actively trying to defeat your plans. Hopefully, that’s not true in your airplane build! In the case of building, the enemy is simply a piece of space, and certain underlying problems such as where the structure is located to support heavy elements, what can (or cannot) be located next to what from a thermal perspective, and how tightly you can bend wires, plumbing, and controls.
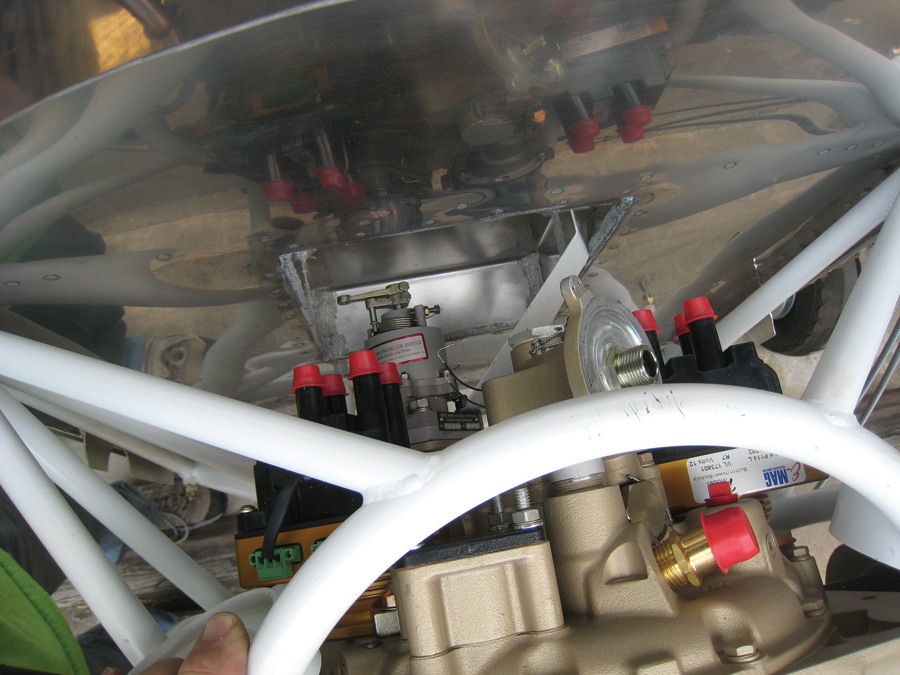
In this trial fitting of an IO-320 to the RV-3, the author discovered interference problems with the oil filter and the engine mount that required a longer spacer. It also became clear that there was little clearance between the P-MAGs and the firewall.
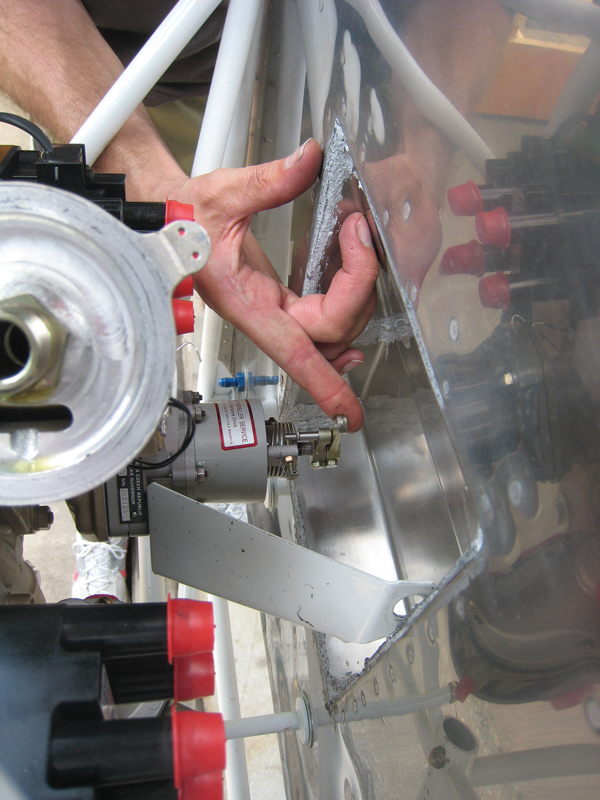
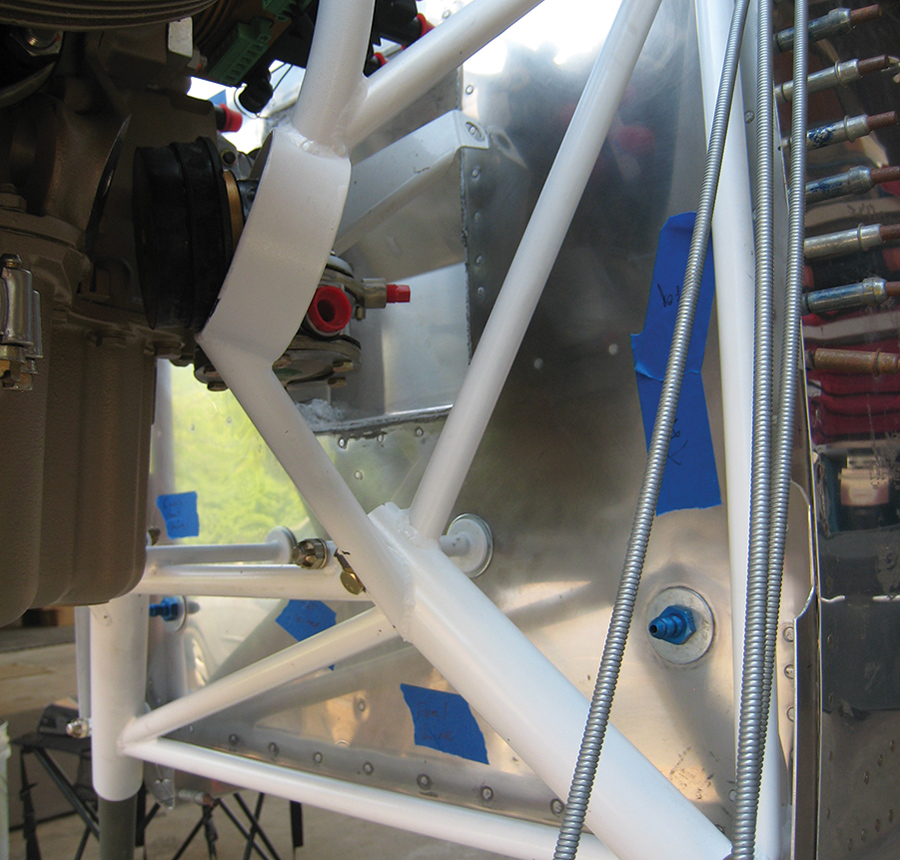
The trial fitting showed that the prop control cable bracket was going to need a redesign, since it hit the edge of the firewall recess.
Mounting items on the firewall is far from a trivial exercise of figuring out what fits, primarily because once you put something somewhere, you have drilled holes that can’t be “undrilled” very easily. It is important, therefore, to have a very good plan before doing anything rash—like breaking out the tools. I personally like to start with a list of everything I can think of that will be mounted on the firewall and everything that will penetrate the firewall. While at first, you might think these lists are identical, that’s not exactly true. Controls, wires, fuel lines, heater boxes—they all penetrate. Other items, such as sensor manifolds, shunts, and oil coolers, might just use the firewall as a convenient structure on which to live. So listing everything that will live on, or go through, that stainless sheet is a good place to start.
Priorities
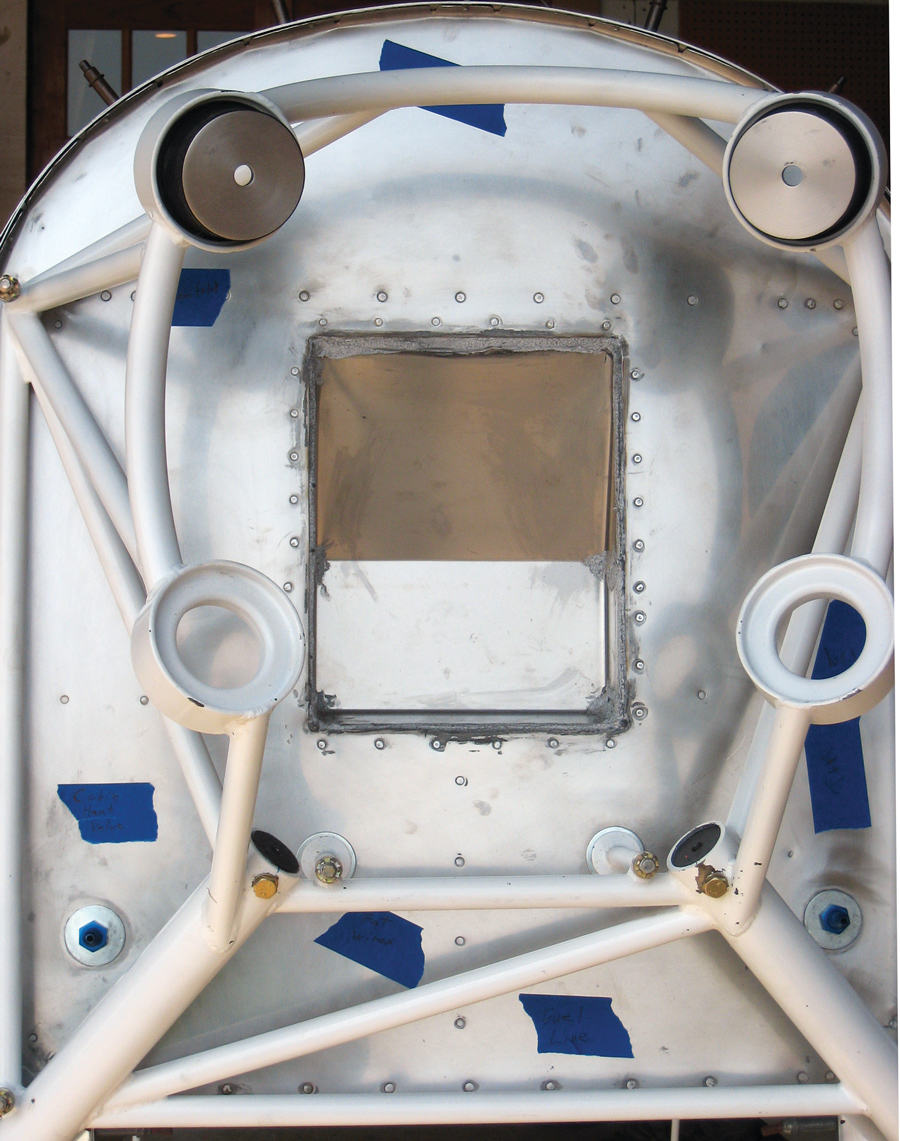
Next comes prioritization—what do you really need, and what would you like to have. Sometimes you are going to have to make decisions that trade items off the list. These are things that you really want to have on the airplane, but might have to give way to things that are essential. Let’s use my RV-3 project as an example. The RV-3 is a small airplane, so firewall space is limited. The engine mount is short, so the engine is very close to the firewall, making the location of large items problematic. In fact, the propeller governor has to extend behind the plane of the firewall, necessitating a recess in that location. The recess in itself removes “acreage” that might be used for something else, and makes it even more important to do some careful prioritization.
Given the up-front choice of a constant-speed prop, here’s what we need to have to make the airplane flyable:
- Engine controls (throttle, prop, mixture)
- Fuel line penetration
- Brake line penetrations
- Starter relay (the master is on the airframe side, back by the rear- mounted battery)
- Battery cable penetration
- Sensor and control wiring
- Sensors for oil, fuel, and manifold pressure
- Ammeter shunt
Now there are additional items that we’d like to have if we can fit them on:
- Heater box (it gets cold at altitude in the winter)
- Inverted oil system (we want this airplane to be capable of zero- G aerobatics)
Note the two lists: one required, one desired. It is important to organize your thoughts this way, and get started with the required list. But—and here is where the chess analogy comes in—you don’t want to forget about your desired list when laying out elements from the required list. In fact, you need to assume that you are going to be able to fit all of the desired items on until you just can’t figure out how to do one (or more) of them. Otherwise, you might get a little careless in allocating space and take up more room than you really need for the required items. Think in terms of preserving large acreage as much as you can. Crowd things together (within reason—think maintenance!) to avoid being wasteful of the one important commodity—firewall space.
Use tape to identify spots for various items and penetrations so that once the engine is removed, you can remember what you decided.
Let me remind you at this point that we have not actually used any firewall space. This is, so far, a thought exercise. Like staring across the board at your chess opponent, you aren’t actually making any moves. You are imagining them one at a time to see if there are any flaws in your plan: If the prop cable comes through here, then the throttle can go through there. But if I put the throttle there, then I will not be able to route the fuel line through that same spot because it can’t be bent that much—and anyway, it will be too close to the exhaust pipe. You get the idea; those are the kind of exercises you have to go through as you develop the layout.
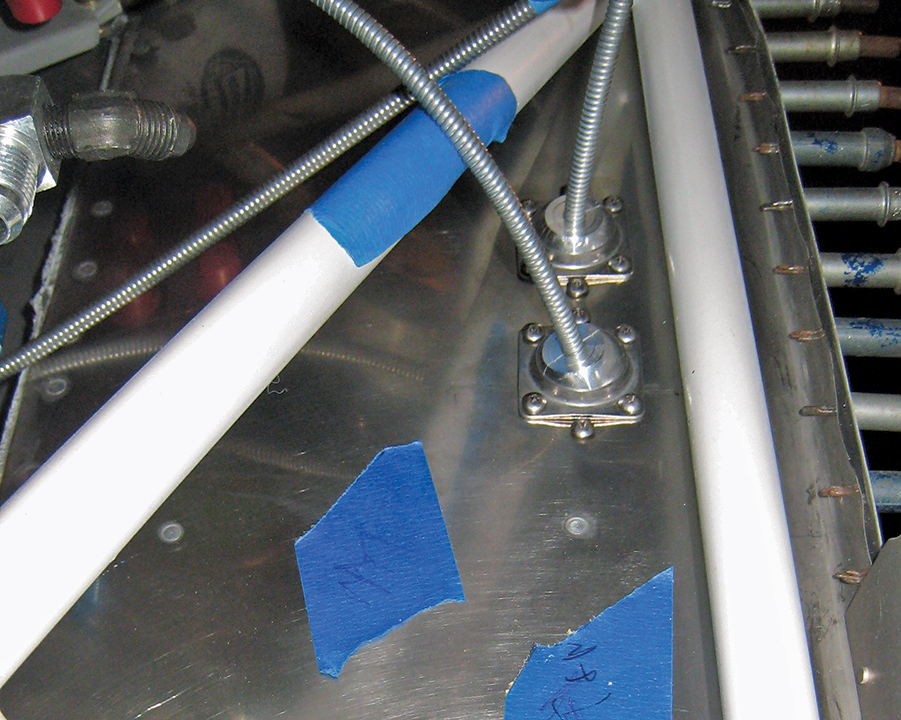
When deciding where to place control cables, remember that eyeball fittings require space for fasteners as well.
Sometimes you have to get creative with control cable routings—as with the prop governor control on this RV-3. So long as you maintain minimum bend radius, cables can go almost anywhere.
Think Three-Dimensionally
Probably the biggest mistake that you can make when laying out firewall components is to think in only two dimensions. Don’t forget (as in my example above) to think about where things go (and come from) after they leave the firewall itself. There are specific minimum bend radii for hoses and control cables, and you also need to think about where things can be secured. Getting fuel and oil lines too close to a hot exhaust doesn’t even sound good—and it is indeed bad for reasons of vapor lock (much less safety). Not only is it easy to forget clearances between specific items floating in front of the firewall, there are things that you probably haven’t even thought about—the exhaust pipe hangers, for instance—and what about the fuel pump overflow line? These things need to exist, and when you lay out your firewall components, they can have an impact.
One final thing that you want to consider before picking up the tools is whether or not you actually have the room to use the tools! It is (again) easy to come up with a layout that is close to impossible to execute—planning for a bolt hole where you can’t get a drill for instance—at least not without removing the engine or the engine mount. So now we have yet another layer of the chess game to consider: the ability to actually build what we plan. Figure out where things fit on the firewall, figure out the clearances needed in three dimensions, and then figure out how you are going to install the nutplates and other fasteners. Uh oh, this is beginning to make my head hurt! And we haven’t quite yet gotten to the desired list, have we?
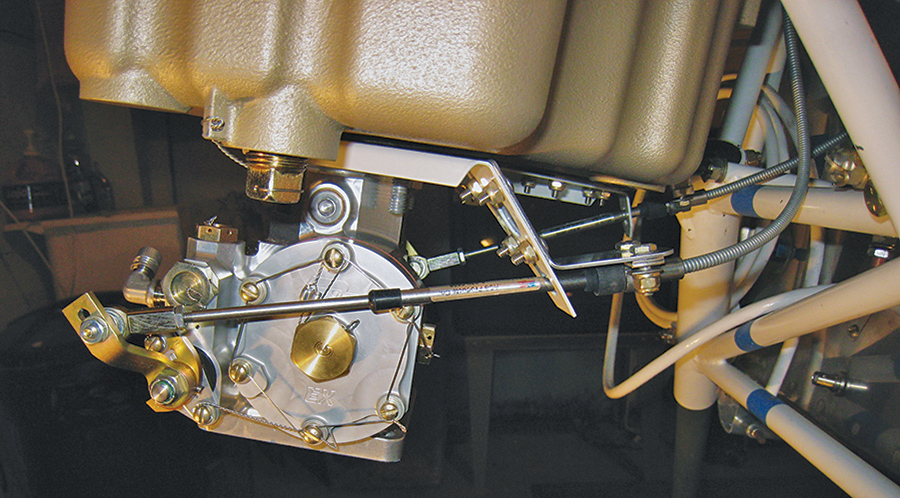
Throttle and mixture controls need to be checked through their entire range of travel before finalizing brackets.
Firewall layout gets complicated because we have so many things that could get in the way four or five steps down the line. There are “chicken and egg” problems as well. You need to plan that a hose is going to be somewhere, but you can’t know for sure where it will be until you have the hose. But you can’t build the hose until you know where it is going to go. “Check,” as they say in chess. At some point, you have to find a move you can actually make—and that might open up the playing field a little to make the next move easier to see. By carefully picking away at the things where you have no choice, or where the choices are obvious, you take away unknowns, and leave the remaining field of options smaller. And in this case, that’s a good thing.
Cables for CHT and EGT sensors take lots of space that might not be obvious early in the layout process.
Only once you have nailed down the must haves can you turn your attention to the items you’d like to have. Now, do you really want to trade the cabin heat valve for inverted oil? Hmm…how much do I want to travel with the airplane versus use it exclusively for aerobatics in the local area—on warm days? Are there other options for either (heated seats for instance, or what some folks call a “half-inverted” system—something good for ten seconds or so of inverted flight)? Maybe re-evaluating your initial requirements, or looking at alternatives to solving them (a heated snowmobile suit?), can shed a different light on the topic. It never hurts to look because you still haven’t drilled any holes…right? (Put down that drill!)
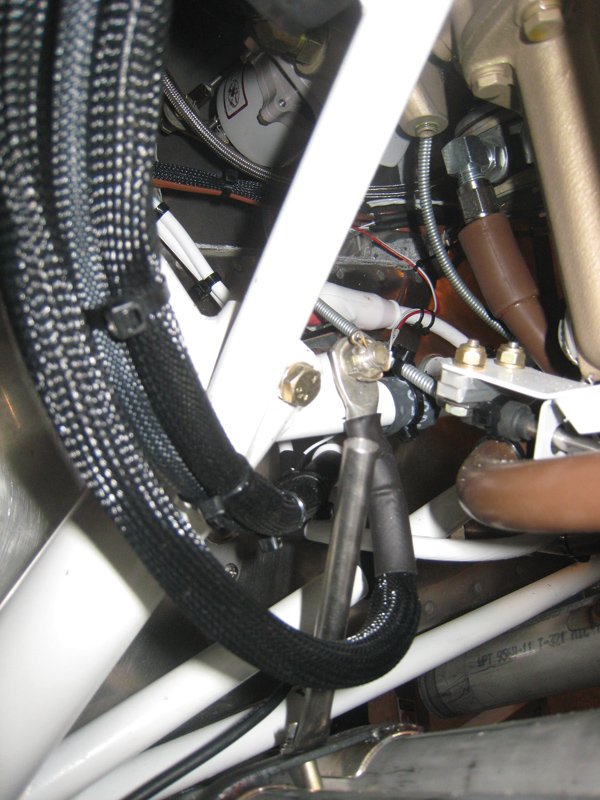
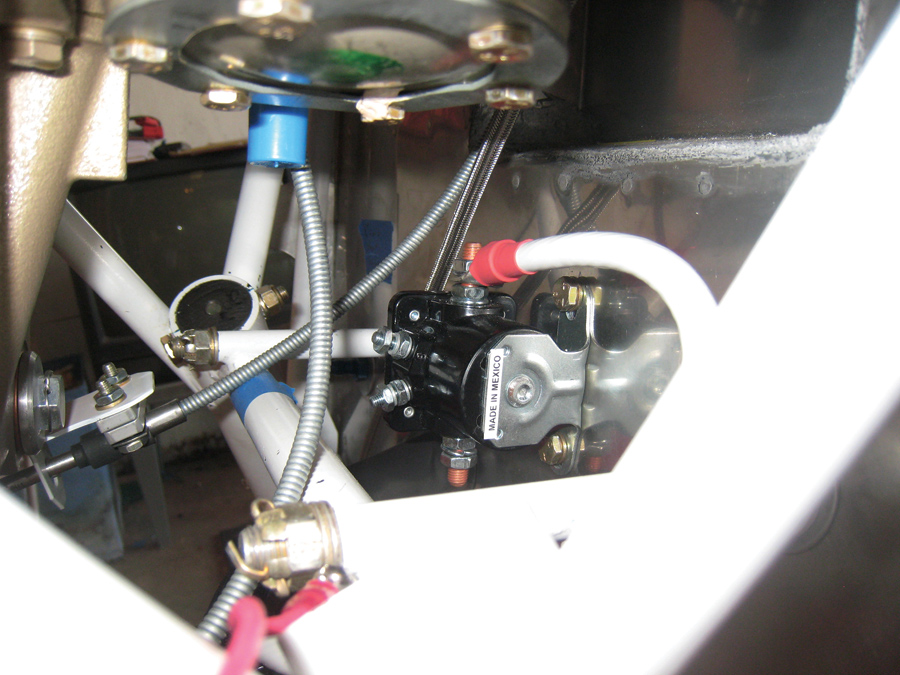
One major challenge when choosing mounting locations is to allow room for future maintenance. This solenoid is just barely reachable with the engine in place.
Making Your Move
In chess, you hold all of the possible moves and countermoves in your head until it is time to touch a piece and put it where you want it. Fortunately, we don’t have to salute that same rule in the workshop. Making sketches (I suggest pencil and an eraser, rather than ink) and putting bits of tape on the firewall where you think things should go are a couple of techniques you might consider so that you don’t lose track of your brilliant solutions. The tape idea can be taken even further by using cut-outs of the devices that are going to occupy the space (just as many do when laying out their instrument panel). Bet you never thought that playing with paper dolls would be a useful adult pastime, did you?
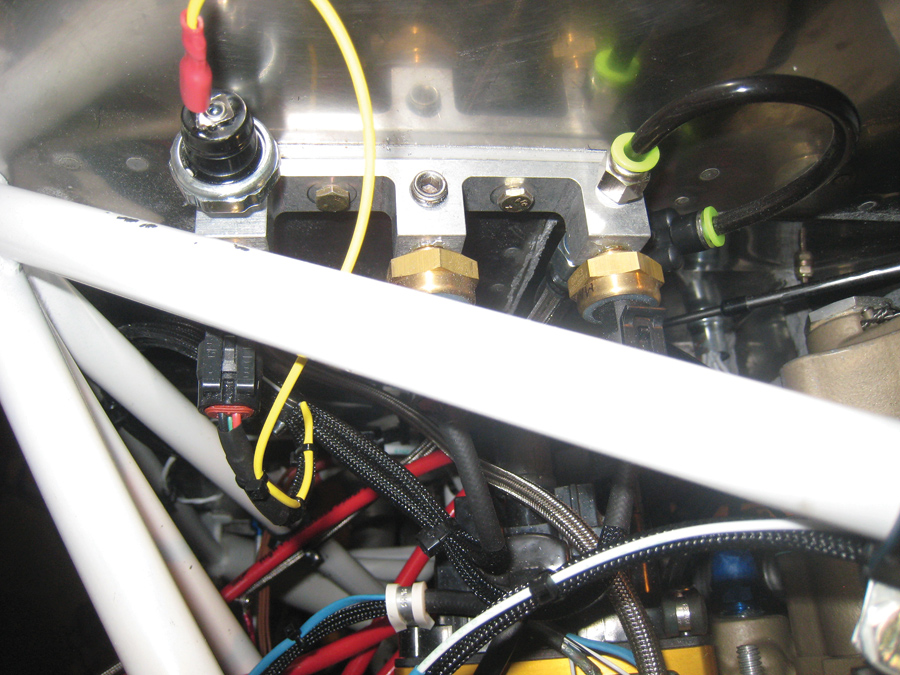
Modern sensors are much smaller than they used to be, allowing for tighter mounting. A sensor manifold like this one keeps them all in one place.
While I haven’t really suggested any particular design solutions in this article (I didn’t intend to), I hope that I have at least illuminated the process required to come up with a solution, and suggested questions that you need to ask in order to come up with a winning game plan. Laying out a firewall is fun if you like to solve puzzles, but don’t let it stump you into inactivity and a failure to finish. Know what you really need versus what you want, take the time to examine lots of different options, and don’t commit to any course of action until you have seen it all the way through to the end. Unlike chess, you are not playing against an opponent—and it would be silly to checkmate yourself.
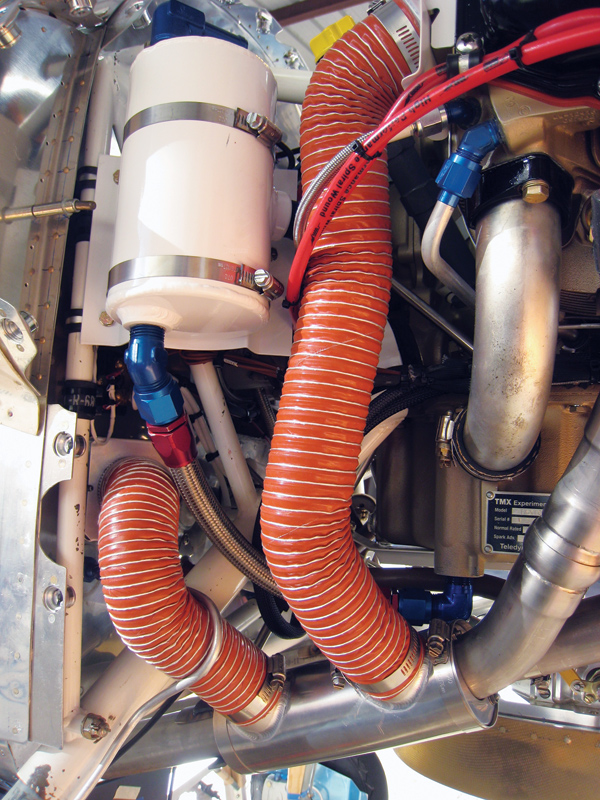
Don’t forget room for heater hoses! This picture also shows how an inverted oil tank can be attached to the engine mount instead of taking up space on the firewall itself.







Paul,
Yet again a very well constructed and thoughtful article.
Happy Landings,
Dave “Daddyman” Clinthorne