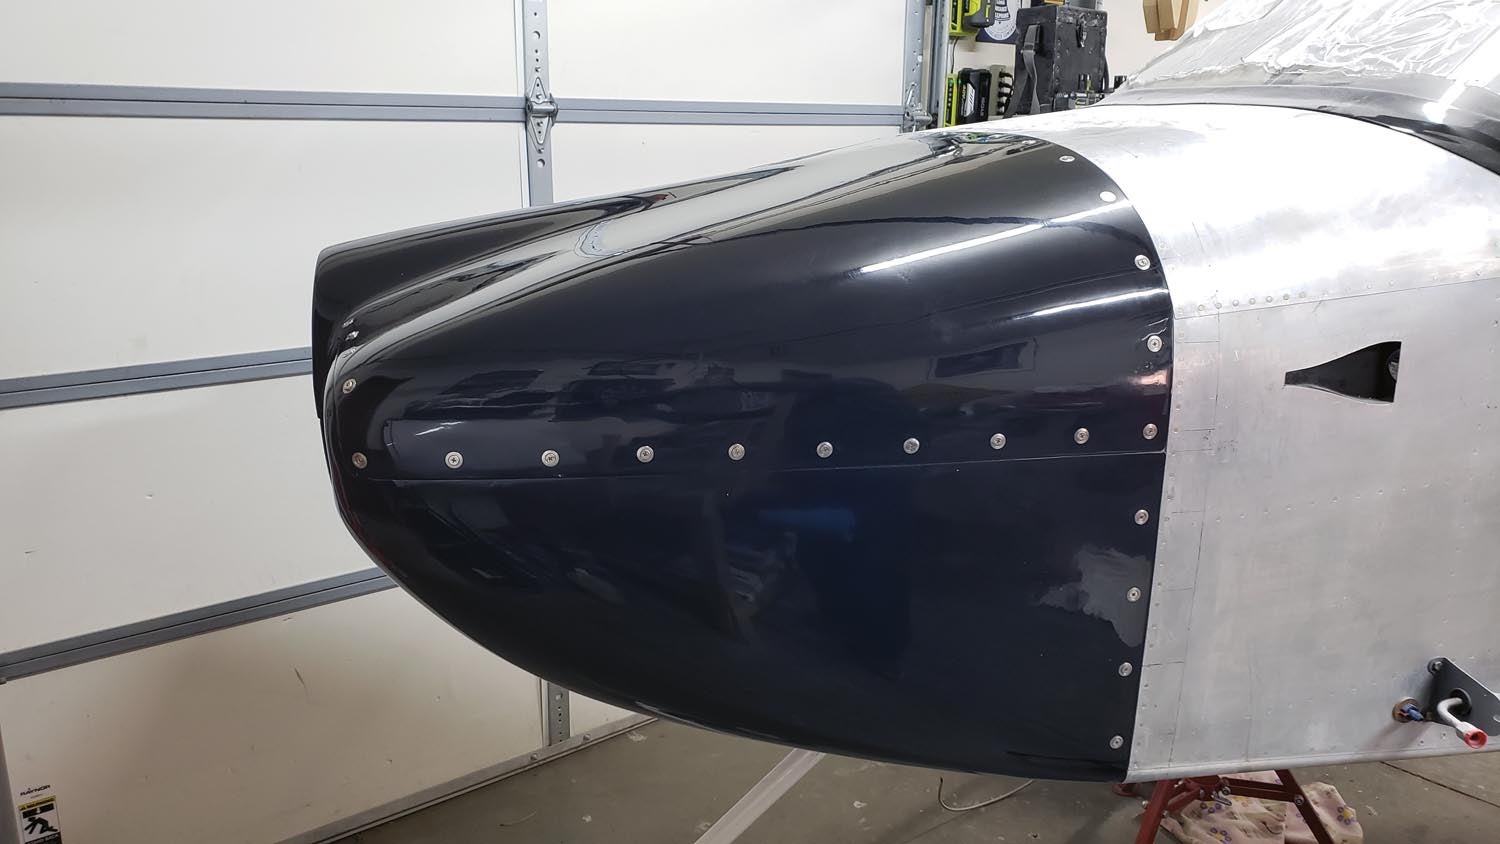
 We ended Part 2 by fine-tuning the edge of the top cowl where it meets the firewall. You want the cowl to butt right up to the firewall edge. Once you’re satisfied with the fit, it’s time to start drilling holes for the Skybolt fasteners.
Step 1
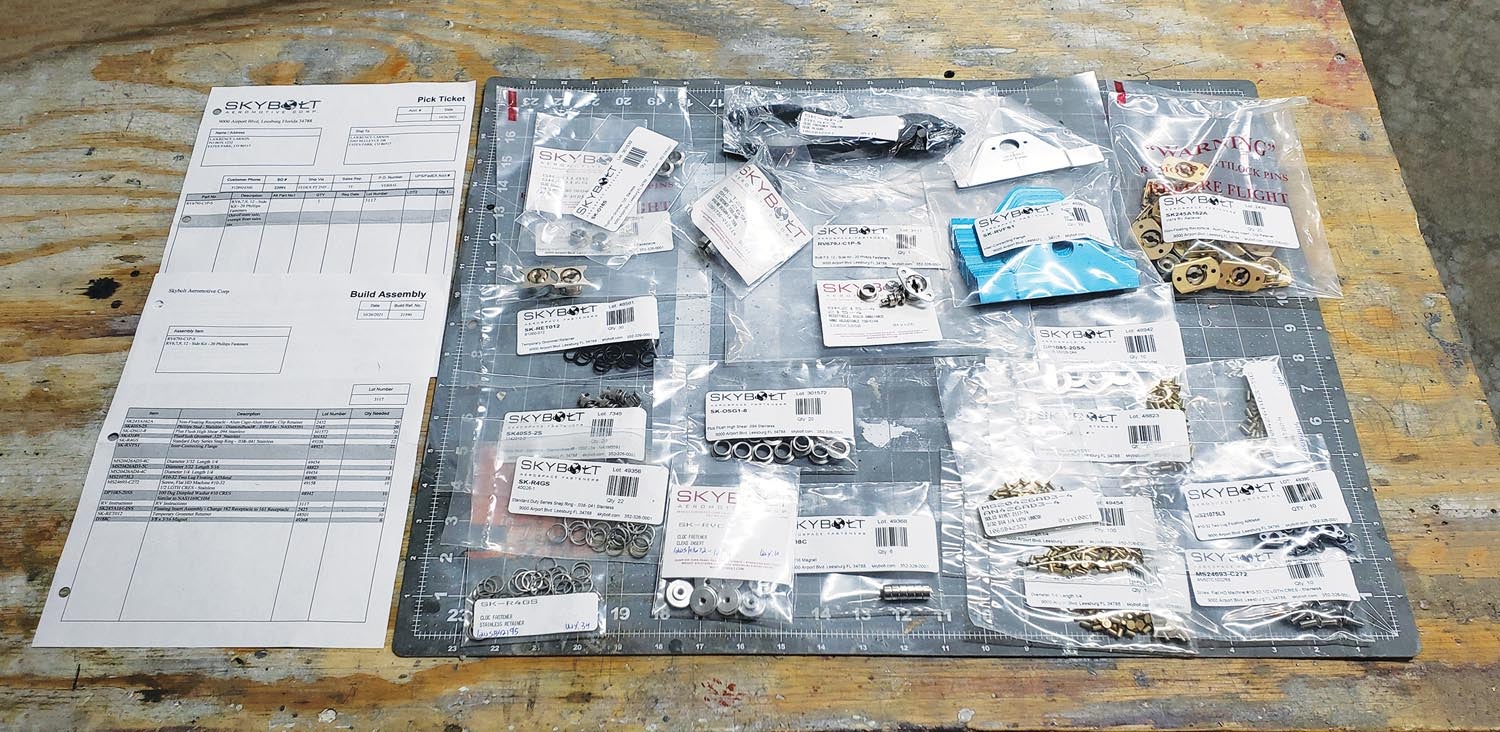
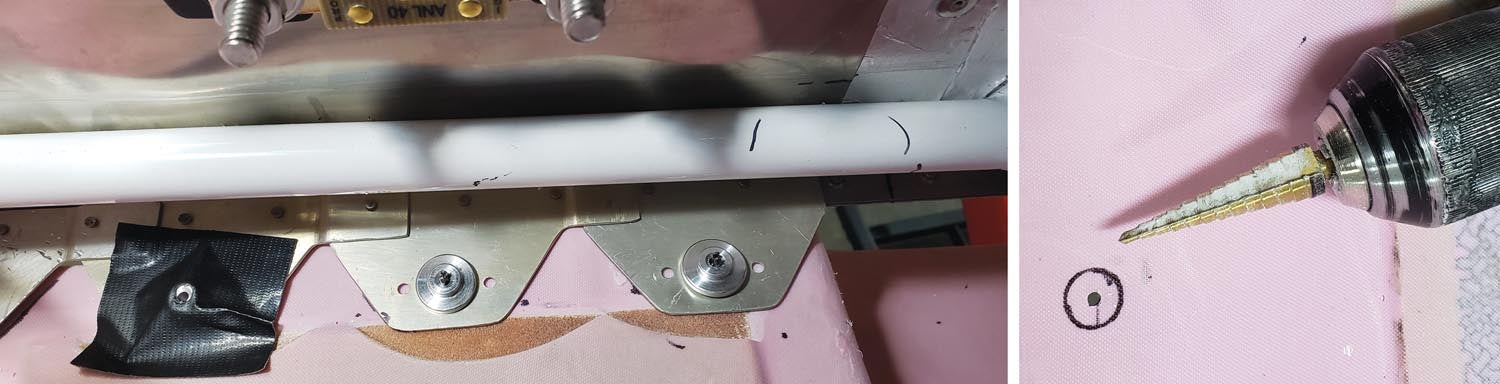
Inventory the Skybolt kit to become familiar with each of the parts. Make sure the top cowl is centered and place a sandbag or weight near the center to keep it from moving. Grab one of those Skybolt 1/8-inch Cleco drill bushings and a piece of black Gorilla tape. Poke a hole in the tape and center the bushing hole on the tape, then slip it into the top center flange on the inside facing out. I found a way to tape a flashlight so it shined through the hole. A work light will also fit the bill.
Go up top and carefully drill that spot of light #40. You want the bit to go into the bushing hole. Match drill #31, making sure to hit dead center on the bushing hole. Cleco. Congratulations! You got one done.
Step 2
Skip one and repeat either side of center. Repeat until half the holes are drilled and Clecoed with bushings. The top cowl should be nice and tight. Reach in and mark the open flanges on the cowl carefully. They should have a #30 hole in the center and a nice pretty circle. Repeat the drilling process on the remaining flanges by moving bushings around. Keep going until all the holes are drilled and marked with pretty circles. You have a gray gel-coated cowl, so you can’t see the light? Have you tried Hare Krishna? Kidding. Try this other drill method.
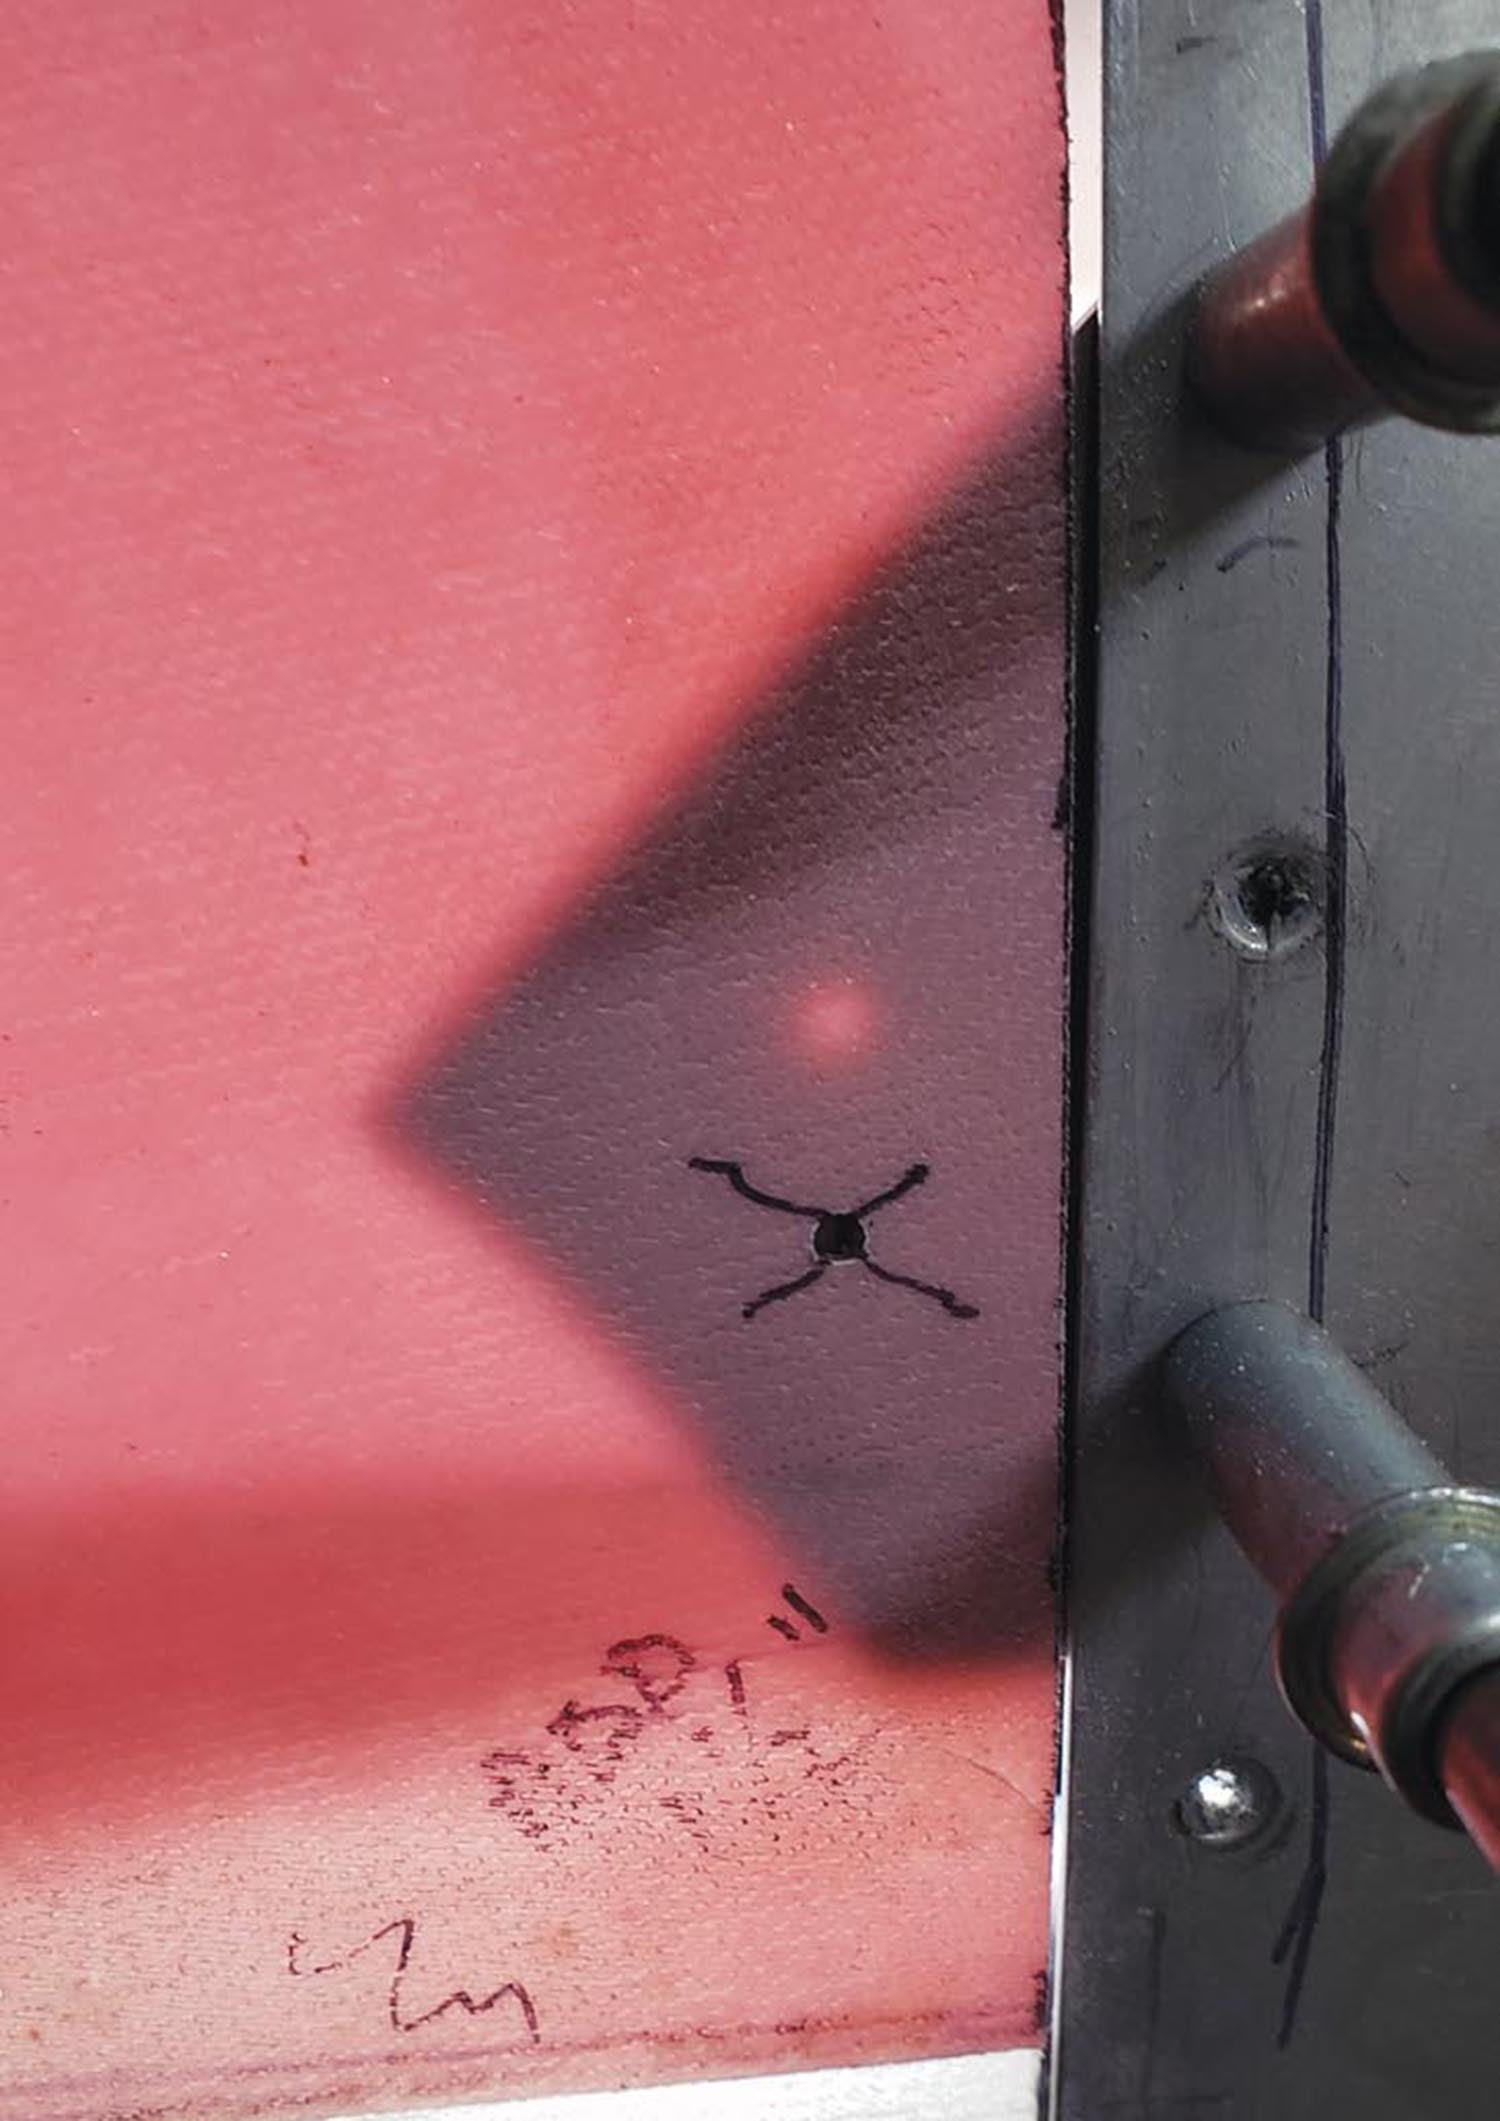
The alternate approach is simply accurate measuring. Each flange location should already be marked. Simply draw angled lines from the center of the flange hole long enough to duplicate onto the cowl. Two angled lines (45°) and one perpendicular line will locate the hole precisely.
Tape the Cleco bushings in place. Place the cowl in position. Extend the lines onto the cowl. Drill the center point with a tiny hole, #50, shooting for the bushing hole. Enlarge to #40 then #31, keeping the bit centered in the bushing.
Step 3
Remove the top cowl. Enlarge the Skybolt grommet holes to 15/32 inch with a step drill. A 1/2-inch hole is fine if you don’t mind the grommets fitting loosely. Step drills tend to cut sideways, so go slow and watch the hole. Work slowly and carefully with the step drill so the final hole is perfectly centered in the circle. Drill all of the holes to final size. The top cowl is done!
Repeat the whole process with the bottom cowl. You may notice that the flanges may intrude on the bump where the honeycomb is thick. Mark and sand down that area. Later, seal with epoxy and a layer or two of fiberglass cloth. Both top and bottom should fit perfectly to the firewall with Skybolt fastener holes. Yea!
Step 4
Install the firewall receptacles in the flanges. Two flush rivets each.
Now, you’ve probably noticed a problem: We can’t Cleco the cowls because the holes are huge. Oh bother! We have to install the cowls with the actual hardware to really get an accurate split line. If you drilled the holes 15/32 inch, the Skybolt grommets will be a tight fit. It’s not a big issue with an unfinished cowl but once painted you don’t want to damage it. We need an install tool.
I fabricated a jig to install and remove the grommets without causing damage. It’s a 5/16-inch bolt and nut, a washer, a 1/2-inch bushing and a 1/4-inch-thick chunk of PVC pipe. Turn down one end of the bushing to 15/32 inch, the same thickness as the inside of the grommet. Bore the PVC to 5/8 inch. Find a washer larger than the PVC.
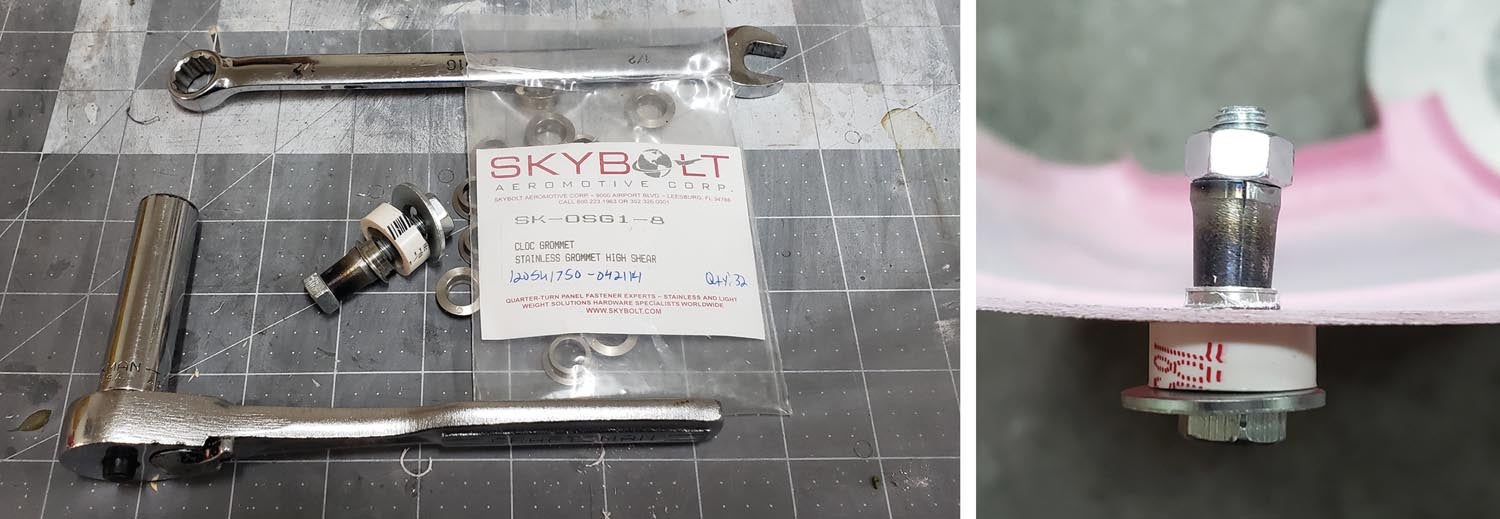
To install a grommet, assemble the bolt, washer, grommet, cowl, spacer, washer and nut. Tighten and it pulls the grommet right in. To remove, flip the bushing and assemble in reverse. Tighten and it pushes the grommet back out. No damage.
Install all the grommets. Install the fastener studs, but leave the lock rings off for now unless you plan to fly with the unfinished cowl. If you enlarged the holes to ½ inch or a grommet wants to fall out, Skybolt provides O-rings for temporary fitting.
Installing the fastener studs requires the pliers. Skybolt studs are easy to install with the SK-4P3 tool. Squeeze, insert and tilt a little until it drops into place and release.
Step 5
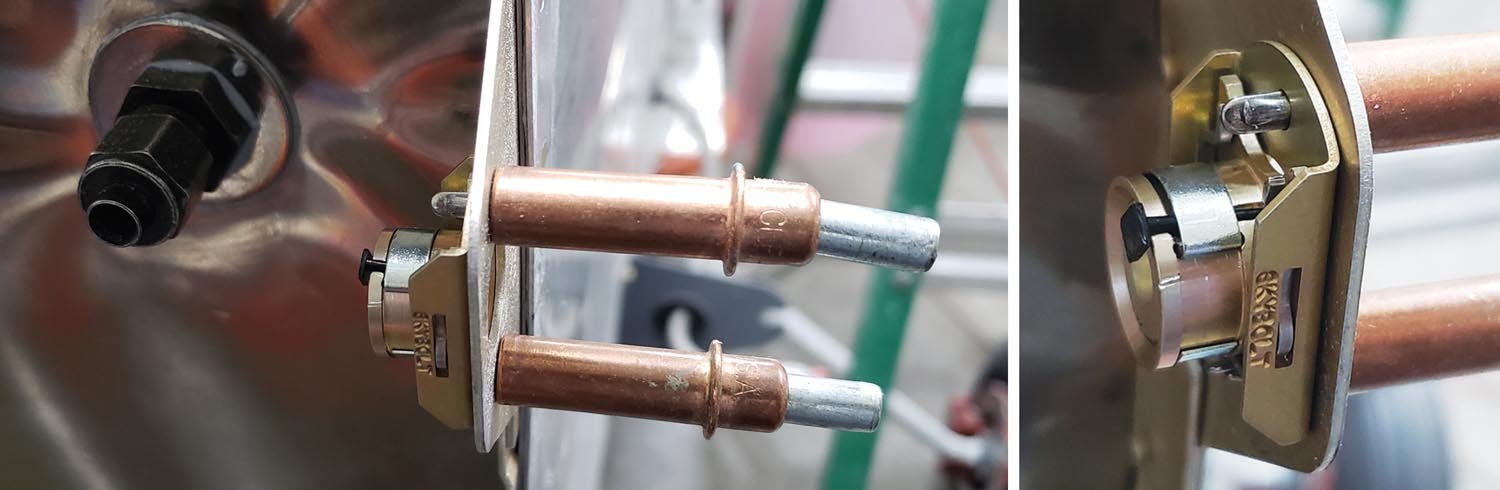
It’s time to get familiar with the receptacles. Note the pin inserted in the receptacle. The pin holds the locking spring, allowing the insert to be freely rotated for adjustment. Once the pin is removed, the receptacle will lock in place. The spring can be released with a sharp probe later if necessary. There are two types of receptacles. One is fixed. The other is floating much like a floating nut plate. Before we go further, check each receptacle by rotating the inner screw with a flat-blade screwdriver. I recommend backing the insert out and applying a tiny bit of Boelube. I found a few with thread-cutting burrs. The insert will jam and ruin the threads when you try to get it to move. Make sure they all screw in and out. It’s very frustrating if one locks up in the middle of fitting the cowls.
Rivet the receptacles in place. I used several floating receptacles: one at the firewall split, one above and one below the split at the firewall, and a couple on the modified nose bowl area. Feel free to use them wherever they help. If you need more, compare one to a fixed receptacle. The fixed receptacles can be modified quite easily to make a floating receptacle by grinding the flange to match.
Step 6
Let’s adjust the fit. Install the top cowl. The spring lock pins should still be installed in the receptacles. Tighten the Skybolt stud to the desired fit, then back off one full turn. Reach in and pull the pins in the receptacles. They should be pretty close, but don’t fret.
Rotate the Skybolts clockwise until the receptacles lock into position. They can be adjusted later if necessary by inserting a pick. Remove the top cowl and repeat with the bottom cowl. Reinstall the top cowl. Now it’s finally time to fine-tune the split line.
Step 7
Install the top cowl and transfer the split line horizon line, marking from the side skin to both sides of the top cowl. Remove the top cowl and repeat for the bottom cowl.
Trim the cowls for the split line. Repeat the process of sanding so the two halves fit well. It’s a good idea to use the firewall Skybolts and Cleco the nose bowl disc to the nose bowl each time so both halves are always in the locked position.
Step 8
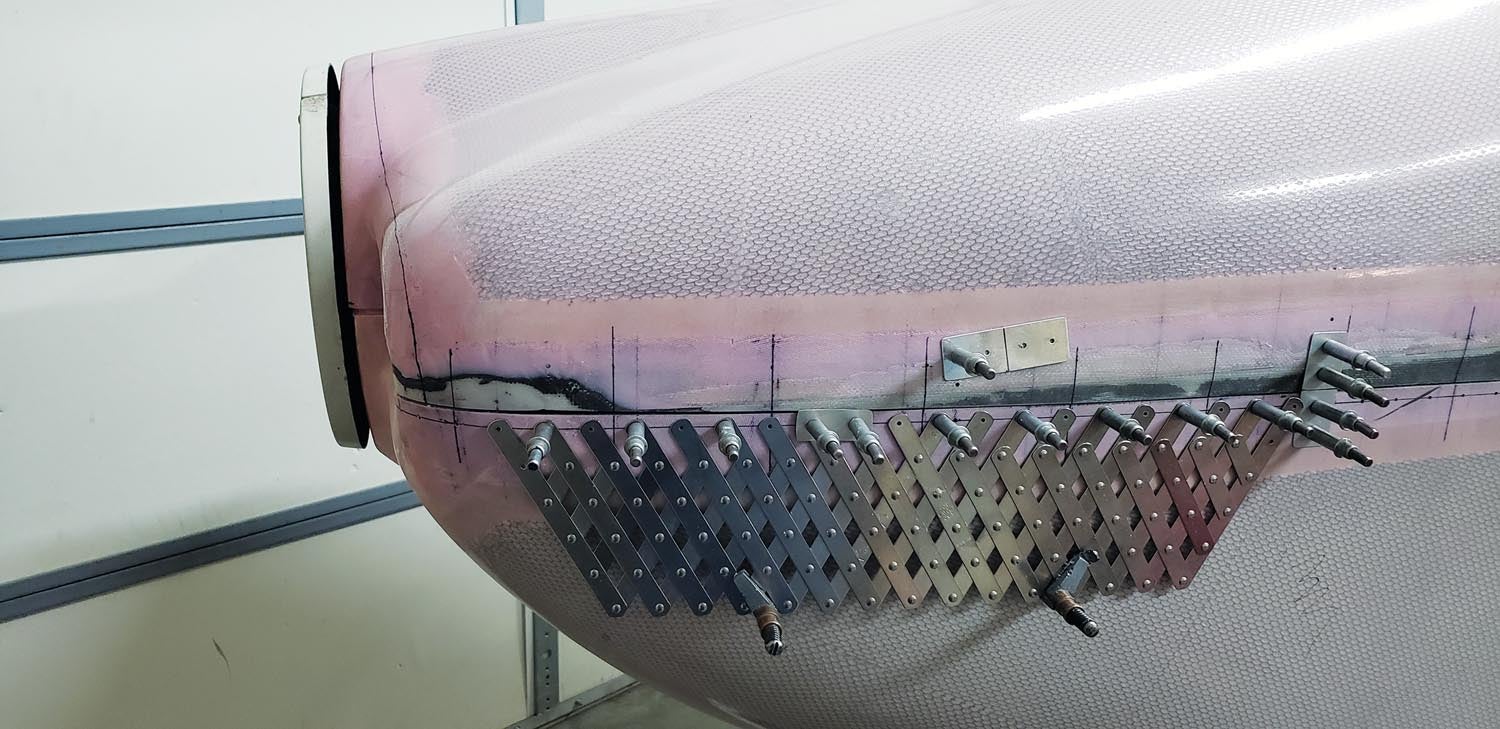
Once the split fits, proceed with marking for the Skybolts. Start 3 inches forward from the first firewall fastener we installed earlier, then space the remaining 3-1/2 inches apart as far forward as practical. Draw vertical lines at each position across the split. Remove the top cowl.
Mark the location for the first flange nearest the firewall and lay out flange rivet holes in the lower cowl using a rivet fan or your favorite scale. Drill. Match drill the flanges and Cleco them in place.
Now comes the fun. How are we going to match drill the top cowl for the Skybolt grommets? You can use a light taped to the bushing inside, but that means 10 flashlights because you can’t reach past the engine to move them. Here’s another way: Remember the lines across the split line at each flange center? Remember the alternate drill method in Step 2 for those gel-coated cowls? Repeat that technique for all the split flanges.
Tape five Cleco bushings on each side. Install the top cowl. Start with a tiny bit, maybe a #50. We want to hit the hole in the bushing. If we miss with a #30, it will push the bushing out of place.
Drill the tiny hole. Drill again with #40. Hopefully you hit the hole in the bushing. Look at the hole. You should see the bushing and which way the #31 needs to go in. Drill #31. Cleco.
Repeat on the remaining nine. Remove the top cowl and move the bushings. I left one on each side as a locator to make sure the cowl was in the exact same place. Repeat and the holes are done.
Step 9
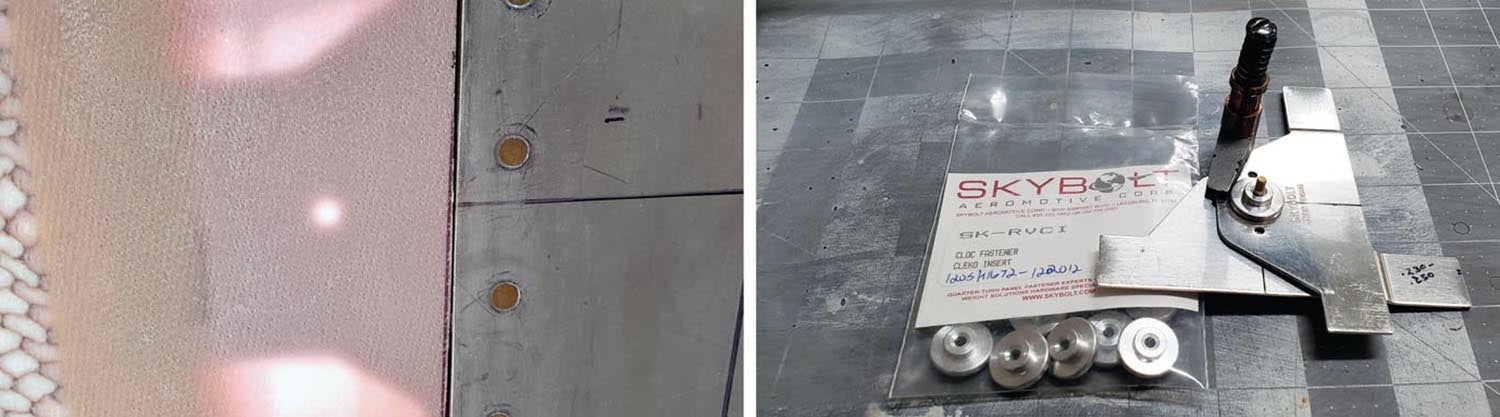
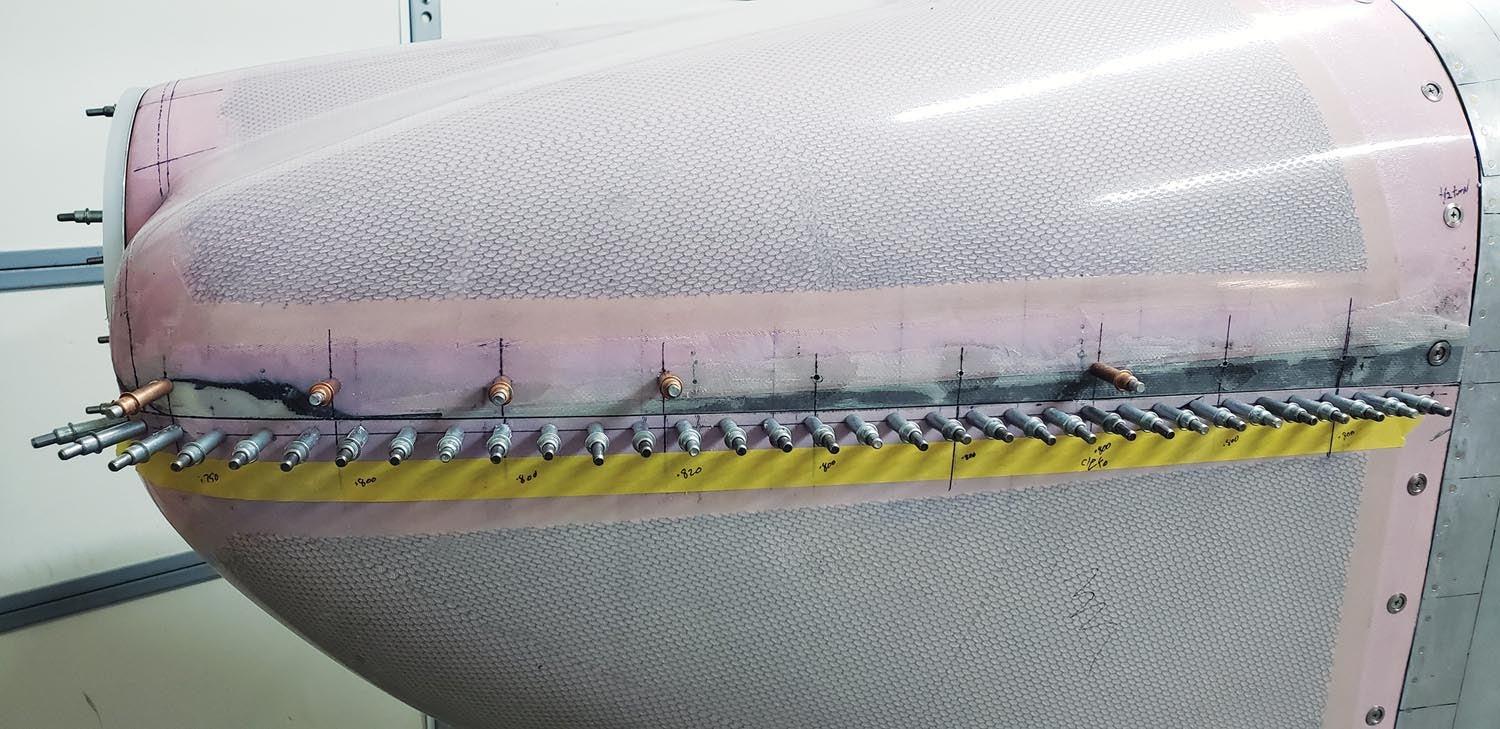
Remove the top cowl and bore the grommet holes in the upper cowl to full dimension. You can’t mark the grommet holes unless you have a trained monkey, but you can Cleco a bushing and trace the outer diameter. It helps keep the step drill centered.
Prep the flanges, install the receptacles and Cleco them back in place on the bottom cowl. Remember the shims.
Install the grommets and studs on the top cowl. Install both cowls and check the fit. You’ve probably noticed removing the cowls can be rather frustrating. The Skybolts don’t always let go. The stud pins tend to hang on the flanges. The trick is to use a probe or a pair of needle-nose pliers to pull the stud out as far as possible. This clears the stud pins. Repeat with every fastener when it’s time to remove a cowl. The cowl will pop right off.
If everything fits, and it should, congratulations. Epoxy the shims and rivet the flanges in place.

Step 10
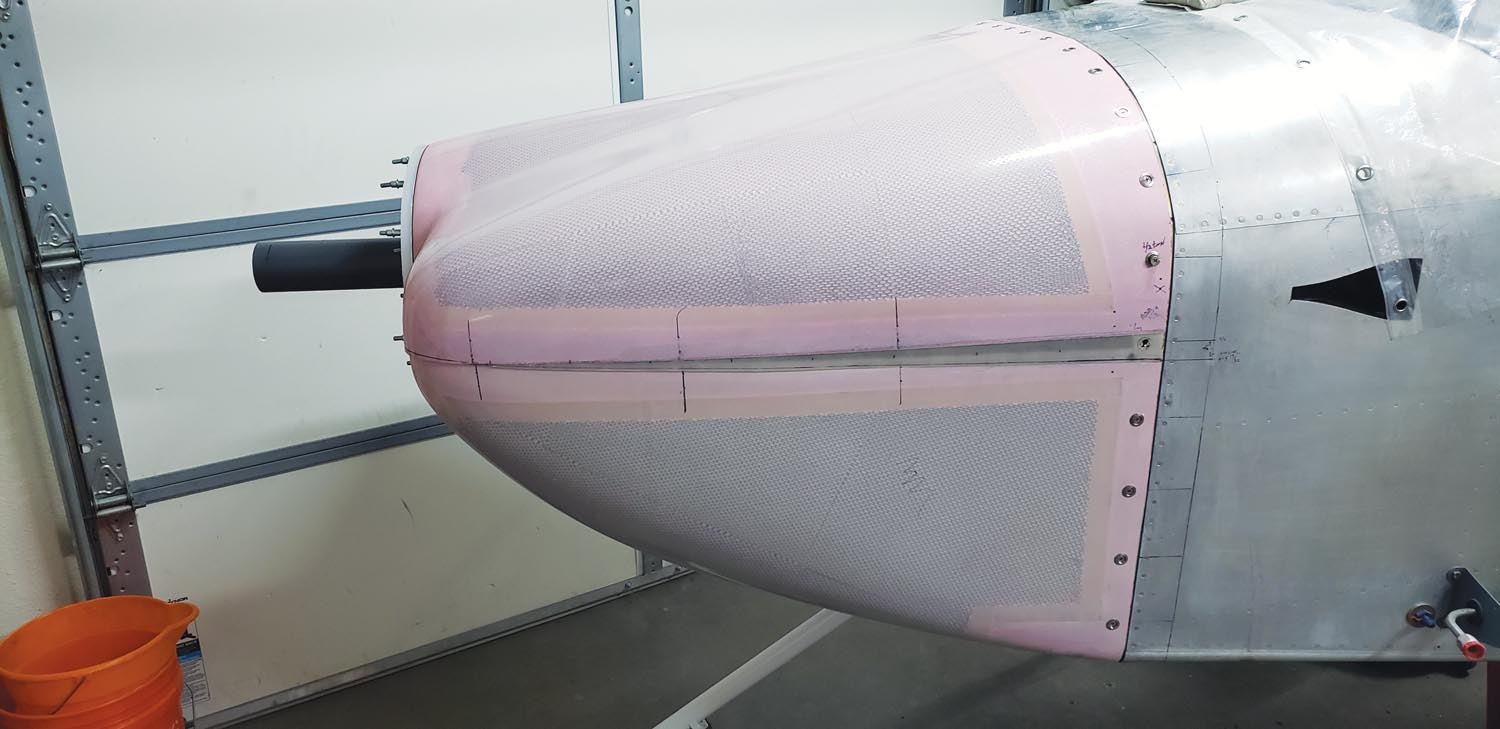
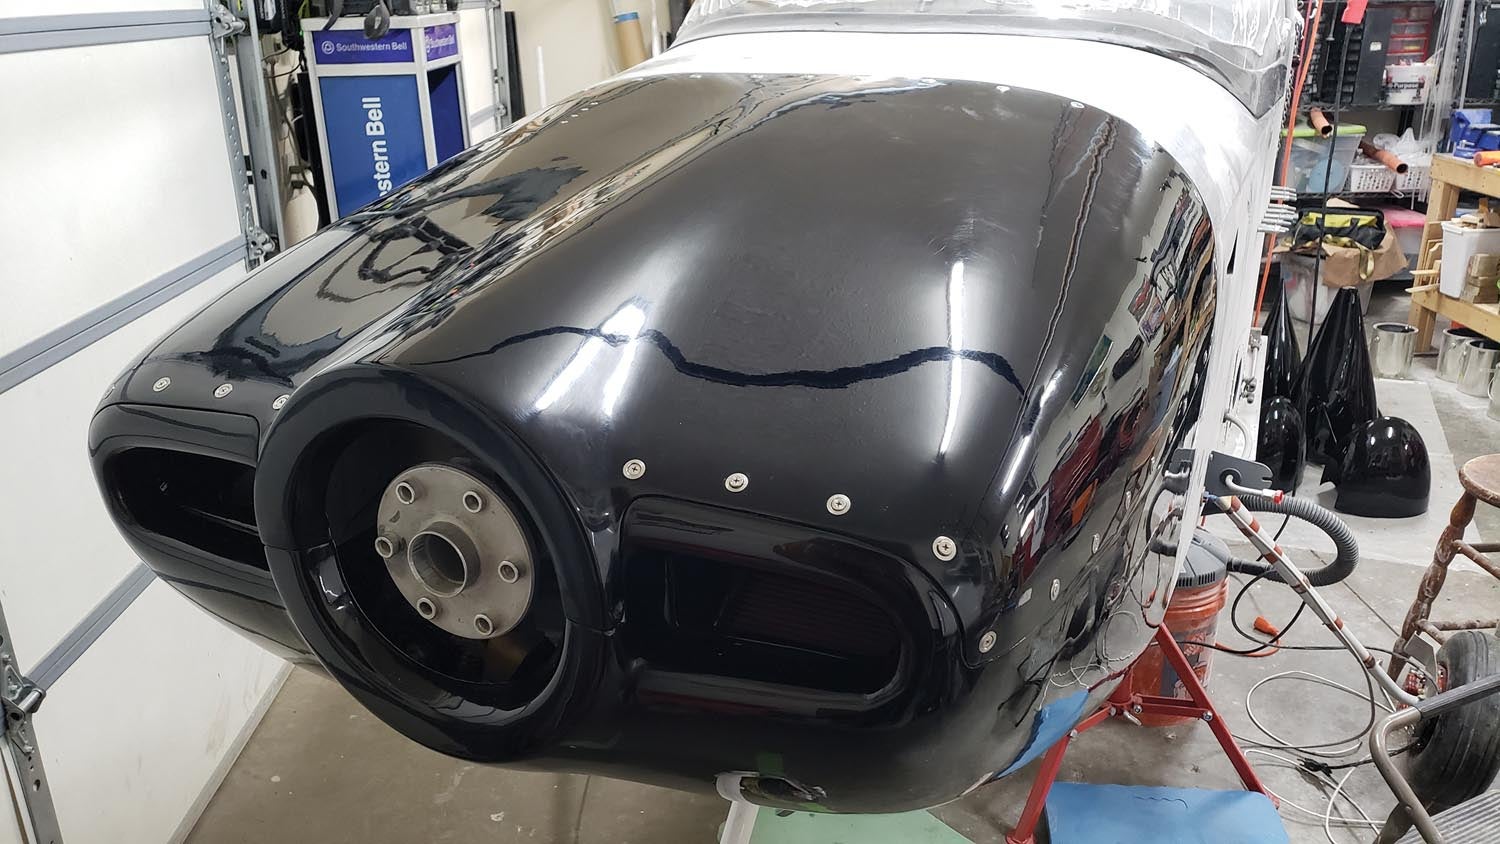
Once the cowl halves are in place, we can check the overall fit and spinner/cowl gap using a spinner simulator. Whirl Wind has a loaner. Mine was fine, but the gap wasn’t perfect. That’s an easy fix just like many gaps on the side splits or firewall.
Set up the nose bowl disc using the bolts and nuts so that when it contacts the bolt heads the gap is even at the desired dimension. Rough up the nose bowl with 80 grit. Wipe the bonding surfaces clean with alcohol or a solvent. Mask areas from epoxy with packing tape. Apply a nice thick layer of micro. Use the EZ-COWL jig to squeeze the micro into a perfect nose bowl face. Cure. Remove and finish.
Step 11
After the cowl has been finished, it’s time to permanently install the Skybolt grommets. The clips are installed with the SK-T26 tool. The tool has two ends. One end is for installing the clips. The rubber handle comes off to swap ends. This video shows the process.
Step 12
The final work is adjustment and correcting minor imperfections. First the receptacles: You probably noticed some receptacles were way too tight and others way too loose. Lay a strip of painter’s tape all the way around the firewall and along both side splits. Install the cowls. Make notes on the painter’s tape. I just used + and – and a number or fraction. The note is how much each receptacle needs to be adjusted to fit properly.
Remove the cowls. Insert a sharp pick in the receptacle notch to release the locking spring. Rotate the receptacle the required amount and pull the pin. Rotate to lock.
Reinstall the cowls to check the fit and repeat if needed. Gaps along the split and firewall? Grab that cheap black electrical tape: Harbor Freight 10 pack. Lay down a strip over the Skybolt flanges or the hinge, then lay another strip with half the tape width overlapping the skin.
Use a credit card to force the tape down against the firewall edge so it forms a nice square edge and flatten any remaining tape so it overlaps the previous tape line. After doing all the edges, go back and lay a strip of packing tape overlapping the black tape on the skin so excess filler won’t stick.
Mix some floxed epoxy. Transfer it to a plastic baggie. Nip off the tip. Run a bead right in the crease. It doesn’t take much—maybe 1/8-inch diameter. Install the cowls.
Lay some packing tape on the cowl so excess flox won’t stick. Use a credit card to spread any excess or fill gaps. Walk away. Cure.
Step 13
Remove the cowl. Not easy, but it should pop off. Remove the tape. File or sand off the excess to the edge. You should have a gap exactly the thickness of the tape and just about perfect for a paint gap. I prefer flox because micro can sometimes break away. Flox will make a nice hard edge. Gaps gone!
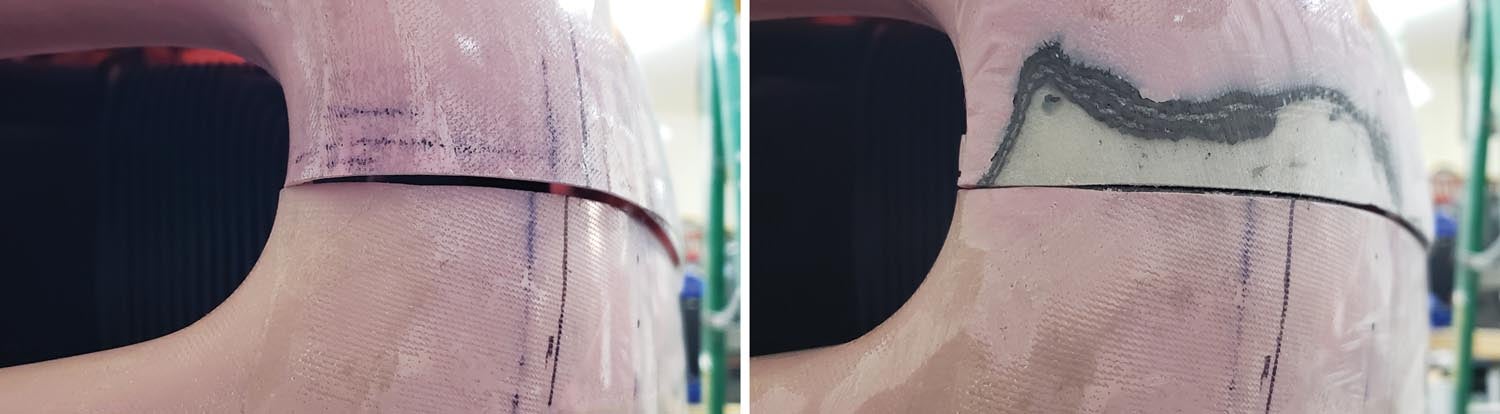
If the edge is lacking a lot of material, it’s best to add fiberglass. Sand the inside from very thin at the edge to full thickness, about 1 inch deep, from the edge. That’s a scarf.
Find something to use as a mold. I use whatever I can find. The side is pretty flat, so maybe use a piece of thick plastic or a strip of scrap aluminum. Whatever you use, apply some packing tape to one surface. Tape it in place so it’s flush to the outside, with the taped side facing inside.
Lay up a couple layers of glass inside, staggering the width. I use 3-inch, 2-inch then 1-inch, staggered so the three layers are flush at the desired edge and staggered into the cowl.
Saturate and apply the layup. Apply peel ply and cure. Additional layers can be added later for extra thickness. Pop off the mold and you should have a nice additional section flush to the outside of the cowl.
Do the cowl inlets have a horrible overbite? Some consider it sexy, but it looks horrible on an airplane! I added some layers of flox and fiberglass, the same thickness as the amount to be removed, into the inside of the cowl nose bowl cavity. The offending overbite was sanded off so it doesn’t look like it needs braces.
How about the cowl-to-spinner gap? It’s better to have too large a spinner-to-nose-bowl gap than too tight. The reason is, it’s a simple matter to narrow the gap by adding a layer of micro. The nose bowl is structural so you don’t want to grind away to increase the gap without replacing the area removed with an equal amount of structural material on the inside.
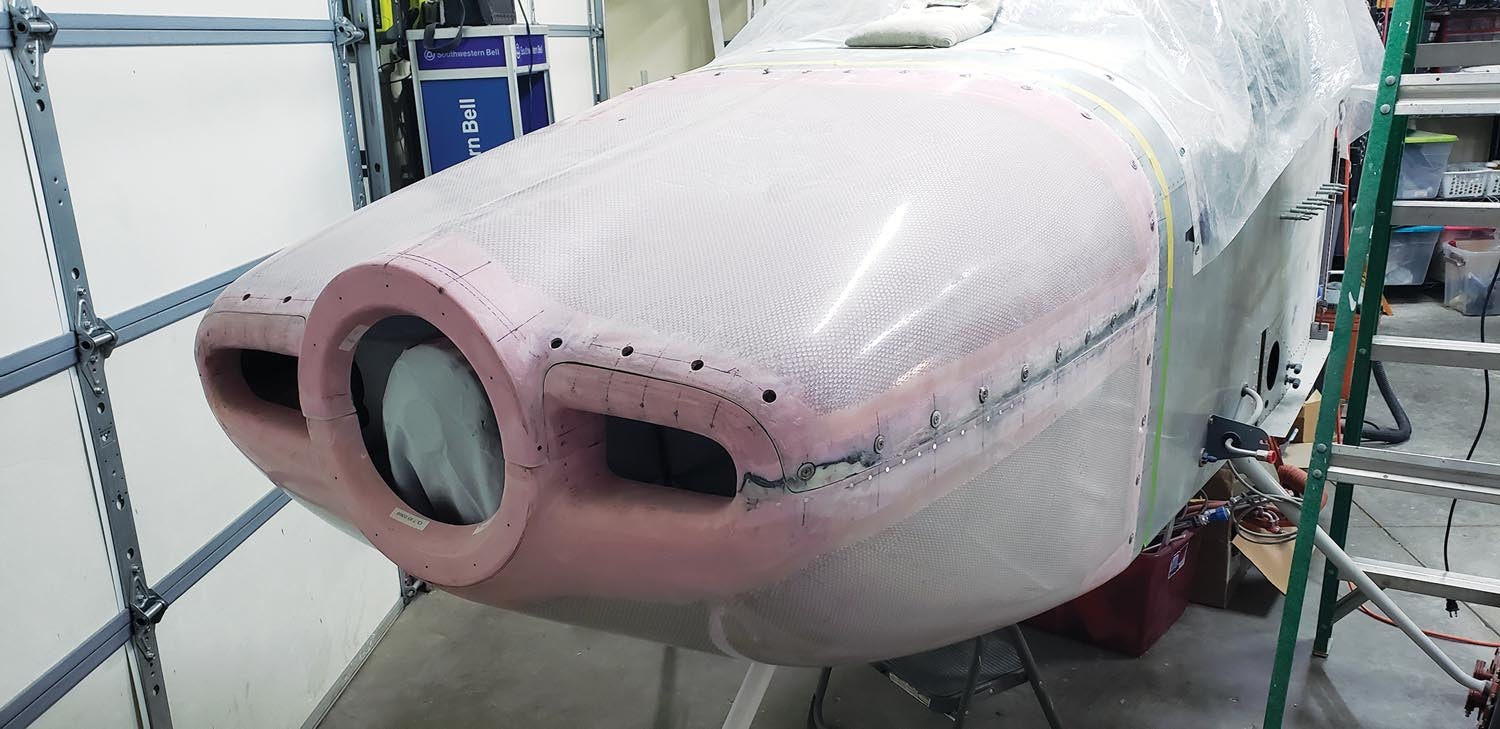
Step 14
Plenum you say? You are brave! I have a plenum and wanted the cowl inlets sealed with a soft connection to the plenum inlet. The solution was to bond the inlets to the bottom cowl then cut the top cowl away. The plenum inlets will connect to the cowl inlet with a section of neoprene fabric, aka wetsuit material, for an airtight seal. Cutting the top cowl this way allows access to the inlet seal so it can be removed before the bottom cowl is removed. It’s cool, but not a project for the faint of heart.
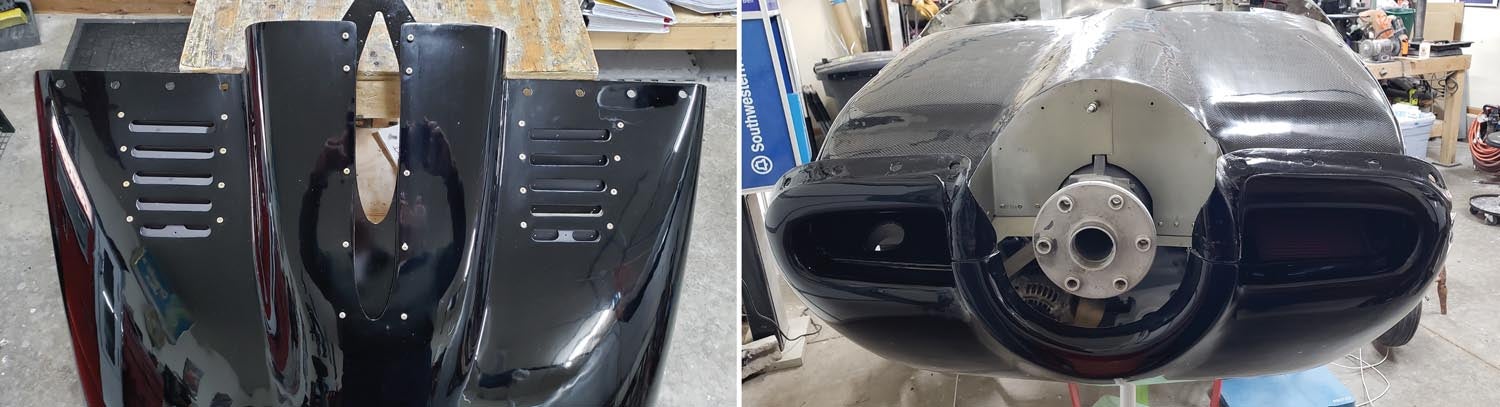
How about louvers and cowl flaps? Anti Splat Aero sells a slick solenoid control, but I didn’t want another control in the cockpit, so I modified the louvers in the bottom cowl to make them ground adjustable. I fabricated two flat sections of fiberglass. They each have slots to function as gates. The louvers have nut plates. Loosen the screws, slide the gate to the desired position, then tighten the screws. The photo shows it pretty well. One is open. One is closed.
That’s about it. Yes, it takes a little more work, but if you can lay up a one-piece canopy skirt (shameless plug), this is easy peasy! Thanks for tuning in. I’ll see ya when I see ya.


![Air Salvage of Dallas is one of the largest and longest-established aircraft salvage yards, with a very large inventory. [Credit: Air Salvage of Dallas]](https://www.kitplanes.com/wp-content/uploads/2026/03/5225124_orig.jpg?w=324&h=160&crop=1 "Salvage Parts")

