Merriam-Webster defines a tool as “A self-absorbed male prone to wearing a necklace”…wrong one…here it is: “A handheld device that aids in accomplishing a task.” I’d argue against the inclusion of “handheld.” I’ve duct-taped tools to a firewall to free my hands for manipulating tools on the other side of the firewall. Sometimes your hand is the tool. A tool, in my opinion, is anything that aids in accomplishing a task. Watch children at play and you’ll remember how versatile a stick can be. When a stick is too long they’ll break it without thinking twice, so it does what they need it to do. Here, I share a few tools I’ve made, modified or witnessed that fill gaps in what is commercially or readily available.
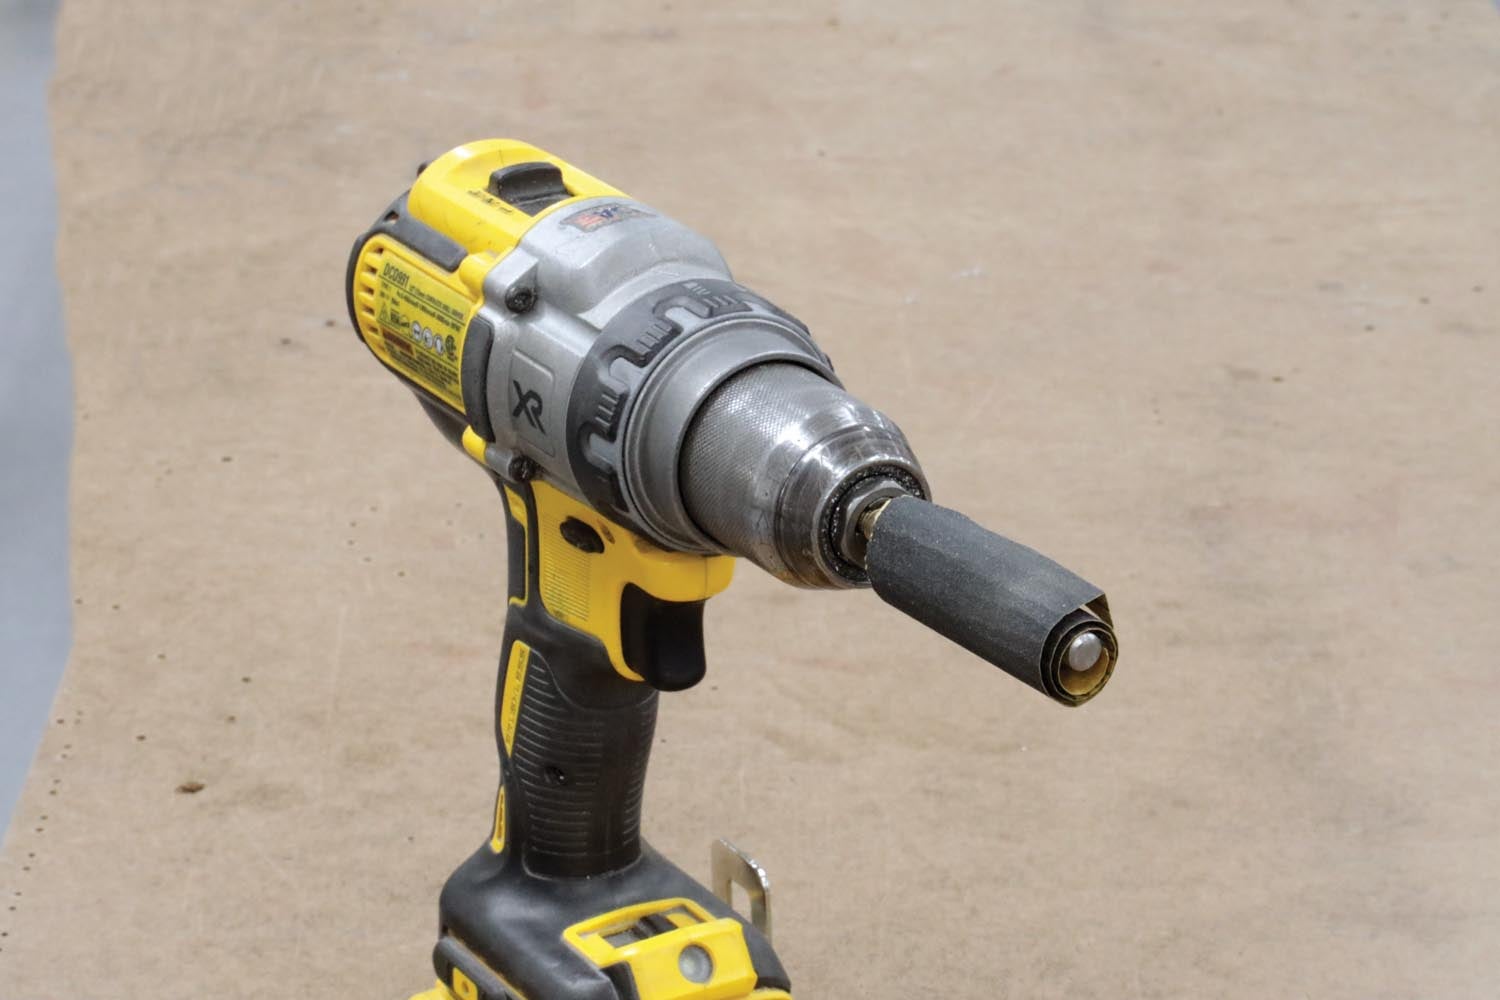
Sandpaper on a Shaft
Sanding small inside radii is done with a homemade flapper wheel. Cut off the head of a long bolt, duct-tape the end of a 4- to 5-inch length of emery cloth to the unthreaded end, wrap it around the shaft and chuck it in a drill. The extra emery cloth acts as cushion between the part and the shaft, and the worn portion of the emery cloth can be torn off as needed to expose a fresh, unused surface. Various diameter bolts and emery-cloth grits can be employed as needed.

Cotter Pin Hole Drill Guide
When a threaded part or fastener needs a cotter pin but it does not have the necessary hole, this tool is the answer. Rather than attempt to start and drill a hole in the threads with an unguided drill bit (impossible, even on a drill press), drill a guide hole through the flat of a nut and let that hole guide the drill bit for a perfectly positioned cotter pin hole.
Dimple Dies
Dimple dies are must-have tools for flush fasteners, but the dies can sometimes be too large to fit where they need to go, particularly the female half when dimpling rib flanges. The solution is simple: Grind away the portion of the die that interferes with the bend of the rib flange. Be careful, however, to leave the portion that creates the dimple intact.
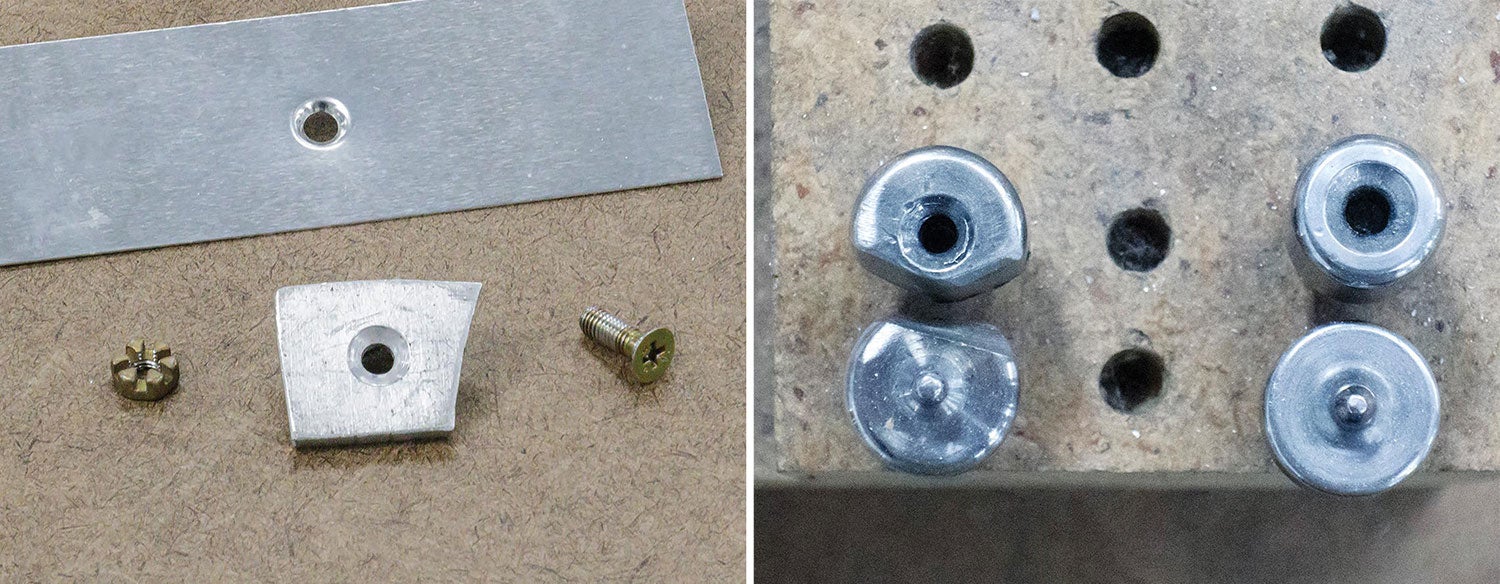
Dimple dies are manufactured for use in benchtop or handheld C-frame riveters (rivet squeezers). Sometimes the size or location of a dimple precludes using one of those tools, or the tool is simply too expensive for your limited need. In those instances a scrap of aluminum drilled to the fastener’s diameter and countersunk to the required dimple depth can be used to dimple a hole. Use a flush screw and nut to form the dimple.
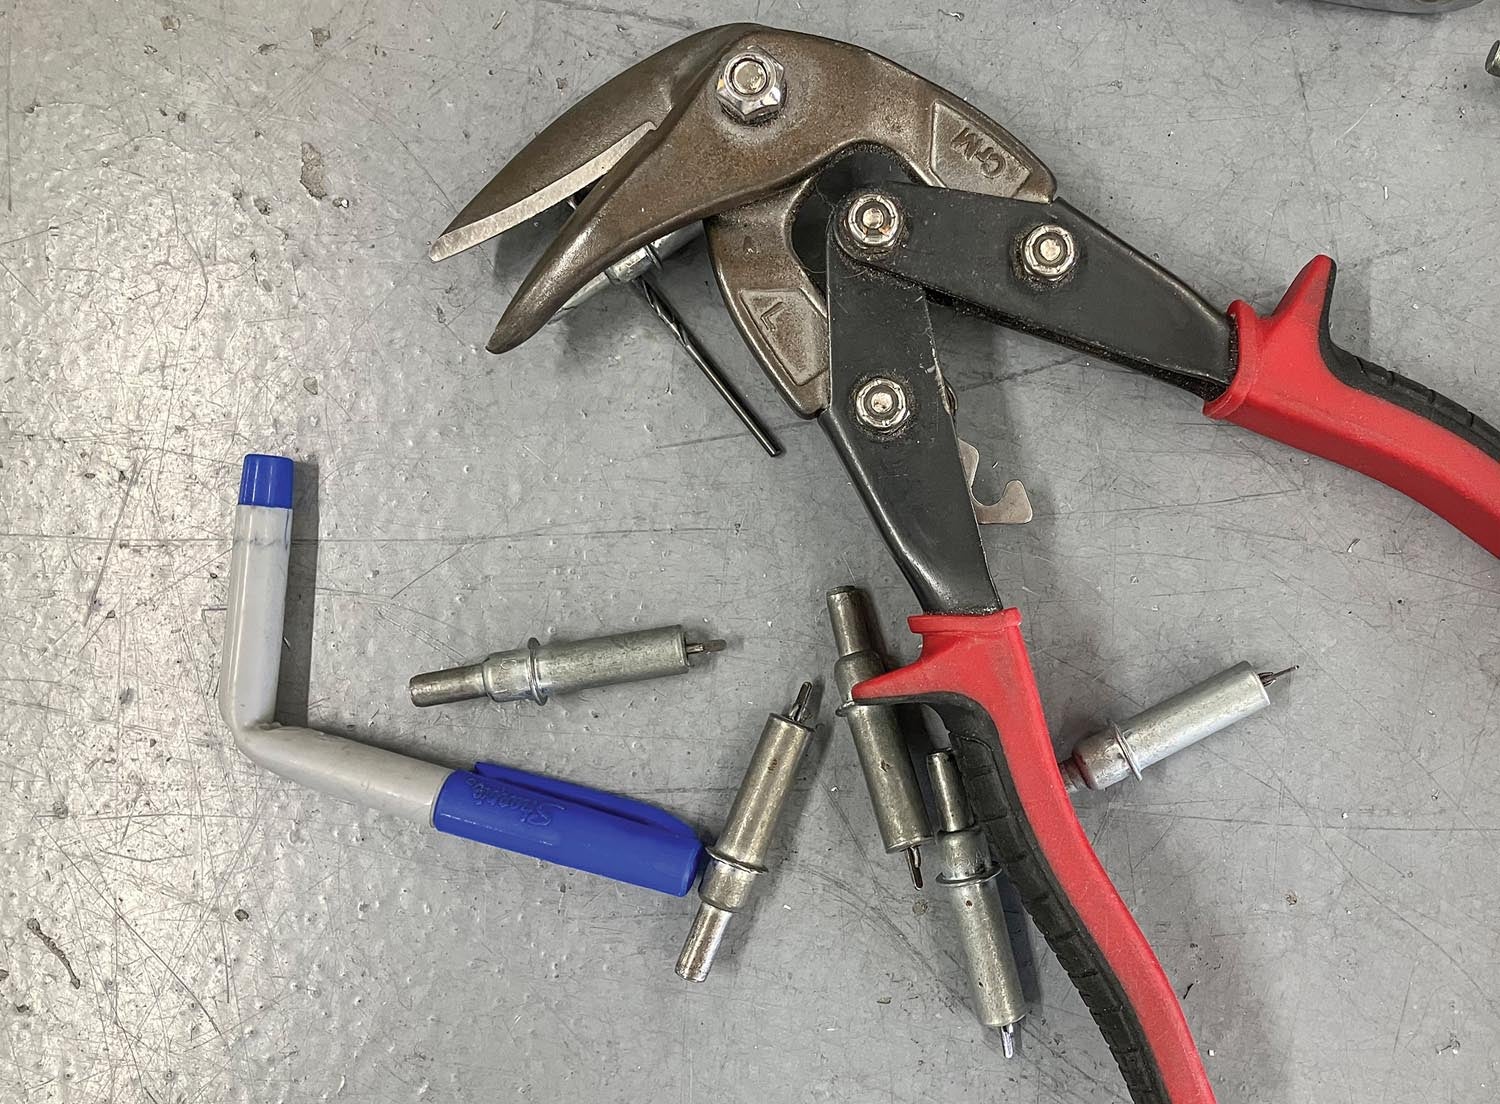
Blind Riveter Nosepieces
Blind riveter nosepieces are mass produced to meet 98% of riveting situations. That gives you and I the chance to improvise for the remaining 2%, which airplane designers seem required to incorporate into their designs. Grinding a nosepiece at an angle allows a rivet to be set where there may be a partially obstructed approach to the rivet hole—like one tucked tightly under a stabilizer. A short cylindrical tube of steel or aluminum placed between a rivet head and the nose of a riveter can also help angle a rivet into a tight spot. The tube’s length is limited only by the ability of the riveter’s jaws to grip and pull the mandrel. The caveat to both of these approaches is that the head of the rivet must be flat against the surface while being set.
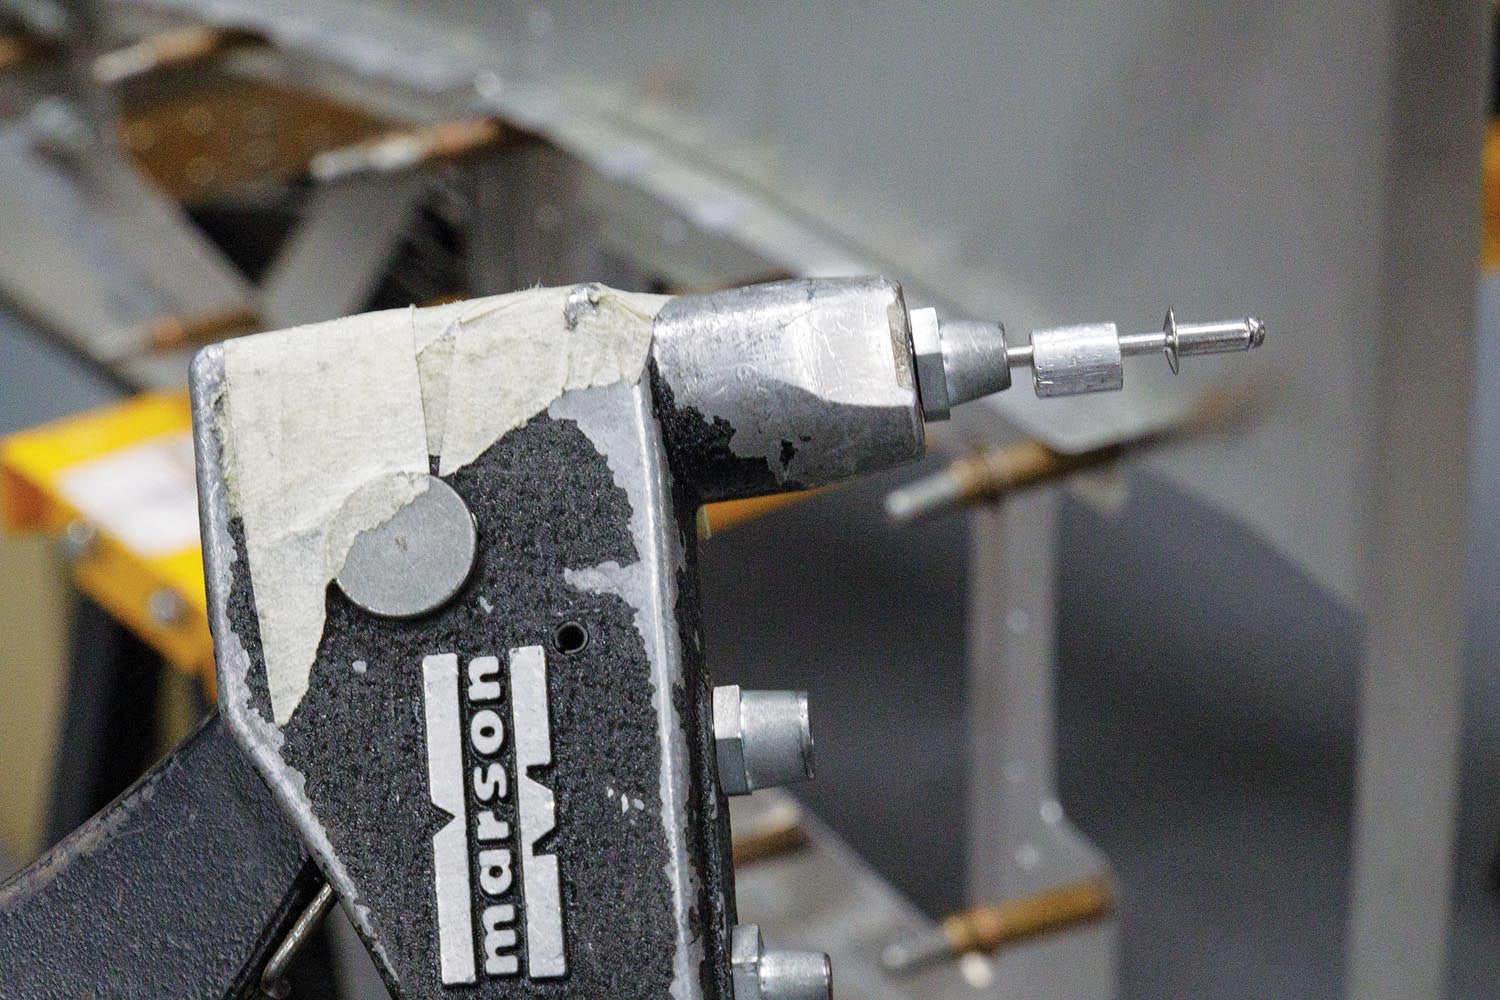
The riveter itself can also be modified. Though I no longer have it to photograph, I cut the moving handle of a riveter shorter by a few inches so I could set a rivet in a tight spot where the full-length handle prevented the riveter from ratcheting to pull the mandrel (much like using a long ratchet wrench in tight space where there isn’t enough rotation for the wrench, so you grab a shorter wrench). I also ground material off the nose of a riveter because the physical size of the nosepiece prevented me from getting the riveter where it needed to go.
Measuring and Marking Tools
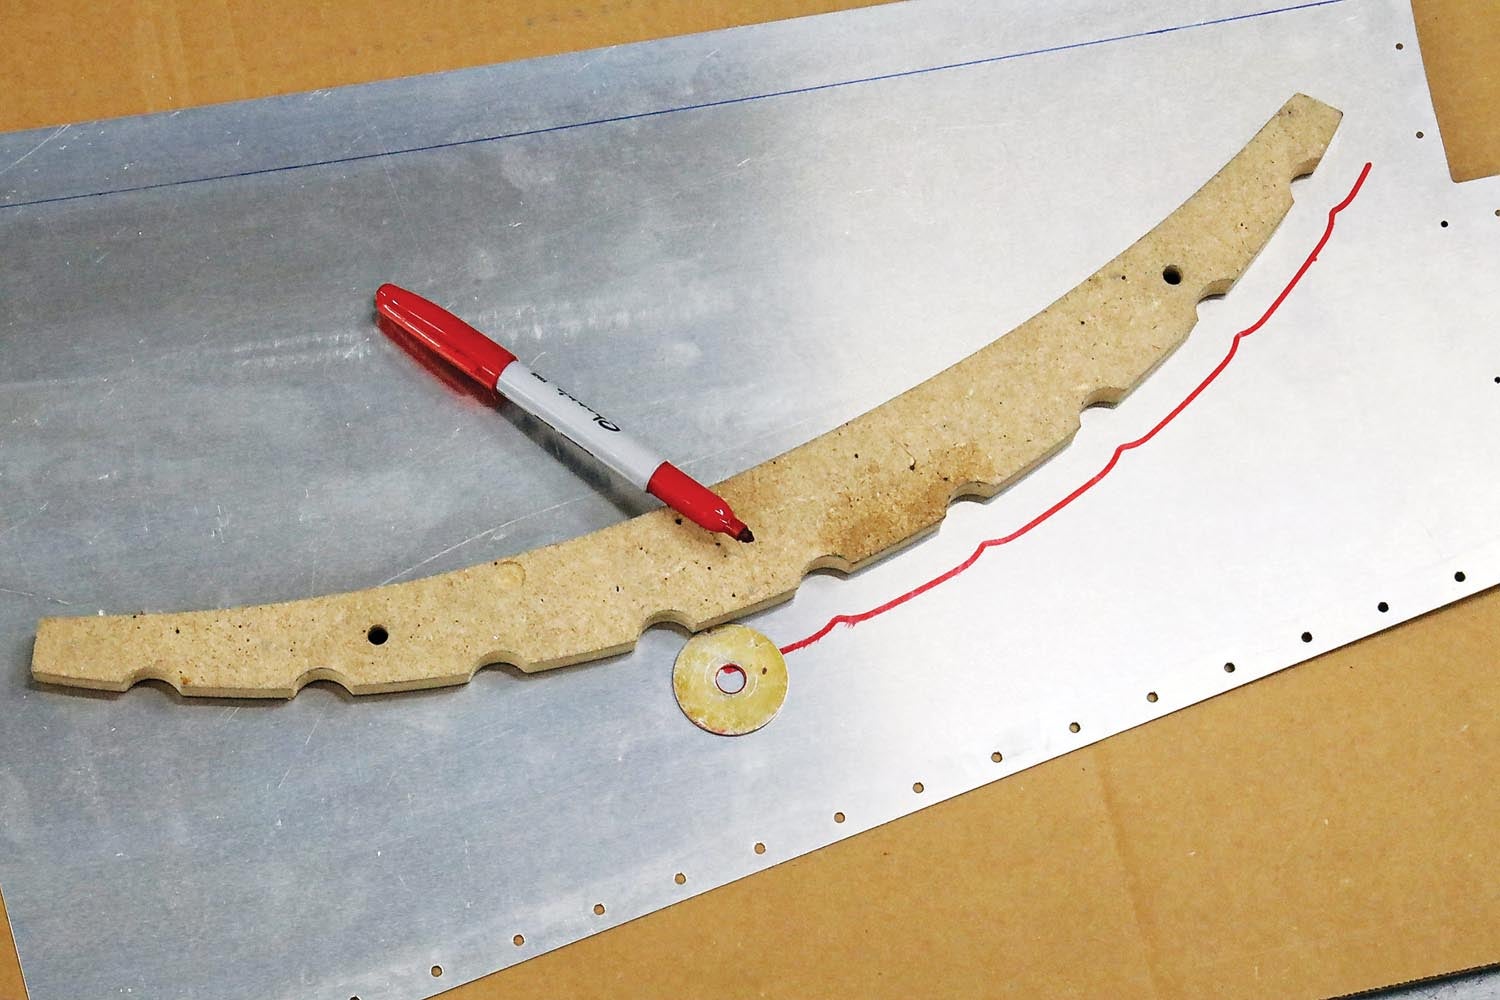
A washer is an efficient aid for tracing the outline of a form block blank to loft a flange. The key is to select the correct washer for the width of the flange you need (washer O.D. minus washer I.D. equals the width of the flange). This quick trick was taught at countless Sonex builder’s workshops for those who chose to scratch build their airplane.
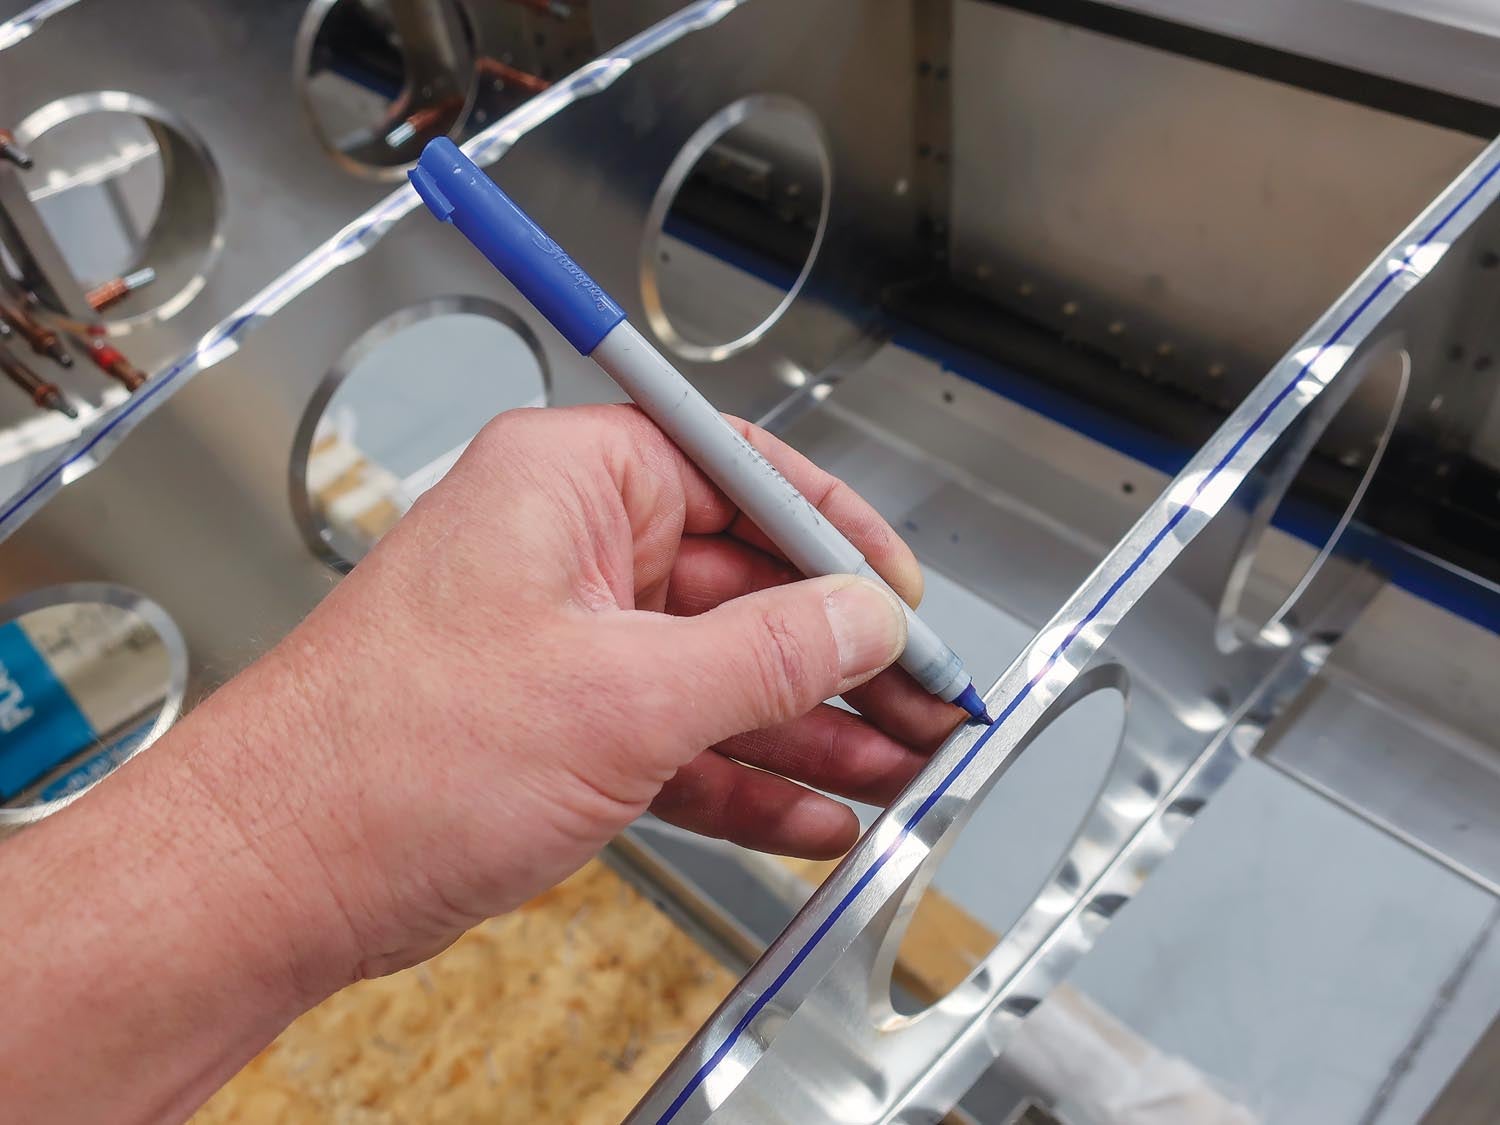
I’ve watched many builders struggle to draw centerlines on rib flanges. Techniques employed include trying to hold a straight edge on a flange while tracing the edge with a marker (this requires three hands, you only have two), and devices that hold a marker and scribe a centerline while the device slides along the web of the rib or tabletop.
You can toss all of that aside—all you need are three fingers. The thumb, pointer and middle finger grip the marker while the tip of the middle finger acts as a depth gauge. The key to this method is to not change your grip as you move from flange to flange, and to use the bent side of the flange (not the cut side) as your guide surface. (Hint: The centerline is not so much to make sure the rivet holes are transferred precisely to the center of the flange, but to make sure rivet holes aren’t transferred and drilled too close to the edge of a flange. For that, a line down the eyeballed center of the flange does the trick).
Chronic tool collecting aside, part of the fun of homebuilding, so long as it doesn’t compromise good workmanship, is making do with the tools and materials you have. There is satisfaction in keeping money in your pocket and progress moving forward by making or modifying a tool to accomplish a task. It connects us to homebuilding’s roots and to our inner child, who still longs to play with sticks.


I really loved this article! Please add additional articles showing these kinds of building tricks. I work alone and a long way from anyone else who is building.
Hi Michael,
Thanks you for reading my column, I’m glad you found it useful. They say necessity is the mother of invention and as a solo builder you’ll have opportunities to invent the methods needed to move your project along. Just remember that anything goes–a tool is only as good as its ability to perform the needed work and if it can to that it may need to be modified or it may be an opportunity to improvise with other tools and materials.
Good Luck and Have Fun!
Kerry Fores
Comments are closed.