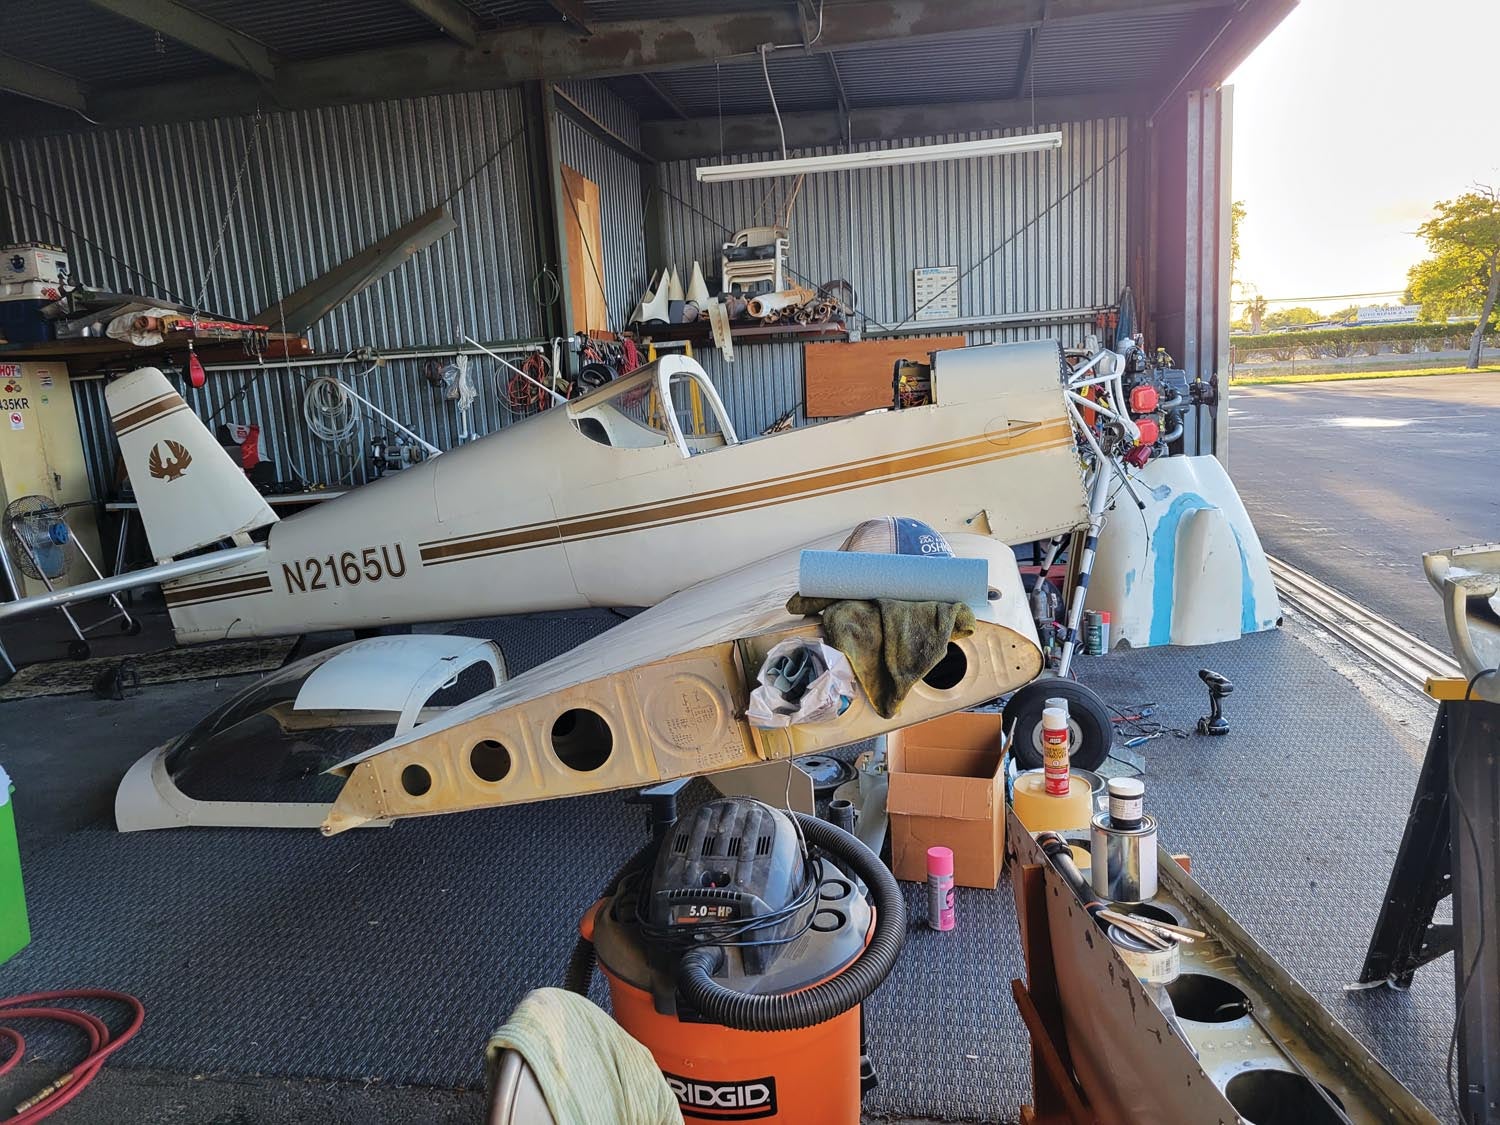
 I’m finding that with a project as intense as an entire airplane restoration, there’s endless moving of parts and pieces. It’s impossible to know where the best place is to start, how long it will take to complete or what problems you might run into along the way.
So aside from the fuel tank project from the previous article, which seemed to be an obvious must-do, the rest of it gets complicated. As I worked on the tanks—mainly to get the sealing slosh out—over the course of many months, multiple smaller tasks were concurrently being accomplished. These included painting my valve covers, researching avionics for panel inspiration, removing the entire panel and starting to sand the RV-6’s exterior for paint. My friend Kerry Richburg continued to work on fiberglassing the cowling and canopy as he mentored me through the sanding process. My friend and CFI, Stan Lawrence, completely installed a new firewall overlay and helped me through the valve-cover painting and panel selection.

Painting My Valve Covers Pink!
The old paint on the valve covers was flaking off, so they were in desperate need of a makeover. Not only would it look more aesthetically pleasing, but the paint would also add an additional layer of protection for the metal. We got new gaskets as well. The valve covers were a perfect side project for me to work on while completing the fuel tanks. It was just painting, right? How hard could it be? First, though, we had to pick a color.
Hangar 32, my project’s home base at the Sacramento Executive Airport (KSAC), attracts many curious visitors. Often, we get people coming by asking, “How’s that airplane going?” or “What’s the project for today?” This would then lead to the question of the month, “What color are you going to paint your valve covers, Tenley?” To which I jokingly replied, “I don’t know. Maybe pink.”
The reactions I got were a solid 50/50. Half of my friends expressed excitement with answers like, “You totally should.” The other half disagreed, often with an appalled face and, “Really? I guess it’s your airplane, do what you want to do with it.” What started off as a joke quickly became a challenge.
I told Stan that I had a color in mind. Next, we had to pick out a shade and find a primer and a compatible heat-resistant paint. Stan excitedly went to the store and brought back two different colors of pink. And because Stan is Stan, he also bought red and gold just in case I changed my mind about the pink.
My Young Eagle friends helped me clean off the valve covers by removing the paint with lacquer thinner. We then sprayed on gray primer, another useful bit found in the depths of the hangar. After waiting an hour, we tried out our first color: Duplicolor Custom Wrap Neon Dynamic Pink.
It looked awesome. This pink was a bright, happy Barbie pink that made a statement. However, we noticed pretty quickly that the “paint” was not going to stay on. This was due to the fact that it was actually a custom wrap with “removable coating,” not a paint. A closer look at the can revealed that it wasn’t heat-resistant, either. Oops.
Sadly, my YE friends and I removed the first pink color and the primer with lacquer thinner. Alas, we had to try again. Take two! We resprayed the primer, waited an hour and tried out the second color of pink: Krylon Fluorescent Bold Neon for High Visibility. It was a hot vivid pink that also made a statement. Once again, our efforts were to no avail as this paint reacted with the primer and bubbled.
As all of us were contemplating the fate of the pink paint idea, Kerry piped in and said that they might have some. I thought, “What doesn’t he have in the back of the hangar?” Even better: If he doesn’t have it then someone else does. Kerry rummaged around in his closet and pulled out a can of pinkish paint—Coral, as it was labeled. He told us that it was old and might not work, but we could give it a try. Yet again, we sprayed the primer, waited an hour and tried the Coral. And thank goodness: It worked. Thank you, Kerry! After all of that, nobody can tell me that I can’t have pink valve covers.
Starting the Panel Process
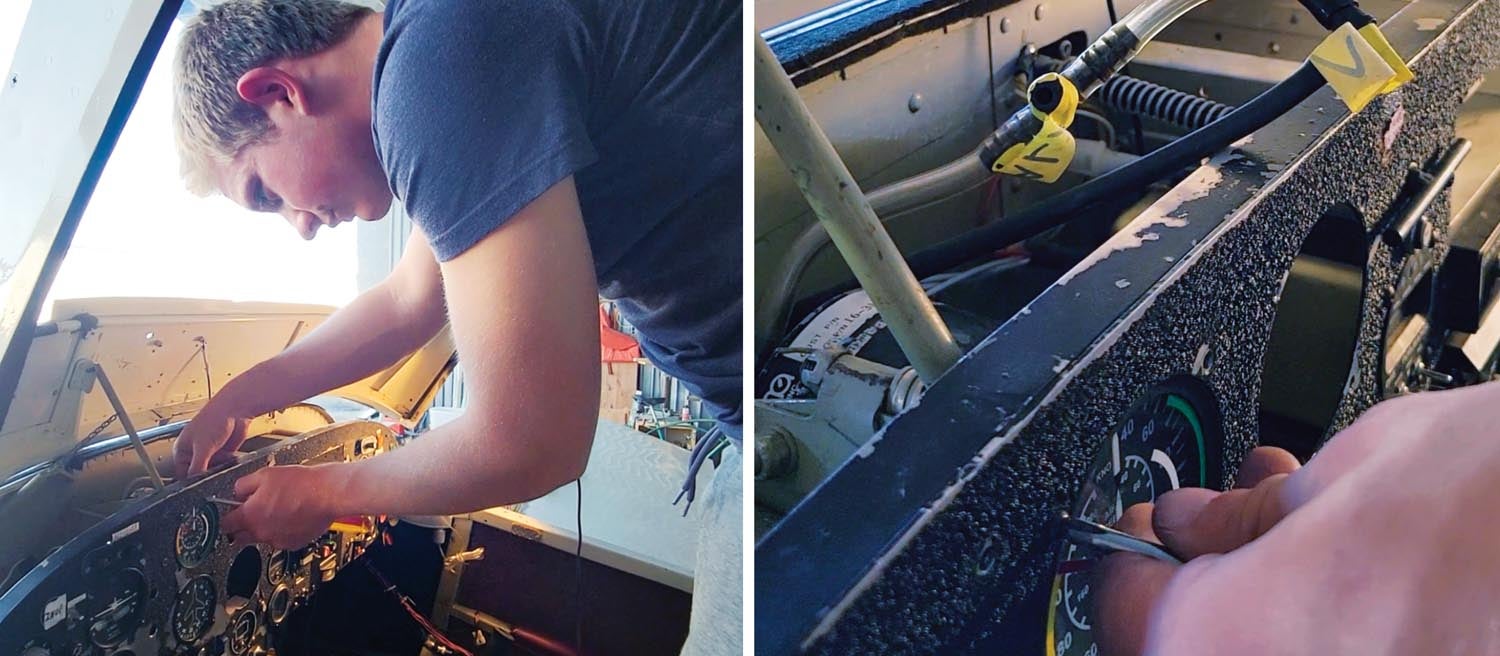
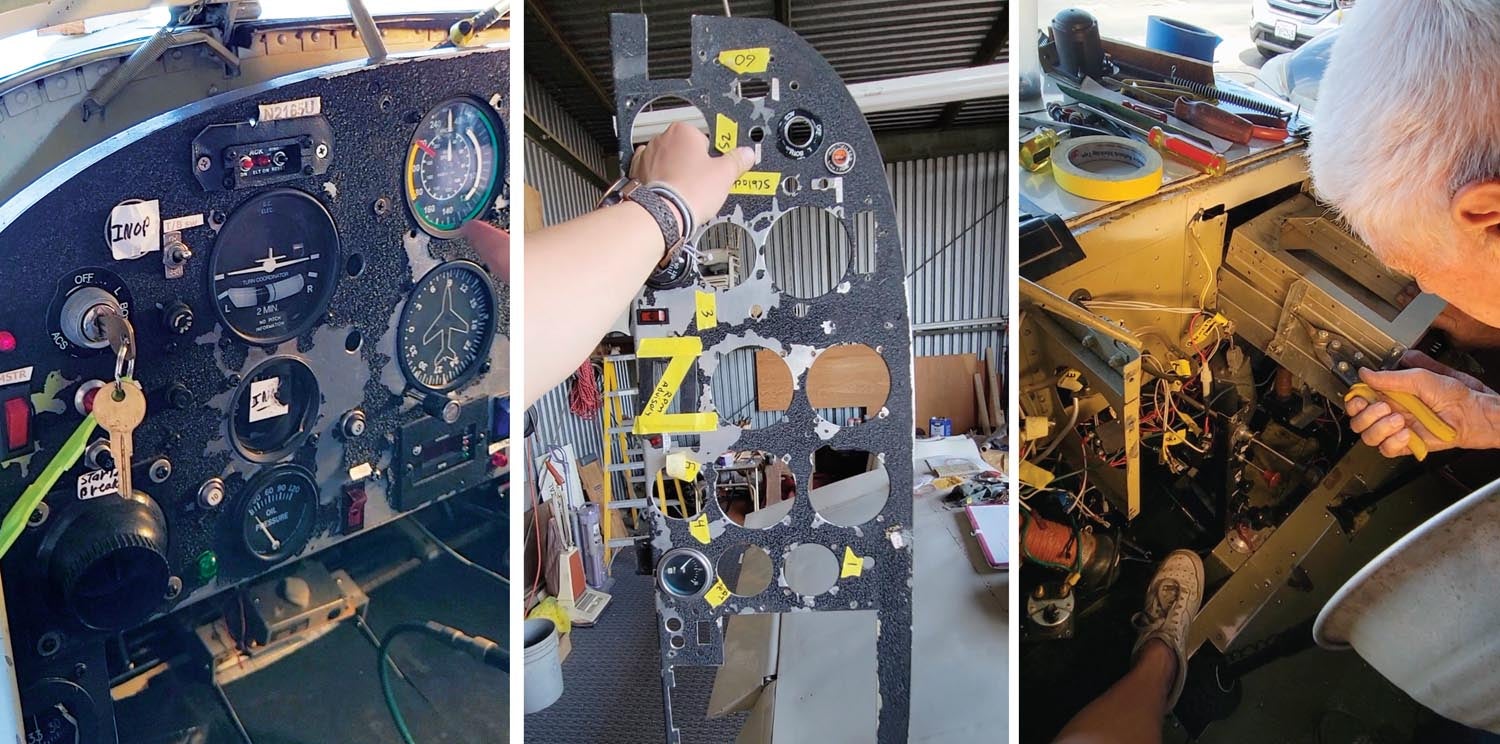
A more pressing question than valve covers was what I was going to do about my instrument panel. As I’ve stated in previous articles, the panel my RV-6 came with had multiple inoperative instruments as well as switches and wires that did nothing and seemingly went nowhere. It was almost like someone replaced a part, then forgot to remove everything that was previously there. The circuit breakers were in random places—there was no rhyme or reason to any of the organization. Ah, the joys of an older airplane. There were many loose ends (quite literally) to tie up.
While most of my instruments and panel equipment were working, many needed to be replaced. Stan, Kerry and my friend Hal Pattenaude (a.k.a. “the boys”) encouraged me to remove the entire panel and upgrade to a new one. More helpers came along from the EAA Vintage Chapter 25 Young Eagles. We made the panel removal a Saturday project. Some worked together to pull the instruments out, while others worked on the valve cover project mentioned above. It was a great educational experience for the YEs as they got to see the inside of a tornado. (With so much going on at once, that’s how this project felt at times—like the inside of a tornado.)
After the RV-6’s hodgepodge panel was removed, I had to decide what to do about it. Did I want a panel with the classic six-pack of steam gauges? Or did I want to upgrade to a glass panel with an EFIS? I took a look at my friends’ panels to figure it out.
For Inspiration
I took pictures of my friend Kim’s panel in her RV-6 (N811WT) and our friend Steve McKibben’s panel in his RV-6 (N4TT). Both of which are gorgeous. Kim’s RV-6 has a glass cockpit, like the one in Stan’s RV-14. Her panel was almost identical to the one I could put in mine. The EFIS screen was the correct size and there was even enough room for an iPad mount in front of the passenger.
Steve’s RV-6 has a steam-gauge cockpit mixed with two MFDs (multifunction displays), a Garmin GNS 430 and an iPad mount. It’s IFR equipped, extremely practical and not as costly as an all-glass panel. After seeing these two examples (plus a few others), I sat down and analyzed the pros and cons of steam gauges versus a glass panel.
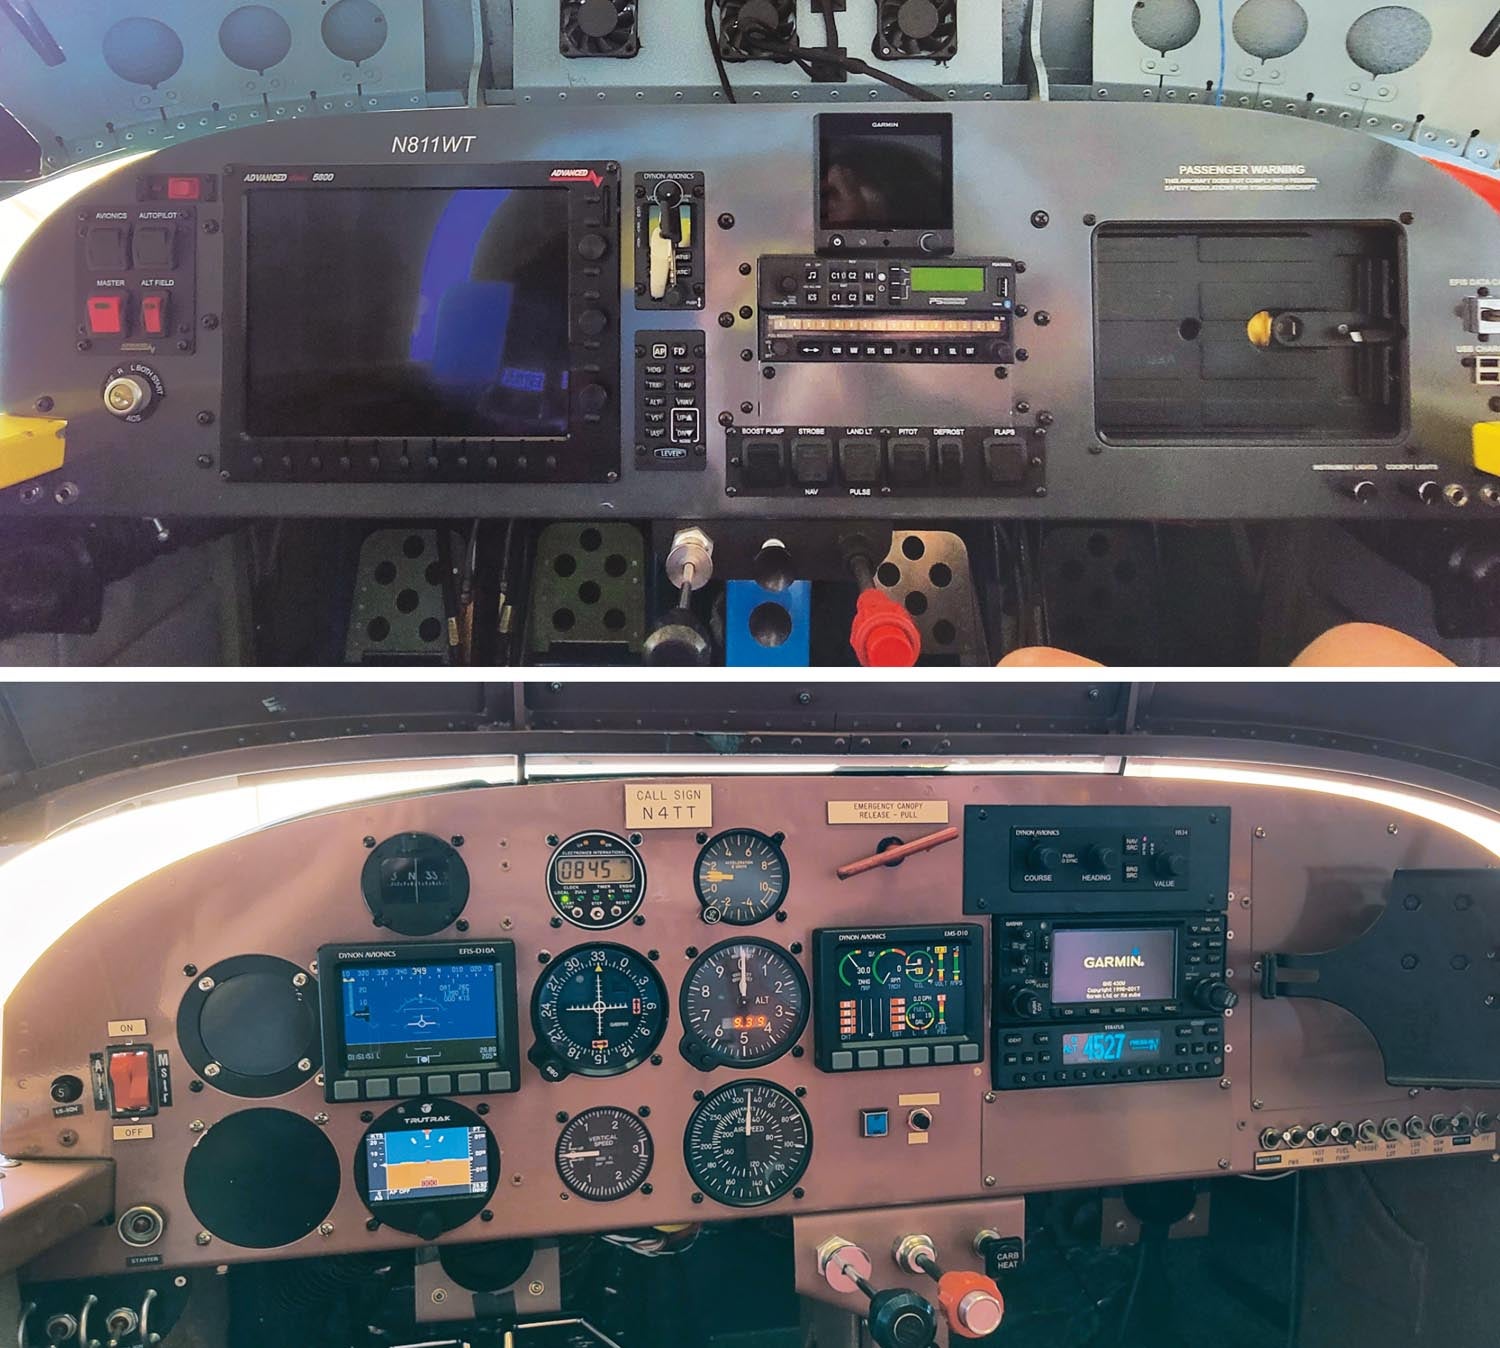
Cost and value: Hands down, a glass cockpit would be more expensive than steam gauges. However, as steam gauges are less modern, having a glass panel in my plane would greatly increase the RV’s resale value.
Safety and reliability: Glass is generally less prone to failures, is lightweight and, when configured properly, has critical redundancy. It’s more reliable as there is no failure-prone vacuum pump. It also includes an all-in-one solution for reading instruments, increasing overall situational awareness.
Ease of use: The all-glass panels that I had my eye on came with “plug and play” harnesses, meaning they were ready to install with prepped wiring and organization. Installing steam gauges seemed like a more daunting process.
The Conclusion
Everyone at Sacramento Executive raves about EFISes from Advanced Flight Systems (AFS). Stan has one in the RV-14, Nick has one in the RV-10, Kim has one in her RV-6—the list goes on. They love AFS because of the amazing team, the customizability and the overall support of their product. They work with you on the design, create and/or collect the parts and put the panel together, then ship it to you. It’s easy, reliable and, in the long run, cost effective.
The plan was to sell pretty much all of my instruments over time and invest in a glass cockpit. Over the next year and a half, I would be working full time at KSAC to save up for my panel, while spending my free time designing my dream panel with the team at Advanced Flight Systems.
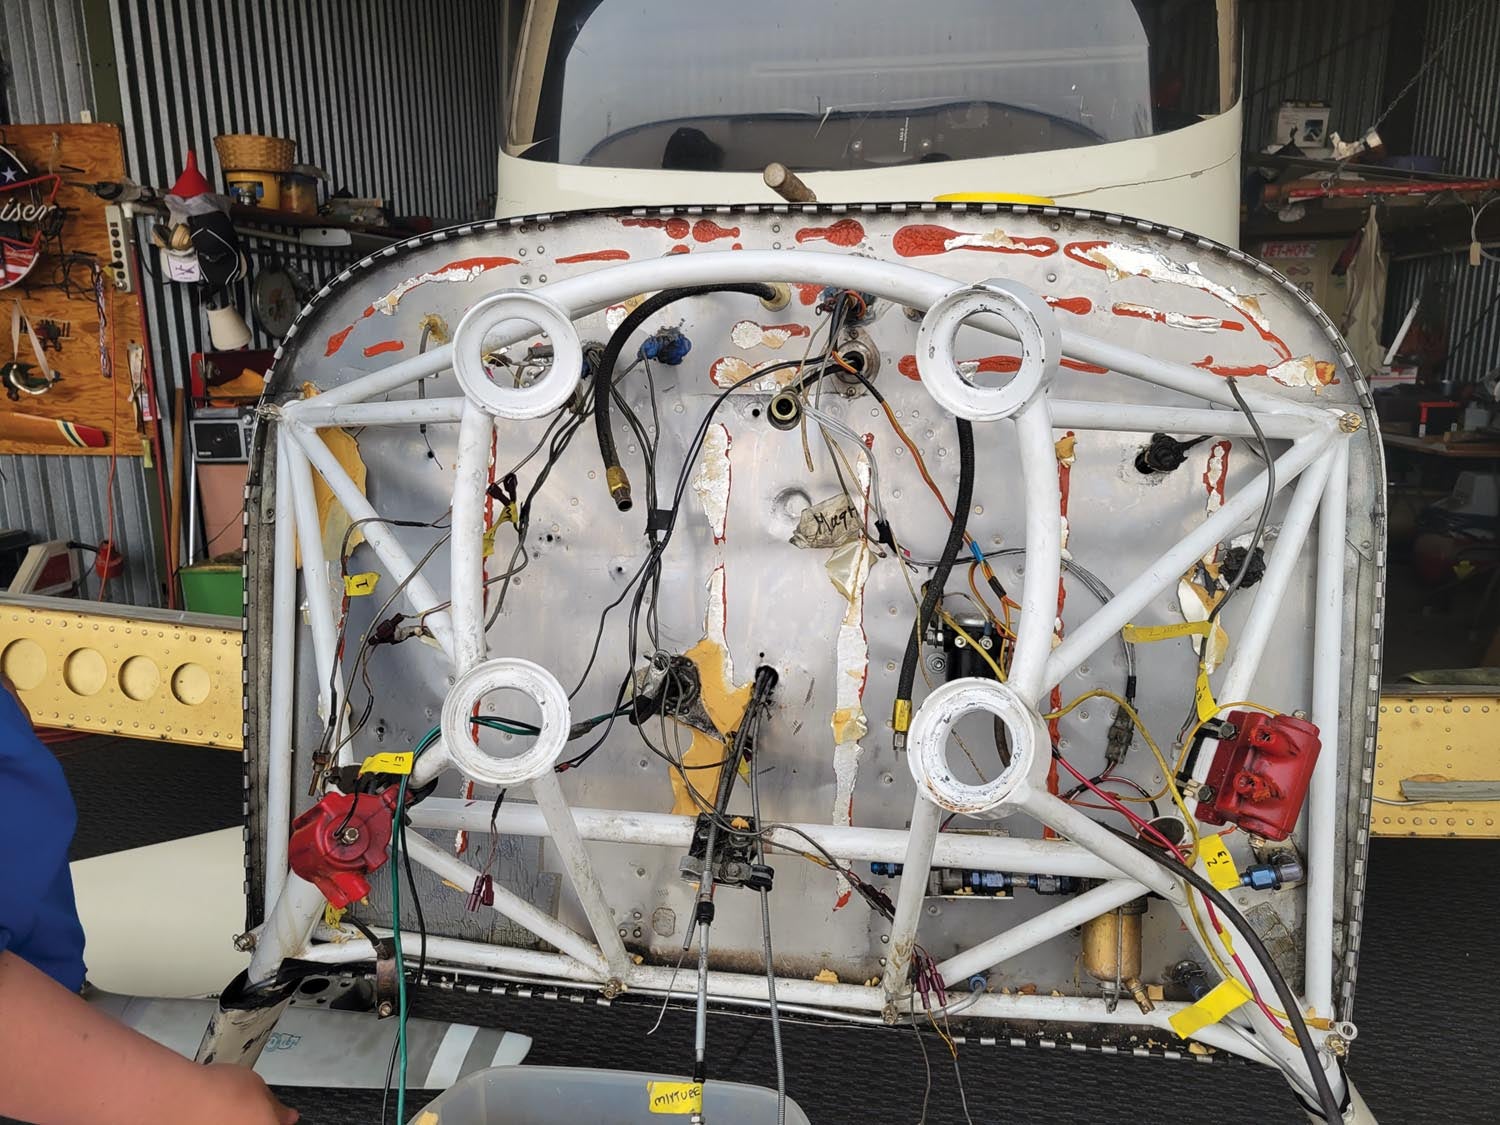
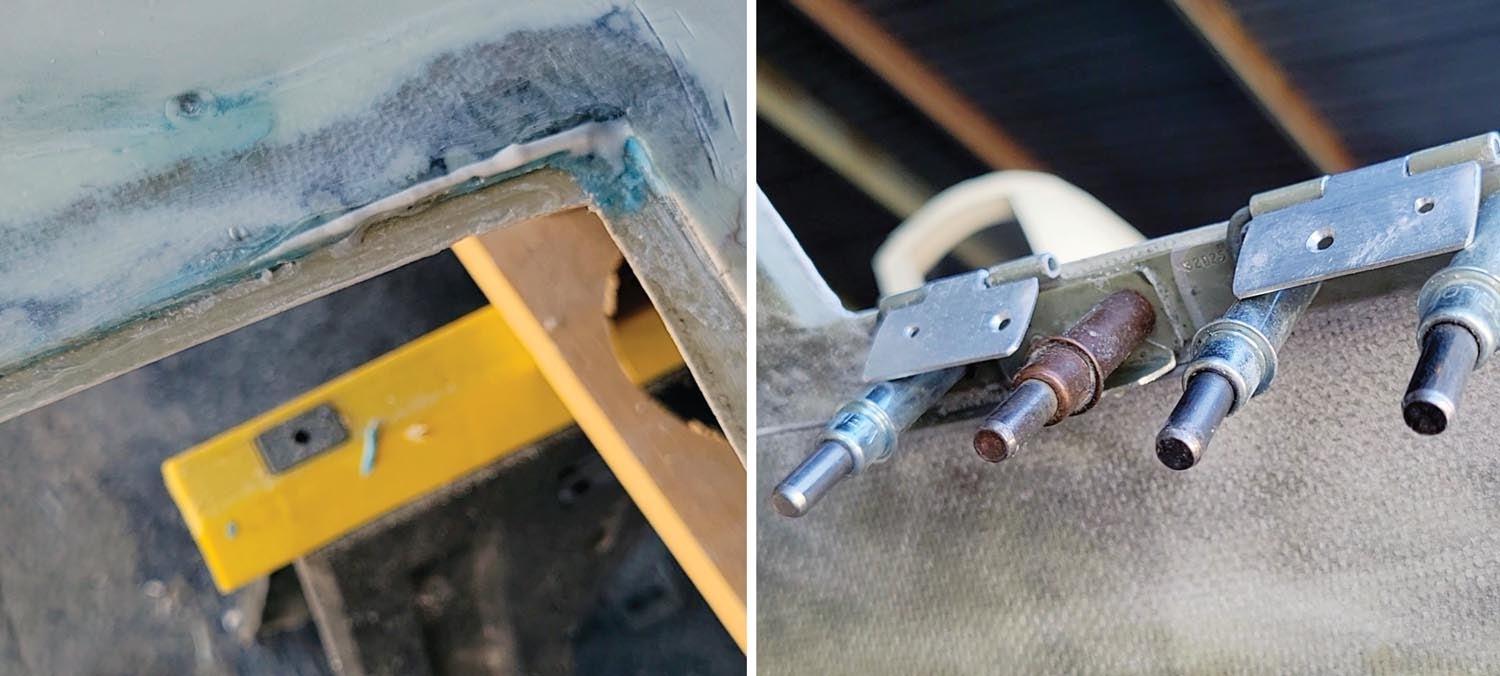
Redoing the Firewall

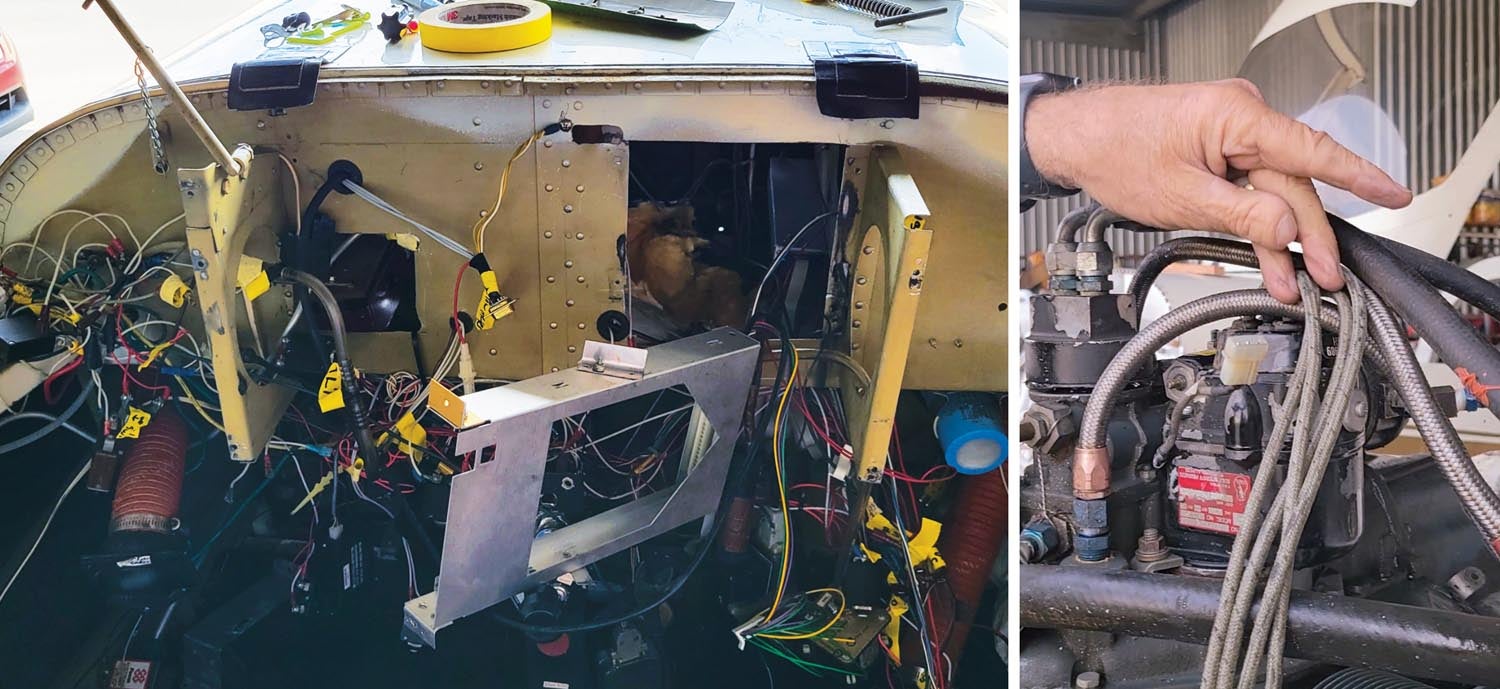
The firewall was covered in insulation material that wasn’t really needed. My friend Adam helped me remove the insulation, then helped clean up the firewall by wiping off the grime and grease. There were also a lot of holes in random places. Because we were adding the glass panel, many of these holes weren’t necessary. Instead of patching them, Stan ended up cutting a stainless steel cover the exact size and shape of the firewall to rivet over the old one.
We also removed the old remotely mounted oil filter to simplify the system with a new spin-on one. However, the new filter was too tall to fit between the engine and the firewall so we had to manufacture a solution—maybe that’s why the remote system was there in the first place. Stan advised me that other Van’s RV owners who have had this issue just cut out a box in their firewall, creating space for the oil filter to fit. He took on the project and got it done! It looks amazing and the filter looks like it’ll fit perfectly!
Fiberglassing the Cowling
Kerry continued his fiberglass work on the cowling. There were parts of it that had been filled in with Bondo. Instead of fiberglass, he was constantly finding and removing the Bondo pieces, then mending the areas of the cowling with fiberglass and epoxy. Another issue was that in some areas, the cowling didn’t line up with the fuselage, so he cleaned up those edges and attached piano hinges.
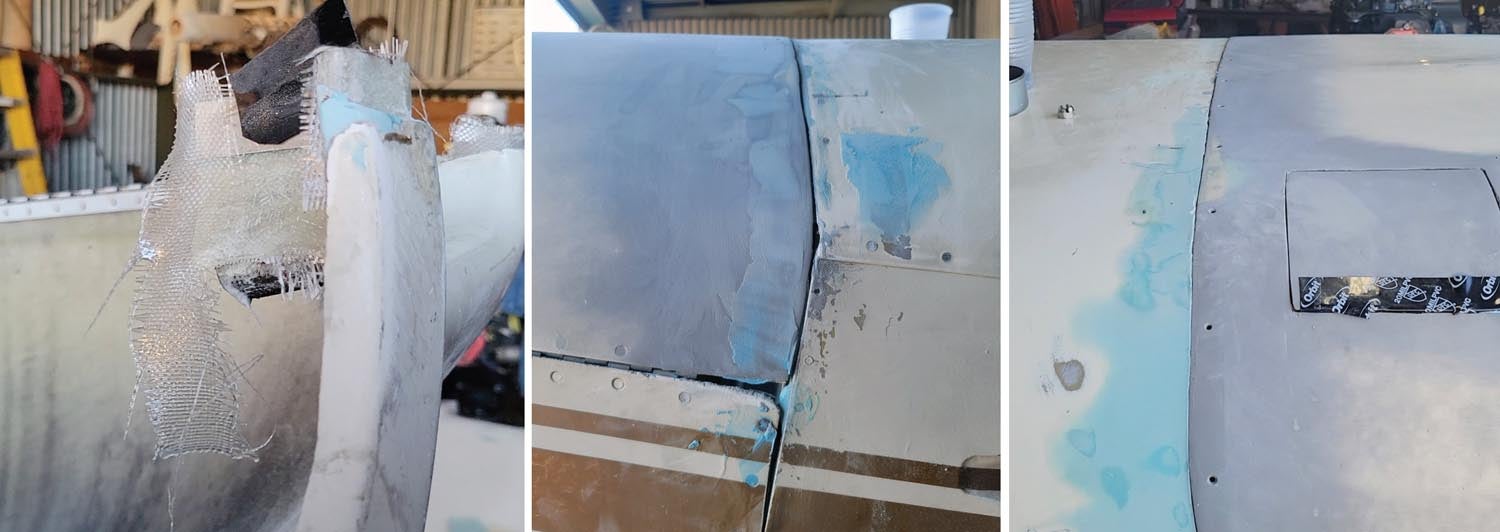
There was one section in the lower right corner of the firewall that was especially problematic. The firewall and fuselage were so dented that there was no fixing it. The previous owner had filled the dent with Bondo, and we had to chip it away as we worked on that corner. For the piano hinges to fit correctly, Kerry worked his magic and carefully installed a nut plate underneath the cowling.
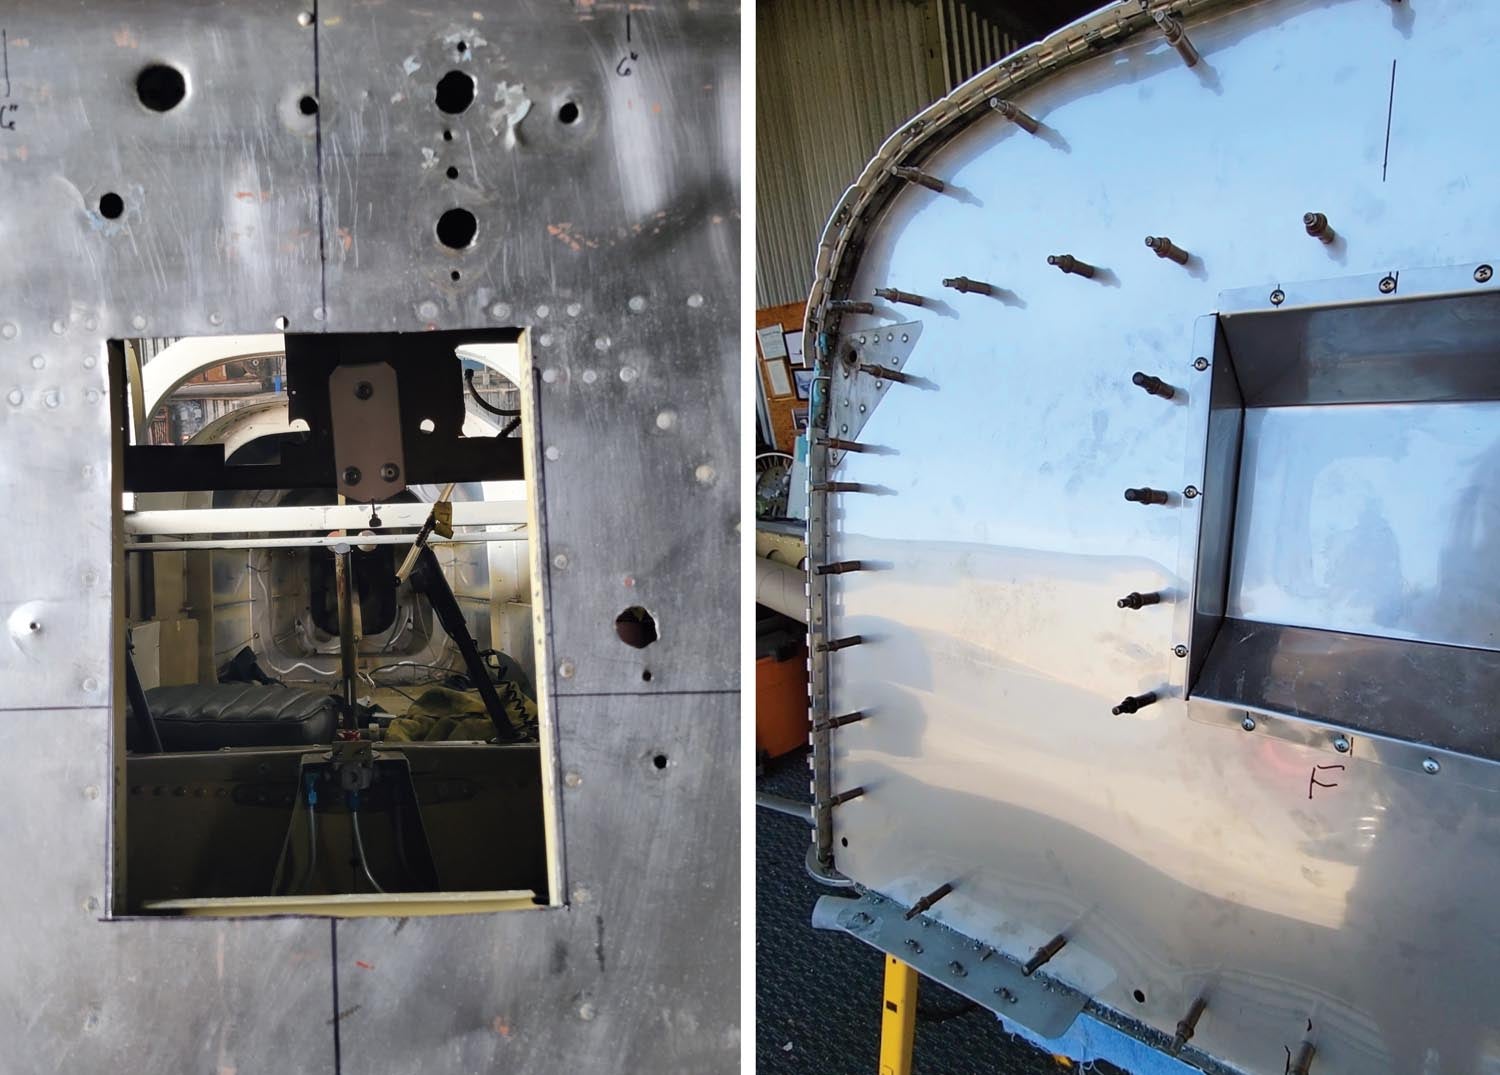
Kerry’s Custom Latch
Kerry designed a custom latching mechanism for the oil-access door in his RV-6 and RV-9. It includes a little handle hidden in the cowling air intakes. You can pull the handle, which releases the latch and pops open the door. I was lucky to be the recipient of one! Kerry kindly gave me a latch. Also, Bruce gave me a metal oil door and hinge, which Kerry then trimmed and fitted to the cowling. My dad contributed the bicycle shifter cable, which attaches the handle to the latch itself, all within the upper cowling. Kerry worked on installing the custom latch as he repaired the cowling. It is so cool and looks amazing!
Sanding
The next big project after fuel tanks is definitely going to be sanding. N2165U is in desperate need of a paint job, so we are going to give it one! The painting part is easy compared to the prep work. The best sanding is done by hand, so you can smoothly and consistently remove the paint from the plane without leaving irregularities on the surface. Kerry showed me how to wrap the sandpaper around a piece of foam and hand sand, letting the sandpaper mold to the surface of the plane. I was instructed to not push too hard as well.
Dry sand leaves dust and residue everywhere, so we started with wet sand. This allowed us to sand without breathing in the paint and to keep the hangar clean. I know sanding will prove to be a long and tedious process—wish me luck and/or send me condolences.

What’s Next?
There will be more to come on sanding in the next chapter! Next, I will work on selling all of the parts of my old panel, designing my new panel with AFS and continuing to pick up other little projects along the way.


Tenley,
Have been following along as your project is similar to mine. Resurrecting a project, fixing and making it your own. I’ve got 3 years in mine with many more projects to complete but am wanting to have it fly more than work on it.
Let the other Mr. McKibben (Steve) know that though few and far between it’s nice to here and see the name even spelled the same show up, and a pilot, other than my Dad. I did, a couple of years ago meet a Piper sales rep with the last name McKibbin.
Keep working, and as said by many… It’s like eating an elephant, take one bite at a time.
Respectfully,
Mark McKibben
Would love to see more details on the oil door latch setup. Great work, so lucky to have good help!
Comments are closed.