Making a pitot tube cover can be a fun, easy project that can be accomplished in a few hours. I was able to make this cover while having breakfast with my wife. Most of what you’ll need can be found at your local aviation fabric store or around your shop. Make sure you check for coupons. I was able to make this cover for $8.22 and still have enough material to make about 10 more. I chose to make my own cover because the pitot cover that I purchased wasn’t long enough.
1. Start your project by tracing your pitot tube onto a piece of cardboard. Make sure you don’t place too much stress on the pitot tube if it is installed on your plane.
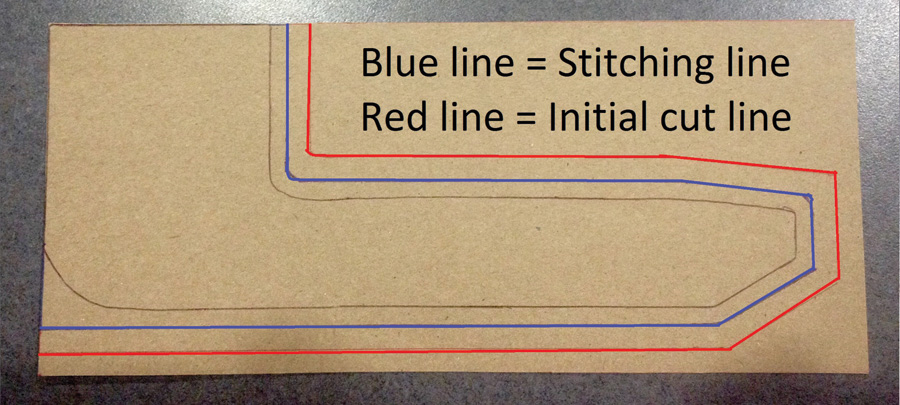
The black line is the outline of the pitot tube. The blue stitching line is 3/16 inch away from the black line, and the red cut line is 1/4 inch away from the blue line.
2. Draw a blue line 3/16 inch away from the black line, as shown in the photo. The blue line depicts the stitching line; said spacing will allow room around the pitot tube while maintaining the correct dimension on the back of the pitot tube.
3. Draw a red line 1/4 inch away from the blue line. The red line depicts the initial vinyl cut line.
4. Grab the piece of cardboard and cut along the red line.
5. Place the cardboard template on top of the red side of the vinyl and trace the shape with a ballpoint pen. Be sure you make a left and right side from vinyl.
6. Once that is complete, trim the cardboard template to the blue stitching line. Place the template on top of the red side of the vinyl. Line up the aft edge of the template on the vinyl, center the template inside the previous line, and trace the shape with a pen. Be sure to do both pieces of vinyl.
7. Cut along the outer red line on the vinyl. Notice that I left some extra material below the cut line in the lower left corner. This is where the red ribbon will be sewn to the cover.

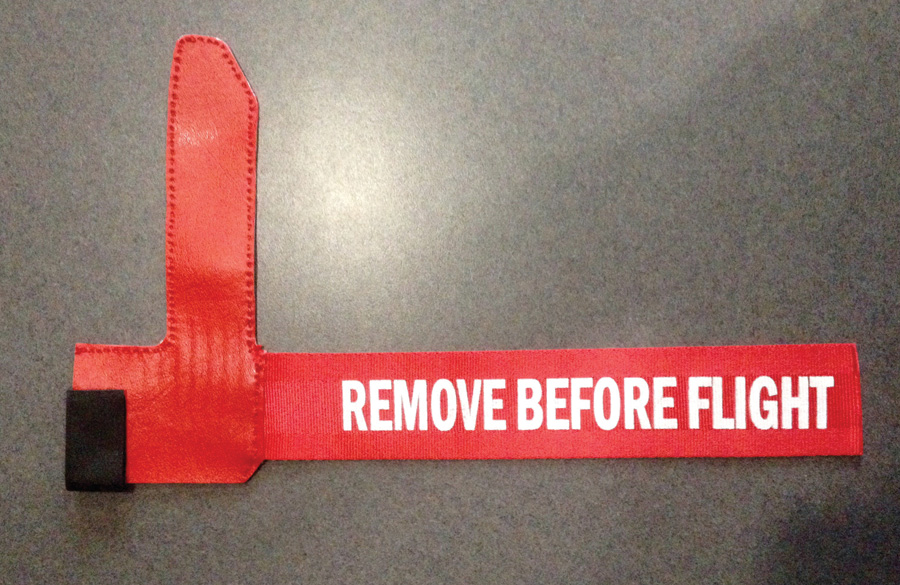
Black paper clamps like the one shown here were used to hold the two pieces of vinyl together for sewing. Notice the notch that extends down from the lower left corner of the vinyl; this is where the “Remove Before Flight” ribbon will be sewn.
8. Place the pieces of vinyl on top of each other (back to back) to start forming the cover. Use black paper clamps to hold the two pieces together.
9. Sew over the stitching line that was traced onto the vinyl. Make the distance between stiches as close or as far as you desire. Then trim the vinyl nicely around the stitches.
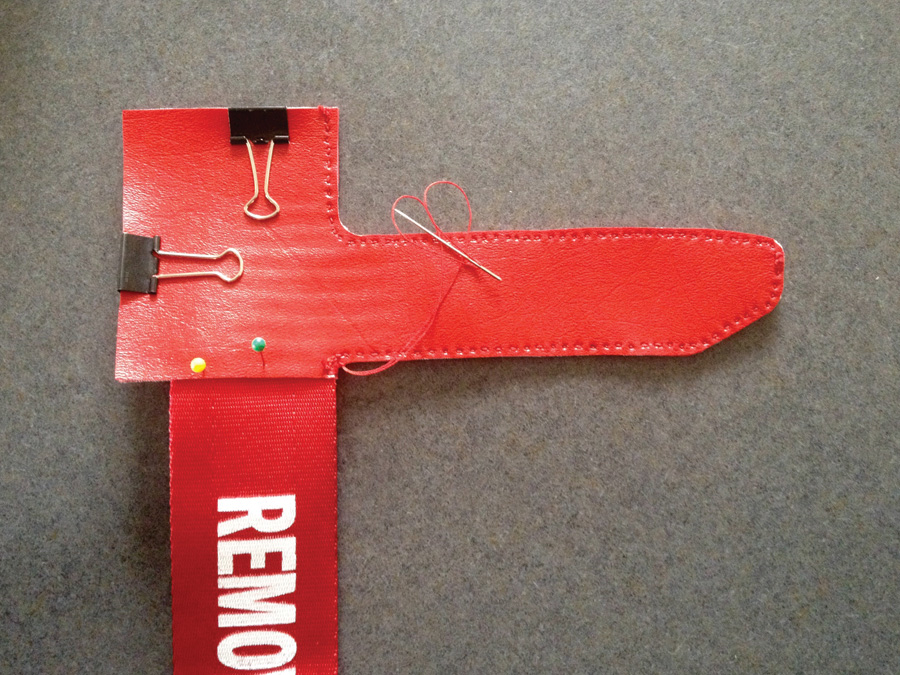
After the two vinyl pieces are sewn together, it’s time to add the “Remove Before Flight” ribbon to the notch at the bottom of the cover. Be sure not to sew the edges where the black paper clamps are located.
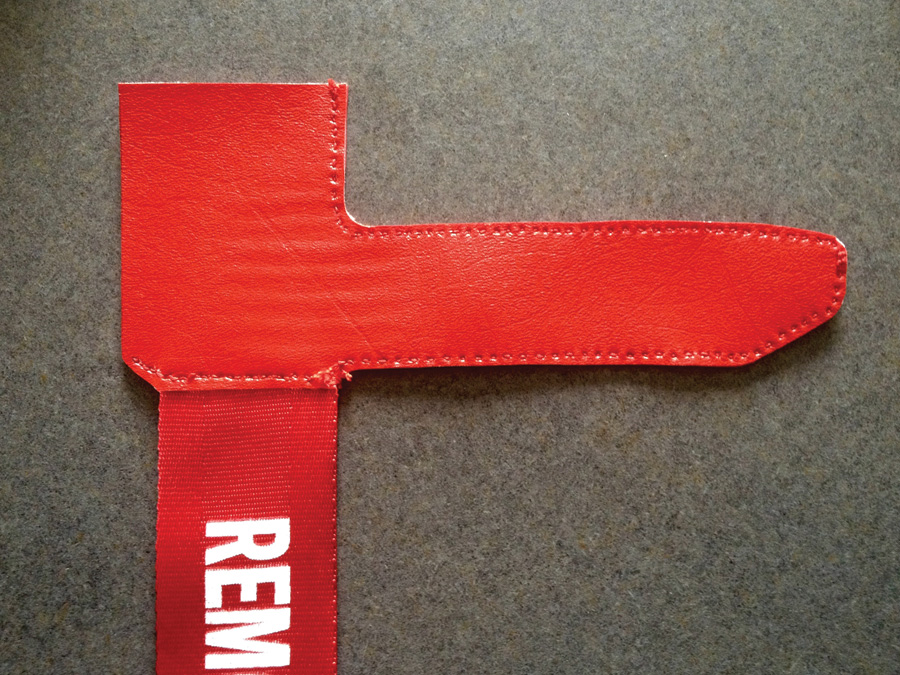
After the “Remove Before Flight” ribbon is sewn to the cover, trim the lower-left corner on an angle, eliminating excess red vinyl.
10. Add a red ribbon. I used a “Remove Before Flight” ribbon that I had lying around. Place it at the bottom-left corner of the pitot tube cover and sew it in place. I used double stitching in this area, as the ribbon will be moving around in the wind. I also slightly offset the ribbon down in order to allow space between the pitot tube and the small portion of ribbon that gets sewn inside the cover.
11. Clamp the hook and loop material to each side of the cover. Make sure you don’t sew the back or top of the cover closed. Individually sew each hook and loop piece to the cover using black thread.

Clamp the hook and loop material to each side of the cover. Make sure you don’t sew the back and top of the cover closed.
12. Nicely trim around the cover to make everything look even.
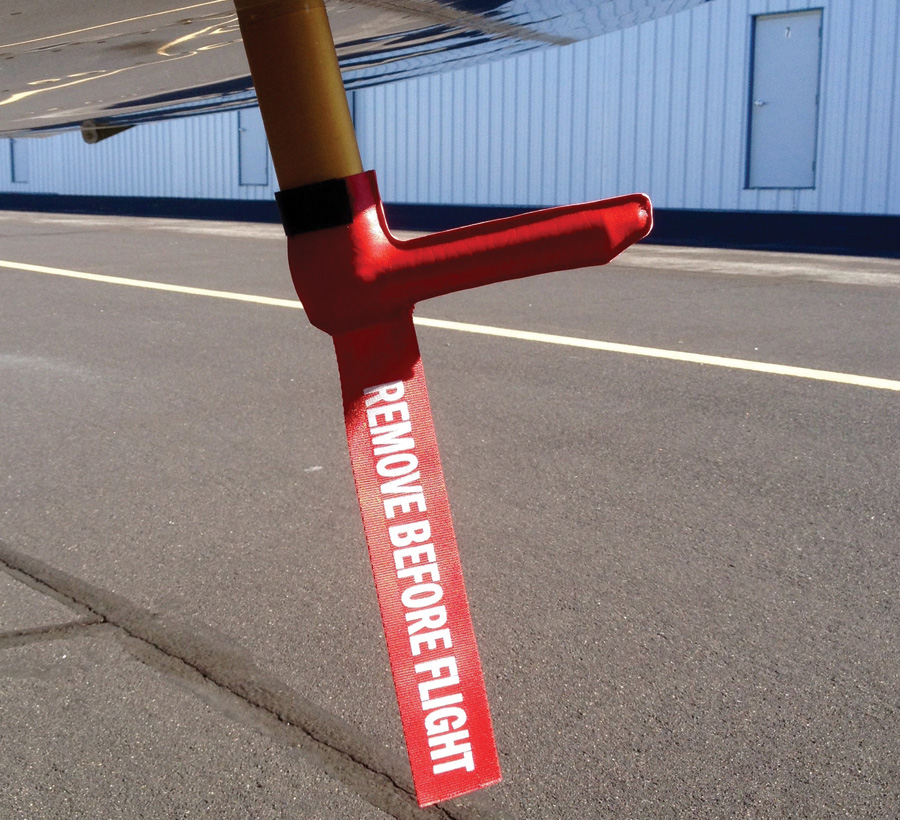
13. Finally, go to the plane and do a trial fit. The cover should fit nice and snug. You now have another homemade touch to go with your homebuilt aircraft. Rejoice in the accomplishment every time you install the cover. If you are lucky enough to have a sewing machine, you can drastically reduce the time required to complete this project.
Each hook and loop piece was individually sewn to the cover using black thread. For the final step, do any necessary trimming around the cover to make everything look even.
Supplies for Pitot Tube Cover
- 1 yard (or 1 square foot if you can buy it) – Red marine vinyl
- 1 – Scarlet vinyl thread
- 1 – Black vinyl thread
- 1 – Red ribbon (remove before flight)
- 1 – Sewing needle
- 3 – Sewing pins
- 4 inches – Hook and loop material
- 1 – Piece of cardboard
- 5 – Paper clamps


