So you’ve succumbed to the siren call to fly your plane to a fly-in. That could be the granddaddy of them all, Oshkosh AirVenture, or your local airport gig. It matters not. You want to show up in style. We’re going to deviate a bit from the norm this month and next, and talk about what you really need to wow the crowd. Everything is color coordinated, so here we go from the ground up.
In the Weeds
They are going to park you on the grass (or in the weeds, if that is an option). If you are at the show for more than a few days, or if it rains while you are there, your wheels will sink into the ground. You need a tire plate to prevent that.
Second, forget the hype about “monster tiedowns” guaranteed to keep your plane strapped to the earth in a tornado. We had one at Oshkosh a few years ago, and nobody’s tiedowns kept their planes from becoming twisted aluminum.
Now, we need to color coordinate all this stuff so that it looks like you did it all on purpose. And then we need to wrap this up with antennas and such from Oshkosh 2012, where 35 years of know-how came to fruition.
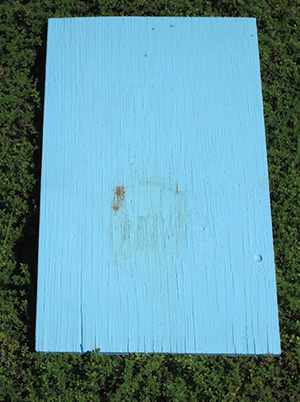
The tire plate. Note the tire mark one-third of the way up the plate.
Starting with the Tire Plate
First, you need a plate for your landing gear. If you don’t want to do this, making neat chocks is moot. Here’s the deal: I measured the square inches of the 182 tire marks on the plate, and it turned out to be about 6×3 inches, or 18 square inches. Since the nosegear takes almost nothing from this, the airplane at 2650 pounds puts about 1325 pounds on each maingear, or about 73 pounds/square inch (psi). That’s enough to drive the tires into soft grass after a good rainstorm. However, a plywood plate 12×20 inches (240 square inches) reduces that pressure to 5 psi, which most grass can take without a lot of trouble.
How did I arrive at 12x20x3/8 inches? Simple. That is the maximum size that fits under the rear seats in the 182. If you have a lighter/heavier airplane and more/less room to store three sheets of plywood, go for it. Why 3/8-inch? I tried ¼-inch plywood and it cracked. I tried ½-inch plywood and it didn’t even strain with the load. I tried 3/8-inch plywood, and it hasn’t shown any stress. If you have a lighter/heavier aircraft than a 182, use the thinnest ply that won’t crack under the load.
I use a thinned primer as the base coat on both sides and the edges. For the color coat(s), use a good latex enamel to match your color scheme. You can use rattle-cans if you must, but at least three coats on top and all four sides. I much prefer brush-paint as it seems to hold up better. The plates shown here are 15 years old, used at least twice a year, and they hardly show any wear. I don’t color-coat the bottom of the plate, but you may if you wish.
Next are the chocks for the maingear. One-and-a-half-inch (40mm) PVC water pipe is your friend. The dimensions for 6.00×6 tires are shown in the photo. If you have larger/smaller tires, you may want to adjust the lengths and widths accordingly. And you can get your N-number stick-ons in various colors at any office-supply store.
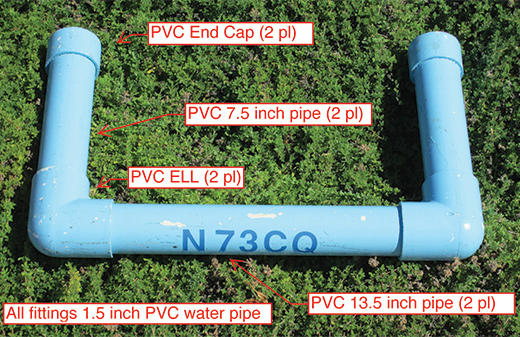
The chock.
I will warn you of this: Do not use these chocks on grass without the plywood plate. A week in soft grass will sink your tires into the ground to the point where it requires a hydraulic jack or sledgehammer to remove the chock from the tire. Heaven forbid that you have wheelpants without the plate, as the chocks will embed themselves neatly into the bottom of the pants, requiring major surgery to free them. On these chocks, I use a good spray paint and again, after 15 years, there’s hardly any wear. I use primer on PVC because most spray paint will not adhere to the plastic.
The Final Element
Now the piéce-de-résistance: tiedowns. There are two distinct parts to my tiedowns. One is the mechanism that is firmly attached to the earth, and the other is the rope that connects my airplane to that mechanism.
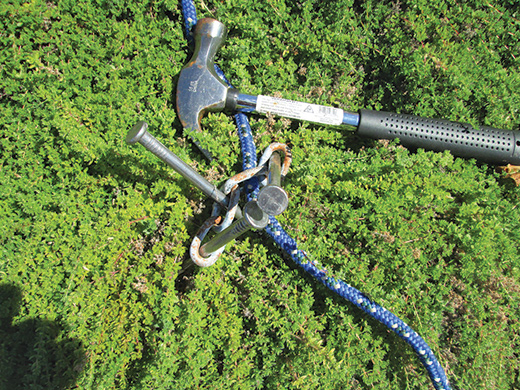
The tiedown mechanism. Nails at 45° to the ground and 120° with respect to one another. The all-metal hammer is for installation and removal.
The mechanism of choice is called a bridge spike in some hardware stores and a large nail in others. Some well-meaning pilots will tell you that nails won’t hold in the soft Wisconsin dirt, and you have to use the corkscrews or the overpriced “super-claw” contrivances. Neither is true. This tiedown mechanism has held through some of the most violent weather ever to rumble through Oshkosh, as well as during a week on the top of the Continental Divide on a Wyoming dragstrip with an every-evening thunderstorm while I was field-changing a jug that decided to part company with the engine about halfway between Medicine Bow and Rawlins.
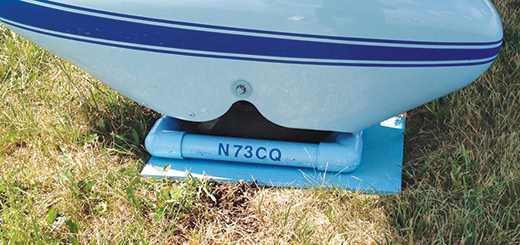
The 182 right maingear on the plate with the chock.
Here is the drill: three 12-inch bridge spikes through three links of a four-link ¼-inch proof chain (the fourth link will be used later). The three spikes are driven into the ground with an all-metal (don’t buy the less expensive wood-handled type) hammer. Drive the spikes in at a 45° angle to the ground and at a 120° angle with respect to each other. Now, far be it for me to be superstitious, but I always drive one spike headed north and the other two southeast and southwest, respectively. And I also throw salt over my shoulder to keep the rhinoceroses away.
Why they call it ¼-inch chain in the hardware store is not clear, but each link should have a ½-inch spacing in the center of the link. Bridge spikes will just barely fit through the links.
Now for the rope. Or, if you are a sailor, you may prefer to call it line. Here is a link to everything you ever wanted to know about rope/line. As with everything else marketed for airplane and boat owners, it can get a little pricey. Just remember that you will be using this rope maybe 100 times during the life of your airplane. So what if it stretches a little or doesn’t have really good UV characteristics—who cares? How many hours is it going to spend holding down an airplane, and how many hours will it be sitting in a bag in the hangar?
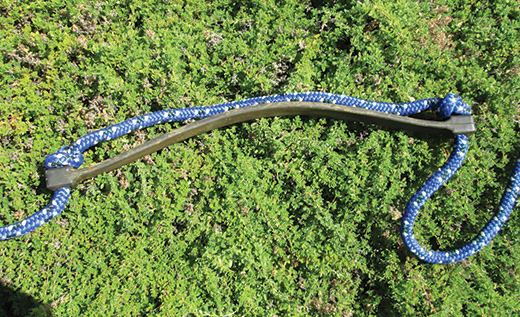
The shock absorber in the middle of the rope.
As for me, I compromised on plain old blue 3/8-inch polyester from the aviation department of my local hardware store. What length? Measure from the ground to your tiedown ring. Double this distance and buy that length of rope for each tiedown ring on your aircraft. I use a rubber shock absorber in the center of the rope so that there isn’t full tension on the rope itself until things get to rock ’n rolling, and then the shock absorber allows the rope to do its job.
It’s also important to keep the rope from unraveling at the ends. Melt the ends with a flame source and then, when it cools, use shrink sleeving over the end. You will thank yourself the second time you use these ropes.
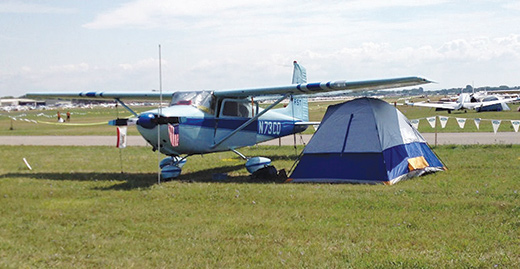
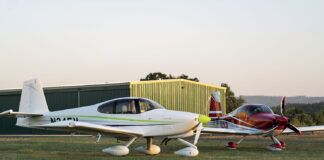
An airplane with all the goodies mentioned in this article, camped at Oshkosh 2012.
I know what you’re thinking: Jim, what about that antenna you mentioned? What about those flags on the propeller in the photo? And where is the aircraft data sheet? Well, we’ll discuss those items next month. Stay tuned.


