This is by far the best ground plane aircraft band antenna I’ve ever seen. Perhaps the best ground plane antenna ever built.
And this is for builders of corrosion queens, termite traps, and Tupperware airplanes, with hope that you can all work together to make these antennas for your hangars. All you’ll need for construction materials are aluminum sheet, copper tape, pine dowels, and PVC plastic.
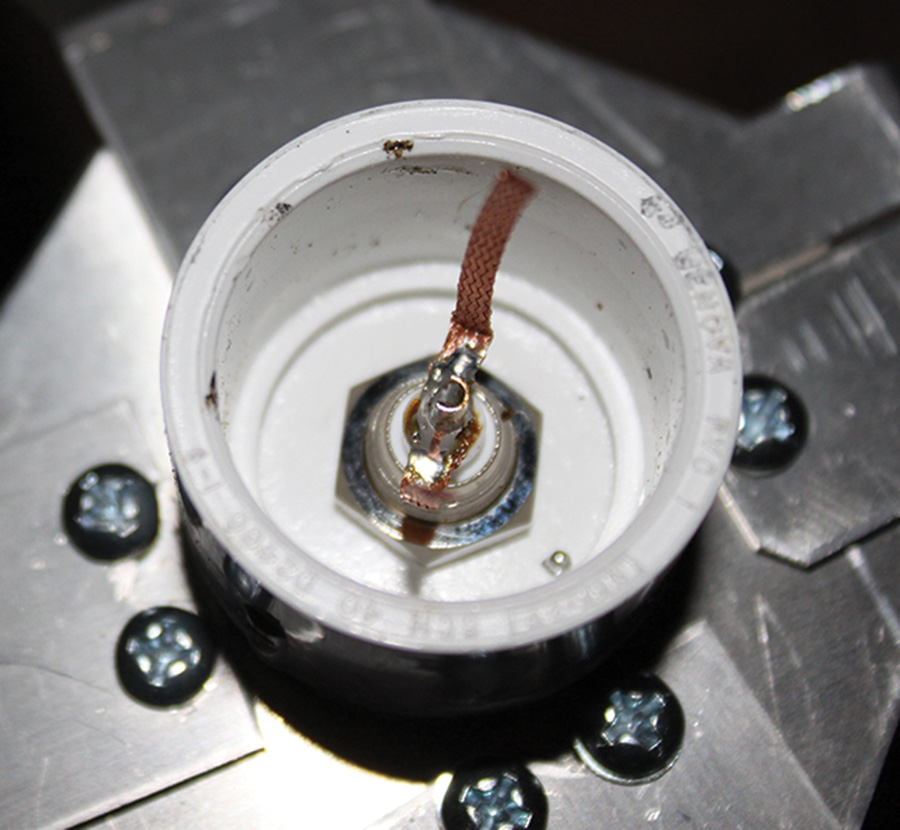
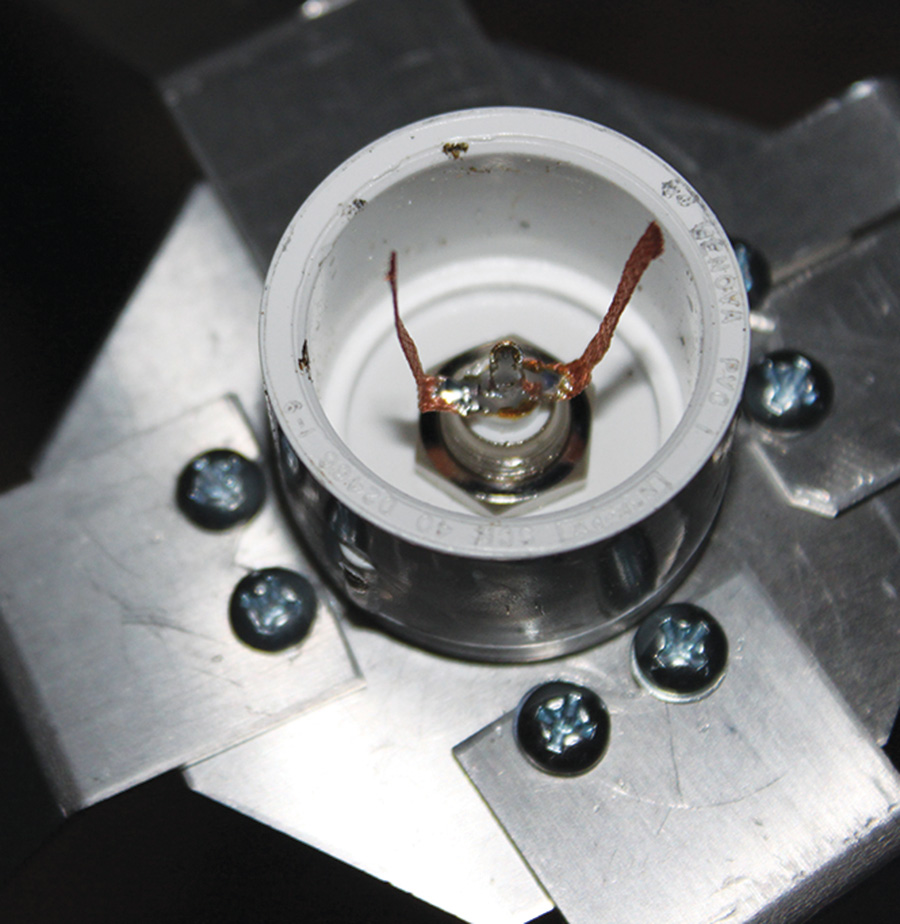
The PVC mounting piece with the BNC connector and copper braid ready for soldering on the radiating elements.
What is and why have a ground plane? Let’s go back to a cold winter day in Newfoundland: December 12, 1901—nearly two years to the day before those brothers at Kitty Hawk decided that we could fly. And at exactly this same spot in Newfoundland, Lindberg left the North American continent 26 years later on his way to Paris.
But I digress. Feller by the name of Marconi got the wild idea that radio waves (called Hertzian waves in those days) could travel across the horizon. He set up a transmitting station in Newfoundland, a receiving station near Cornwall in England, and in December of ’01 transmitted • • • (the Morse code letter S) from Newfoundland to England. That may not sound like such a big deal until you understand that those Morse code dots are what we now call “bits,” and we send tens of billions of digital bits daily around the world on many of the same principles that Marconi used in 1901.
Another bit of trivia for your collection: When Lindbergh left Marconi’s transmitter location in Newfoundland, the first landfall he made in Europe was within spitting distance of Marconi’s receiving station in Cornwall.
So, on to the antenna. Marconi judged (correctly) that Hertzian waves (or what we now call radio waves) would launch off a vertical antenna rod that was perpendicular to the surface of the earth (sort of like a fence stake) at an angle roughly equal to half the angle between the rod and the earth’s surface. This will launch Marconi’s signals at about a 45° angle. He was absolutely correct, but didn’t quite understand that there was going to be radiation slightly above and slightly below this angle.
Brother Marconi used waves way down in the 2-4 MHz range. We need to do something in the 118-137 MHz range.
Enter the concept of frequency. Down at Marconi’s frequency, antennas were hundreds of feet long. In our aircraft band, we are talking inches or centimeters. And, what Marconi did not know was that his waves would travel by “skip” off of the ionosphere thousands of miles, while our aircraft band signals are absolutely line of sight.
So, given that our frequencies are way above Marconi’s vertical (literally “ground” plane) antennas, and since frequency and wavelength are reciprocals of one another, we have the option of building our smaller “ground planes” out of metal rather than earth.
I don’t think it is a great leap of engineering faith to think of a VHF ground plane built out of aluminum. But now, let’s couple the interesting and serendipitous ways of making the antenna.
If we have a true antenna (quarter wave, explanation later) over the earth, the natural feed impedance is 32 ohms. However, if we build a dipole (several columns back in Kitplanes®), the feed impedance is 72 ohms. Somewhere between the true vertical antenna (90° to ground) and the dipole (0°) is the magic 50Ω number that we want for communications antennas.
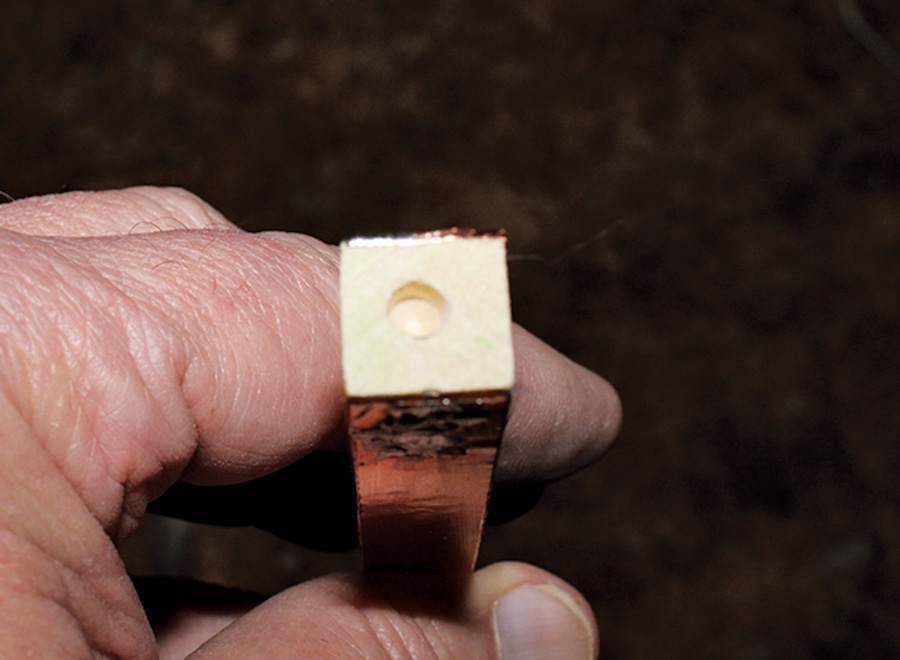
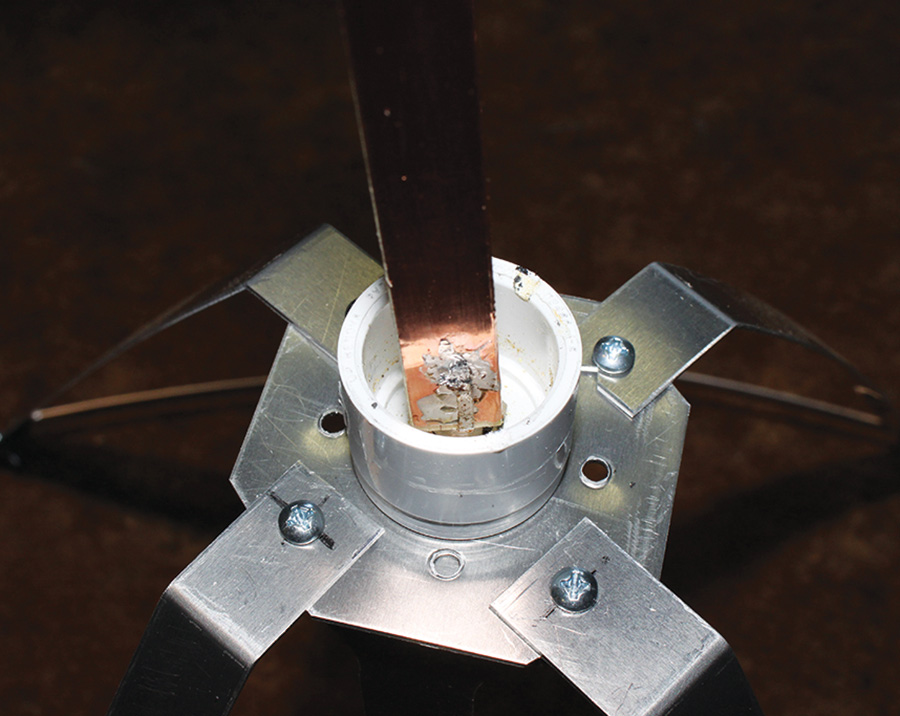
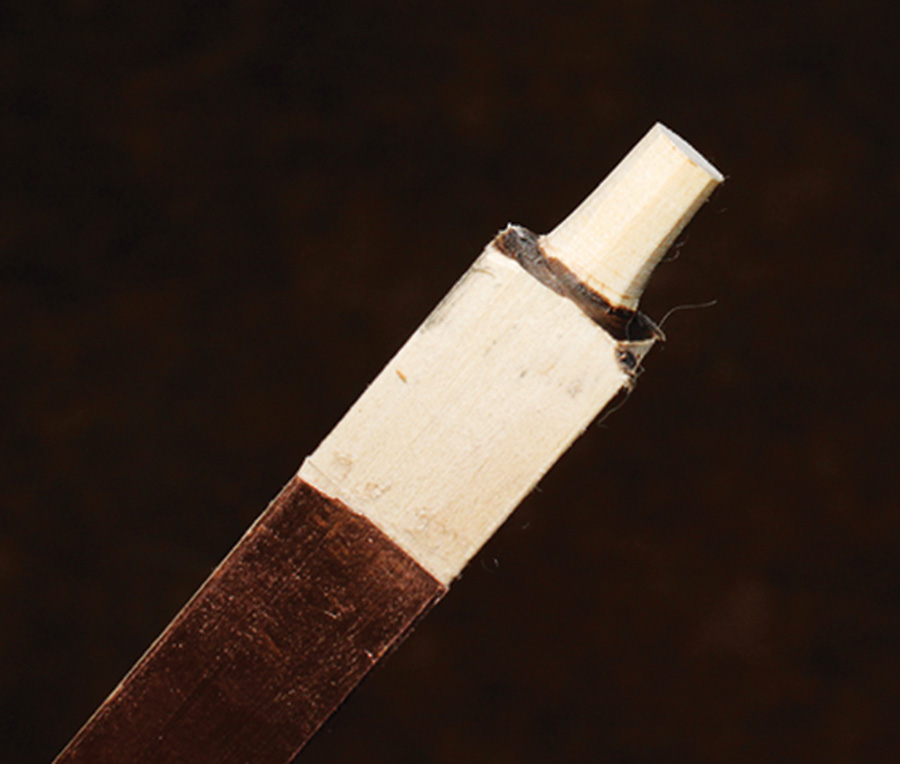
The hole in the end of the square dowel that will mate with the center conductor on the BNC connector. This “connection” is purely for mechanical stability. It has no electrical function.
Strangely enough, that is at a 45° angle between the “radiating rod” and the “ground plane.” And, we have achieved the goal of not radiating our power above the horizon, but nearly directly at the horizon, which will give us maximum range to distant aircraft. Another Weir two-fer.
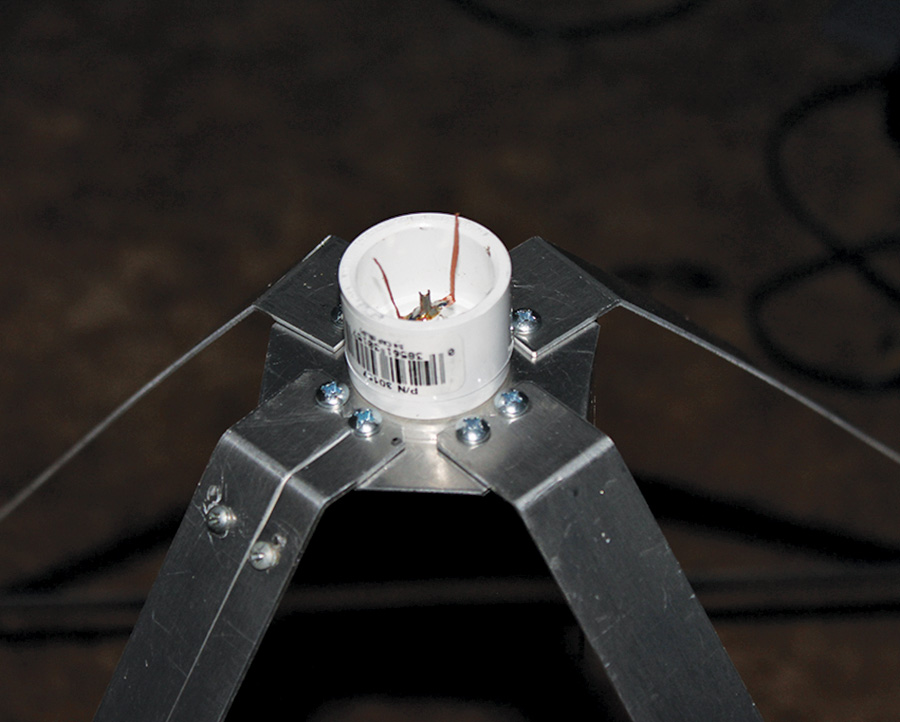
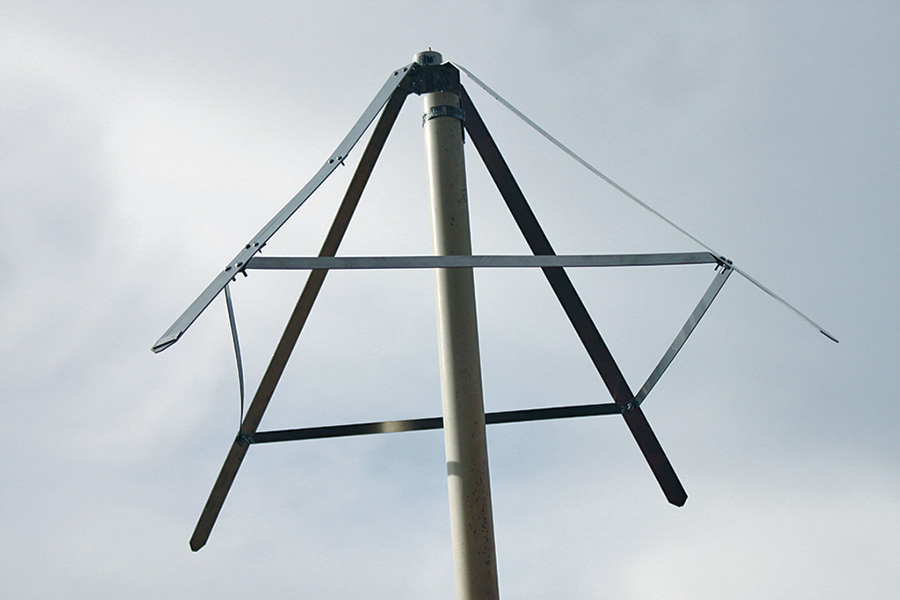
OK, tinbenders, front and center. There is a small aluminum plate that contains a mount for the PVC coupling and attach holes for the ground plane elements. The braces you see about two-thirds of the way down the ground plane elements are absolutely not electrically required. They are there to keep the ground plane elements from swinging in the wind.
Woodbutchers, your turn. I need a half-inch square dowel that most hardware stores have. Work with the numbers below to find out how long; the little milled “dowel” at the top has no electrical function—it is there to keep the antenna rod from vibrating.
Plastic Pushers—you are responsible for supplying the mounting fitting (a three-quarter inch PVC flat-bottom end cap) for the BNC connector and the final three-quarter inch of PVC pipe that covers it all. Get a rubber grommet or washer that force-fits into the pipe with a hole in the center to fit over the machined dowel.
Electronickers, here you go: Get the Tupperware and tinbenders to drill a three-eighth inch hole in the dead center of the aluminum plate and the dead center of the PVC mounting fitting. Mount a UG-1094 BNC fitting into that hole, connector side down. Locate a source of half-inch wide sticky-back copper tape. Locate a three-inch piece of copper braid (desoldering braid or braid stripped from a short piece of coax cable).
Here’s the details of construction:
• Write down the frequencies you want to cover. Take the lower frequency, add to it the upper frequency, and divide by two. For the aircraft band, this is ((118+137)÷2) = 127.5 MHz. Divide 2953 by this frequency to get the measurement for a center-frequency quarter-wave in air. 2953÷127.5 = 23.2 inches.
• The start is a metal mounting plate. Dimensions are not critical, so long as the legs and the PVC mounting fitting don’t interfere with one another. For the aircraft band, a plate three inches by three inches is a good place to start. From the square plate, cut the corners to make an equal-sided octagon. I used 50-mil (0.050″) aluminum because it is what I had. Thickness is non-critical. However, for physical robustness, I wouldn’t use much thinner than 30 mil.
• Drill a three-eighth inch diameter hole in the center of the plate and a matching hole in the center of the PVC mounting fitting. Use the BNC connector to mate the plate to the fitting. Fasten securely with the lock washer on the inside of the PVC fitting.
• Manufacture four ground plane legs. The width is fairly non-critical, but past about 4% of a quarter-wave, you reach diminishing returns. Four percent of 23.2 inches is 0.92 inch, so I used one-inch stock. Make them so that the distance from the center hole in the mounting plate to where the end of the ground plane legs end is a quarter-wave, 23.2 inches from center hole to leg end. Drill the ground plane legs and the mounting plate to match, making sure that the ground legs don’t interfere with the plastic mounting fitting.
• Note from the photos that the ground plane legs can be mounted with a single or double screw/nut assembly. Assemble the legs to the mounting plate.
• The support braces are not electrically necessary, but those wide legs flop around in the wind a lot. The braces are just there for mechanical support, and can be placed anywhere on the legs.
• To equalize the response of the antenna across the band, calculate midway between band center (127.5) and the low end of the band ((118+127.5)÷2) = 122.75 MHz, and the high end of the band ((137+127.5)÷2) = 132.25 MHz. The copper tape lengths of these two frequencies come from dividing 2547 by these frequencies. This gives us two pieces of tape, one 20.7 inches long and another one 19.3 inches long. These are the “radiating elements.”
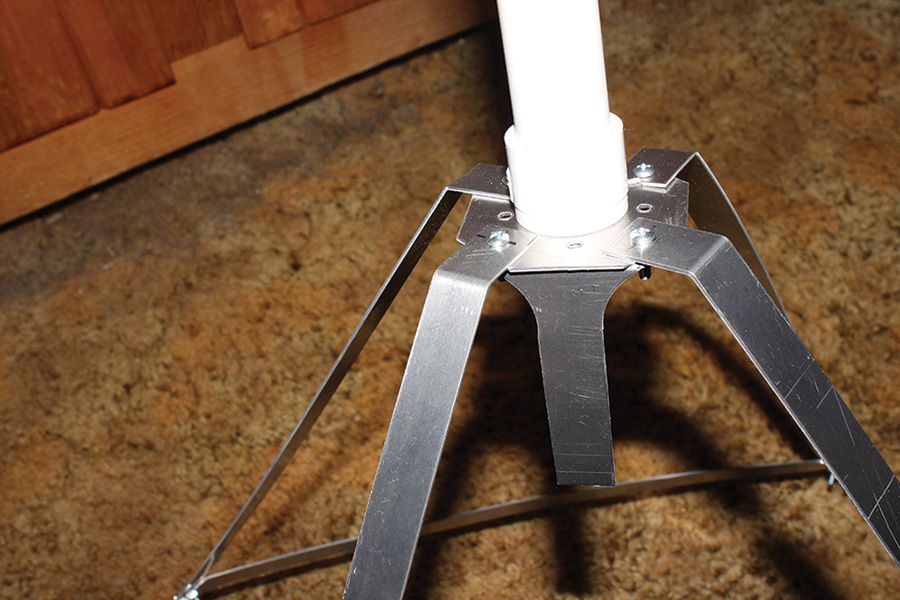
The two-screw ground plane strap mounting to the plate and the plastic mounting mast bracket for use with a worm clamp mast bracket mounting.
• Take the longer of these two pieces of tape. Cut a half-inch square wooden dowel one-quarter inch longer than the longest piece of tape. Drill a one-eighth inch hole a quarter-inch deep into one end of the dowel. Use a sander or a grinder to mill the other end of the dowel into a circle about a quarter-inch in diameter.
• Carefully affix the long piece of tape to one long edge of the dowel, with one end flush to the drilled end of the dowel and the other end flush just below the milled rounded end of the dowel. Affix the shorter piece of tape on the opposite long edge of the dowel with one end of the tape flush to the drilled end of the dowel. The other end of the tape should be well short of the rounded end of the dowel.
• Carefully place the dowel drilled end over the center pin of the BNC connector on the PVC fitting. Cut the three-quarter inch pipe so that there will be less than one-quarter inch of free space at the top of the pipe.
• Use an awl or icepick to put a small hole in the exact center of the copper braid. Push the braid onto the center pin of the BNC connector on the inside of the PVC fitting, as far down as it will go. Solder the braid to the pin. Use some silicone sealant between the braid and the metal of the connector so that there is no chance of the braid shorting to the ground metal of the connector. Fit the dowel over the BNC center pin and form the braid up and over the copper-taped dowel. Remove the dowel and solder-tin the braid.
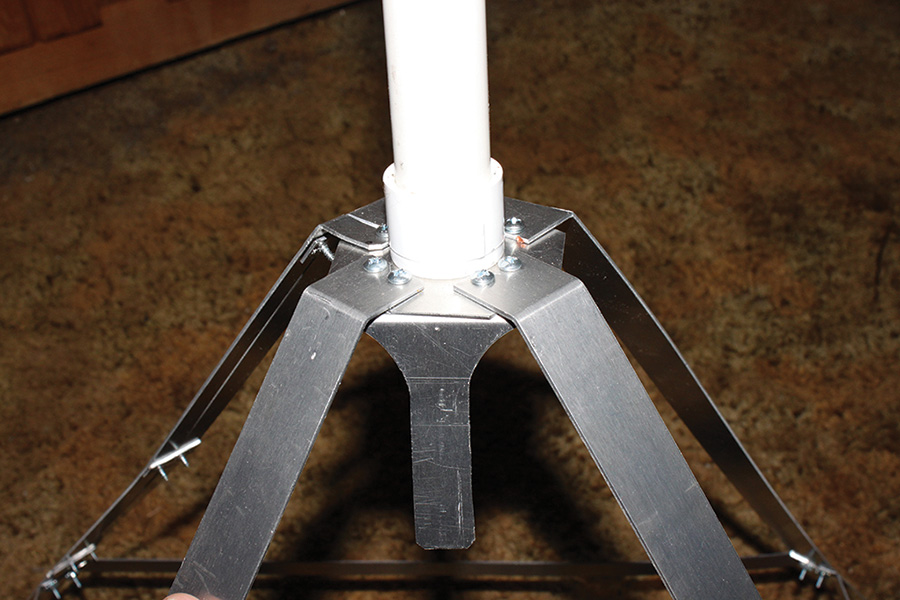
The same thing with a single-screw ground plane strap mounting and the narrower straps on a higher frequency (two-meter) ham radio antenna.
• Press the dowel down as far as it will go onto the center pin of the BNC connector and solder the braid to the copper radiating elements. Be careful not to let the dowel put stress on the braid, put the PVC pipe over the dowel and pipe-glue it into place. Press the grommet into place into the pipe and over the rounded part of the dowel. Pipe-glue a cap onto the top of the pipe.
• Test the antenna by mounting the antenna onto a pipe and into the air above any other conductors. Hook a BNC cable between the radio and the antenna and listen for distant stations.
That’s it for this month. This antenna was really built on the principle that necessity is a mother. The new engineering lab needed a test antenna and I always wanted to build the ultimate ground plane. While I was at it, I built a second antenna for the amateur two-meter band with exactly the same methods and it works perfectly. This is the ultimate “stay tuned”. See you next month.

![]()
Jim Weir is the chief avioniker at RST Engineering. He answers avionics questions in the Maintenance Bay forum at www.pilotsofamerica.com. His wife, Cyndi Weir, was his high school sweetheart 50 years ago and now she keeps Jim from making stupid blunders in spelling and grammar. Check out www.rst-engr.com/kitplanes for previous articles and supplements.

