This article will consist of two parts. First, we’ll look at the applications for a relatively new arrival on the LED lighting scene called a “strip light,” and next time we’ll discuss how to adjust them. But before we begin, I want you to conduct a little investigation of your own.

Left to right: One cell with the green LED lit. One cell with the red LED lit. One cell with the blue LED lit. One cell with all three LEDs lit producing (to the eye) white light, but to the camera, three distinct colors.
Find an old low-resolution CRT-type computer monitor or TV set, and a really good magnifying glass. Then get as close to the screen as you can; you should be able to see blue, green and red dots, depending on the color displayed on the screen. If you have an all-white screen, you will see all three dots illuminated equally. Now, put the magnifying glass down and step away. For you readers with a white screen, can you still see individual dots of color? No. When equal amounts of red, green and blue light emanate from what is called a “point source” the eye is programmed to see it as white. Those colored dots are so close together on the point source that your eye does not perceive them as individual dots, but as a single point of light.
Using those three colored spots of light, you can create any color of the rainbow, as well as black, using proportionate amounts of red, green and blue light. For example, to make orange I would use roughly 60% red light in combination with 40% green light. To get purple I would mix about 80% blue light with 20% red light.
If I can get three LED color dots close enough, and feed them just enough current that the light from each dot is equal for an equal amount of drive voltage, I can change the color by varying the amount of drive voltage.
The close-up photos above show that the tiny area of the individual “cell” contains three LED colors: red, green and blue. However, when they are all lit, the eye perceives them as white. You can’t fool the camera, though. While my eye saw pure white through the viewfinder, the camera saw all three of the LEDs in their true colors.

A black vertical cut line separates one segment of the light strip from another. Note that both cut ends will still have copper pads for wire attachment. To the right of the cut line (white circle) is an LED cell. The little black rectangle farther right is a black current-limiting resistor. To the left of the cut line is another LED cell, and farther right there are two more current-limiting resistors.
Practical Applications
These little gems have many uses: as courtesy lights to illuminate the entry/exit areas on an airplane, as front-mount instrument lights or map lights, or even as warning lights. Let your imagination take wing. Visit www.ledstripstudio.com to see some stunning photos of LED strips in non-aviation applications.
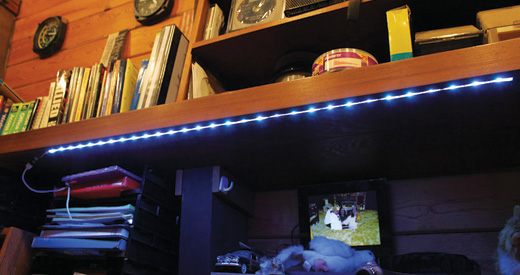
The light strip over the author’s computer bench—completely drowned out by the overhead.
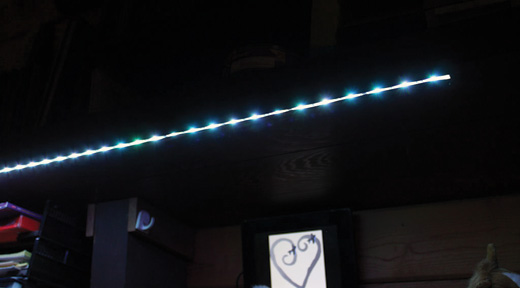
The dark mode with only the light strip on.

The LED strip produces enough light at the author’s work table to illuminate a recipe book.
Light strips are easy to locate online. Just Google “LED strip lights analog.” I’ve used two sources, both excellent. I bought my first strip lights from www.xoxide.com. These (item number 70665) come with a 40-inch light strip with 30 individual cells of all three color LEDs. They also come with a microprocessor controller, a wall-wart power supply for home use, and a remote controller. I mounted one over my computer bench so that I can turn off the large overhead lights at night and still see what I am doing. I use another in the Cessna 182 “Flying Electronic Laboratory,” where it is mounted under the eyebrow of the instrument panel and does a remarkable job of lighting it up at night, with none of the dead spots you might encounter with an overhead light.
My technical consultant (and resident sweetie), Gail, told me about a second source: Adafruit (www.adafruit.com/products/285). Don’t be put off by the name. Adafruit is big into the Arduino micro-controller, and you will probably read more about these in this column in the future.
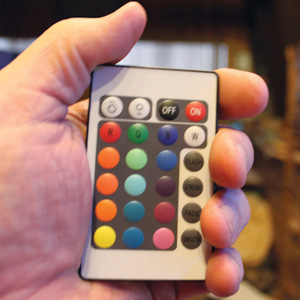
The infrared remote control for the Xoxide LED strip. Note the colored buttons in the center of the controller. You can have any preprogrammed color you want.
Adafruit doesn’t sell controllers or wall warts or remotes—just the strips themselves. But the price per strip is less than half the price at Xoxide, and Adafruit will sell you from 1 meter (40 inches) to 5 meters (200 inches) in 1-meter increments. If you wanted, you could have a string of lights more than 16 feet long. One meter of strip lights is the smallest quantity you can buy, but you can cut them off every 4 inches or in multiples of 4 inches. From a 1-meter length of strip light, you can get 10 4-inch strip lights.
How much current do they draw? Adafruit splits its analysis into segments. One meter of strip light can be cut into 10 smaller strips, and each of these smaller segments has three light cells: red, green and blue. Each segment color (all three reds, all three greens or all three blues) takes 20 milliamps (mA), so for a full white light each segment would draw 60 mA. At 10 segments to the meter, each full meter strip light takes 600 mA, or 0.6 amps. In other words, a full meter of strip light takes 200 mA (0.2 amps) per color. If, for example, you wanted to make orange, you would run full red but only partial green and probably draw somewhere around 300 mA for the whole meter length of lights.
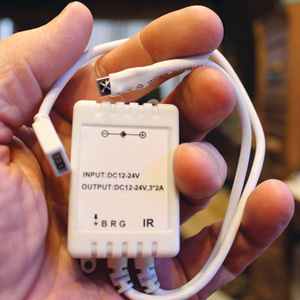
The microcontroller that produces the various functions commanded by the remote control. The large connector to the left connects to the light strip; the smaller device on top is the infrared receiver for the remote control.
A full technical discussion is available at www.ladyada.net/products/ rgbledstrip, and you can also link to a forum about all the Adafruit devices at http://forums.adafruit.com. The technical discussion also has excellent photographs of exactly how to cut the segments and fasten wires to them. (My only criticism is that they use too heavy a wire for the connections; I much prefer a #24 AWG wire for currents of this magnitude. If you start wiring up several meters of these lights, you may want to go to a #20 or so.)
Next month we will take up how to dim these little rascals and produce various colors. Until then, stay tuned.


