In my April 2021 column, I described making custom rivet nuts to replace self-tapping screws for the wing root fairings on my Jabiru. While only one of the mounting holes had stripped out, I thought it might be a good idea to eventually replace the remaining self-tapping screws with regular screws.
Because the backside of the stripped hole I was fixing was not accessible, a rivet nut was the only possible solution. Except for the same screw on the starboard-side fairing, the remaining screw locations were backside accessible. So the question was to use rivet nuts, or bond some sort of threaded flange bushing for the remaining screws.
I decided to go with a threaded flange bushing—mainly because making two dozen flange bushings was going to be a lot faster than making two dozen rivet nuts.
Like the rivet nut, you can buy ready-made threaded flange bushings. If money is no issue or time is a factor, you’d do well to look up the various products offered by Click Bond. The “click” installation process and adhesives provided make them nearly foolproof. The downside, of course, is the price. A single Click Bond CB5006 small flange (1-inch diameter), 8-32 threaded bushing is $6 each.
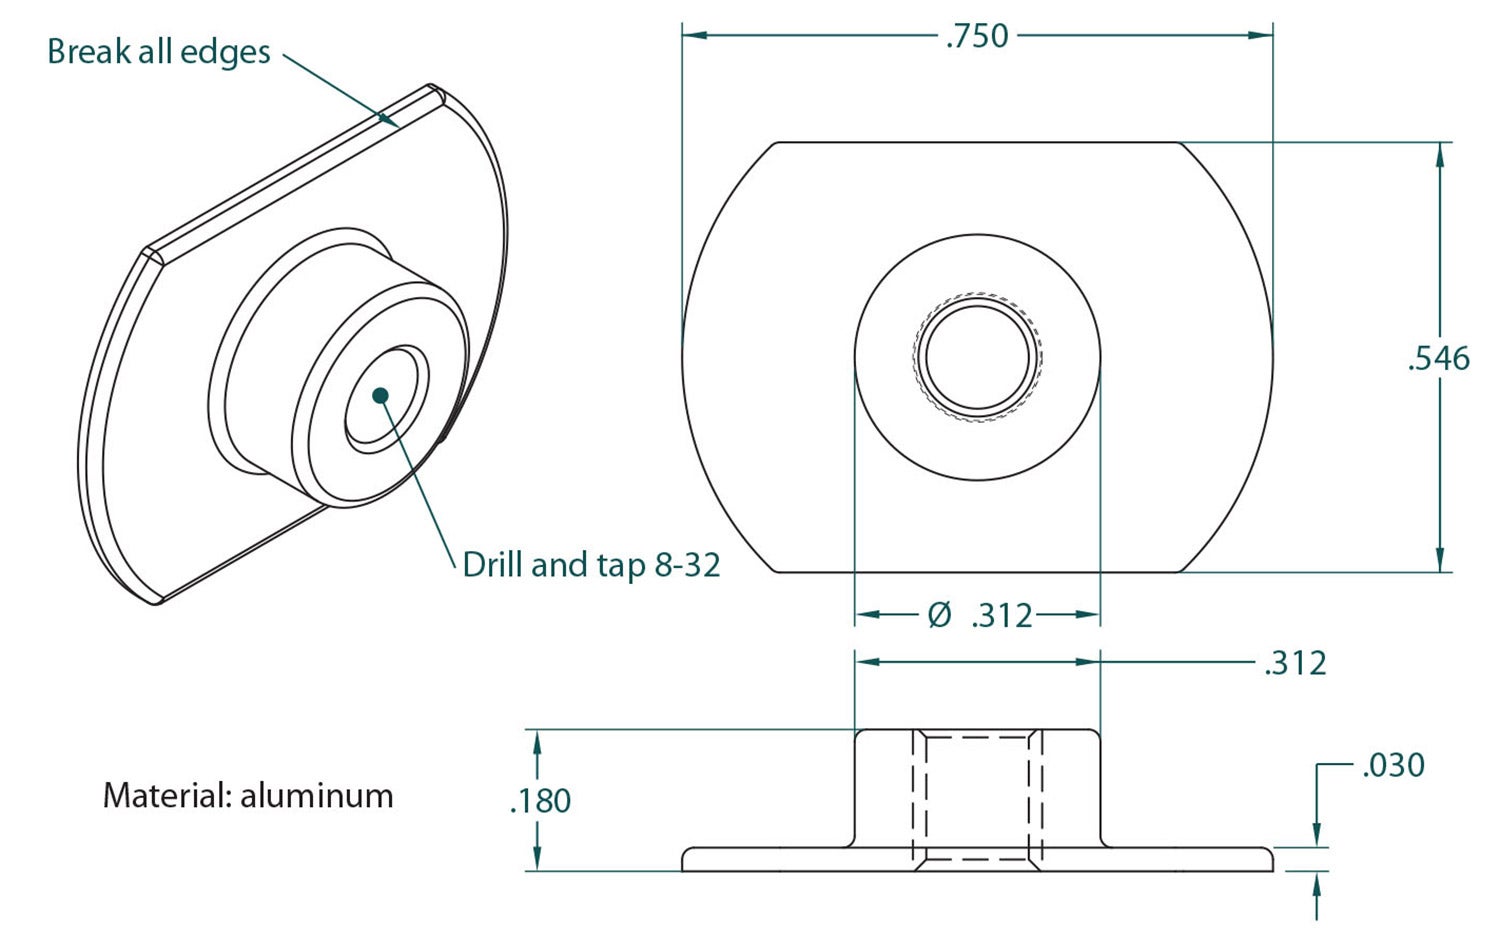
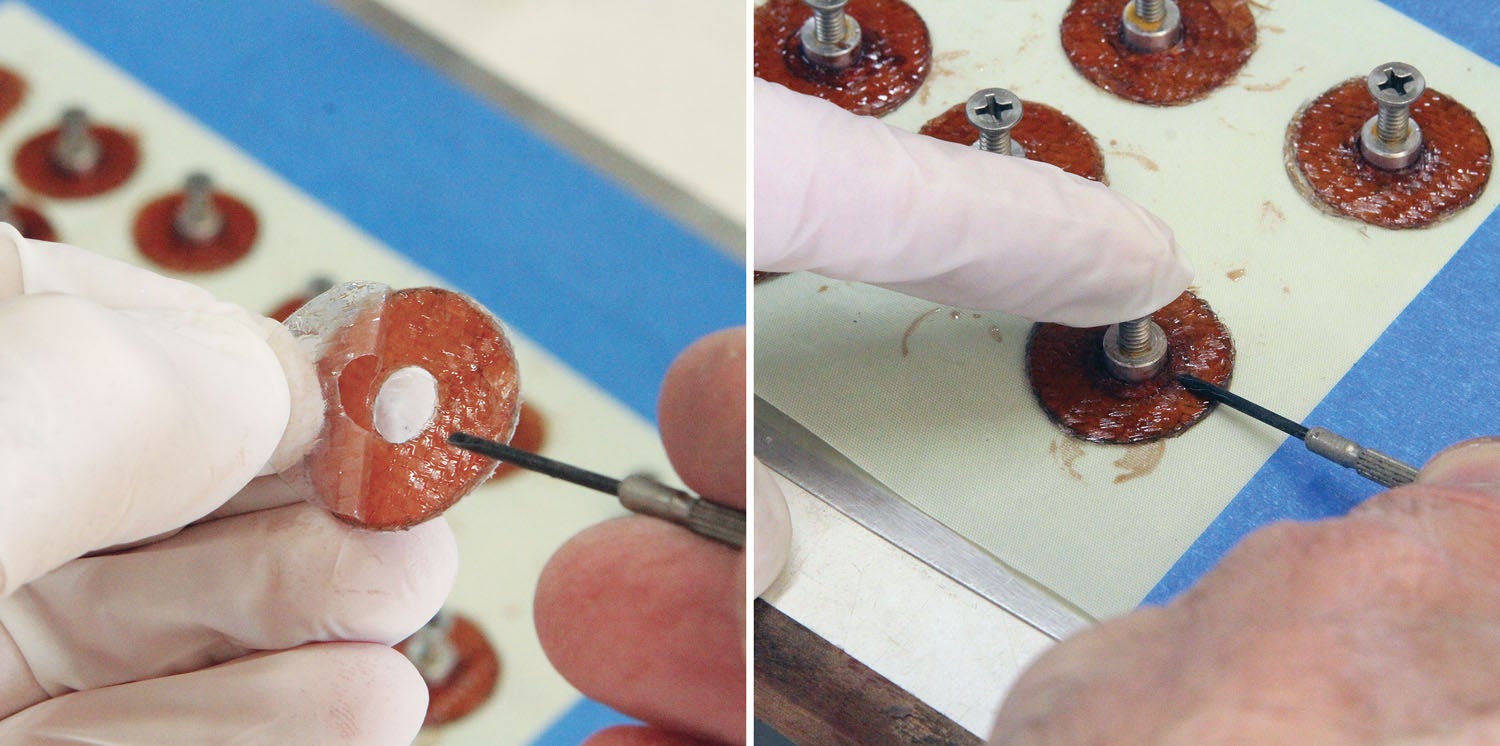
Another issue was bonding to the curved surface of the fuselage. Threaded flange bushings work best when bonded to a flat surface. To compensate for the curve, I made the flange diameter smaller (3/4 inch) and then sandwiched the flange to the fuselage with a donut-shaped fiberglass patch. (When threaded hardpoints are built into composite structures, they are usually sandwiched between layers of fiberglass or carbon fiber.)
To make the circular patches, I made hand punches to knock out the center circle (5/16 inch) and the outer circle (1 inch). Since I was working with fiberglass cloth, the punches needed to be sharp, like a leather or fabric punch.
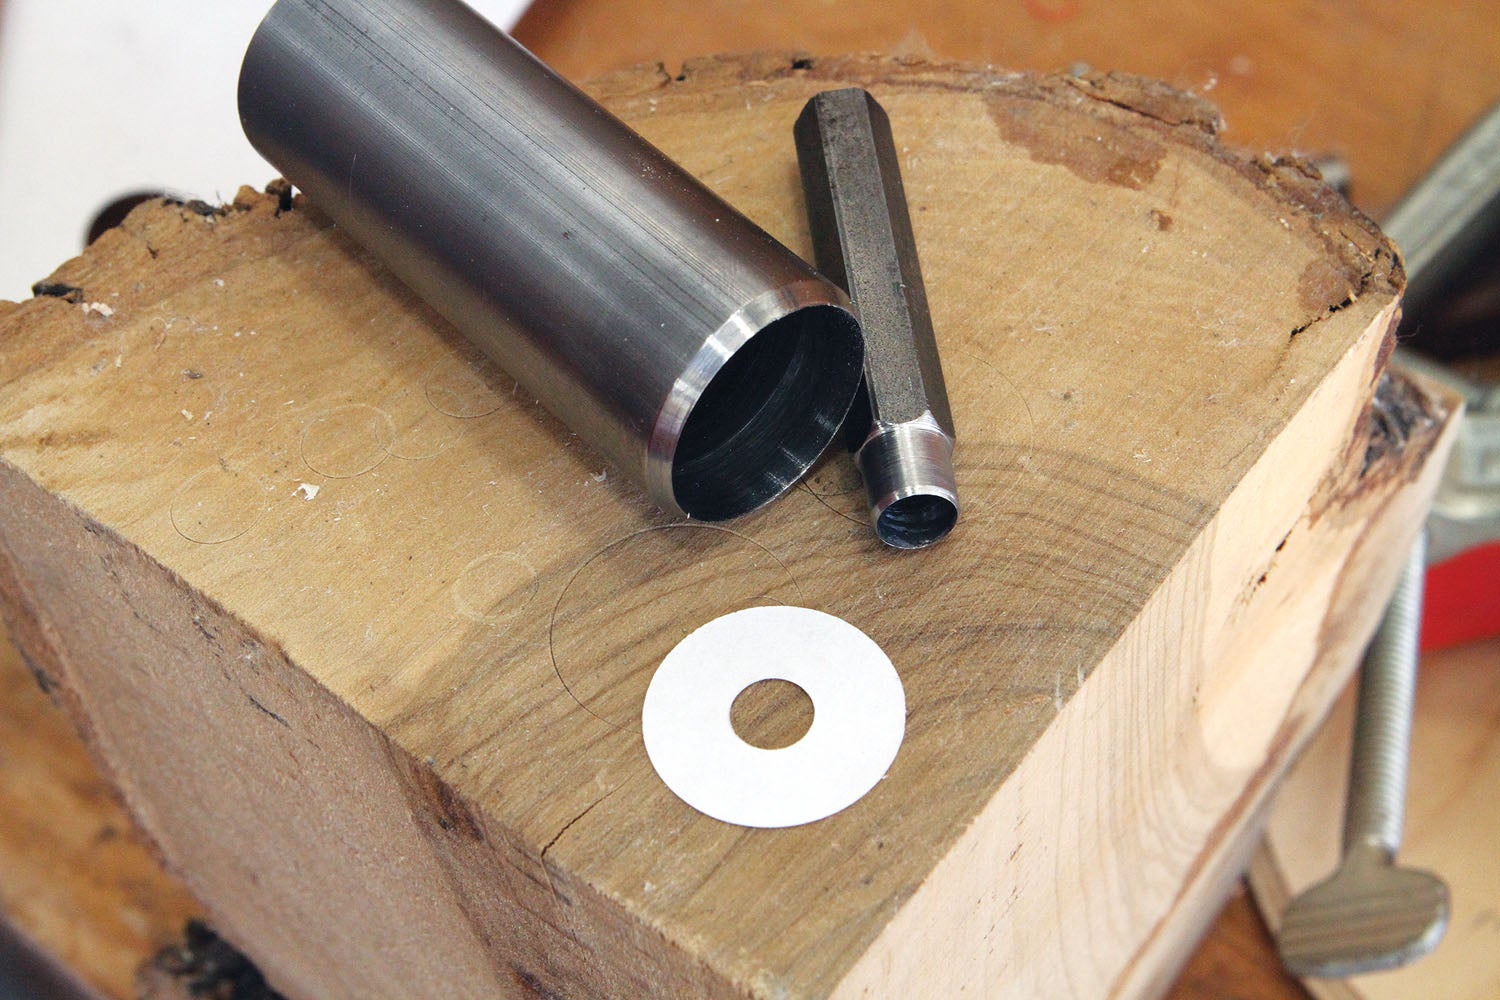
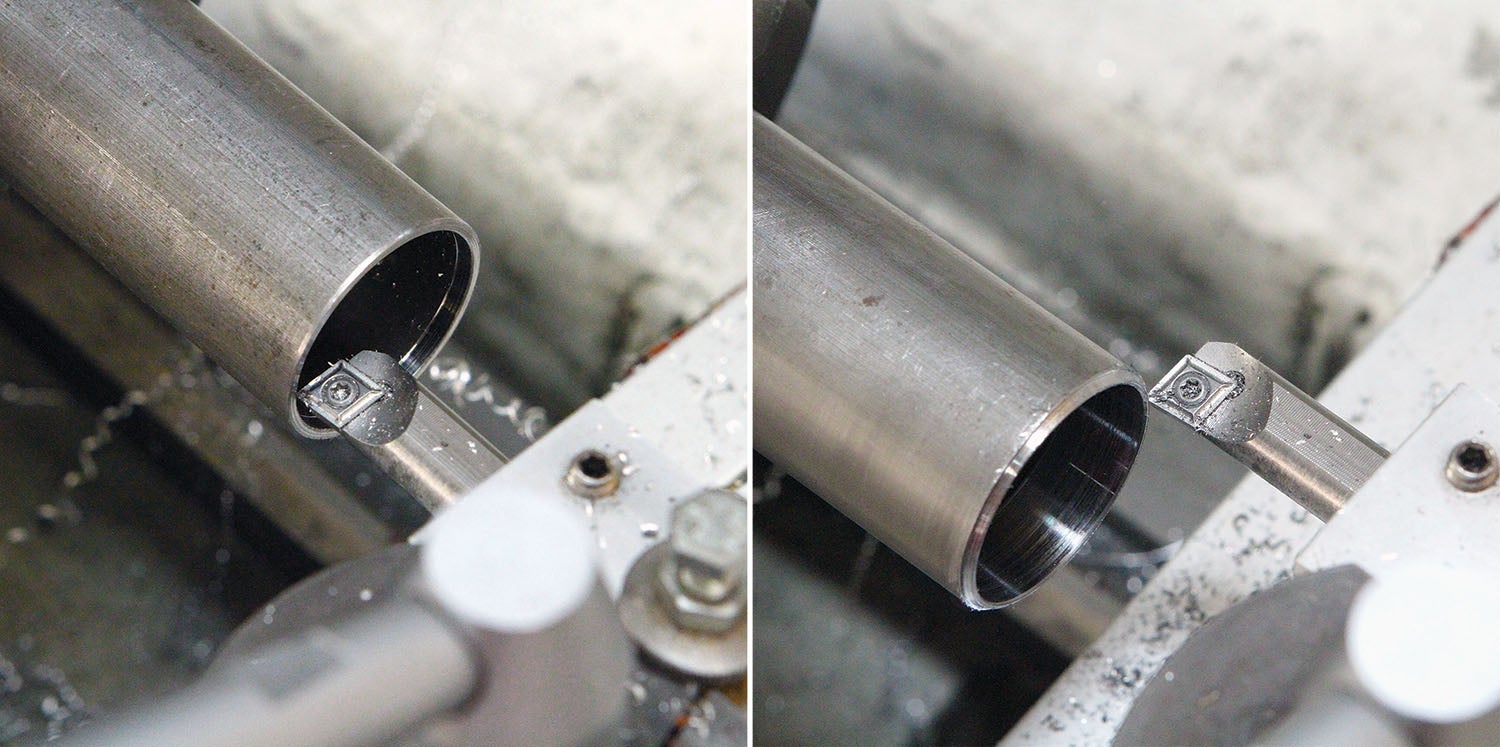
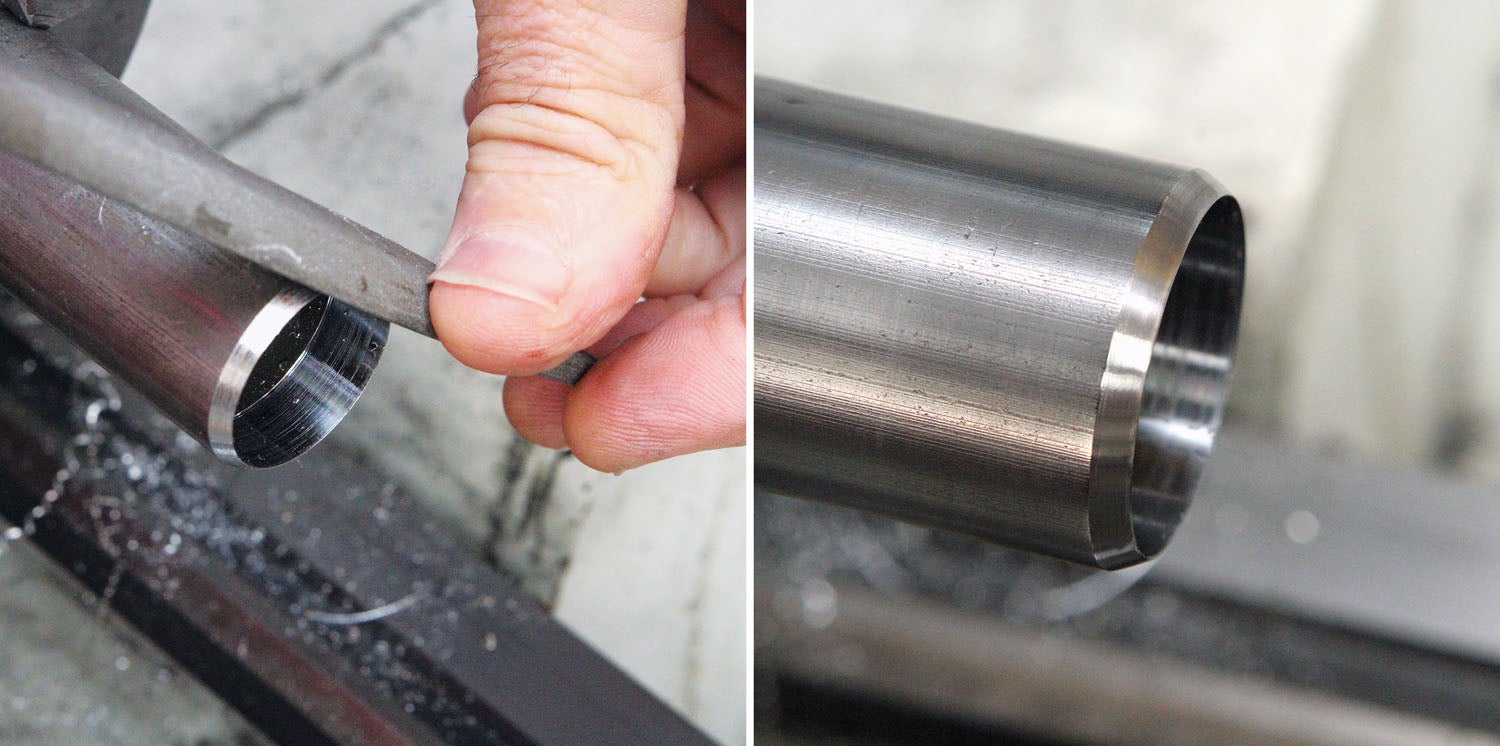
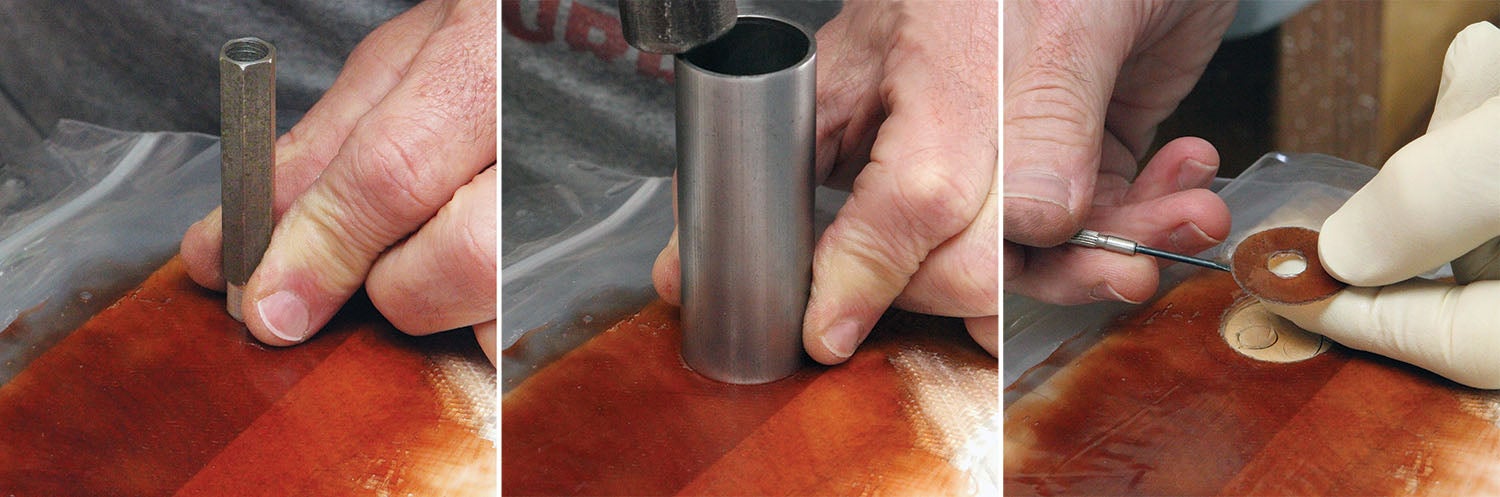
The 1-inch punch was basic lathe work. I used a short length of scrap 1-1/8-inch OD x 0.065 steel tubing. I first faced both ends on the lathe. Using a boring bar, I took a very light clean-up cut on the inside of the end to be chamfered for the cutting edge. Then, using the cross slide set at 30°, I used the boring bar to cut a chamfer to create a knife edge. A fine-tooth precision half-round file was used to clean up tool marks. I then polished the chamfer with fine and super-fine laps (see “Laps and Lapping,” February 2021) to make the edge razor sharp.
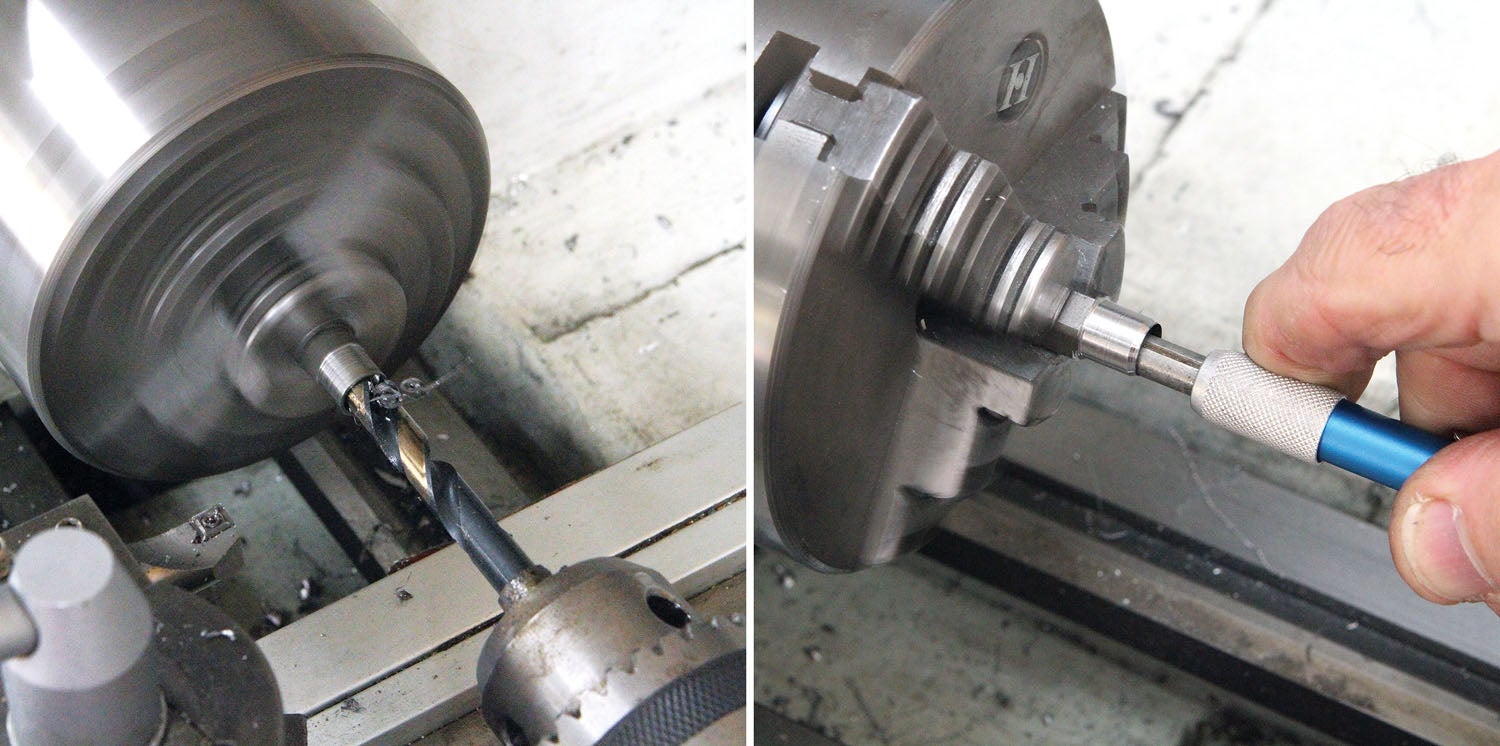
Since I didn’t have any small-diameter tubing suitable for the 5/16-inch punch, I drilled and turned it from a short section of solid 10mm steel hexagon stock that I had lying around. Other than through-drilling the 5/16-inch ID and turning the OD for the cutting edge, the machine operations were basically the same as the 1-inch punch. To sharpen the edge, both the chamfer and ID were lapped.
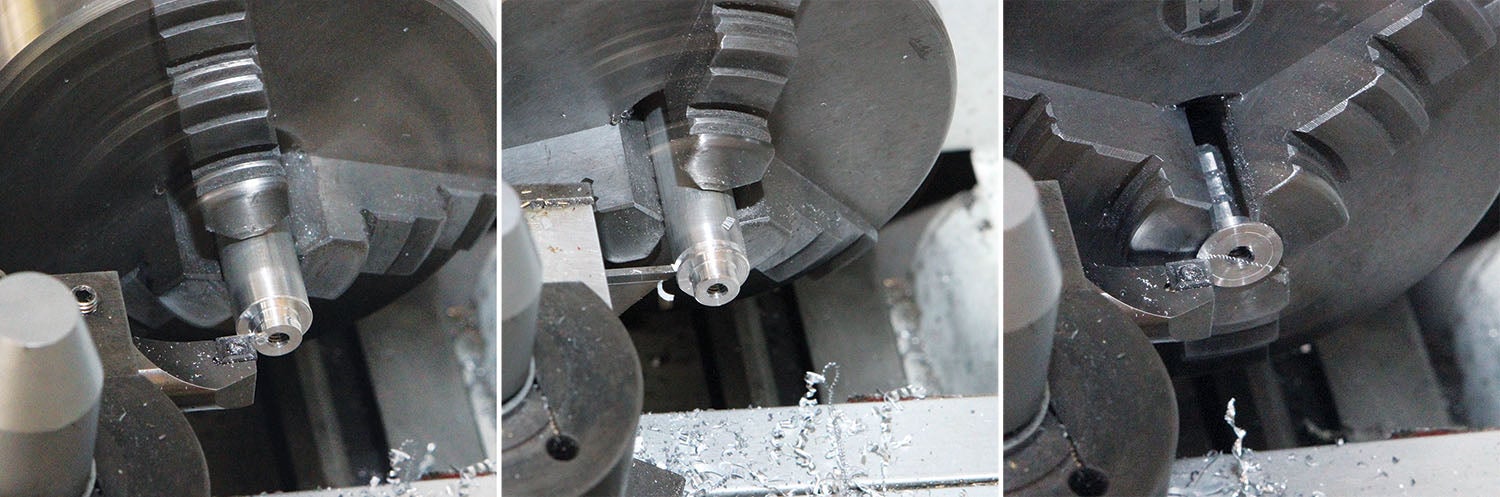
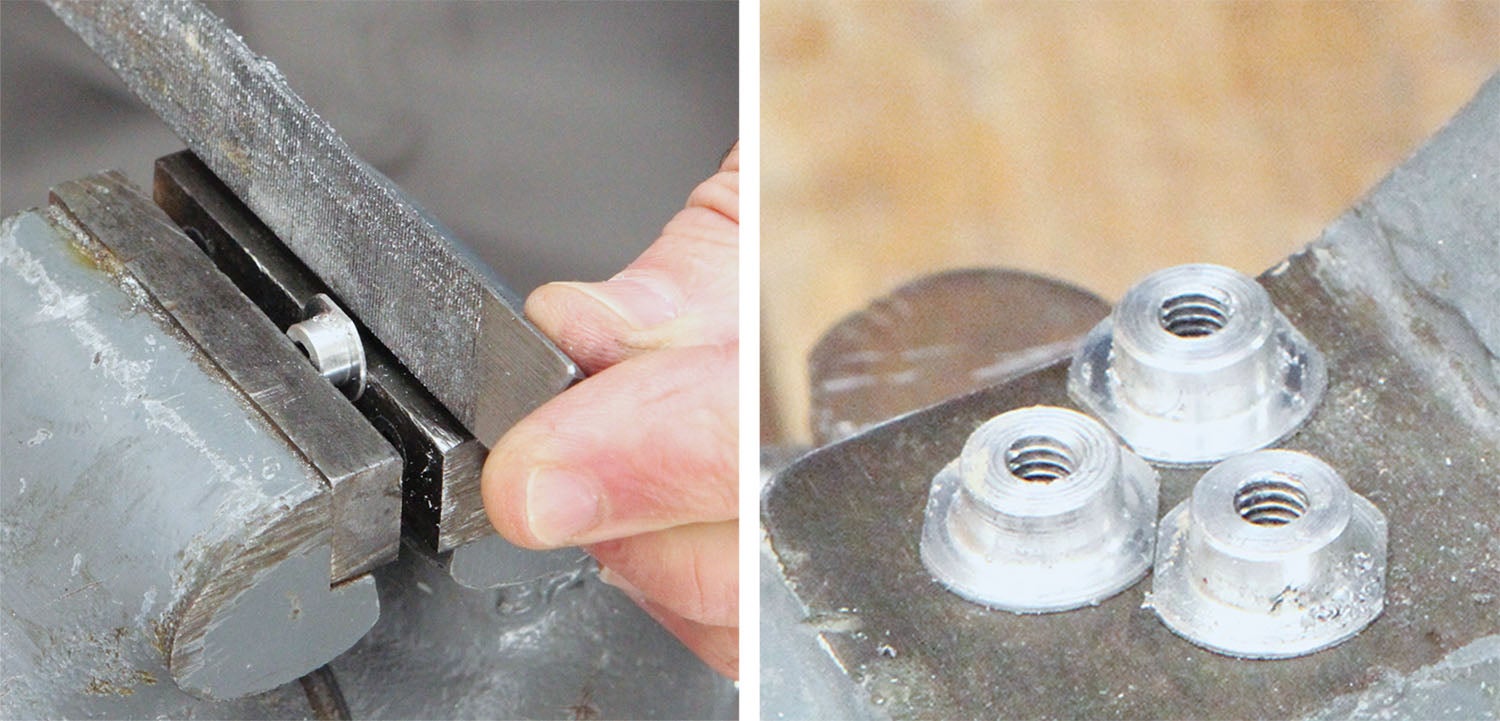
Making the threaded flange bushings went quickly. When making a batch of parts—anything over five is a batch to me—I like to work out a routine that makes the workflow more efficient. Batch work can be tedious, but the mental exercise of working out ways to streamline the process can make it more interesting, and I am often done with the job about the same time that I’ve mentally figured out how to “mass” produce them.
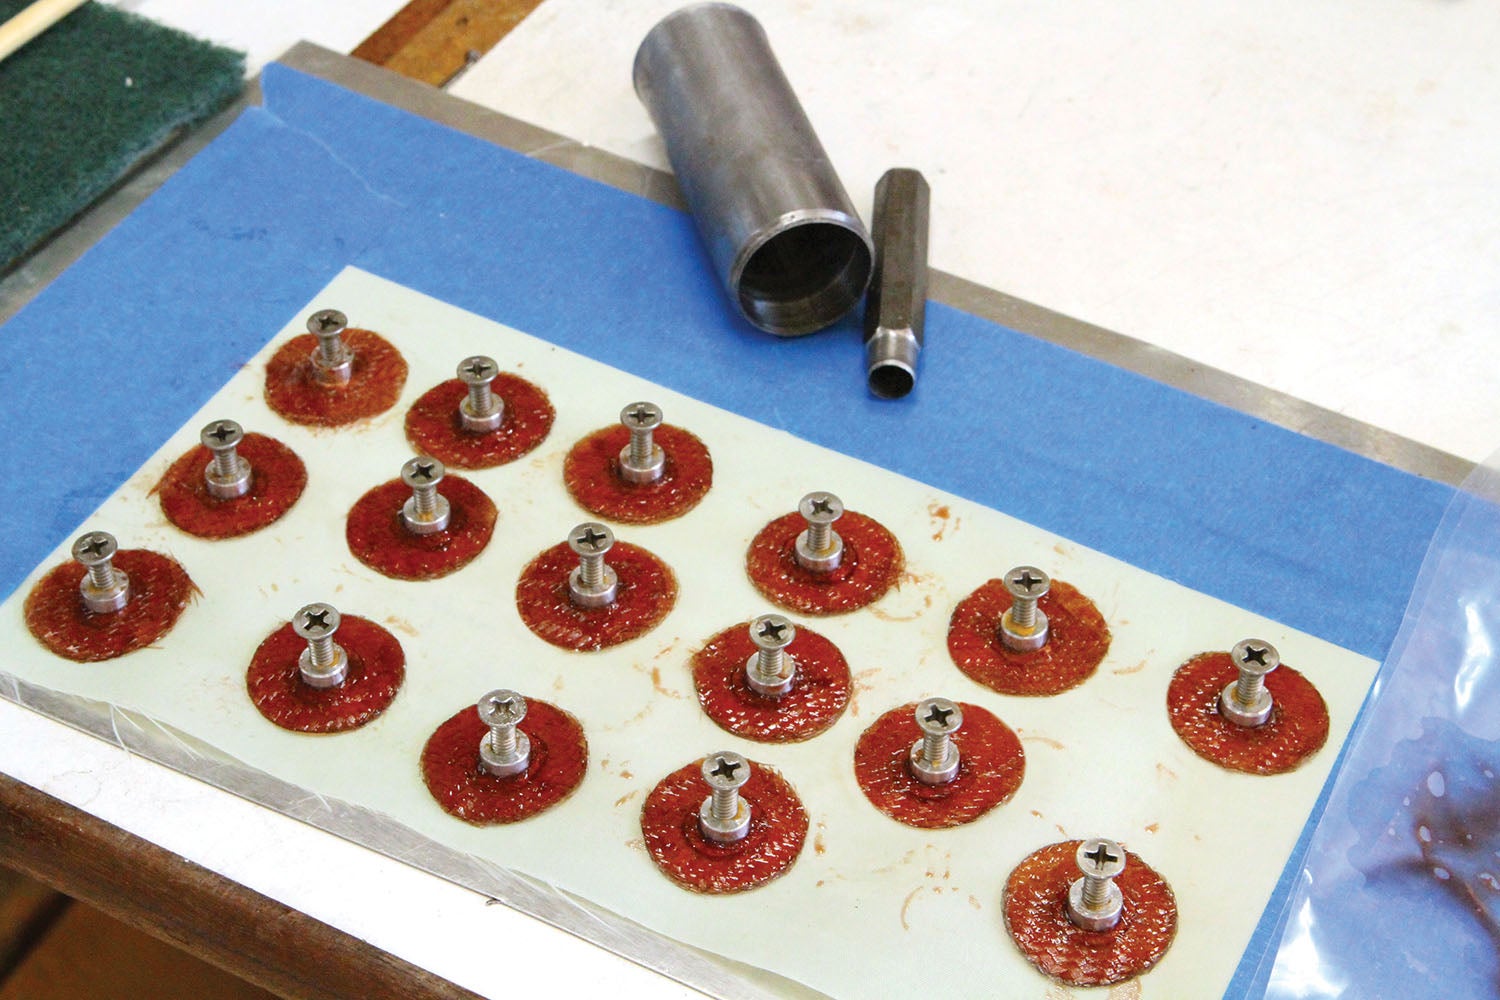
With the parts cleaned and dry, it was time to lay up the fiberglass for the reinforcing donuts. The trick to making fiberglass patches (or in this case, donuts) that will hold their shape is to prepare the layup between two sheets of heavy plastic. Ideally, the plastic sheets should be 20 to 30 percent larger than the layup. I learned this from my neighbor, Phil Hooper, who picked it up from the folks at Velocity. Note that this technique is different than using vacuum bags or clear plastic sheets for pattern templates, both of which were covered by Eric Stewart in a series of articles (“Rapid Prototyping and Experimental Design”) in 2017.

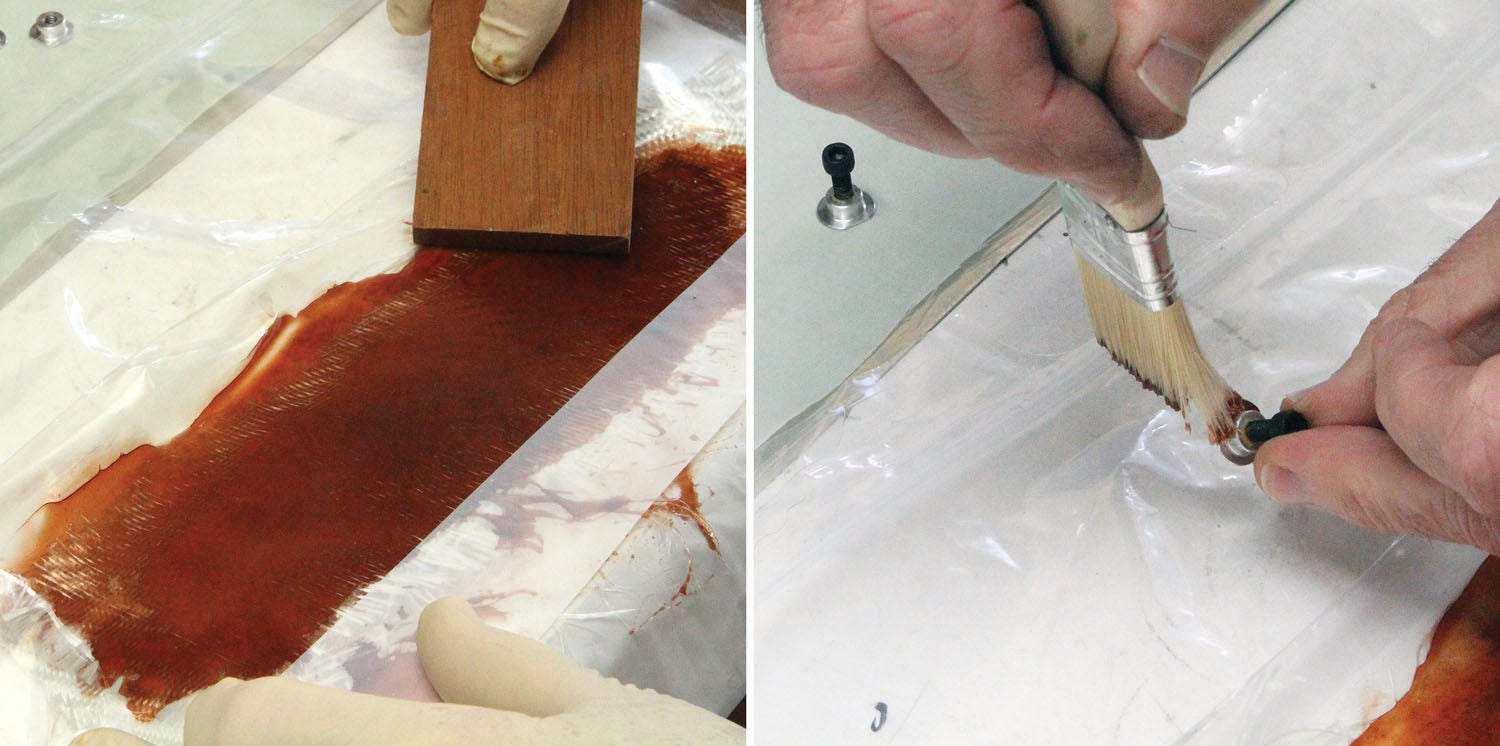
When doing a layup without the plastic sandwich, it can be tough to estimate how much resin to use. On top of that, it takes a deft hand with a squeegee or roller to force the epoxy resin into the fiberglass cloth layers without stretching or distorting the material. It can be tricky!
But when doing a layup between plastic sheets, it’s pretty much foolproof. The plastic provides a window to easily see which areas are saturated or not. Not enough resin? Simply peel up the plastic and add some more to the dry spots. Too much resin? Simply squeegee the excess away from the cloth and into the margins. The most important part is that the plastic sheets allow you to squeegee aggressively without stretching or distorting the cloth.
After allowing sufficient time for the epoxy to get tacky, you cut out the pattern while it’s sandwiched between the plastic. The plastic sheeting holds the otherwise slippery and sticky layers of cloth from delaminating or distorting until you’re ready to apply it. Very cool!
Typically, you would use scissors to cut out the pattern, but my patches were small and I needed to make several. The idea of maneuver scissors to cut small circles seemed problematic. The punch solution allowed me to quickly and cleanly make as many donut patches as I needed.
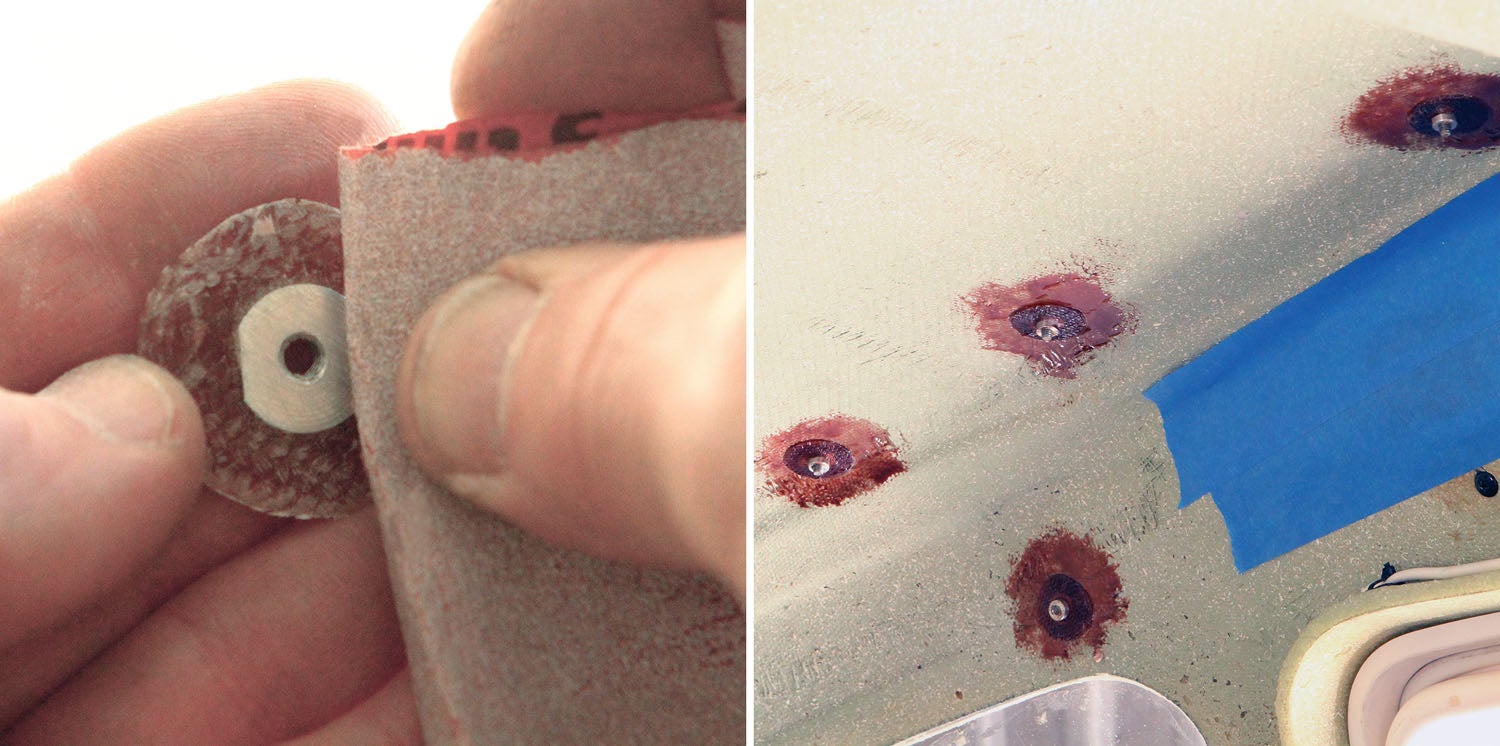
I used West System epoxy for this project, with the fast-cure hardener. You’ll notice that the resin is dark red, which was caused by using hardener that had been sitting on the shelf for several months. According to West Systems, “…the hardener’s color will not affect the epoxy’s cured physical properties.” Also worth noting is the cure time for “fast” is 6 to 8 hours. While it takes 60 to 90 minutes (depending on the temperature) to set up, the pot life is about 10 minutes, so once it’s mixed, you need to start applying it to your layup to assure compete fiber saturation. That’s it for now. Time to get back in the shop and make some chips!


I do something similar, but instead of machining the flange nuts, I purchase tee nuts from McMaster-Carr.
For example: https://www.mcmaster.com/90975A015/?SrchEntryWebPart_InpBox=weld+nut
Then fill each threaded hole with a silicone rubber “worm” to keep the epoxy out of the threads.
Lay out a bunch of these Tee Nuts on a sheet of peel ply, atop a sheet of plastic, then drape the fiberglass cloth over all of them.
Wobble a pencil through the cloth to make a hole for each nut without cutting any fibers.
Mash the cloth down around each tee nut, then wet it our with resin. More peel ply, then polyester batting (aka baby blanket).
Finally, vacuum bag the whole thing down onto the table.
Once you get the routine, you can make a hundred at a time, then cut them apart on the bandsaw.
You can also make long strips with equally-spaced nuts if needed.
Comments are closed.