Sometimes good ideas come from halfway around the globe, and sometimes they come from my next-door hangar neighbors. This one is really neat because one of the neighbors is the fellow down at the end of my hangar row whose Mooney I inspect every year, and the other one is his son, across the row from me.
Son bought himself a Cessna 150 and learned to fly in it last year. Of course, the first thing you do when you buy a One-Filthy is to turn it into a one-place airplane by loading it up with all sorts of new electronics gear. One of the first problems he found with putting in two com transceivers is that he had to (a) connect both speaker/phone outputs to a single headset and (b) connect one microphone audio and key to a single transmitter mic input.

The inside of the power amplifier. The purple board is from OSH Park, the prototype PC board manufacturer we talked about in last month’s column. The board cost $7.50 to have made, and I can’t make one in my home lab for that price.
“B” is easy. “A” not so much if you want to be able to listen to both at the same time. Dad is a very experienced ham radio operator (www.qrz.com, NW6Z if you want to look him up), knew that the problem was solvable, and asked me (WX6RST) to take a look at it.
One of the first questions was whether or not there were any other audio inputs to sum together at the same time. One thing led to another, so I told him I’d give him a circuit that would add up to six audio inputs together while completely isolating one from the other. Both Dad and I knew from experimentation that simply twisting together two audio outputs from two radios to try and drive a single set of earphones is not going to work very well and may damage one radio or the other (or both if you haven’t made sufficient sacrifices to the electron gods recently).
This project came along just in time for me to use one of the services I told you about in last month’s Kitplanes column. It was a perfect opportunity for laying out a PC board (PCB) and sending it to OSH Park for a prototype board. Sure enough, less than a week later the board for this project wound up in my mailbox as a perfect purple PCB.
How does all this magic translate itself into hardware? There are several steps in the design, and I’ll run you briefly through each one.
• The first thing to do is define what you expect for the inputs and the outputs. In engineer-speak these are colloquially called the “goesintas” and “goesoutas” respectively. In our case, we expect our inputs to be the individual radio outputs at around 2 to 3 volts (RMS).
• The outputs to the headphones should be about the same, telling us that the amplifier circuit from input to output needs to have what is called “unity” gain—whatever level you have at the input, you have at the output.
• Additionally, most radio headphone outputs like to work into an impedance somewhere between 100 and 1000 (1k) ohms (Ω).
• In particular, the “standard” impedance for audio of this sort is usually around 600 ohms. Finally, we’d like the output to drive anything from a 4Ω speaker to a 600Ω headset.
Next, what do we have for operating voltage and current? This older aircraft has the standard nominal 12-volt electrical system, and we can draw multiple amps from it if necessary.
Finally, what sort of form factor do we want? In my world, I like to put circuits like these into small aluminum preformed boxes that I can buy off the shelf so I don’t have the expense of custom-making a special chassis. That defines how big the circuit board can be.
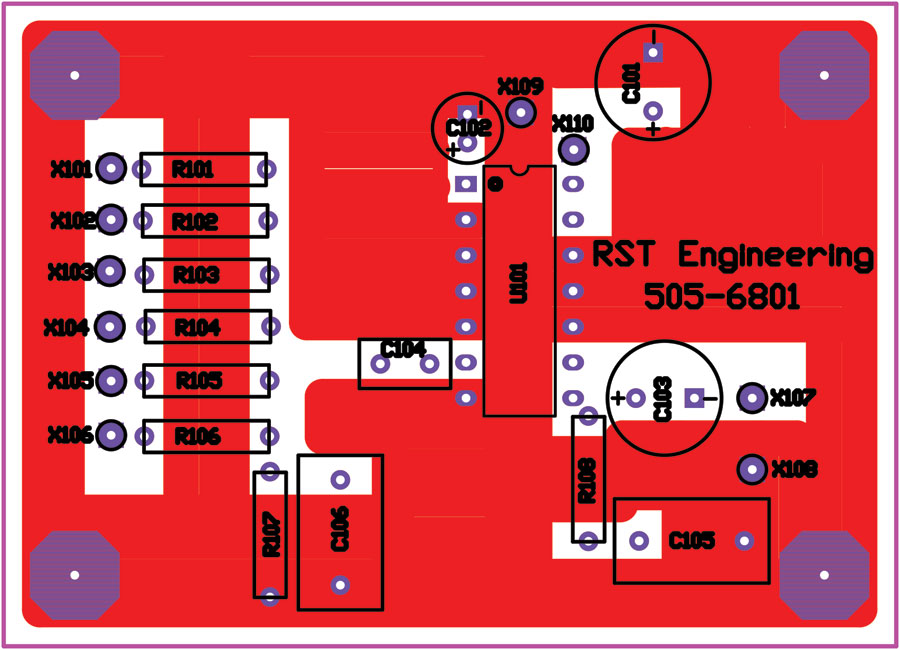
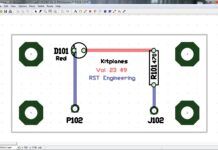
The top of the circuit board. Everything in red will come out in copper on the PC board. This copper will serve as the heat sink for U101, the IC in the center of the board. The little blue octagons in the corners are also copper and will transfer more heat from the board through the metal standoffs and mounting hardware to the aluminum chassis.
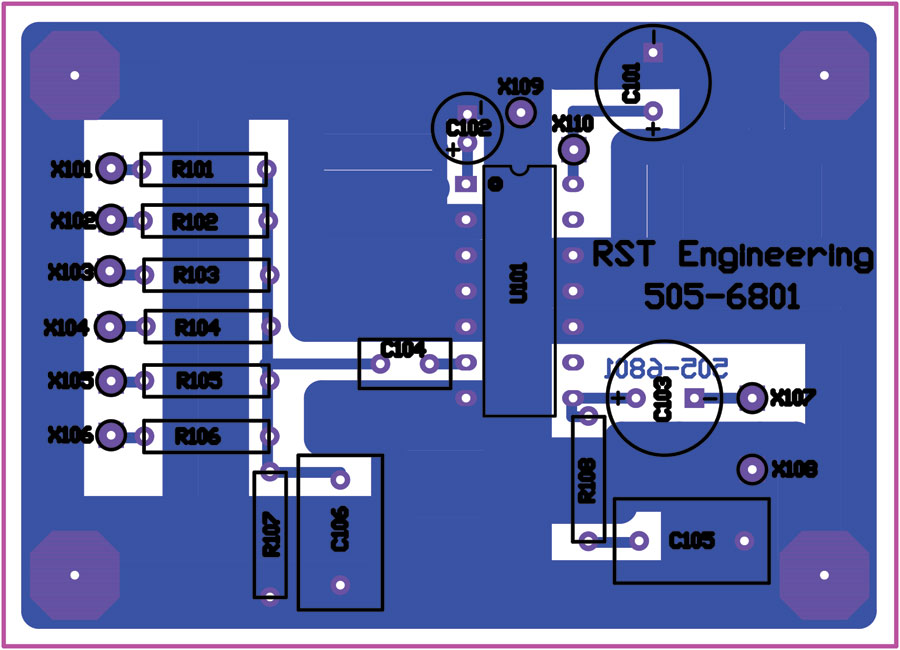
The bottom of the circuit board. Like the top, everything in blue will come out in copper as a second heat sink.
Taking all this into account, using an LM384 integrated circuit power amplifier is a good starting point. The 384 brings six of its 14 pins out as a way to get heat out of the chip, and this lets us use a lot of the excess copper on the bottom of the board (and the metal chassis, if we are clever) as a way of getting rid of the excess heat. If we do the heat sinking this way, we can get a solid 2 watts of “clean” audio out of this chip, and that power level will drive your speaker and/or headphones nearly to the threshold of pain.
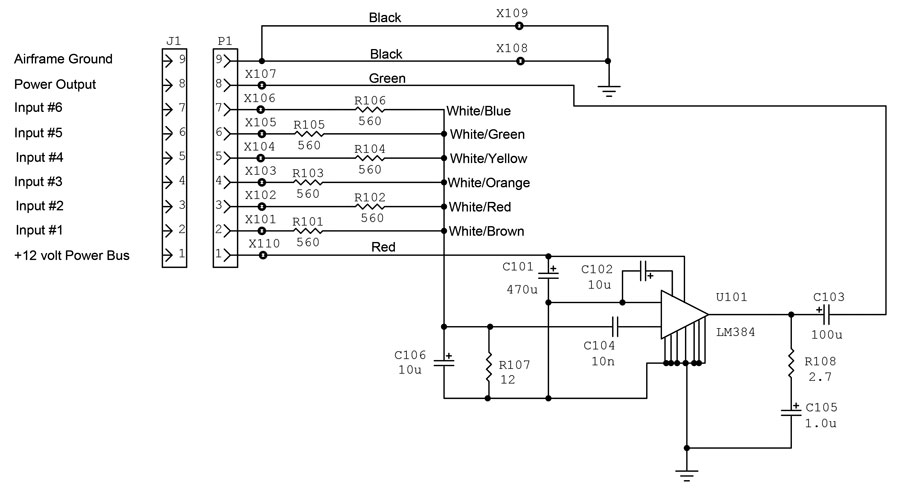
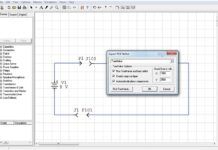
The problem is that the 384 has a fixed voltage gain of 50, and we want a unity voltage gain. That’s not a real problem, and we can easily take care of this and provide an input impedance of about 600Ω to all six of our inputs at the same time. Note on the schematic that each of the 560Ω input resistors R101-R106 get “summed” (added together) in R107, and each of the input resistors then sees an input impedance of about 572Ω (560+12; close enough to 600 for me), but each of the input voltages is dropped by the ratio of (560 12), or 47 (close enough to 50 for me).
C106 gets rid of a lot of the high-frequency static and noise, and C104 restricts the thumpy low frequencies, leaving only the midrange audio frequencies for communications to get through. If you plan on playing your music through this amplifier, swap the values of C106 and C104.
What you cannot see on the purple board is all the copper we used as a heat sink. You can see it on the top and bottom artwork images that I provided for you. How does the heat get transferred to the chassis? Through the metal screws holding the board (through appropriate metal standoffs) to the chassis.
As to how to take care of item (a) in the third paragraph above? I have uploaded a completely separate input switching scheme to my personal KITPLANES web page at www.rstengineering.com, and then to the “KITPLANES Files” link on the home page. Here you will find a DPDT switching scheme for simple microphone switching and 3PDT-4PDT schemes for automatic switching of the radio audio, as well as switching the microphone circuits.
With the microphone/key switching setup as described above, and with a single-pole toggle switch for each audio input, you can easily set up a poor man’s audio panel. You’ll see a full description of this setup in a future KITPLANES column.
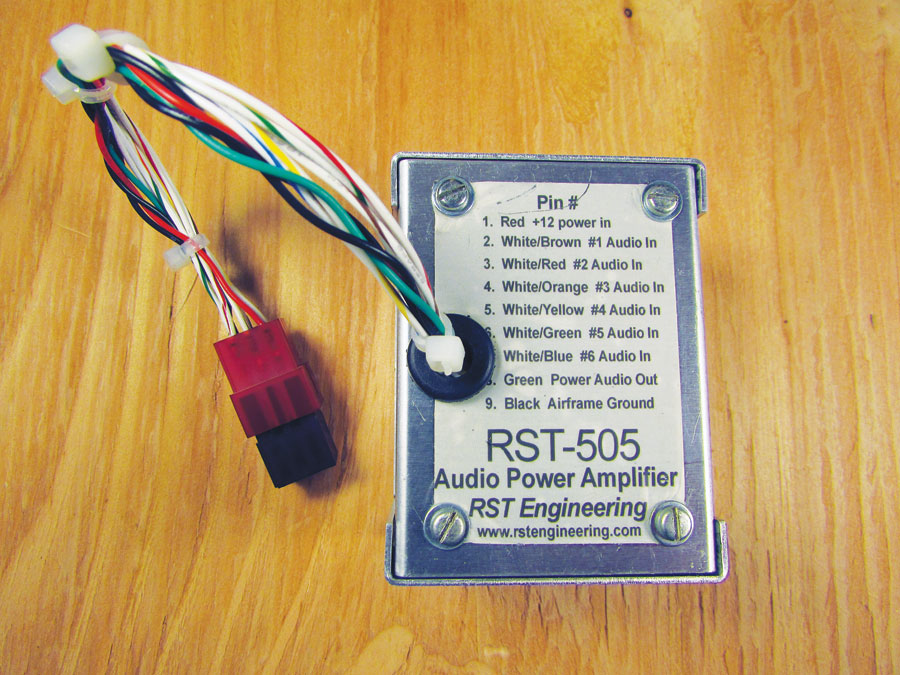
Just a short note: If you don’t want to go through the hassle of buying all these parts and getting a board made, RST has kitted up a quickbuild version of this called the RST-505. Look for it on the www.rstengineering.com web page.
Coming up—a wild hair on my thoughts on the ultimate electronics workbench, a whole series on how to use your cheap multimeter, and much more. Until then, stay tuned.

![]()
Jim Weir is the chief avioniker at RST Engineering. He answers avionics questions in the Internet newsgroup www.pilotsofamerica.com-Maintenance. His technical advisor, Cyndi Weir, got her Masters degree in English and Journalism and keeps Jim on the straight and narrow. Check out their web site at www.rst-engr.com/kitplanes for previous articles and supplements.

