There comes a time in every airplane build when the fuselage has to come off its workbench or platform and go on its own gear. Once that happens with a taildragger, you quickly discover that having the little wheel on the ground makes the process more difficult. You’re constantly leaning backward when working in the cockpit, and the nose points way up in the air, making engine access a hassle. Whatever the reason, getting the tail up off the ground often makes life easier.
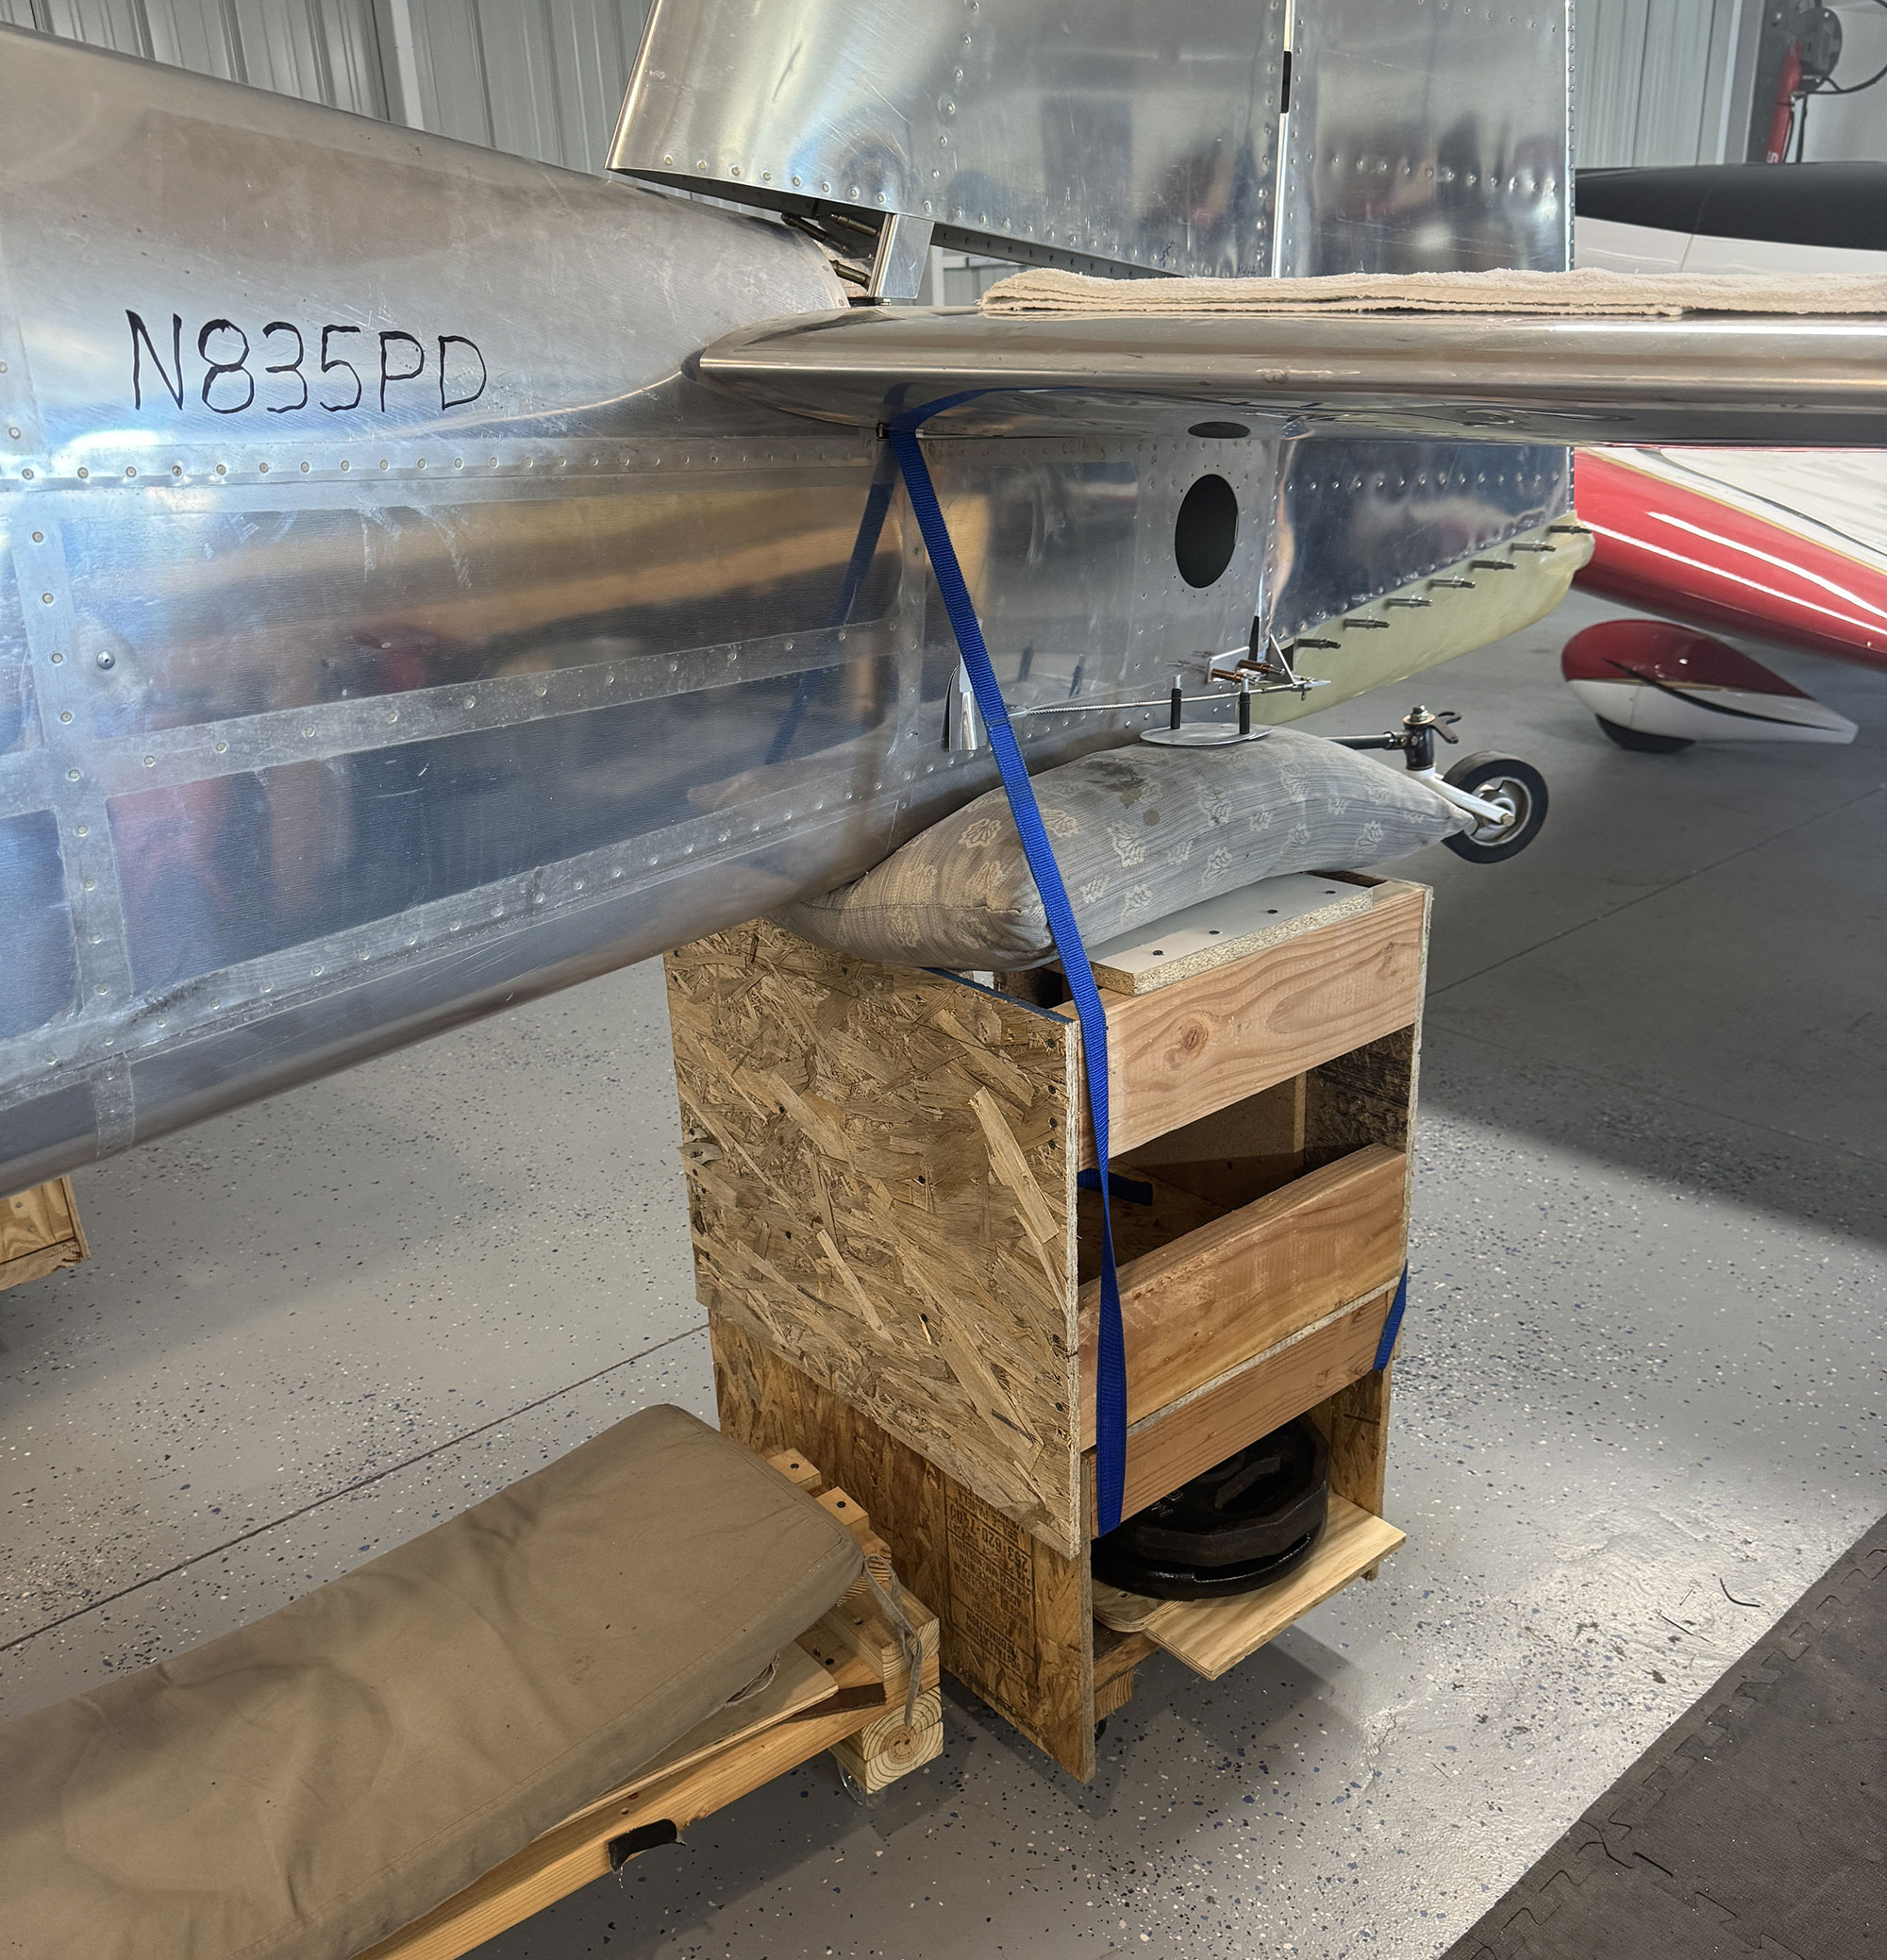
While we have a proper tail lift for maintenance work, it’s in regular use with other aircraft in our fleet—so dedicating it to a new build isn’t practical. Instead, we typically make a tail stand or “bench” from whatever material we have on hand. For our F1 Rocket project, that started with a basic wooden furniture dolly (rated for 500 pounds) as the base. We added scrap 2x4s and some leftover OSB panels we had tucked against the hangar wall. A large old pillow (emphasis on old—and dirty) pads the top, providing a broad, secure support for the fuselage.

Once the airplane was up on its (very tall) gear, we decided to level the fuselage to make engine installation easier. We built a vertical extension to the tail stand using similar scrap materials. It rests on top of the first box, with OSB “wings” extending downward front and back for stability. Those wings also offer extra surface area to drive in a few more screws and keep things solid.
Finally, the IO-540 going on the nose of the Rocket is heavy—and with no wings installed yet, the center of gravity is still forward. So we visited the local Play It Again Sports store and bought four 25-pound barbell weights (at 75 cents a pound). These sit atop the dolly base to hold it down, and we used two hold-down straps to secure the fuselage to the “tower.”
The result? A secure, mobile, and level fuselage—ready for firewall-forward work.


![Members of the North Idaho High School Aerospace Program gathered at KSZT [Credit: North Idaho High School Aerospace Program]](https://www.kitplanes.com/wp-content/uploads/2026/02/IMG_3499.jpg?w=324&h=160&crop=1 "North Idaho High School Student ACES Fly the Aircraft They Built")