![Left to right, shiny new bulkheads, wooden form blocks, and old bulkheads. [Credit Tinley Ong]](https://www.kitplanes.com/wp-content/uploads/2026/03/IMG_3429-1024x682.jpg)
![Before riveting we clecoed the new bulkhead in place. [Credit: Tinley Ong]](https://www.kitplanes.com/wp-content/uploads/2026/03/IMG_4152-1024x682.jpg)
Hey guys ,it’s been a minute. But we’re back in full swing, baby. And we’re not stopping or slowing down anytime soon. It’s time to get this bird in the sky.
So, what’s been happening? We’re finishing the bulkhead, fixing the horizontal stabilizer, and working on the wiring.
And, while Ben and Lee will be helping me with the bulkhead, tailwheel and horizontal stabilizer situation, I’ve taken it upon myself to figure out the wiring.
Finishing the Bulkhead: Test #2
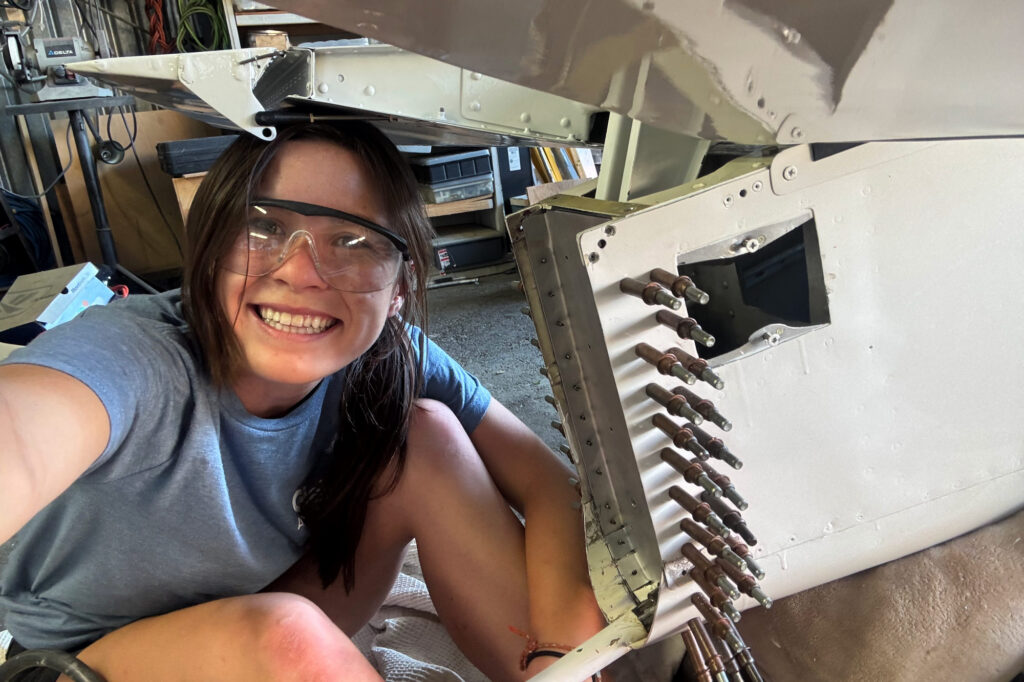
After accidentally destroying my aftmost bulkhead earlier this year, my friend, mentor, and talented craftsman, Ben Marsh, came to my rescue to help fix it. The bulkhead is made up of two F-612 parts sandwiched together. After venturing out to Eagles Nest (CA20), creating the custom parts, and fitting them in my RV-6, we realized the three holes for the vertical stabilizer bolts didn’t quite line up the way we wanted. So, we decided to go back to the shop and make another custom bulkhead.
Ben took it upon himself to make the replacement part. Afterwards, I met up with him and we prepped it for paint. Using three different chemicals and seeing how they changed the metal was really interesting. First, we sprayed the bulkhead pieces with paint booth alodyne and the part turned gold. Then, we sprayed it with a paint booth brightener. “See how foamy it’s getting? So what’s happening here is the acid is chemically reacting with the aluminum part. On a microscopic level, it’s etching the part.” Ben said. After that, we used a degreaser and scrubbed it with scotchbrite. “What you’re looking to do is to take the sheen off of the part,” Ben explained.
Ben painted the parts and the following week, we went back to Hangar 32 to start riveting. And yes – we needed #30 rivets. Riveting the bulkhead was tough. I had my fears but Ben assured me with his signature phrase “not to worry.” He added, “we will get through this.” Ben’s confidence was contagious and rivet by rivet, my doubts faded away.I held the bucking bar while Ben wielded the rivet gun. One by one, each rivet was bucked into place. The new bulkhead was a perfect military green and I can confidently say that I trust that part to support my plane, thanks to Ben.
Bulkhead is in. What’s next?
Onto finishing up everything else… should be simple, right? All we need to do is reinstall the vertical stabilizer, elevator, and rudder, wire the ELT and trim, and then the tail section is done.
Wrong. Ben and I were excited the bulkhead turned out the way it did. We stood there admiring our work when he paused dramatically and said “that tailwheel ain’t straight”.
We eyeballed, analyzed, and roughly measured.Our attention was drawn to part WD-409, the bracket that mounts between part F-612 and F-611. Part WD-409 is what the stinger attaches to, and we noticed that the hole where the stinger attaches is augged out. Don’t know how it happened but it looks like two holes next to each other, not one clean one. On top of that, the stinger looks to be crooked and where the tailwheel itself mounts to the stinger it’s rotated slightly off.
And we’ve gone down a whole ‘nother rabbit hole.
That Tailwheel Ain’t Straight
To get some more accurate measurements, Ben got a plumbob and showed me how to use it. We confirmed that the stinger is slightly offset, angling left as it comes out the back of the fuselage. And the tailwheel yoke is mounted to the stinger crooked, so one side of the wheel is touching the ground more than the other.
We arranged an evening to meet up with my amazing mechanic friend, Lee Ulrich. “Nope, that’s not straight” he said. I was pretty unhappy that we had yet another thing to fix on this dang airplane, but Ben and Lee both reassured me that it would all work out. They reminded me that sometimes it’s about the journey, not the destination. And, they were both more than willing to help me out.
Fortunately, my CFI and adopted grandpa, Stan Lawrence, had a spare WD-409 bracket and some old stingers from our late and loved friend, Hal Pattenaude. The stingers had already been drilled through, but the bracket was in fantastic condition. I ordered a new stinger and we agreed that when it came, we would redrill the bracket, stinger, and tailwheel in the mill. All at once. And in a straight line.
Okay, the stinger problem is fixed. But what’s up with this weird crooked tailwheel?
After asking around, it all tracked back to Stan. When my plane came to me in 2022, it had a completely different tailwheel on it. Stan had gone to the aircraft salvage yard and picked up a new tailwheel off a very highly modified RV-4. He liked this one because it didn’t have the same bracket as my original one, so if I taxied off the pavement, it wouldn’t hit the side of the concrete as hard.
After some more digging and communicating with both Stan, Ben, and my new friend, Brian Beatty, we realized that the tailwheel Stan had scavenged was from a Taylorcraft. It was a great tailwheel but I needed to decide if I wanted to keep it.
New Tailwheel vs. Old Tailwheel. Pros and Cons and a Chat with Brian
I have an experimental plane. This tailwheel itself is perfectly good. Why mix it up?
I ended up consulting the expert on tailwheels, Brian Beatty. He owns JD Air, a tailwheel company based in Colorado. I’ve actually been using the JD tailwheel mount assembly for the years that I’ve been flying the RV-14. He helped lay out the facts for me and we discussed the pros and cons of keeping the tailwheel Stan found versus getting a new one.
The advantage of keeping the tailwheel I have is that it’s an excellent tailwheel in great condition. It is by far the most inexpensive option as well.
The disadvantage of keeping this tailwheel is that if I ever get a new tailwheel, I’ll need to redrill the stinger or get a new stinger. The pin that attaches the yoke for my current tailwheel is one vertical pin. With the new JD tailwheels, the attachment is two horizontal pins. Considering I’m already investing the time and money into lining up a new stinger, bracket, and current tailwheel, I might as well get a more modern, lightweight tailwheel.
More Horizontal Stabilizer Issues
In addition to finishing up the bulkhead, we discovered that whilst installing the horizontal stabilizer, the structural integrity had been compromised. So we need to fix that again.
My amazing mechanic friend, Lee Ulrich, had helped me with my vertical stabilizer. He added a reinforcement to comply with a service bulletin, SB 14-01-31. Since then, we had remounted the horizontal stabilizer with the hope that it would be there to stay.
Wrong. While assessing the tailwheel crisis, I noticed something off. There are four holes where the vertical stabilizer and horizontal stabilizer attach. It looked as though when match drilling those holes, the drill had gone through the support that Lee had just added…. Oops.
The structural integrity of the support was compromised. And, because the VNE is determined based off of the horizontal stabilizer, we decided not to mess around with it.
When Lee reexamined it, he also noticed that one of the bolt holes on the angle for the bolts that attach the horizontal stabilizer to the fuselage was within close tolerances as well. That was more of a concern, so we decided to fix that section, too. It’s still a work in progress, but hopefully we will resolve the horizontal stabilizer and tailwheel situation simultaneously.
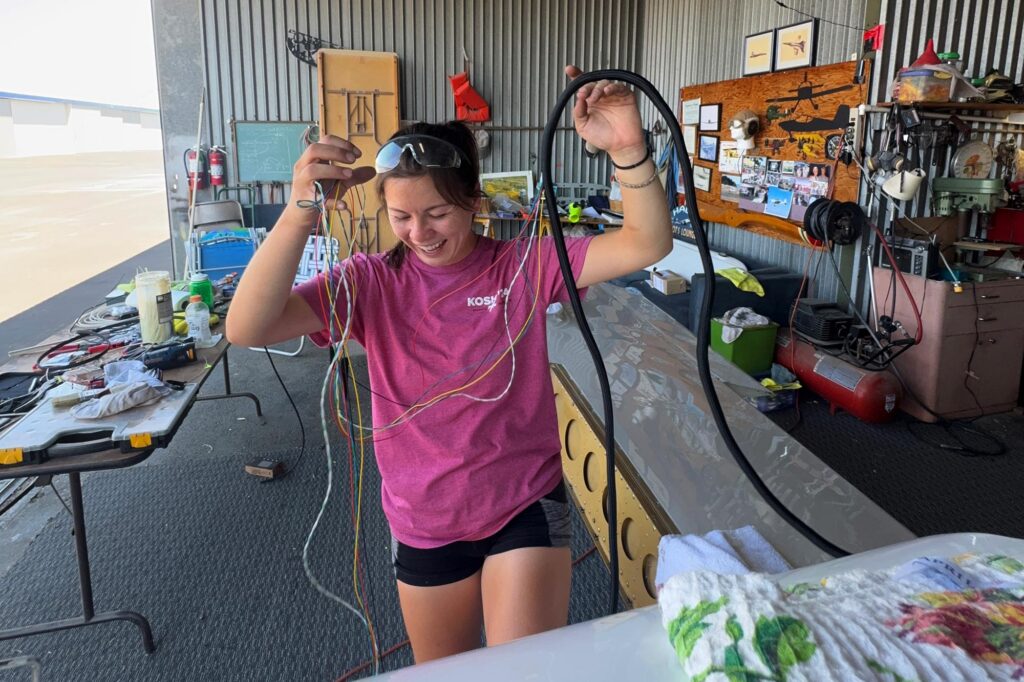
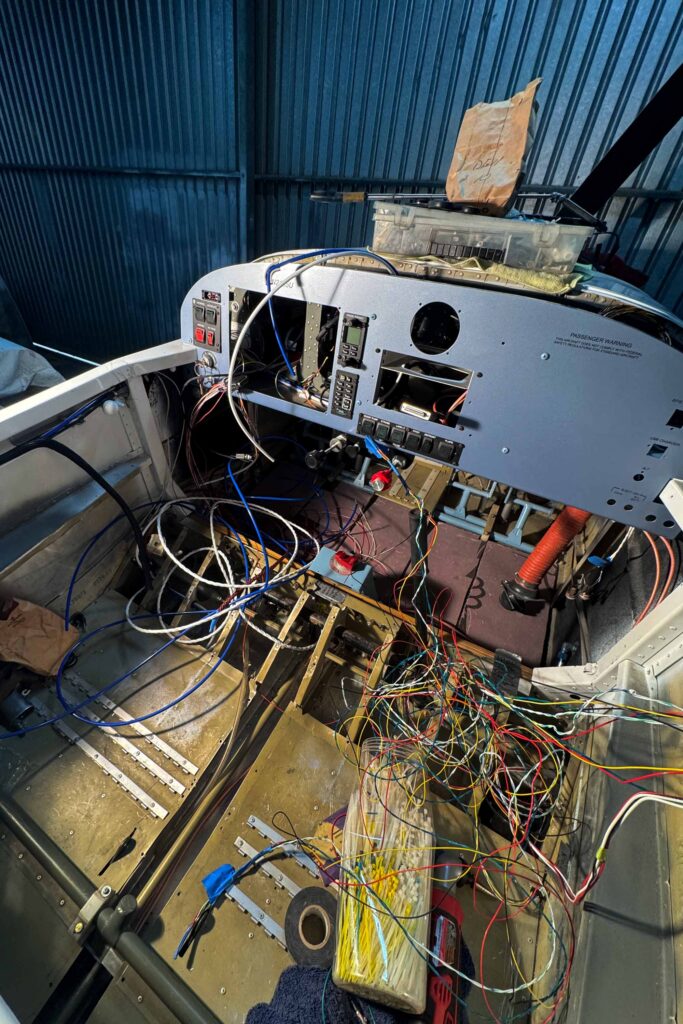
WIRING. Who Trusted me with this??
I never planned to be a wire-er, or an electrical engineer, or anything involving electricity, honestly. My friends Nick and Hal were going to be helping me, but unfortunately they aren’t with us anymore. So I’m figuring it out because it’s my plane. If I don’t do it, nobody will. So, where to start?
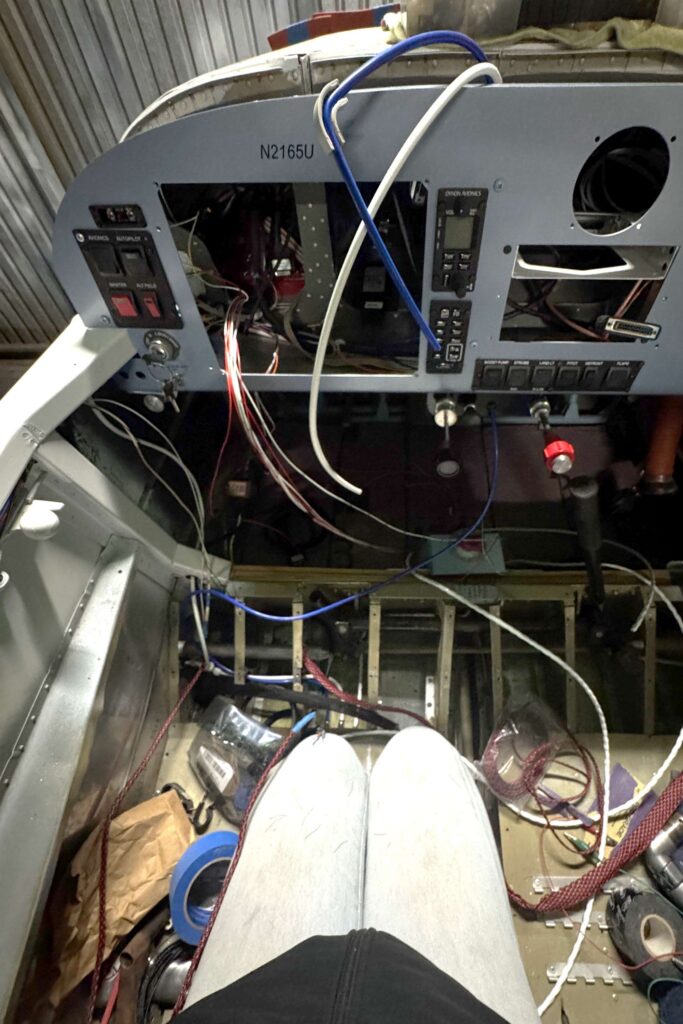
So far, we still need to route the wires to the Advanced Control Module (ACM) and attach the ends to their respective places. This includes the lights (navigation, strobes, and landing), autopilot servos, pitot and static lines, control stick wires, ADAHRS, comm and ADSB coax cables, all ELT wires (remote control, power, ground, and GPS data), GPS wire, trim, and flaps.
I have since been looking and analyzing, even to the point where I literally dream about it… Builders, you know what I’m talking about. And I wake up the next morning and have a plan. It’s wild.
The entire central valley was trapped in a thick layer of fog for most of November, so I had no choice but to work on my plane instead of fly. Sitting in the cold hangar for hours with the heat from the light, mapping out where all of my wires will run, was surprisingly meditative and cozy. Occasionally, airport friends would stop by and peel open the hangar door to check in. I love getting my friends’ thoughts and advice. Theres a lot to learn as I’m not only routing the wires, but I’m also figuring out the right ways to protect them, deciding whether or not to use standoffs vs grommets, drilling the holes for said grommets, and figuring out details as simple as the zip tie size for the standoffs.
Once I know what to do, I can do it. So Stan showed me how to read the wiring diagram to verify each wire and label. We checked each pin and soldered and crimped as needed. Then, we realized that three ELT wires and the canopy latch also needed to be connected to the aircraft rear connector, added those wires to the D SUB PINs and labeled everything. We called up Jonathan at Advanced Flight Systems and he was very helpful. I had so many questions but he told me it’s better to ask now than have to go back and try to correct them later.
I spent the evening diving into the memories in the back of my mind from that one time that Kyle had showed me how to attach these pin things to wires. After comparing it with some others, I figured it out. I ran those wires to the back of the plane with my other ELT wires.
One day as I was finishing securing the ELT wires, I was struggling with keeping all the wires on the left side of the fuselage together and away from my canopy latch. “Those should all be protected. And if you did protect them then it would be easier to keep them up and out of the way,” my friend Tommy Ishii said. That sent me down a wiring rabbit hole, because I realized I needed to protect all of the wires I’d already run. And, for the ones I had protected, I’d used the wrong size sheathing.
Tommy came back to help me run my autopilot, static line, re-pin my ELT wires, and secure the headset jacks. We then ran out of expandable sleeving, so I ordered more.
Running Wires for my Lights
Back in July, Tommy helped me with my lights and we secured everything with twisted adele clamps. Then my young pilot friend, Matthew Howell, helped me cover my navlights and map out where to run my wires. That was also huge.
Hal had started on my lights and I needed to go back and continue his work. For the lights, there’s a 25-pin connector that connects to the “Aircraft Rear” section of the ACM. The navigation lights, strobes, strobe sync, landing lights, pitot heat, ELT wires all connect to it. Some wires, like the pitot heat, require the use of two pins, then you solder the wires together and it becomes one wire. I learned how to solder the wires and we differentiated left from right, then mapped out how to run them.
What’s Next?
My tailwheel is coming this week, Ben and I and will redrill that with my stinger and the WD-409 bracket. My lights still need to be crimped. Stan and Kerry are ready to help with the wingtips and adding rivnuts to the fuel tanks. And I’m ready to be out there every day tackling it all.
![Careful planning and determination will get you to your goal of building and flying your own airplane. [Credit: AdobeStock]](https://www.kitplanes.com/wp-content/uploads/2026/05/Pulsar-Sunset.jpg?w=218&h=150&crop=1 "Last Bits")
![Making rare use of my drafting tools for the internal timing. [All Images Credited to Andrew Robinson]](https://www.kitplanes.com/wp-content/uploads/2026/05/P1010535.jpg?w=218&h=150&crop=1 "Conquering the Magneto, Part 2")
![[Credit: AdobeStock]](https://www.kitplanes.com/wp-content/uploads/2026/05/AdobeStock_262642207_AGCuesta.jpg?w=218&h=150&crop=1 "Winging It")
![Lowell Farrand spent years serving as an FAA DAR and is in the EAA Hall of Fame. He offers sound advise to builders. [Credit: Bill Wilson]](https://www.kitplanes.com/wp-content/uploads/2026/05/unnamed-4.jpg?w=218&h=150&crop=1 "Think Like a Builder")
![Humberd and his daughter using the 701 for some farm duty transportation. [All Images Credited to Jon Humberd]](https://www.kitplanes.com/wp-content/uploads/2026/05/1-3.jpg?w=218&h=150&crop=1 "Builder’s Spotlight")
![[Credit: Viking Aircraft Engines]](https://www.kitplanes.com/wp-content/uploads/2026/04/engine.jpg?w=218&h=150&crop=1 "Editor’s Log")
![Author Bill Wilson takes a break from measuring and cutting the Lexan windshield during his Onex build. [All Images Credit to Bill Wilson]](https://www.kitplanes.com/wp-content/uploads/2026/04/image-2.jpg?w=218&h=150&crop=1 "Think Like A Builder")
![Andrew bought a Thorp T-18 project, which started him down the road to experimental aircraft project ownership and construction. [Credit: Andrew Robinson]](https://www.kitplanes.com/wp-content/uploads/2026/04/IMG_7725-scaled.jpeg?w=218&h=150&crop=1 "Winging It")
![The integrated ECLIPSE NG features a very sunlight readable display that shows the engine and all flight data organized in one or more pages. [Credit: Fielden Aero LLC]](https://www.kitplanes.com/wp-content/uploads/2026/04/1_Screenshot_.jpg?w=218&h=150&crop=1 "FLYBOX Avionics")


