The most difficult thing about teaching? Some say it is standing in front of a classroom doing public speaking for hours at a time. Others say it is the hours of preparation required for a single hour of classroom work. Me? Id say its remembering all the time that the students most likely don’t know what I know.
Every month when I sit down at the KITPLANES design bench, I have to remember that the odds are you probably have never fooled around with (or, as we say when we are writing our monthly job report, heuristically researched) what Im going to show you. And so it is this month.
Last time we figured out how to run the battery down flat with some load resistors. This month we go the other way and figure out how to make a charger that takes that flat battery and puts some juice back into it.
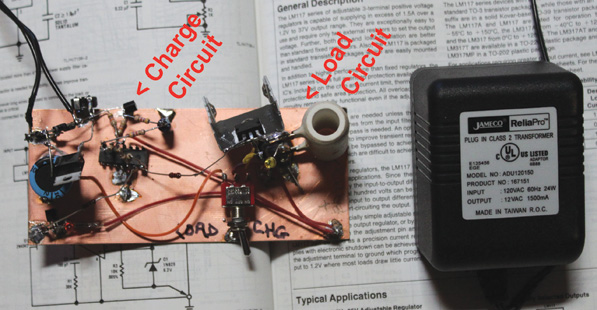
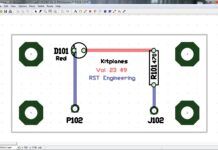
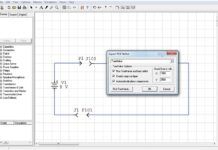
Load and charge circuits.
As I explained, the folks at Concorde have written a treatise on how to recondition one of their AGM (absorbed glass mat) sealed aircraft batteries using relatively expensive equipment. Being on the cheap side, I have experimented (see experimented you Cess-Bee-Moo drivers?) and found that there are other ways to recondition these batteries using less expensive equipment. This article will show how to recharge the battery, albeit slowly, to pretty much the same condition as when using the pricey stuff.
Enter the LM317, my variable voltage regulator of choice for the last 35 years or so. This little gem is totally tolerant of over-current, over-temperature and a lot of other overs that make it just about the most bulletproof device in my arsenal. There have been a lot of 317-killers introduced to the market, and as yet none of them has made the A list.
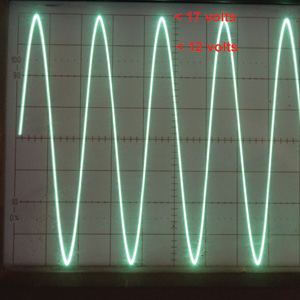
A sine wave on an oscilloscope showing 12-volt and 17-volt levels.
So what do we have? We have an integrated circuit in a power package that will, if asked, deliver an amp and a half at any voltage from 1.2 volts to about 1.5 volts below the primary power supply. It is adjustable anywhere in that range. Just for grins, lets say that the power supply puts out about 17 volts. (You can have any output voltage you want from 1.2 volts to 15.5 volts. In particular, you can have 14.1 volts with one simple adjustment.)
An aside: This 17 volts is an interesting voltage. A lot of the wall-wart power supplies put out 12 volts AC. This 12 volts is a sine wave that contains as much power as a DC supply of the same voltage. The sine wave is continuously varying voltage, so there has to be compensation for the fact that there is a point where the voltage is zero, a point halfway up to 12 volts, 12 volts itself and then some more voltage to compensate. The compensation voltage lets the sine wave go up to 1.414 times the 12 volts on the nameplate, to 16.97 volts. When we use diodes to rectify this voltage to produce the DC necessary to charge the battery, the diodes rectify to the peak voltage, not the 12-volt (RMS) voltage.
Why do many wall-warts put out 12 volts RMS? Because in the transition from vacuum tubes to transistors, there were 12-volt filament transformers on the surplus market, and we just got used to using them for a low-voltage power supply. The 12-volt filaments in vacuum tubes are there because if you wanted to be able to use the tubes in both a home as well as a car radio, you ran the filaments from the 12-volt battery supply in the car and from a 12-volt filament transformer at home.
The Details
So much for ancient history. Were going to use a 12-volt wall-wart and a bridge rectifier to convert that 12 volts into 17 volts DC. The wall-wart is rated for 1.5 amps, and the only diodes I have are rated at 1 amp. Thats good in that Im going to have to choke the output of the regulator down to about half an amp if I don’t want to have to buy a big, fancy heat sink. That doubles the amount of time it will take to charge the battery, but this project isn’t concerned with time; heat is the enemy of all things electronic.
Mostly I don’t recommend any particular parts source for you, but here Jameco (www.jameco.com) has the best prices on wall-warts by far. One in particular (#167151 at $10) is a real bargain.
The diode bridge? Four plain old 1N400x rectifier diodes will do the job, but if you want to get tricky, you can use one of those snazzy all in one package bridge rectifiers like the Jameco #145129. Your choice. The 1N4001s are about 2 apiece (8 total for the four) or 40 for the prepackaged bridge. C1 takes the pulsed DC provided by the bridge and smooths it to low ripple while also providing a low impedance to the Vin (input voltage) terminal to prevent oscillations. U1 is a plain-Jane LM317 in what is called the TO-220 plastic package with a metal heat-sink tab. This charger has been shut down to about half an ampere, so there wont be any additional heat sink necessary.
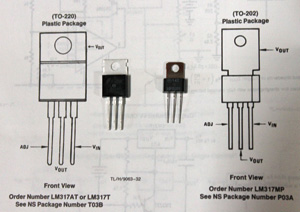
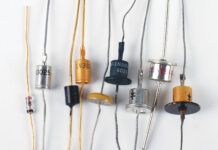
The TO-220 and TO-202 packages.
Here is how the LM317 works. Inside of the LM317 is a precise voltage regulator with a fixed voltage of 1.2 volts. You can get the LM317 hot or cold, high current or low, and that precision regulator doesn’t move a bit. It takes good, solid engineering to make this band gap reference so stable. The deal, then, is that the ADJ terminal (output voltage adjust) will always track the output voltage minus the bandgap 1.2 volts. Thus, when the output is 14.1 volts, you should measure 12.9 volts on the ADJ terminal.
R2 and R3 set the output voltage; R2 is going to be somewhere around 5kΩ, so the 10kΩ potentiometer should be set to half-scale as a starting point. Concorde recommends that the battery be brought back up to 14.1 volts after draining it, so that is what the output voltage should be set at.
U2A takes the voltage drop across R1 and turns on when that voltage gets to what corresponds to 500 mA (half an amp). That, in turn, biases Q1 on and shuts down the bias on U1, keeping the voltage below this current level.
As U1 fully charges the battery, the voltage out of U2A drops to the point that U2B turns on and lights D3, the green fully charged light.
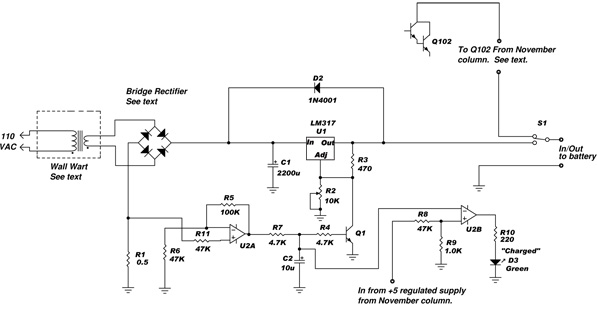
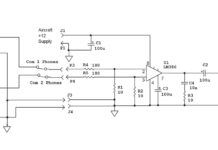
The schematic.
Companion Piece
This charger could be part of a stand-alone battery charger, but we said last month that we wanted it to be the companion to the battery load circuit described in the November 2010 issue. With the addition of S1, we can drain the battery, flip the switch, and then charge the battery. This is what Concorde calls conditioning the battery when it has been allowed to sit for a long time between charges.
If that is how you want this device to work, connect the output of this charger to one of the outside terminals of a single-pole double-throw (SPDT) switch (S1). Remove only the lead to the collector terminal of Q102 of the load circuit, leaving all the rest of the power-supply wiring intact. Connect a wire from the collector terminal of Q102 to the other outside switch terminal. Connect the pole (center terminal) of the switch to the power-supply wiring that connects to the (+) positive terminal of the battery being reconditioned.
Now for the surprise of the month. First, let me tell you a little secret. There is another version of the LM317 that comes in the very small TO-202 package and regulates output to 500 mA. Remember how I said that the output tracks the ADJ terminal precisely? Well, it tracks it as well for an AC signal as it does a DC signal, and Im going to leave it at that. Tune in next month to see how this plays out.


