 At this point in the series, I’ve walked you through the initial decision to overhaul, the steps required to pull the engine from my wife’s Van’s RV-6, followed by disassembly, disbursing those parts for repair or replacement and then the final reassembly of our Lycoming O-360. (If you’re just joining us, this series started in our February 2021 issue and continued in March and April.) It’s a big job, and that’s why it’s taken four parts to cover it all.
But now we’re in the home stretch, and the next part is…paperwork. It’s not essential when, exactly, you do the paperwork on a project like this, except that it should probably be done before the first flight. Now, technically speaking, the only thing you have to log for your Experimental aircraft are required inspections, like the condition inspection, transponder certifications and anything else required by the regulations. Although many will be floored by the thought, there is no requirement to log oil changes and regular maintenance. Really.
However, good practice makes most people log everything they do to an airplane, just as if it was certified. Some do this out of habit, some because they heard it was required (even if it is not) and some realize that keeping good records makes an airplane more valuable if it ever comes time to sell.
Few items have as big of an effect on an aircraft’s value as an engine overhaul. Done right, you have an engine that has been thoroughly gone over, all items brought back to factory limits and a machine that can be counted on to run to the next recommended overhaul. Done wrong, an overhaul might be nothing more than a bit of spit and polish, with dubious parts and a lot of hand-waving over what was “fine” as is and what few things needed replacement. The value of detailed log entries is in showing what was actually done. This is especially true as more owners come to Experimentals from the certified world and expect more documentation. If you can put them at ease, your airplane might be easier to sell should you ever decide to.

True Overhaul
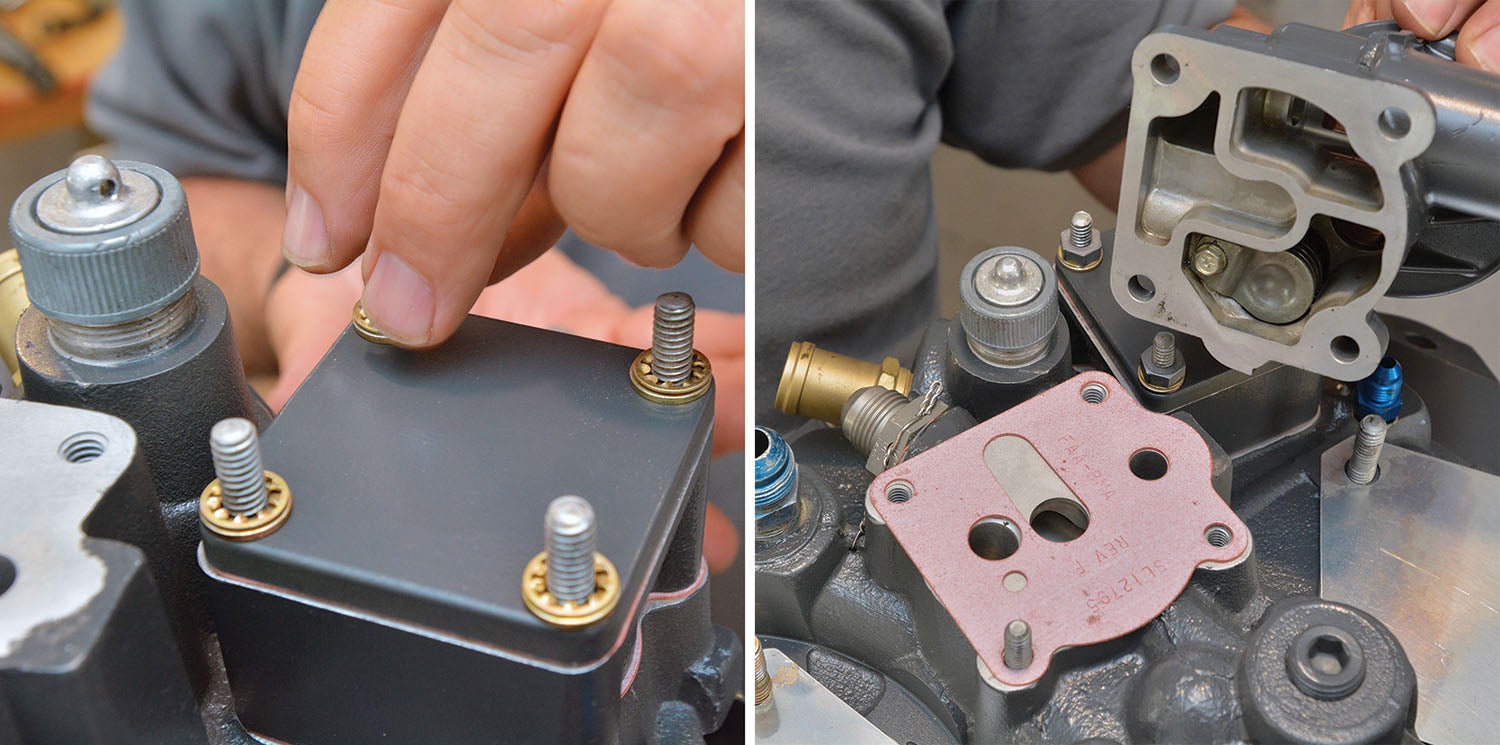
If you’re doing a true overhaul—remember, only the factory can “zero time” an engine—you will have to send all major parts out for reconditioning and examination. When they come back, you should have an assortment of yellow tags to prove what was done. You will also have receipts for all the new parts that you will install. In addition, if you have the prop overhauled (as we did), you’ll have work orders and certifications from the prop shop. Save everything! All of the yellow tags, all of the receipts, all of the work orders—these are proof that the engine was, indeed, overhauled. Write a description of the work performed—expect it to take several pages—and then sign and date it. Keep this record as part of the engine log.
When it comes time to sell or simply establish a value for an airplane, this paper trail makes things easy. Having serial numbers and part numbers for all components also makes life easier should, for example, a supplier call out suspicious parts or items caught up in an airworthiness directive. (Yes, I know ADs don’t explicitly apply to Experimentals, but don’t you want to know if you have a bad crank or cylinders?) Keeping this all together will help you or a future owner understand the pedigree of the airplane.
Testing and Break-In
Ideally, when an engine has been built or rebuilt, it is installed on a test stand for the initial run-in procedure. This is easily done at the factory or one of the large overhaul shops that have test stands. But for those doing field overhauls (our case), we have to use an alternate method—running and breaking in the engine on the airframe itself. It is less than ideal because cooling isn’t optimized, as it can be in a test cell with a special “test club” propeller, but it can still be done safely.
Lycoming recognizes that field-overhauled engines are going to have to be run-in and broken-in on the airframe and has published Service Instruction No. 1427C to help you with the process. It includes notes and things to look for (and to look out for) as well as guidance and procedures to take you through to a reliable engine. It’s worth following these guidelines carefully.
Engines delivered after a test stand run-in (mostly new engines) are, in fact, often broken in when you mount them on the airplane. The run-in procedure usually takes 60 to 90 minutes and does a lot of the engine break-in before they pickle the motor and ship it to the customer. While it is still important to observe proper break-in procedures when installed on the airframe, it is often hard for the pilot to tell when the engine has reached the break-in point because it has already occurred. This is especially true of engines with steel cylinders subjected to a nitride coating—they tend to break in quickly and without trouble.
So what, exactly, do we mean when we talk about engine break-in? It is primarily the process of the rings seating into the cylinder walls and smoothing out the little microscopic bumps and ridges that are left as part of the honing process. Until the rings match the cylinders, we can expect higher-than-normal oil consumption as oil bypasses the rings and ends up burned in the combustion chambers. This is why Lycoming’s primary indication (and Continental’s, for that matter) to identify when break-in has occurred is stabilized oil consumption. We often use a sudden drop in CHT as an indication that the break-in has occurred, and this would follow the idea that the rings and barrels have finished the roughest part of their break-in dance. But the real truth is oil consumption.
Why do we look at CHTs? Well, this is a relatively recent phenomenon, brought about by the influx of electronic engine monitoring and all-cylinder CHT measurements. Until the electronic revolution, pilots had little to no insight into the cylinder temps and simply had to follow procedures until oil consumption stabilized. That meant checking oil after each flight, but to do it with accuracy meant letting the engine fully cool down and the oil drain back into the sump to get repeatable measurements.
Your Role
Cylinder break-in requires high cylinder pressures with temperatures maintained below limit values. Generally speaking, with a Lycoming such as ours, that means we will run it at power settings above 75%, ideally 80%, while maintaining adequate cooling to keep the CHTs below the limit value of 450°. Lycoming allows 500°, but getting above 450° doesn’t give you a lot of margin to play with if the temperatures aren’t coming down. High cylinder pressures result from high power settings, and if you are flying near sea level, this is easy to achieve. If, however, you live in the mountains, the air is already thin enough that getting power levels above 75% can be difficult—meaning that you do not want to climb high—you need to stay as low as safely possible to let the engine work hard.

Many people think that leaving wheel pants and fairings off the airplane will “make the engine work harder,” but this is a false idea, understandably brought over from ground engine break-in. The engine in an airplane works as hard as the throttle and rpm settings you give it. The airplane will go faster or slower depending on how much drag it has, but that doesn’t alter the horsepower being produced. A draggier airframe will, however, negatively affect cooling—cooling for the air-cooled Lycomings being provided by airflow and increasing with the square of velocity. So giving away 20 knots at the top end by leaving wheel pants off robs the engine of significant cooling—and we want to keep those temperatures from getting too high.
What happens if we overheat the engine during break-in? The oil bypassing the rings (because they haven’t broken in yet) will get hot enough to cook into the cylinder walls, creating a glazed condition that prevents further break-in. In this case, the only recourse is to remove the jugs, hone the cylinders, install new rings and start the break-in process over. So, make sure to use high power settings (fly low and hard) and lots of cooling until you see the oil usage come down!
What about watching those CHTs? Well, yes—you should keep an eye on them in the first hour or two of flight. Assuming all goes well, they will start out higher than you are used to seeing and then suddenly drop a noticeable amount—usually around 20° to 30° in a short time. Different cylinders will drop their temps at different times, but they will usually all break in within the same half hour. If you see this drop, you can be pretty sure that the break-in point has been reached, so start watching oil consumption more closely to see if it has decreased. That’s your confirmation.
What is acceptable oil consumption? Well, the first liar never stands a chance in these sorts of discussions. We all want to brag that we don’t add any oil in 50 hours. But the average I have seen over the years tends to be between 12 and 16 hours per quart. Lycoming allows up to 1/2 quart per hour if you are looking for a high limit. I have engines that vary between 12 and 40 hours per quart—and I always look a little more carefully at the one that goes 40. There is something odd about that one.
Ground Runs
The first thing you need to do when running in the new engine is to just make sure it starts and runs properly. Before you turn that key, however, double- and triple-check every electrical and plumbing connection. Have qualified friends take a look as well. In our case, it was almost three months since the airplane had seen the engine on the nose, and we wanted to make sure all connections were correct and tight.
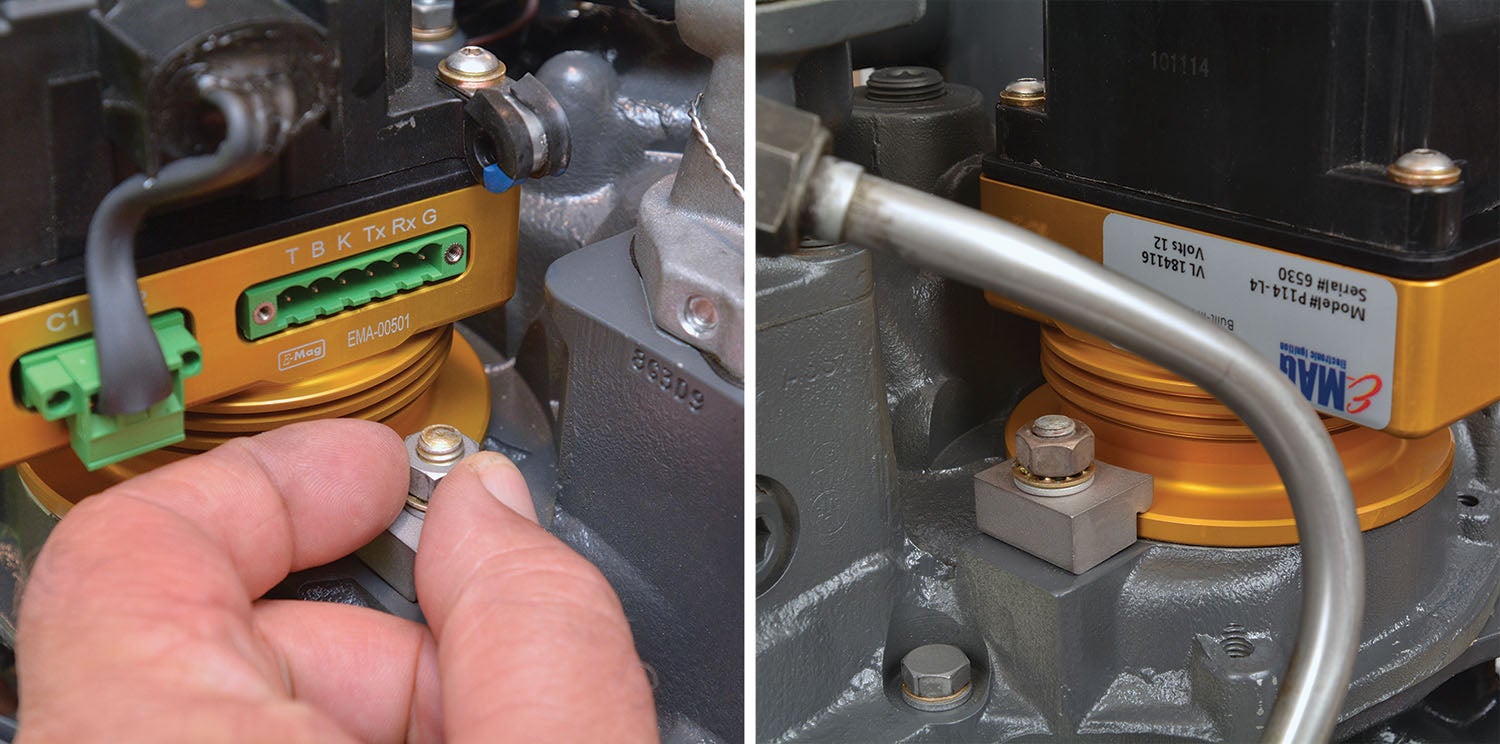
Next, check the ignition timing—then check it again. Improper timing can lead to very high temperatures, and you don’t want that to happen to your new engine. Remember, magnetos are timed to a point before the cylinder reaches top dead center, while many of the electronic ignition systems now available are timed at TDC itself. Make sure to read and fully understand the instructions for your engine, set things up and time them. Then start over and do it again to confirm that you have done it correctly. This is especially important if you have changed ignition systems during the overhaul, as we did—don’t fall back on old habits!
Before you start the engine, it is wise to clear air from the oil pressure instrumentation line to make sure that when you start the motor, you see oil pressure right away. It is nerve-wracking to start a fresh motor and not see oil pressure for 20 seconds. Lycoming says you’re OK to 30 seconds—but it is a lot more settling to see it right away. The easiest way to purge the line is to disconnect it at the sensor (or gauge), remove a spark plug from each cylinder and use the starter to rotate the engine until you have oil coming out of the line. Then reconnect the line and repeat the cranking until you see the pressure on the gauge. Always observe the cranking time limits for your starter (usually 20 or 30 seconds) and give it a rest after the proper time. If you don’t get oil out of the hose or pressure on the gauge in 30 seconds, stop and figure out what might be wrong—it shouldn’t take that long.
With everything checked several times, pressurize the fuel system and check again for leaks. Then roll the airplane out, chock it, set the brakes and use the standard starting procedure to bring it to life. If you have done everything right, the engine should fire right up. Don’t run it up to high rpm, and watch the temperatures. A good rule of thumb is that so long as the cylinder temps don’t get above 300°, metallurgically, they don’t know that they have been run.
Check to make sure that the throttle is properly connected and the engine responds appropriately, quickly check that both mags are firing by trying each one, check the oil pressure and after a minute or two, shut down and crawl out to check for leaks, drips or loose items. Congratulate yourself on a good first run and let things cool down. If you need to adjust oil pressure—do it now. Then pick up the factory procedures and follow them for the next run. In our case, that was simply running to get a smooth idle, set the idle mixture and idle stop and then shut down for an additional cool down. Both of these runs were done with the cowling off—they were short and intended to look for problems.
With these runs out of the way, it’s time for the cowling—install everything for flight and then do another test run on the ground, this time bringing the power up as directed by the procedure. If you have a constant-speed prop, this might be the time to do a cycle to fill the hub with oil. When this is done, take the cowling off one more time, check everything for leaks, top off the oil (especially if you have cycled the prop—this can take a half quart), reinstall the cowling and you’re ready for flight!
In-Flight Break-In
As we’ve already discussed, the main goal of breaking in the engine is to get high power with CHTs above 300° but below the limit of 500°. That’s quite a broad range. For me, I’ll accept CHTs in the range of 350° to 450° but prefer below 420° and above 380° for a good break-in.
Don’t dawdle during engine start and taxi—you want to take off with as low a CHT as you can because you’re going to see higher CHTs on the climb than you’re used to. Plan your taxi, have everything ready for departure, then hit the starter and get off the ground as expeditiously as possible. Climb to pattern altitude and remain within gliding distance of the runway! Keep yourself in position to return and land if you see or feel anything that you don’t like. Stay in this orbit with the power set as high as you can until you are comfortable that nothing bad is going to happen. At this point, you have two choices—land after 20 minutes to de-cowl and recheck things or continue the orbit to get a full hour’s flight, then land and check things over.
If this is a new airframe and engine installation, I opt for the shorter time. If you have done a rebuild and installation on a proven airframe (our case), I go with the longer first flight.Remember—break-in can occur quite quickly, and it is a shame to miss it because you let a cooling cycle happen after a short flight. Again, do all your flying at high power until you see evidence of break-in. We saw it happen in the second hour on this plane, but continued to run it hard for a couple of hours just to make sure. This is because we live at a density altitude of 6000 feet msl, and it is hard to generate the power required for a solid break-in.
Being at altitude also means that we tend to break in motors by racing around the valley at 1000 feet agl. If you have this same situation, be considerate of the neighbors, stay over a highway (or away from homes) and keep a good eye out. Most pilots rarely fly that fast that low to the ground and things can happen quickly. We try to keep turns shallow to prevent losing speed (and cooling airflow), and shallow turns require a lot more airspace, so make sure you don’t run into a mountain or valley wall. I find that a good autopilot helps fly the break-in smoothly and precisely—use it if you have one.
Final Checks
While you’re breaking things in, keep an eye on all the instruments. Make sure you’re getting good output from the alternator by watching the voltage. Check the oil temperatures—under normal conditions, they should stay at the set point of about 180°. Oil pressure should be within limits—I like to see 75 to 80 psi at cruise rpm. Expect to reset the oil pressure since you will have replaced the relief valve springs and housing, so you’re starting from scratch. Expect to take the cowl off a few times after early flights to adjust things and inspect for leaks.
You’ll change the oil early—most call for a change on a new build at about 5 hours, just to make sure nothing is coming apart. That means you want to check the suction screen as well as cut open the oil filter to check for anything out of the ordinary. If you’ve done a careful build, expect that these will be pretty clean—but there might be a few flecks of something that escaped notice in the cleaning process.
Once you’ve put 10 or more hours on the engine, you should have reasonable confidence in it, and you can extend the range of flights. In our case, we were happy to take the proven airframe and new engine on a cross-country at about 15 hours—but we also had good landing alternatives along the way.
At 25 hours, we decided that the airplane was cleared for all uses and have just kept flying it. Hours build, confidence increases. If a rebuilt engine survives for 50 hours, it is unlikely that there is anything major wrong with it.
A Renewed Airplane!
The funny thing about renewing an airplane so that it is more marketable for sale is that once you get it all back to new, you don’t want to sell it anymore. In the case of our sound-airframe, fancy-panel machine, it now has a fresh engine and prop that raises the sale potential considerably—but also makes it a more reliable machine to have around.
Whether you keep or sell your renewed airplane, use common sense and unemotional thinking about what you should spend money on and what you shouldn’t—this will be the key to happiness. A factory-new engine on an old airframe is likely not to bring enough to pay for the engine—but it might make the aircraft marketable—so you need to weigh the pros and cons of your particular situation. In our case, we spent close to $20K bringing everything up front to fresh standards, without doing much that was “new.” And we think that it not only made the aircraft marketable, but it might also even break even on the costs. Of course, that doesn’t account for our own labor—a not insignificant amount, written off in the name of “education and recreation.”
On the plus side, if we keep the airplane, we know that we can have confidence (once we get through a few proving and testing hours) in the airplane and its performance. After all, it is more comfortable knowing exactly what is under the hood when you’re over hostile terrain. Finally, there is the warm feeling that you get knowing that instead of a potential problem airplane sitting in your hangar, you have one that you know is up to snuff mechanically and one that has the paperwork pedigree to prove that. Knowing that your machine is sitting out there, reliable and ready to go, is, as they say, priceless.
![[Credit: Lisa Turner]](https://www.kitplanes.com/wp-content/uploads/2026/02/Fuel-Selector.jpg?w=218&h=150&crop=1 "Fuel Follies")


