My mom once told me that when she and dad got married, she had three theories about raising kids. Then she had me and my two brothers and she ran out of theories about raising kids. A quote often attributed to that eminent scientist Yogi Berra (but actually predates him) reads, “In theory, there is no difference between theory and practice. In practice there is.” And Linus Torvalds (the inventor of the Linux computer operating system) said that when theory and practice clash, theory loses. Every single time.

So it is with new untested ideas. In the November 2020 issue of Kitplanes® I gave you lots of theoretical ways of making a relatively low-powered solar power supply to keep the aircraft battery topped off. Most of those theoretical ways need major and minor modifications to make the project into something that I would be happy with on a permanent basis. Let’s go through them one by one.
The most major modification was to swap a “real” solar array for that Harbor Freight solar array. There were a few reasons for this. The primary reason is that there was no way to bolt the HF unit to a variable-angle metal mounting mechanism. Without knowing what was going on inside the HF plastic frame, I was hesitant to recommend drilling mounting holes in the frame. I could probably have gotten away with it, but in the engineering world there is no such thing as “probably.”
The second reason was the plastic frame itself. We do get some reasonably violent weather up here in the hills, and I wasn’t convinced that the plastic window over the cells themselves would survive a really stomping hailstorm.
Third, the HF array came out of the plastic frame with a relatively short pigtail pair of wires. Since the array would have to be mounted at the front of the hangar wing to avoid shadows from the main body of the hangar (either early morning or late afternoon sun, depending on which side I chose), wires would have to be run from the front of the hangar, along the inside wall, and to the controller near the airplane at the back of that wall. Splicing longer wires with crimp terminals that would be exposed to the elements for years on end didn’t thrill me.
Finally, the HF array was a watt and a half of power, which at 13.6 volts to charge the battery is a rather wimpy 100± milliamperes. At high noon. On a very sunny day. Into a battery rated in ampere hours. I wanted a little more margin for cold, dark winter days, which is the time that we really need to keep the battery up since our flying on those sorts of days is usually very limited.
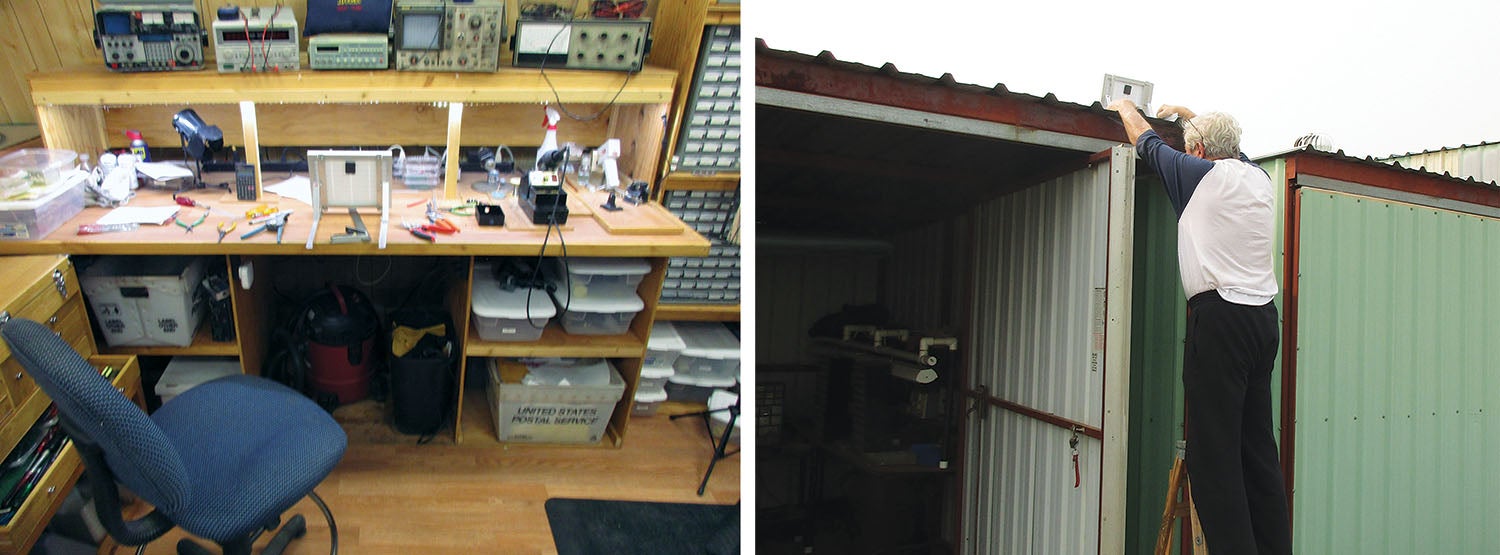
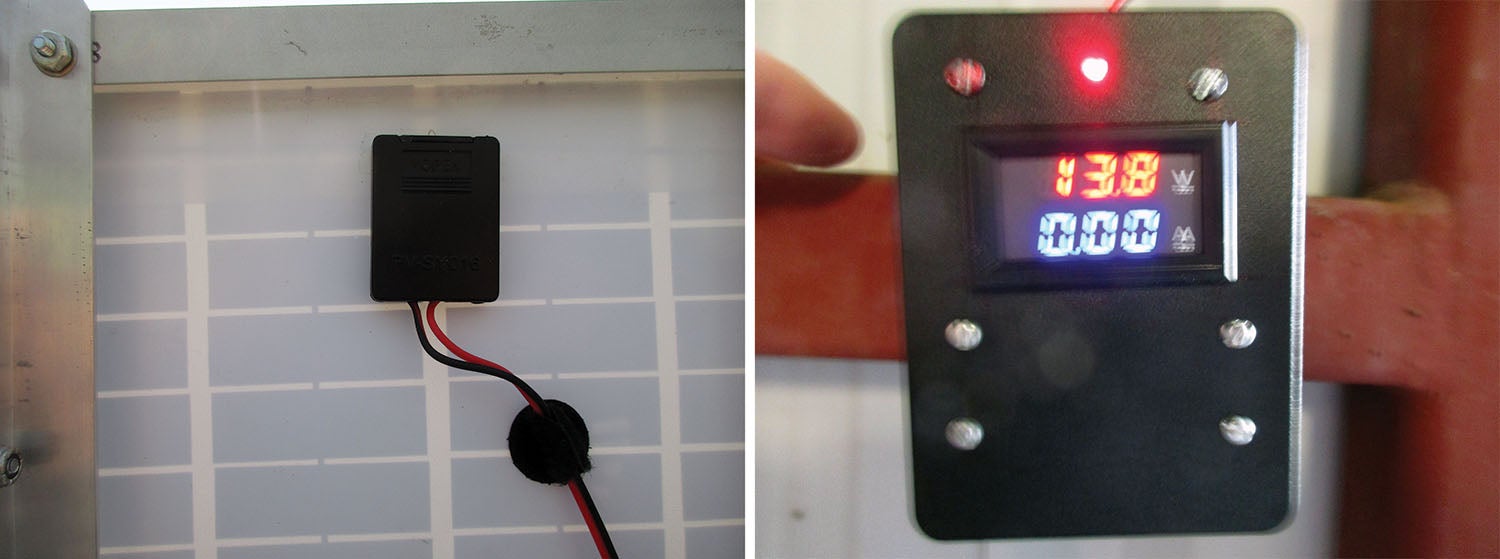
The solution to all these problems, strangely enough, cost exactly one dollar more than the Harbor Freight array. There are half a dozen manufacturers of 5-watt devices that will give us a bit under half an ampere (370 mA), and for several reasons I chose the one made by Eco-Worthy. It has a rigid metal frame with mounting holes. It has real tempered glass over the cells. It has enclosed solder terminals on the back of the panel for wires. Here is a handy hint: Go directly to the Eco-Worthy website to buy—it is less expensive and they offer free shipping. Here is another handy hint: The unit is manufactured offshore and the frame is not square and the mounting holes are not aligned with one another. I assumed (and we all know how that word breaks down) that the frame was square and that the holes were aligned, and it took me three lengths of aluminum angle to make three different mounting frames before I did some serious measurement to determine the actual dimensions and where the mounting hardware would fit.
The November PC board was intended for a standard metal chassis that I use. It was twice as big as it needed to be and the output resistor(s) were run directly to the battery terminals, wasting battery power at night when the solar array was dark. The PC board was redone to half the width and the resistors were moved to the anode side of the output diode.

The November input-output terminals were the standard old clunky terminal strips. The problem with them was that you had to remove the terminal strip from the chassis, put the wire on, then reassemble the terminal strip into the chassis. Since I gave up on the metal chassis with the PC board and went with the plastic box, there was no good reason not to simply use machine screws, washers, lock washers, solder lugs and crimp terminals for interconnecting wires coming from the solar panel to the regulator.
The fourth change was a subtle one. I had originally planned on mounting the small array on the back side of the small hangar side wing and pointed south. I reasoned, correctly, that this would provide maximum irradiation from the sun, from sunrise to nearly sunset, where it would then be blocked for a short period of time by the taller main hangar structure. What I got in an “aha!” moment is that this is the only place on the hangar where the large 100-watt solar panel could be placed for maximum sunshine. Reasoning that the large 100-watt panel needed the choice spot on the hangar forced me to use the front of the opposite small hangar wing to avoid being shielded a good part of the day by my neighbor’s T-hangar main structure. That has proven to be the best of all possible worlds.
The final change was to abandon trying to make a cheap soldering iron into a hot-knife cutter for the meter cutout. Instead I made a paper 1:1 scale drawing, printed it on the laser printer, rubber-cemented it to the chassis and used a coping saw to make the cutout. Perfect fit.
In the September 2020 issue of Kitplanes® I said that pointing the solar array due true south was important, and the vertical angle of the array would change from time to time during the year to optimize the conversion of sunlight to electricity. What I did not say is that this vertical angle is a fairly complex equation involving the law of cosines. Fortunately, an Excel spreadsheet is a very convenient way of calculating three different ways of changing angles. One way is to do a single angle that isn’t optimum year-round, but does mean that you never have to climb up a ladder to change the angle. Another way is to calculate two changes a year, one in September and one in April. A third way is to change the angle four times a year, once for each season. The difference between the efficiency of the single angle (70%) and the best four changes (76%) is only 6%. Me? I’m picking the middle one so that it does well in the winter when I fly the least.
You can find this spreadsheet free for download at my personal website, www.rstengineering.com, then go to the HOG solar panel page. As a free bonus, you can also download the video file of my presentation virtually (on computer) during this year’s Oshkosh online forums event. Please enjoy with my compliments.
I think I’ll take a brief respite before going into the main 100-watt solar panel system as I really don’t want to be out in the smoke from the California wildfires bolting it to the hangar. I think a brief return to a very accurate digital thermometer for 50¢ might make a fun project for those of you interested in just how hot it is inside your engine compartment or how cold it is inside the hangar fridge. Until then…Stay tuned…


I’ve frequently used the quote: “The difference between theory and practice is greater in practice than it is in theory.” Thank for the in depth examination of this topic.
Comments are closed.